EZYLOCK – Smart Lock initialization manual – v03.02
1. First Steps
Prior the lock initialization process, make sure to remove the batteries and only insert them when
requested. Also, ensure that the lock is correctly installed (see the Installation Manual).
1.1. Configuring your account
Before initializing, you must have installed the app Ezylock Remote Management® on your phone and
have a valid subscription in Ezylock®, which enables the remote management of locks and user
accesses. If you don’t have a valid subscription, you can sign up to the service by accessing the site
www.ezylock.com/ezylock , then clicking “Register Now” and following the instructions provided. Don’t
forget to add a valid credit card to enable the full access to the available features.
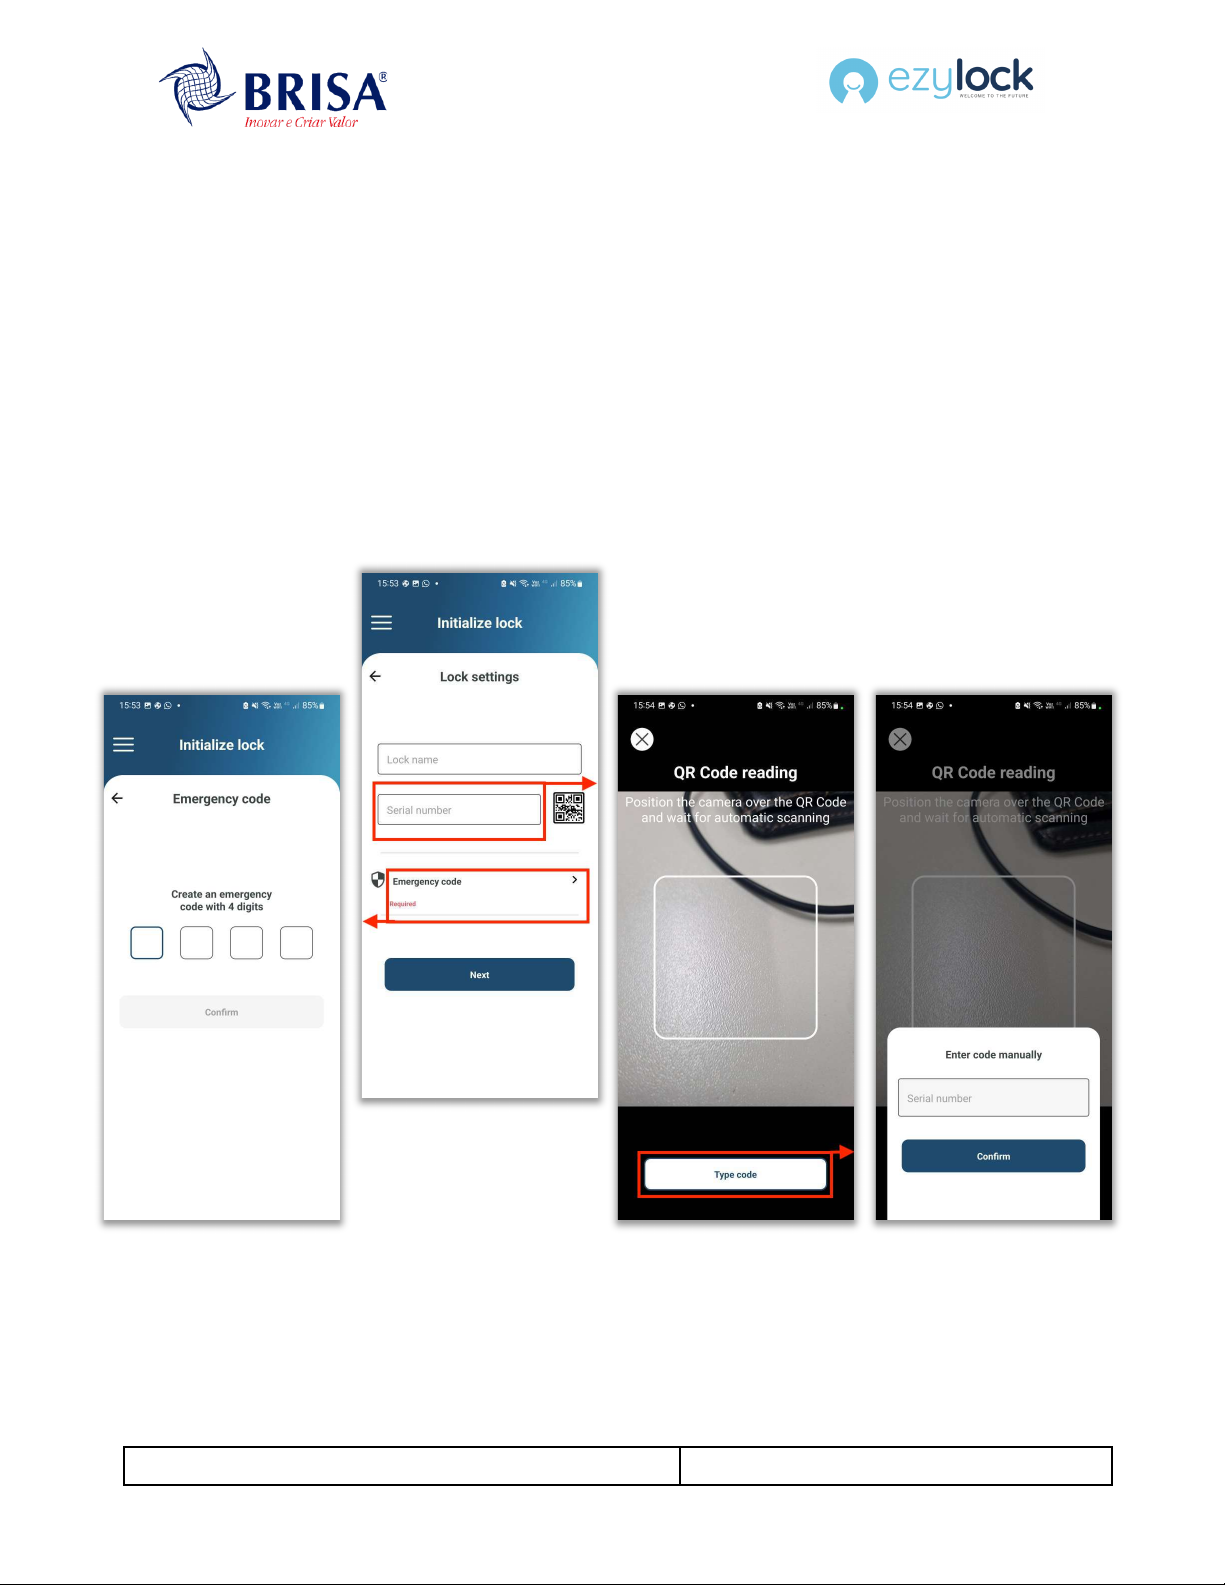
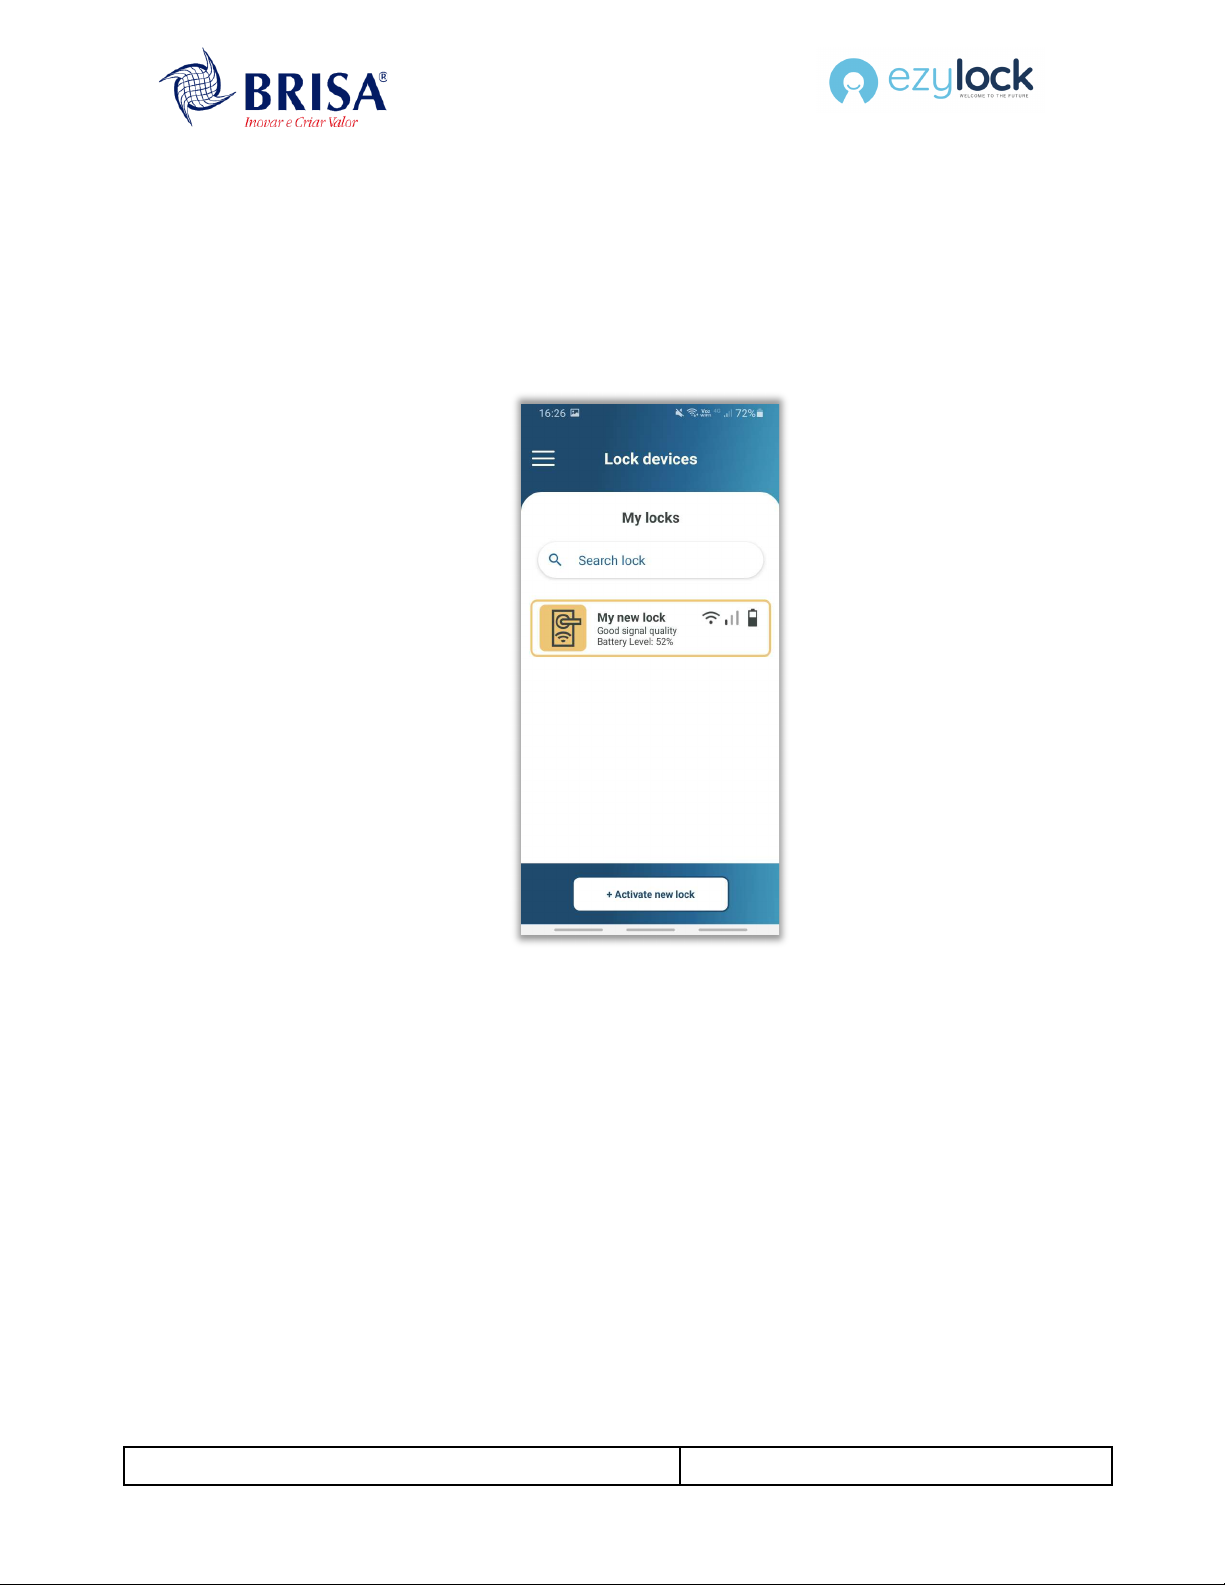
1.2. Initializing a new lock
Once you have downloaded the app Ezylock Remote Management®, log in with your credentials. To
initialize the new lock, access the Initialize Lock entry available in the side menu or in the Dashboard, or
press button + Activate new lock at the bottom in the locks list. Observe the informative message
concerning the connection to the lock’s network and click Continue.