Brisa EZYLOCK US 00 WF User manual

Smart lock installation manual

Page: 2 of 16
EZYLOCK – Smart Lock installation manual
SUMMARY
1. Product instruction ................................................................................................. 3
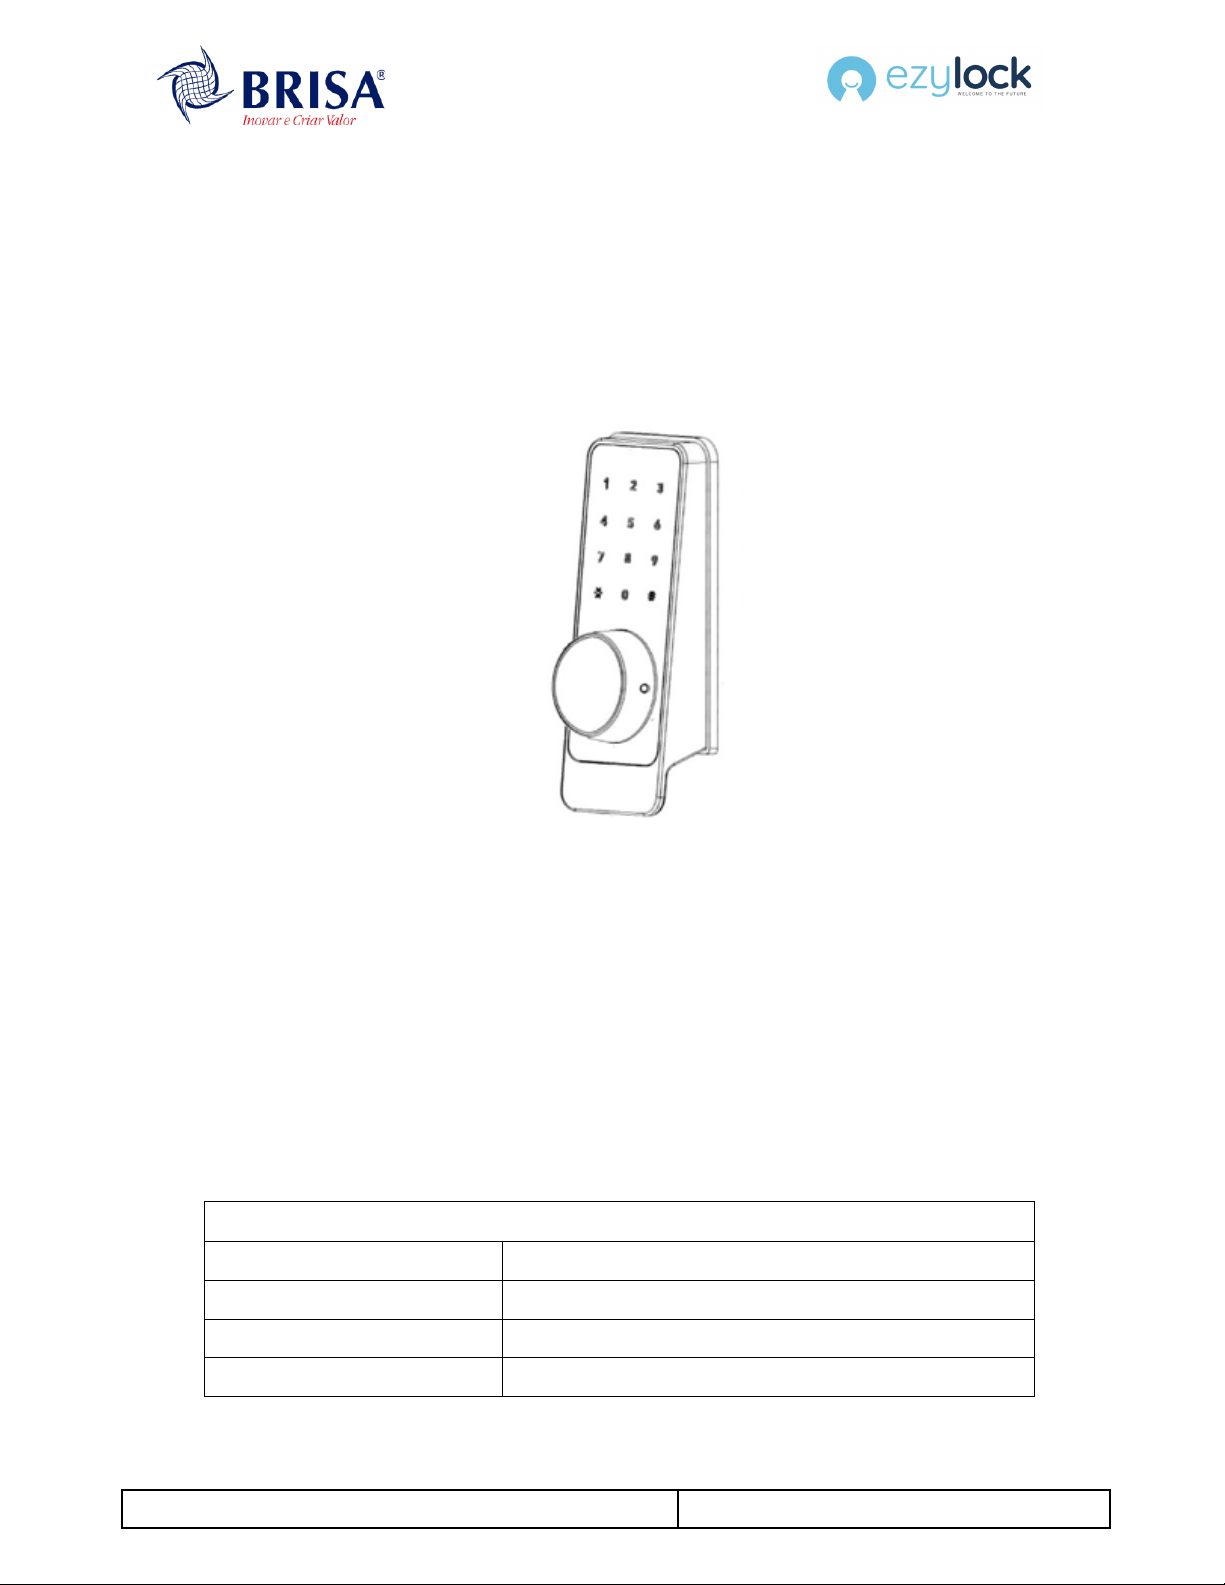
1.1. Product description ................................................................................................ 3
2. Product structure .................................................................................................... 4
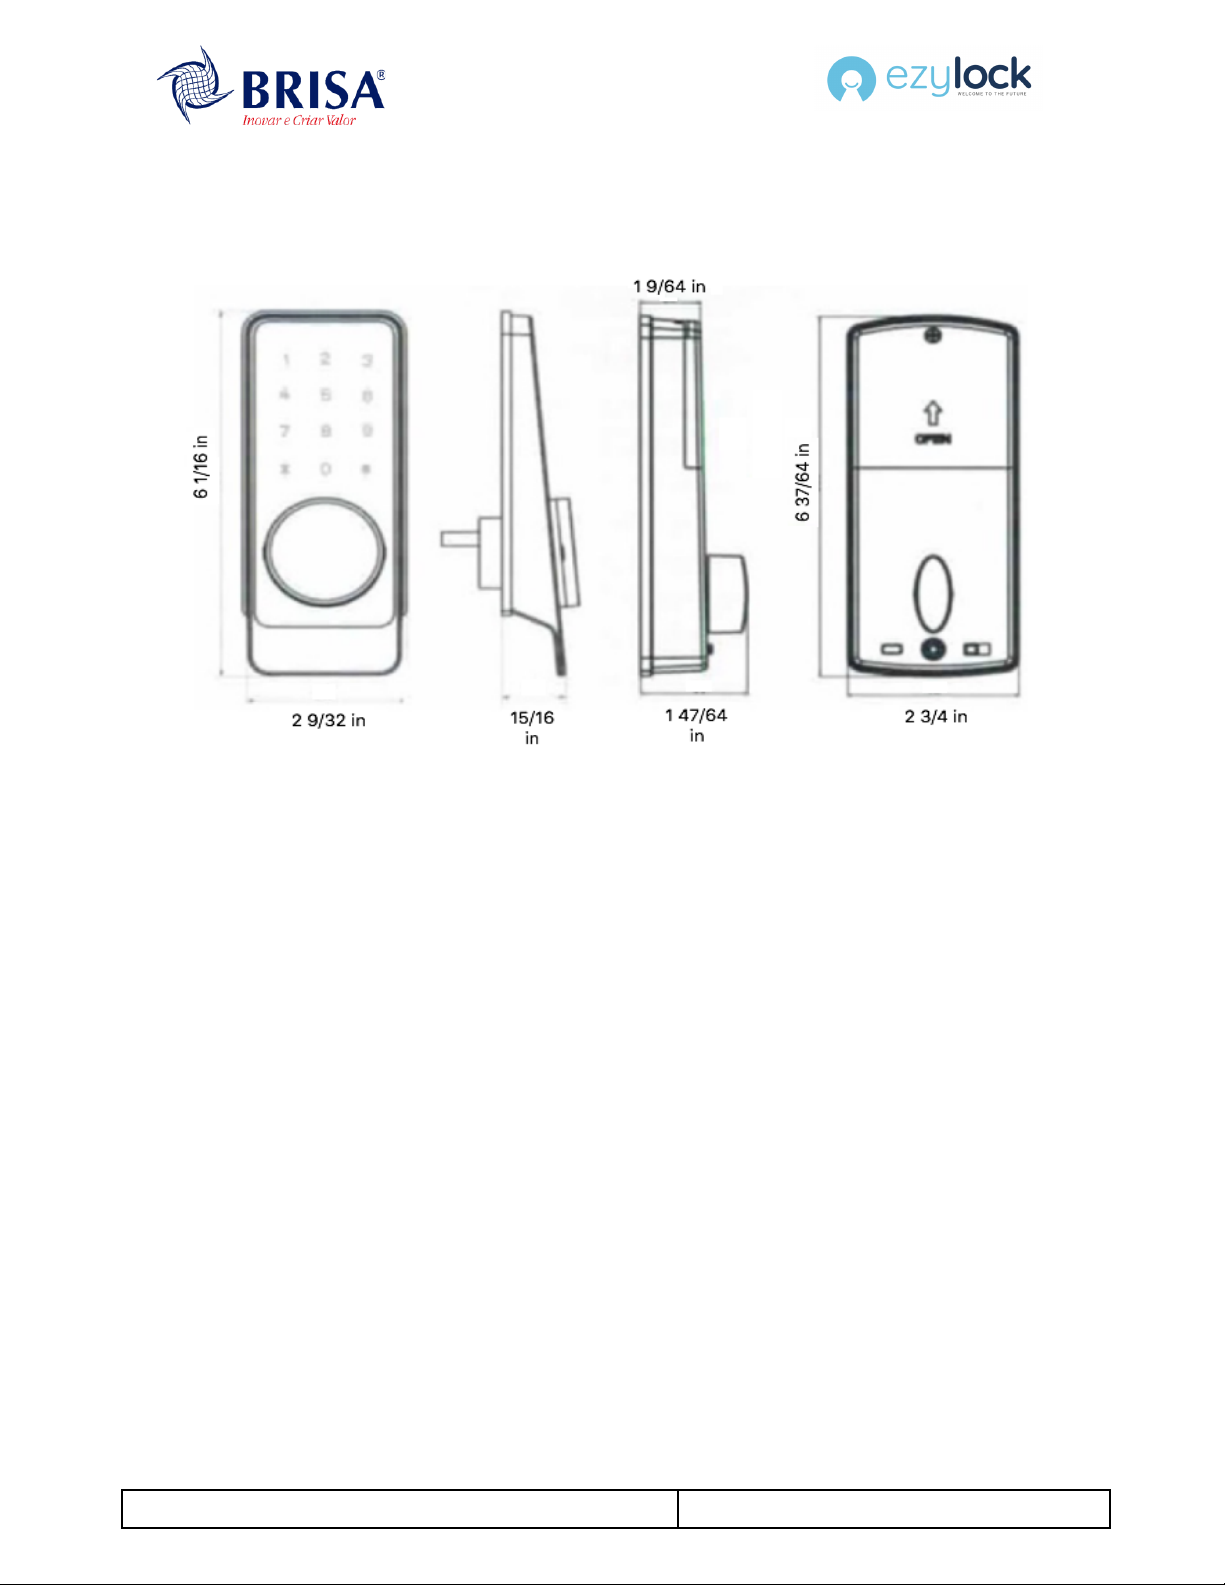
3. Product dimensions ................................................................................................ 5
4. Product features ..................................................................................................... 5
5. Technical parameters ............................................................................................. 6
6. Installation and adjustment ................................................................................... 7
6.1. Adjustments before Installation ............................................................................. 7
6.2. Installation condition ............................................................................................. 9
6.3. Installation assembly .............................................................................................. 9
6.4. Installation steps ................................................................................................... 10
7. Maintenance ......................................................................................................... 14
Appendix ...................................................................................................................... 15

Page: 3 of 16
EZYLOCK – Smart Lock installation manual
1. Product instruction
Before using the lock, please read the user manual carefully.
1.1. Product description
Figure 1: EZYLOCK
EZYLOCK is a smart, secure, versatile and easy-to-use lock.
It is suitable for homes, vacation homes, hotels and offices.
It supports firmware update in which software functions can be expanded through.
EZYLOCK is for push-to-enter door use only.
Smart lock specification
Model
EZYLOCK US 00 WF and EZYLOCK 4G WF
Dimension
154 x 58 x 24mm (6 1/16 in x 2 9/32 in x 15/16 in)
Material
Zinc alloy
Weight
1.10kg (38.8 oz)

Page: 4 of 16
EZYLOCK – Smart Lock installation manual
2. Product structure
Figure 2: EZYLOCK structure

Page: 5 of 16
EZYLOCK – Smart Lock installation manual
3. Product dimensions
Figure 3: EZYLOCK dimensions
4. Product features
• Tilted structure design for better view and convenient operation.
• Auto locking when door closes.
• Individual codes
• Double locking from switch inside adds additional privacy and security.
• Security passcode.
• Low battery alarm.
• Mechanical emergency key.

Page: 6 of 16
EZYLOCK – Smart Lock installation manual
5. Technical parameters
Power supply
4.5V ~ 6.5V (4 pcs AA alkaline batteries)
Support phone system
Android 5.0/iOS 11 or above
Alarm voltage
4.8V ± 0.2V
Static current
< 60 mA
Dynamic current
< 200 mA
Operating temperature
-40ºC ~ 70ºC (-40ºF ~ 158ºF)
Operating humidity
20% ~ 93% RH
FAR (False Acceptance Rate)
< 0.001%
FRR (False Reject Rate)
< 1.0%
Opening time
around 1.5 seconds
Mobile phone app
no limitation
Password store capacity
250

Page: 7 of 16
EZYLOCK – Smart Lock installation manual
6. Installation and adjustment
6.1. Adjustments before Installation
Before installing the smart lock on the door, confirm whether the lock is left or right open and
move the SWITCH according to the open position.
Remove the battery cover. When facing the front of the device, if it locks to the right, flip the
switch to the R position. If it locks to the left side of the door, flip the switch to the L position.
L – means left-open
R – means right-open
Keep the latch in the retracted position and keep the cylinder tailpiece in a vertical position.
If necessary, adjust the size of the tailpiece. The relation between tailpiece length and door
thickness is:

Page: 8 of 16
EZYLOCK – Smart Lock installation manual
Make sure the holes and positions follow the template below

Page: 9 of 16
EZYLOCK – Smart Lock installation manual
6.2. Installation condition
• Door frame: > 4 21/64 in
• Door thickness: 1 3/8 – 1 31/32 in
• Door thickness: > 1 31/32 in (Cylinder will be longer)
6.3. Installation assembly
Figure 4: EZYLOCK installation on the door frame

Page: 10 of 16
EZYLOCK – Smart Lock installation manual
6.4. Installation steps
1.
Drill a large and a small hole on the door for the front
and rear panel and drill a round hole on the door
frame for the deadbolt according to the 1:1 template.
2.
Insert the deadbolt into the hole of the door frame and
fix it with 2 screws.
3.
Insert the thin bar of the front panel into the hole of
the deadbolt in a vertical position.

Page: 11 of 16
EZYLOCK – Smart Lock installation manual
4.
Put the cable wire of the front panel through the door
hole to the inside of the door.
5.
Pass the cable wire through the small square hole on
the right side of the mounting plate.
6.
Remove the battery cover. When facing the front of
the device, if it locks to the right, flip the switch to the
R position. If it locks to the left side of the door, flip
the switch to the L position.

Page: 12 of 16
EZYLOCK – Smart Lock installation manual
7.
Insert the plug of the front lock into socket of the rear
lock and insert the thin bar into the hole of the knob.
8.
Fix the rear panel on the mounting plate with 3
screws.
9.
Load 4 AA alkaline batteries in the battery holder of
the rear panel

Page: 13 of 16
EZYLOCK – Smart Lock installation manual
10.
Fix the battery cover with a screw.
11.
According to the actual size of the strike box, drill a
hole on the door frame, insert the strike box, and
cover the strike plate, and fix it with 2 screws.
Test and debug: Turn the knob of the rear panel to
check whether the deadbolt protrudes and retracts
smoothly; insert the mechanical key to check whether
the deadbolt protrudes and retracts smoothly; Press
the “ button for locking & unlocking” (see Figure 2 –
item 9) to open/close the door to check whether the
deadbolt protrudes and retracts in and out of the
strike box smoothly, if It is not smooth and misaligned,
please adjust It until it is perfect.
12.
Add the magnetic device to assure the auto-locking
when closing the door.

Page: 14 of 16
EZYLOCK – Smart Lock installation manual
7. Maintenance
1. Contact of the lock surface with corrosive substances might cause damage to the prevention layer
of the lock and the product life will be affected.
2. We suggest inspecting the lock once a year to ensure the screws are secured and the lock is
properly lubricated.
3. To avoid any inconvenience caused by high battery consumption, it is suggested to replace new
batteries as soon as the low battery alarm happens.
4. In case the keyhole behind the front cap cannot work smoothly, we suggest to regularly apply a bit
of graphite powder (pencil powder) as the lubricant into the cylinder (once a year).
5. If you are leaving for a long trip or don’t plan on using the lock for a while, please carry the key with
you, and remove the batteries to ensure the service life of the lock.

Page: 15 of 16
EZYLOCK – Smart Lock installation manual
Appendix
Packing List
Number
Part Name
Quantity
A
Front panel
1 pc
B
Rear panel
1 pc
C
Mounting panel
1 pc
D
Deadbolt
1 pc
E
Strike box
1 pc
FGHI
Screws (pack)
10 pcs
J
Strike plate
1 pc
K
Mechanical keys
2 pcs
Template
1 pc
User manual
Download

Page: 16 of 16
EZYLOCK – Smart Lock installation manual
Installation tools
This manual suits for next models
1
Table of contents
Other Brisa Lock manuals