Installation cont
Installation contInstallation cont
Installation cont
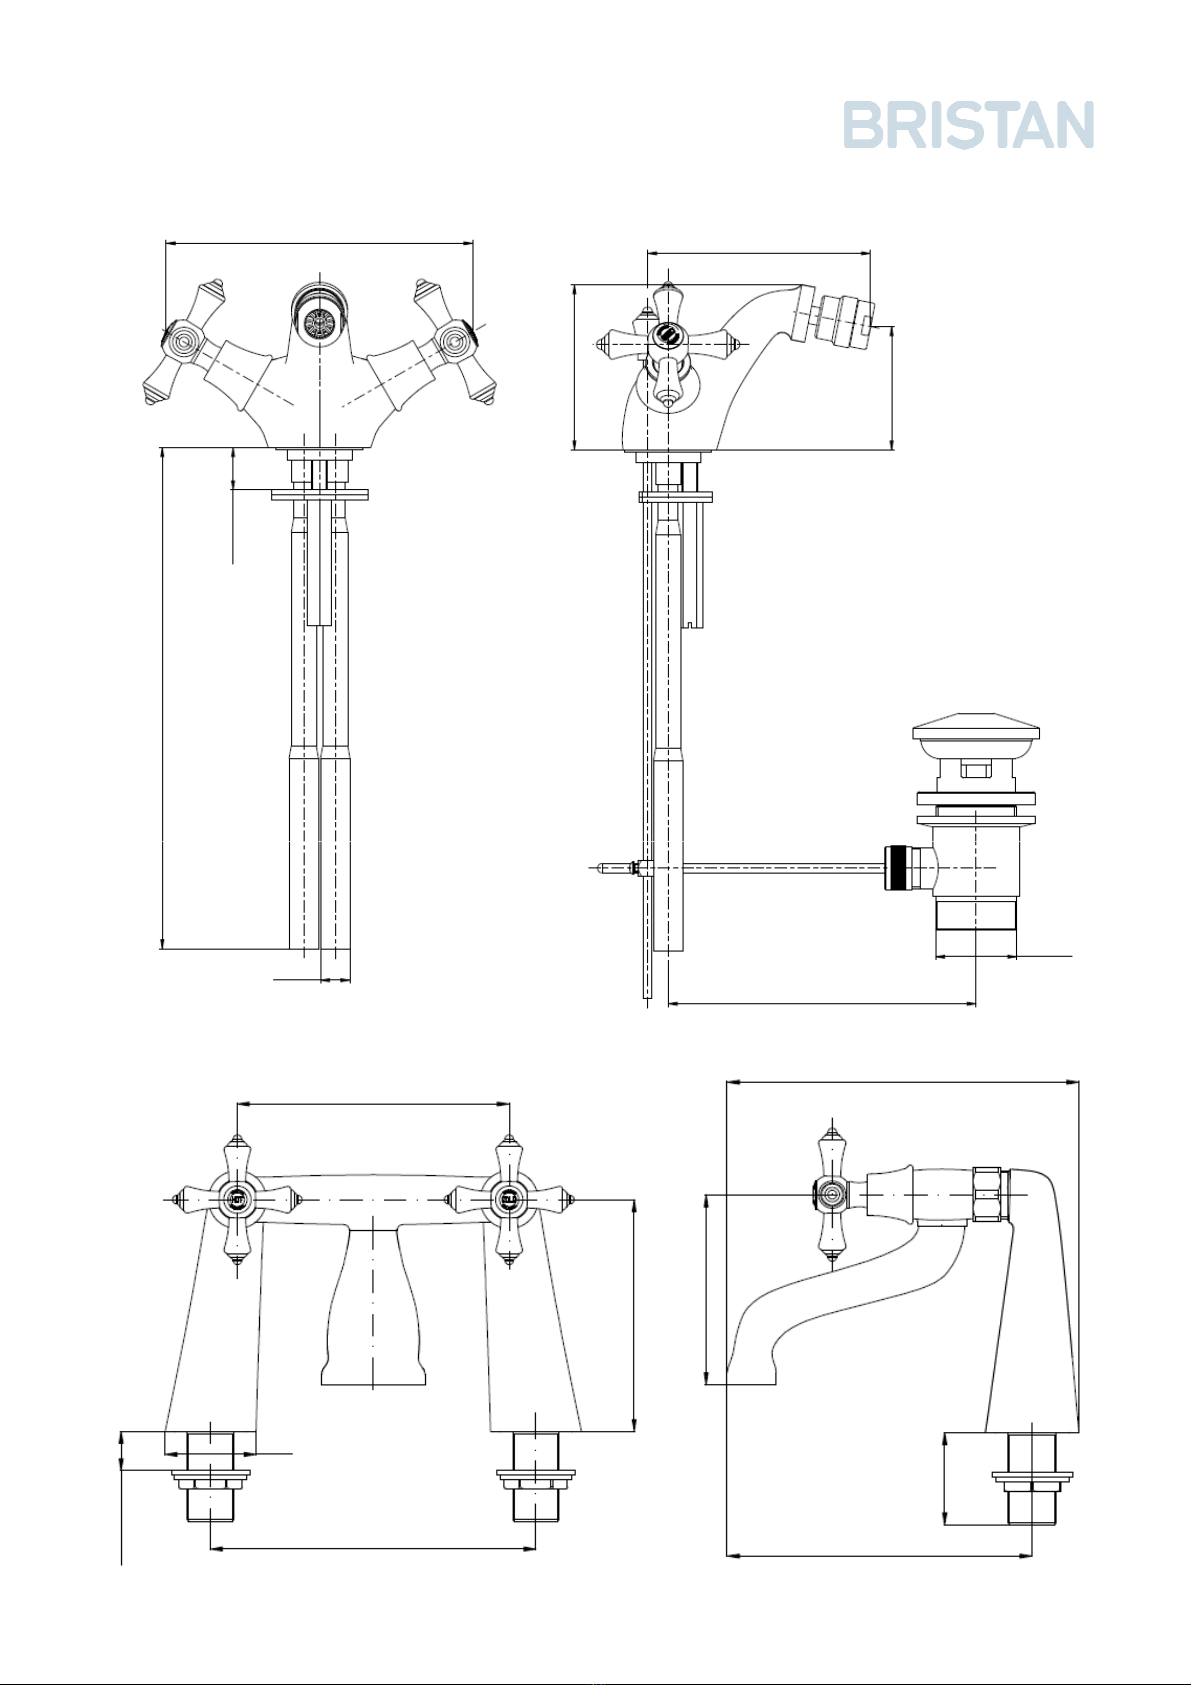
Bidet Mixer
Bidet MixerBidet Mixer
Bidet Mixer
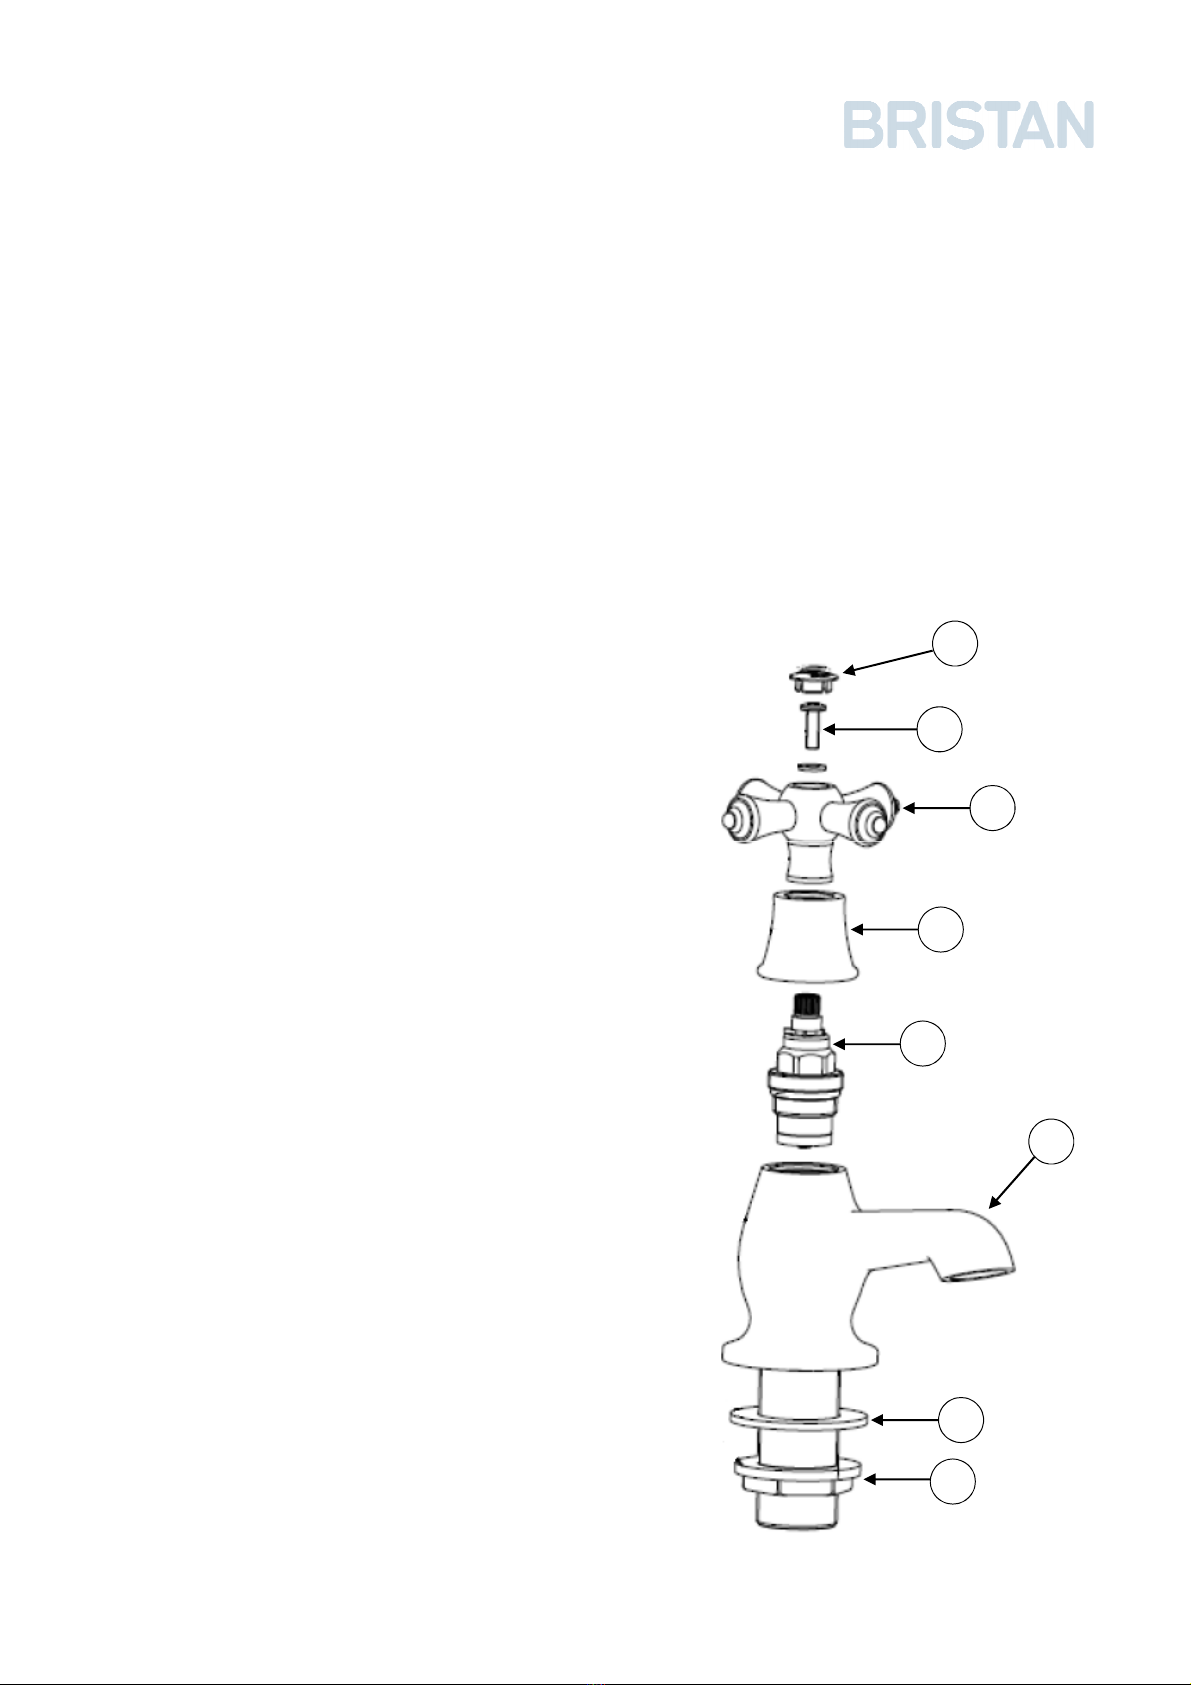
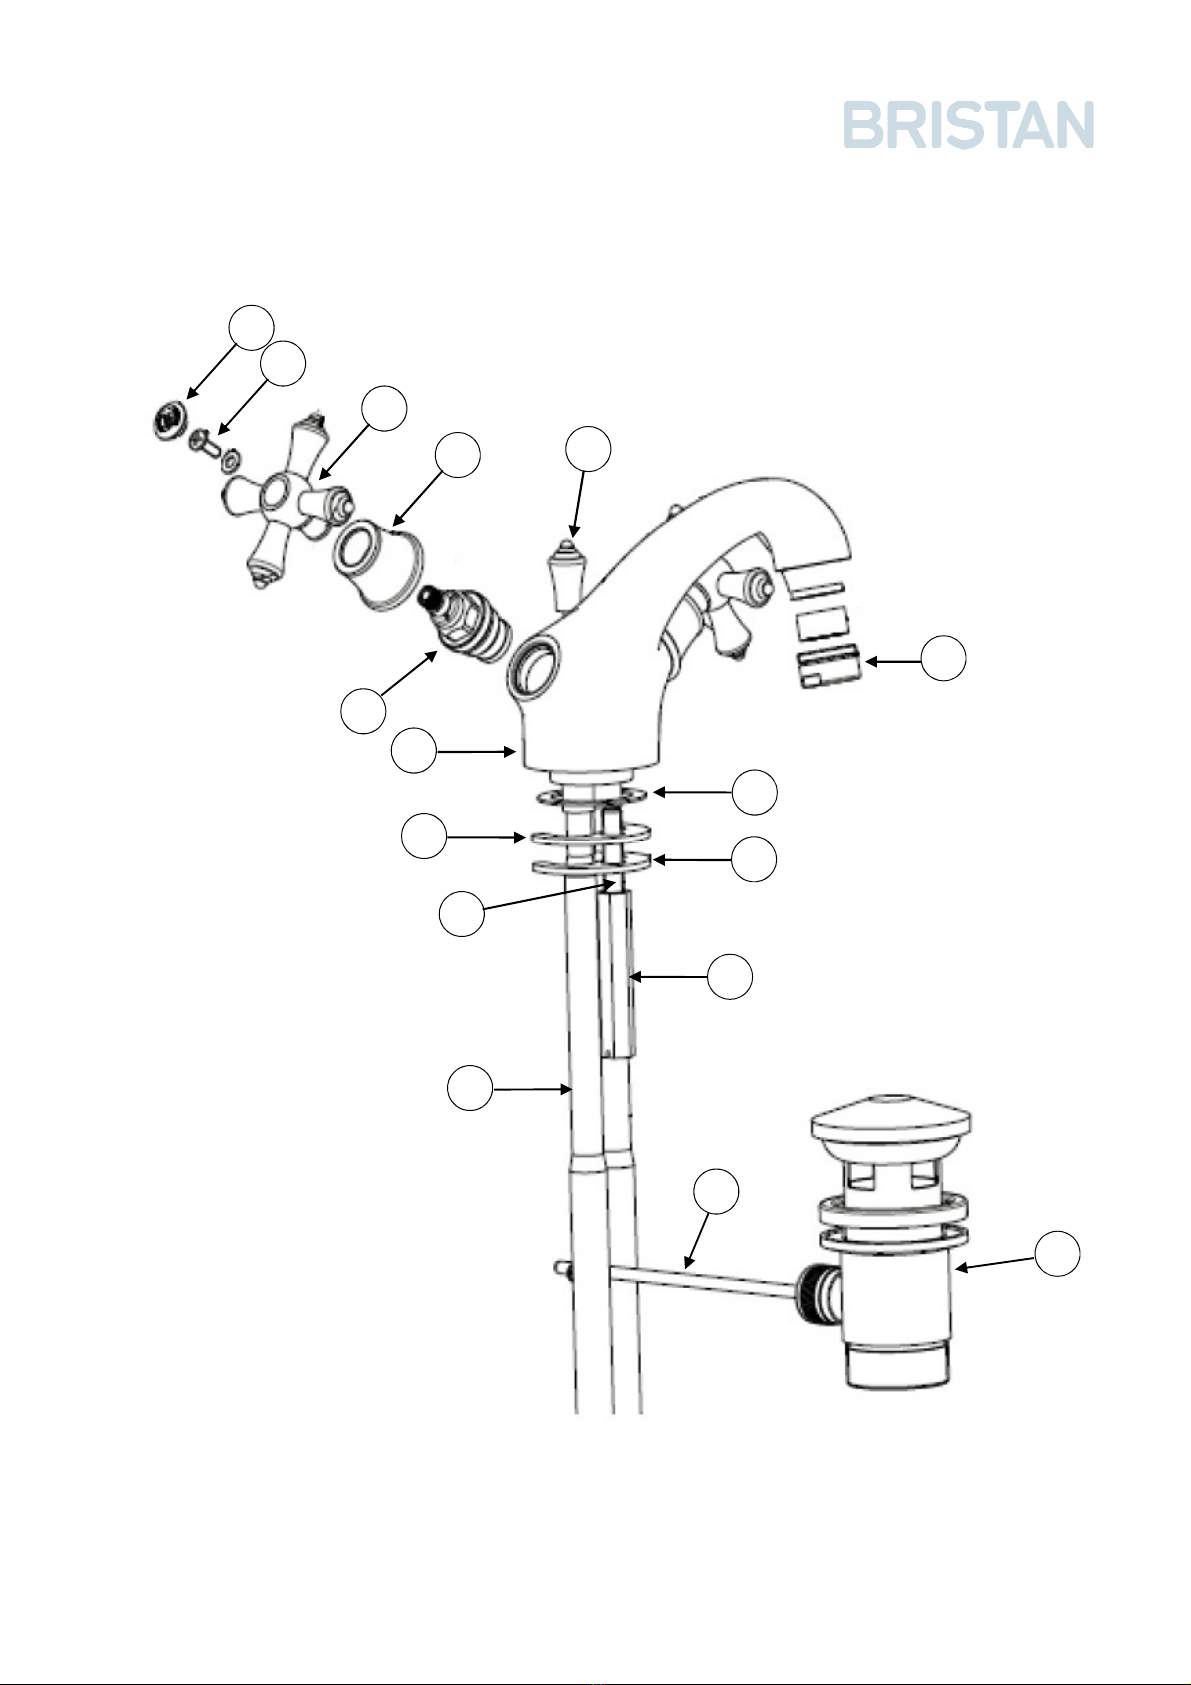
1. Identify all co ponents are present prior to starting installation using the diagra
overleaf.
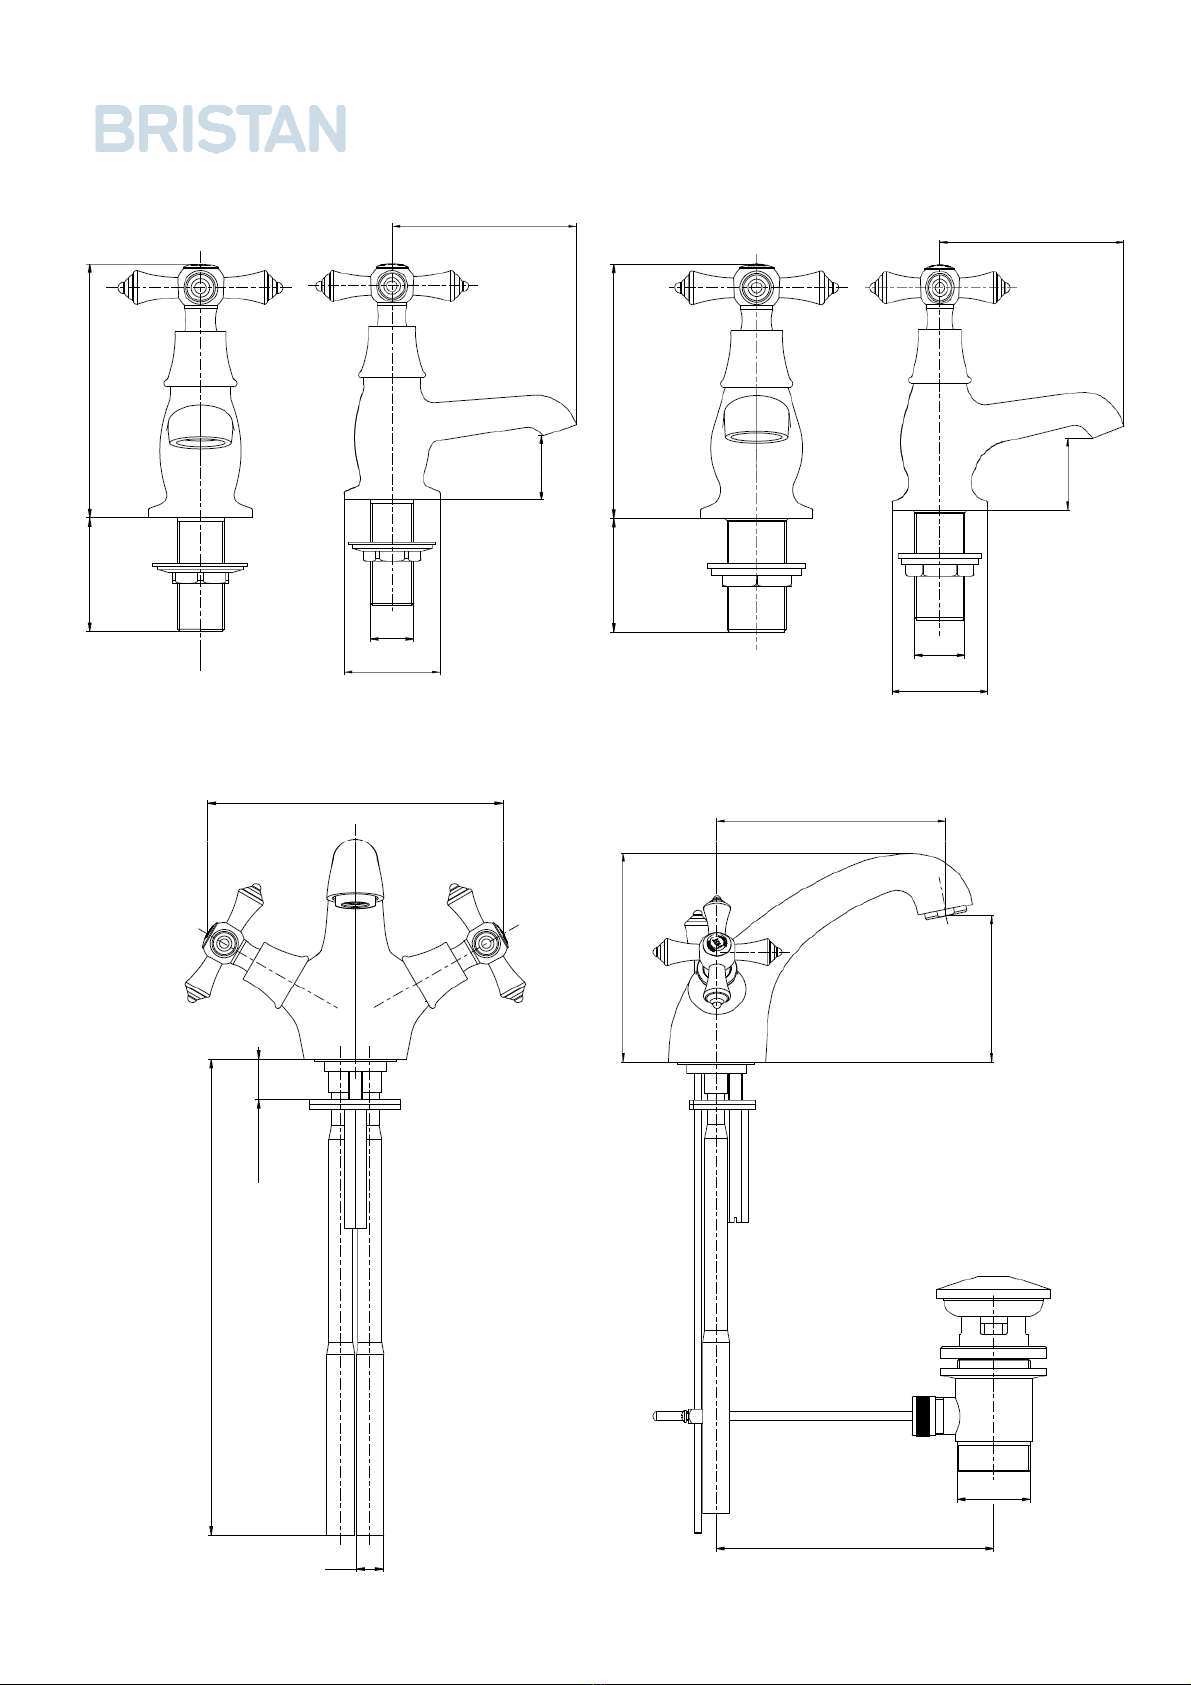
2. Fit the ixer body (6) to the basin.
3. Fit the washer (7) between the bidet ixer and the top of the bidet, and ‘C’ shaped rubber
washer (8) and the ‘C’ shaped etal washer (9) to the underside of the basin and screw
the fixing stud (10) into the botto of the ixer body (6). Tighten the fixing nut (11) on to
the fixing stud (10) to secure the basin ixer in place.
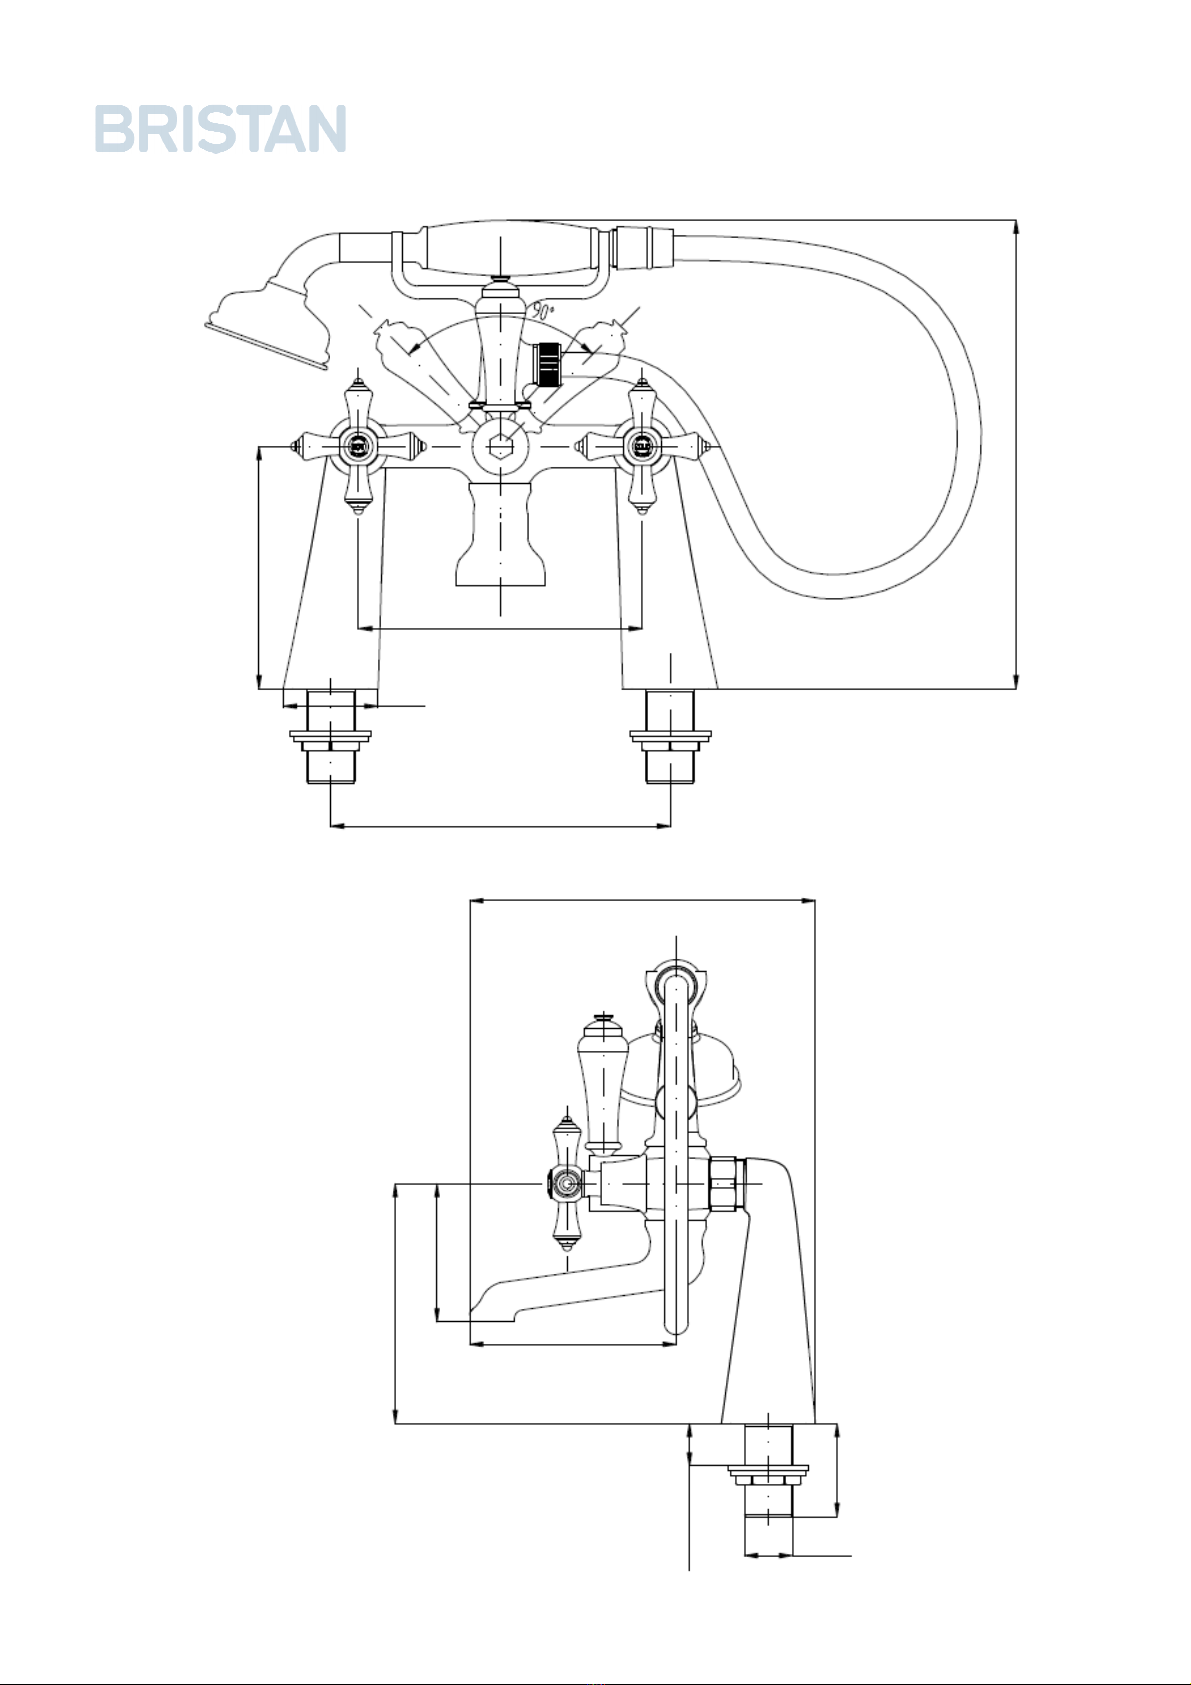
4. Fit the copper connecting pipes (12) to the ixer (DO NOT OVERTIGHTEN)
(DO NOT OVERTIGHTEN) (DO NOT OVERTIGHTEN)
(DO NOT OVERTIGHTEN) and connect
the hot and cold water supplies.
5. Fit the pop up waste (14) to the basin ensuring a rubber washer is fitted between the
basin and the waste. Use a pure silicon sealant where necessary. Place the other rubber
washer under the basin and tighten the botto of the waste to secure in place. Connect
the drainage pipe (not supplied) to the waste.
6. Fix both pop up rods in position, the vertical rod slides down through the hole in the back
of the ixer body.
7. In order to fill the basin, pull the pop up waste knob (15) up. To release the water push
the pop up waste knob (15) back down.
8. Turn on both water supplies and turn the handles into the open position, letting the water
flow for a few inutes to check all joints and connections for any leaks.
1. Indice x2 9. ‘C’ Shaped Metal Washer x1
2. Handle Screw x2 10. Fixing Stud x1
3. Handle x2 11. Fixing Nut x1
4. Shroud x2 12. Copper Connecting Pipes x2
5. Valve x2 13. Horizontal waste rod x1
6. Mixer Body x1 14. Pop up Waste x1
7. Washer x1 15. Pop up waste knob x1
8. ‘C’ Shaped Rubber Washer x1 16. Flow Straightener x1
10