Brock MEYER ENERGY MISER ME1000S User manual

MEYER® Tower Dryer
ME1000S/SG-ME2650S/SG
MFH1968-5BMay 2014
WALKWAYS and LADDERS

BROCK® MEYER® Walkways and Ladders
2MFH1968-5B
SAFETY First! Recognize SAFETY Information
This symbol is used throughout this Manual to identify particular stages where the bin
Contractor and/or Operator need to take special note and precautions regarding the danger
described in these Instructions. Please read all the SAFETY information and the
instructions completely prior to beginning the construction.
This is the Safety-Alert Symbol. When you see this symbol on your equipment or in this
Manual, be alert to the potential for personal injury.
Signal words DANGER, WARNING, or CAUTION, are used with the Safety-Alert
Symbol. Be sure to follow ALL National and Local Safety Standards governing each
installation site.
Understand Signal Words
DANGER indicates an imminently hazardous situation which, if not avoided, WILL
result in death or serious injury.
WARNING indicates a potentially hazardous situation which, if not avoided, COULD
result in death or serious injury.
CAUTION indicates a hazardous situation which, if not avoided, MAY result in minor or
moderate injury.
WARNING! Do not attach yourself to, or carry loose or dangling rope on structures near
or adjacent to the Tower Dryer entry area. Loose rope or material can be
suddenly sucked into the Dryer Fans (which may start automatically). This
can cause equipment damage, severe personal injury or death.
Use Fall Restraint/Arrest Systems
When working on or inside a Tower Dryer at heights where fall hazards exist, use an
adequate fall restraint or fall arrest system with a lifeline and harness, tied to a secure
point. A proper fall arrest system should withstand 5,400 pounds [2449 kg] of stress
to prevent falling. A fall restraint system typically withstands less than 5400 pounds
and allows a limited fall of about 2' [610]. To ease injury, it is recommended the fall-
distance on restraints be set at 6' [1 829] maximum.
WARNING! Purchase and use secure lifelines and adequate fall restraint/arrest systems. Some
facilities mandate that safety harnesses be used where there is risk of fall and/or
entrapment. Failure to use fall restraint and/or arrest systems consistently when
climbing or entering grain drying towers can cause serious injury or death.
WORK SAFE! While some photographs in this Manual were taken at sites where
certain PPE might not be required, Brock recommends using SAFETY equip-
ment, especially hard hats and SAFETY harnesses—at all installations. ALWAYS
follow appropriate federal, state and local codes for PPR requirements. See Base
Manual MFH1968-1 for recommended PPE.
Table of Contents
SAFETY First! Recognize SAFETY Information.........................................................................................2
Understand Signal Words DANGER, WARNING, CAUTION • Use Fall Restraint/Arrest Systems........2
About This Manual...........................................................................................................................................4
Definition of Terms and Symbols • Measurements • Identification of Parts and Hardware...................4
Ladder SAFETY Procedures ..........................................................................................................................5
Installations While the Tower Is on the Tower Trailer .............................................................................6-15
Install Walkways and “Ship Loose” Ladders-and-Cage on the Main Tower..............................................6
Be Careful Stepping on the Horizontal Tower ............................................................................................6
Order of Walkway Installation ....................................................................................................................7
Bracket Installations .................................................................................................................................7
Walkway/”Catwalk” Arms ....................................................................................................................8-9
Floor Sections ......................................................................................................................................10-11
Upright Posts • Handrails, Upper and Mid .........................................................................................12

BROCK® MEYER® Walkways and Ladders
MFH1968-5B 3
Ladder-and-Cage Installation Basics, Horizontal Tower ....................................................................... 13-14
Outside Ladder Sections • Ladder Splice .................................................................................... 13-14
Cage Hoop Halves ..............................................................................................................................14
Lift the Tower to “First Stage” to Work Underneath ................................................................................15
Types of Walkways ...................................................................................................................................... 16-24
Common Parts in Walkways ......................................................................................................................17
Full Walkway (3121-00052).................................................................................................................... 18-19
Partial Walkway (3121-00120), All Models ........................................................................................... 20-21
Eave Platform (3121-00175) Roof Module All Models.......................................................................... 22-23
Eave Platform on the ME1000S - ME1600S ........................................................................................24
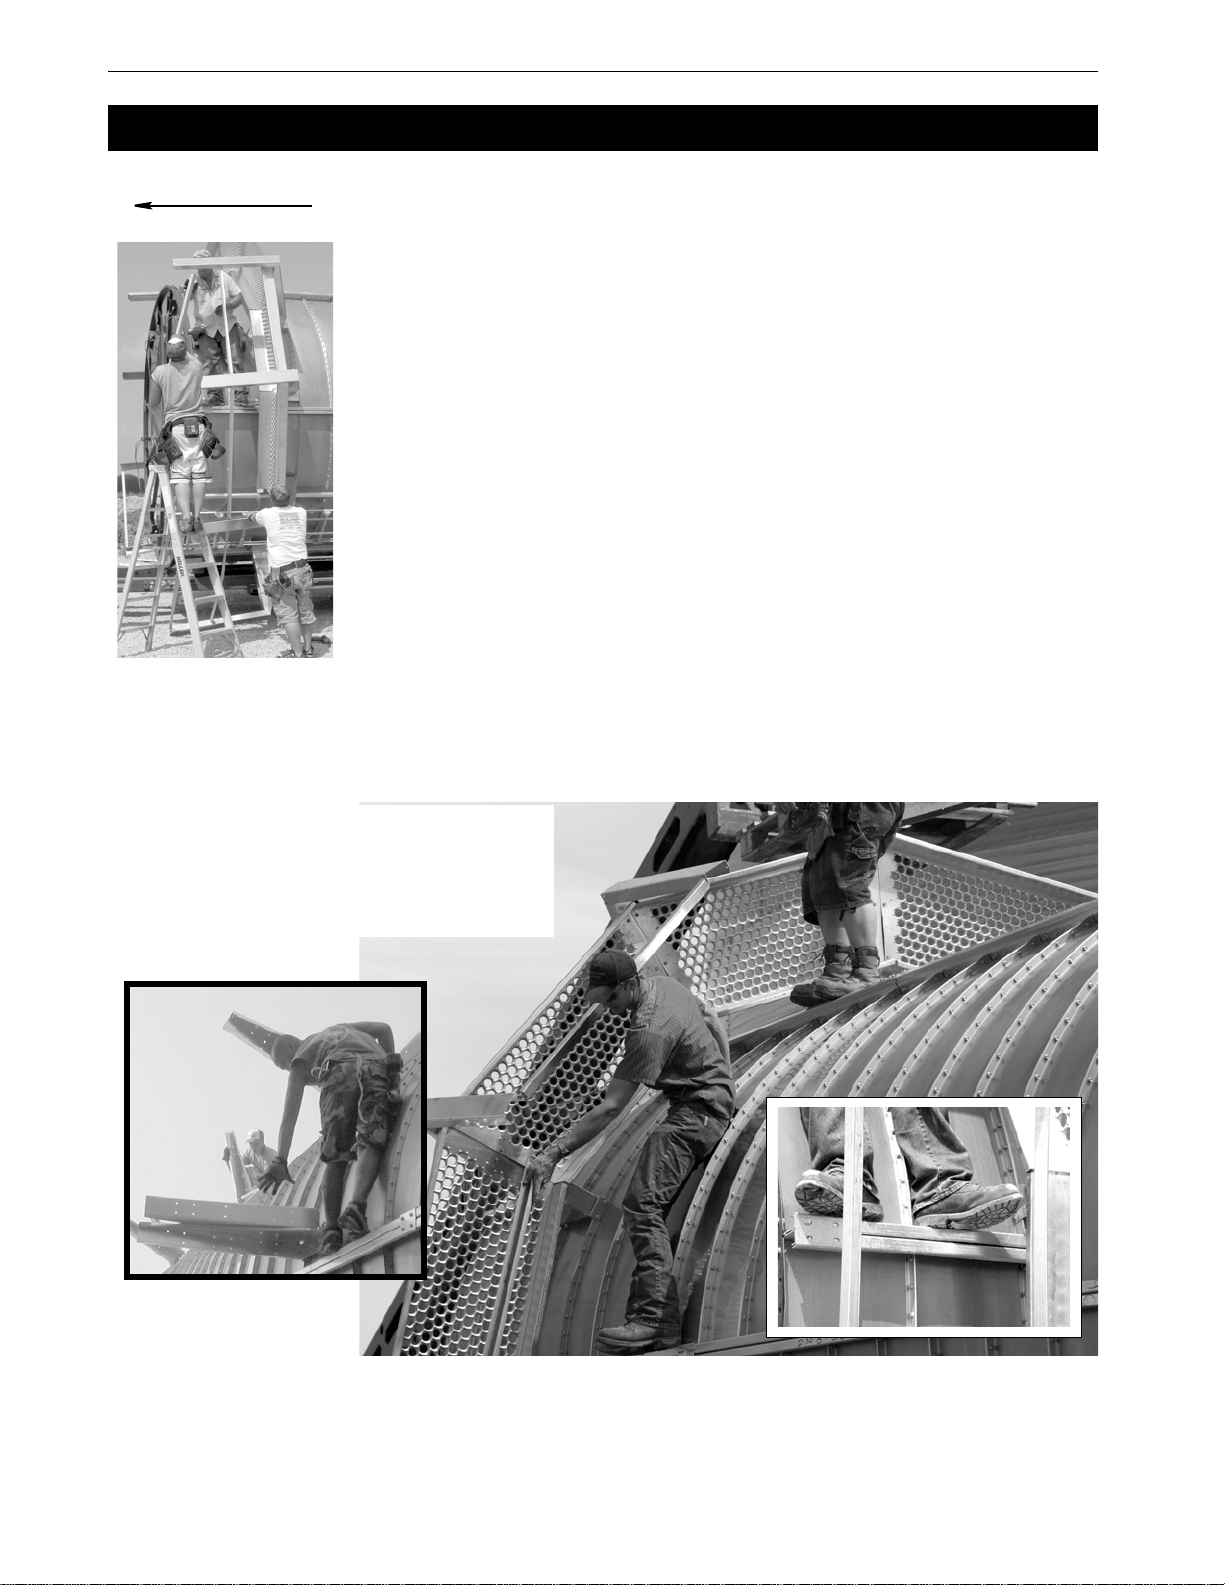
Outside Ladder-and-Cage Installation ...................................................................................................... 25-35
Ladder-and-Cage Parts Identification.........................................................................................................25
Top Ladder Extension Through the Eave Platform....................................................................................26
Extension Rail Bracing to the MEYER® Roof .........................................................................................27
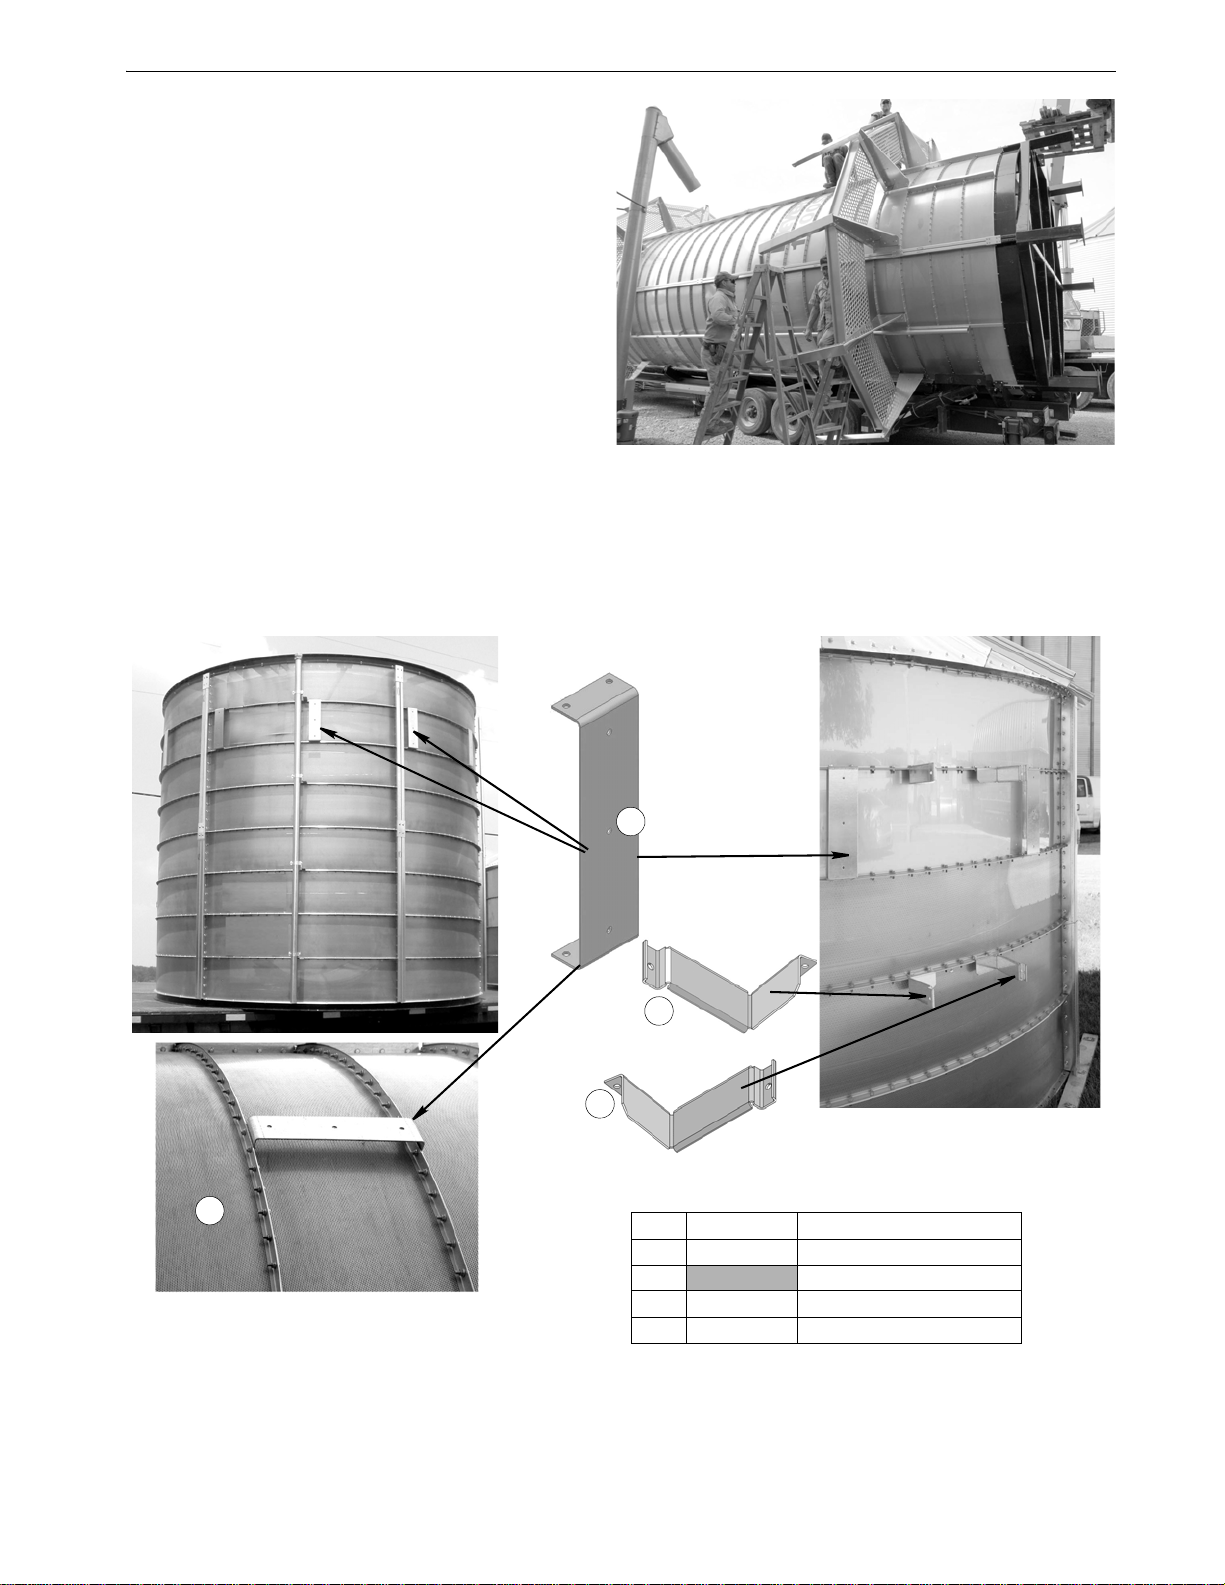
Outside Ladder Brackets to the Tower.................................................................................................... 28-29
Ladder-and-Cage Sections....................................................................................................................... 30-31
Hoop Halves .......................................................................................................................................30
Cage Channels ......................................................................................................................................31
Bottom Flared Cage Section ....................................................................................................................32
Outside Bottom Ladder (May Be Pre-Installed).........................................................................................33
Locking Ladder Door Assembly 9-41037............................................................................................... 34-35
Tie-Back Installation ............................................................................................................................35
Diagrams: Outside Walkways and Ladder-and-Cage ............................................................................. 36-55
Outside Ladder-and-Cage Packages...........................................................................................................36
Outside Ladder Package Kit Numbers Chart..............................................................................................37
ME1000S with 1 Level Catwalk (3121-00084)..........................................................................................38
ME1200S with 1 Level Catwalk (3121-00085) ......................................................................................39
ME1200S with 2 or 3 Level Catwalks (3121-00163)................................................................................40
ME1400S with 1 Level Catwalk (3121-00165 .........................................................................................41
ME1400S with 2 or 3 Level Catwalks (3121-00166)................................................................................42
ME1600S with 1 Level Catwalk (3121-00087) ........................................................................................43
ME1600S with 2 or 3 Level Catwalks (3121-00112)................................................................................44
ME1800S with 2 Level Catwalks (3121-00088).......................................................................................45
ME1800S with 3 Level Catwalks (3121-00179).......................................................................................46
ME2000S with 2 Level Catwalks (3121-00089) ......................................................................................47
ME2000S with 3 Level Catwalks (3121-00113).......................................................................................48
ME2000S with 4 Level Catwalks (3121-00185).......................................................................................49
ME2400S with 3 or 4 Level Catwalks (3121-00091)................................................................................50
ME2400S with 5 Level Catwalks (3121-00043).......................................................................................51
ME2650S with 3 Level Catwalks (3121-00176).......................................................................................52
ME2650S with 4 Level Catwalks (3121-00178).......................................................................................53
ME2650S with 4 Level Catwalks (3121-00184).......................................................................................54
Inside Ladder Installations ......................................................................................................................... 55-57
Inside Ladder Sections................................................................................................................................55
Internal Service Platform Ladder Access...................................................................................................56
Top Inside Ladder Sections........................................................................................................................57
Pre-Installed Inside Ladder Sections..........................................................................................................57
Diagrams: Inside Ladders .......................................................................................................................... 58-66
Inside Ladder Package Kit Numbers Chart................................................................................................58
ME1000S ...................................................................................................................................................59
ME1200S ................................................................................................................................................60
ME1400S ...................................................................................................................................................61
ME1600S .................................................................................................................................................62
ME1800S ...................................................................................................................................................63
ME2000S ...................................................................................................................................................64
ME2400S ...................................................................................................................................................65
ME2650S ...................................................................................................................................................66

About This Manual BROCK® MEYER® Walkways and Ladders
4MFH1968-5B
The intent of this Manual is to help you follow step-by-step instructions for plumbing
installations in the BROCK® MEYER® Dryer.
IMPORTANT!
Pay particular attention to all SAFETY Information in this Manual.
CAUTION!
Read and understand this Manual. Failure to follow proper procedures may
cause damage to equipment or personal injury.
Contact your Brock Dealer to replace this Manual should it become lost or damaged.
Store it in a convenient place for easy reference.
Definition of Terms and Symbols
•ThisPlanning Symbol is used in areas where planning needs to take place
before assembly and/or installation can continue.
• “Horizontal,” “vertical,” “bottom,” and “top” refer to the Dryer as it is standing.
The symbols ('') equal inches and (') equals feet in English measurements.
Measurements
The symbols ('') equals inches and (') equals feet in English measurements.
Metric measurements are shown in square brackets following the English
measurement. For example: 15' [4.572 m] 90' [27.432 m]
Identification of Parts and Hardware
• Names for some components which have BROCK® Part Numbers have been
capi-
talized
throughout this Manual to
call attention
to them.
• Parts and basic components are identified in
Figures
and their accompanying Tables
as “Items” with a black number in white circle. See
Figure 1
below.
• Hardware is identified by a shaded circle and table item cell.
• Dimensions and lengths are noted with a white circle
on
an arrow or line, then identi-
fied with numeric values in a
Figure
Table.
• Pictures may vary slightly from actual components, which may have been modi-
fied for better fit or function.
Hardware Basics:
Organize all hardware so the packages and buckets are easy to locate. When leaving
for the day, remember where you are in the installation, which connections are tight,
and which connections are loose.
IMPORTANT!
Always have a second person check the tightening on all Ladder and
Walkway connections!
ThisPre-AssembleSymbol(left)suggeststhat a particular assemblycanbefinished
ahead of time. Plan to sub-assemble and add hardware any parts that can be prior to
installation. Make sure to use proper hardware.
About This Manual
Figure 1.
Part and Hardware Identification
6
832
38
43
Item Part No. Description
6 U-24016 Ladder Cap
8 U-24142 Extension Rail 54'' [1 372]
32 39-20152 Nut, Flange 5/16''-18
38 39-20101 Washer, Flat 5/16 x 1 1/4''
43 39-20322 Bolt, Hex Head 5/16-18 x
1 1/4'' Gr. 5

BROCK® MEYER® Walkways and Ladders Ladder SAFETY Procedures
MFH1968-5B 5
DANGER! Failure to comply with the following instructions may result in death or
serious injury.
IMPORTANT!
The Ladder Section with the DANGER Decal (Part No. 13-23790) in Figure 2
at left must be installed as the BOTTOM Section of each Ladder.
1. The WORKING LOAD of the Ladder is 300 lbs [136 kg]. Do not overload.
2. Never climb a damaged or improperly assembled Ladder. Before use, inspect the
Ladder carefully for deterioration from chemicals or weather.
3. Keep the Ladder and Bin away from power lines and live electric wires.
4. Keep rungs free from slippery material such as ice, snow, mud, grease, manure, etc.
5. Wear slip-resistant shoes.
6. DO NOT USE LADDERS if you tire easily, or are subject to fainting spells, or
use medicine or alcohol, or are physically handicapped.
7. FACE THE LADDER when ascending or descending. Maintain a firm grip.
Center your body between Side Rails.
8. Discard and replace the Ladder if it is exposed to fire or damaging chemicals.
9. Never use the Ladder as a horizontal platform, plank or material hoist.
10.Never apply a side load. Never push or pull anything while on the Ladder.
11.Never drop or apply an impact load to the Ladder.
12.Never sit on the ends of Ladder Side Rails.
13.Never use the Ladder as a scaffold.
14. Never use the Ladder when in poor health.
DANGER! DANGER!
DO NOT enter the Tower Dryer through the Manhole during the filling/
unloading operation or while the Dryer is in use!
When the Dryer and auxiliary equipment are not LOCKED OUT, grain fill may
start at any time without warning.
DO NOT allow the Dryer to run while any adjustments are being made. SHUT
OFF, LOCKOUT and TAGOUT all electrical power BEFORE working on or near
the Dryer. Keep hands, feet, hair, and clothing away from all parts in motion.
Failure to shut off, LOCKOUT and TAGOUT power to the Dryer will lead to
personal injury or death.
Ladder SAFETY Procedures
Figure 2.
Ladder DANGER Decal
13-23790
Figure 3.
Slippage and Suffocation Hazards in Flowing Grain
at Roof Module

Installations While the Tower Is on the Tower Trailer BROCK® MEYER® Walkways and Ladders
6MFH1968-5B
Install Walkways and “Ship Loose” Ladders-and-Cage
on the Main Tower
Orientation: Remember at all times that the actualTOP of the structure is towardthe
cab of the truck. The BOTTOM of the Tower is toward the back end of the truck.
Install all possible Walkways and Side Ladder-and-Cages while the Tower trailer is
horizontal.
Refer to pages 7-15 for installation of 5/16'' hardware on Walkways.
DO NOT TIGHTEN Walkway Handrail or Post connections, as they must be leveled
to vertical after the tower is raised.
IMPORTANT!
The lower Partial Walkway (3121-00120, pages 20-21) cannot be installed until the
Tower is raised to vertical.
Cage sections are not pre-installed. Hardware is located in the Ship Loose Bolt Kit.
Refer to pages 25-35 for installation of Outside Ladder-and-Cage hardware/parts.
TIGHTEN all Ladder and Cage connections. They will have to be re-tightened after
the Tower is raised to vertical.
BE CAREFUL Stepping on the Horizontal Tower
Begin on 6' stepladders, and continue the installation stepping only on the screen
Stiffeners (pairs). Remember to step sideways so Screens will not be damaged.
Installations While the Tower Is on the Tower Trailer
TOWARD TOWER TOP
Figure 4.
BE CAREFUL!
STEP ONLY on Stringers/Stiffeners! DO NOT
place your weight on the Screens. Step
SIDEWAYS so the Screens will not be
damaged. Use the next Stiffener to pull
yourself up.
Figure 5.
Stand on Stringers Only

BROCK® MEYER® Walkways and Ladders Installations While the Tower Is on the Tower Trailer
MFH1968-5B 7
Be cautious of personal SAFETY while working on the Tower in this position. Use
an adequate number of ladders.
Bracket Installations
For your convenience, Walkway Arm Brackets (3121-00035), Ladder Brackets, and
some Ladder Sections are pre-installed. Check these Brackets for tightness when the
Dryer is onsite.
Order of Walkway Installation
• Walkway Arm Brackets
• Walkway Arms
• Floor Sections
• Vertical Posts
• Handrails
See common parts on page 17.
Figure 6.
Right: Walkway Installation
on Horizontal Tower
1
Figure 7.
Walkway Arm Bracket Pre-Installed on Intermediate
Module and Horizontal Tower Module
Figure 8.
L/R Ladder Brackets on Module
as Shipped
Item Part No. Description
13121-00035 Walkway Arm Bracket
2Tower, Horizontal
33121-00169 Ladder Bracket-LEFT
43121-00168 Ladder Bracket-RIGHT
2
3
4

Installations While the Tower Is on the Tower Trailer BROCK® MEYER® Walkways and Ladders
8MFH1968-5B
Attach the Walkway Arms, twelve (12) per Full Walkway, to the pre-installed Arm
Bracketswiththree(3) 3/8x1''galvanizedHexHeadBolts.Secure withFlangeNuts.
Continue installing Arms around the Tower. Remaining Arms must be installed after
the Tower is raised to vertical.
All Arms must remain loose until all Walkway Floor Sections are attached.
Figure 9.
Install Walkway Arms
Walkway/”Catwalk” Arms
Consecutive Walkway Arms are bolted into the eleventh and twelfth (11th/12th)
bolt holes from the first set of bolts. There are ten (10) holes between Arms.

BROCK® MEYER® Walkways and Ladders Installations While the Tower Is on the Tower Trailer
MFH1968-5B 9
2
Figure 10.
Walkway Arm Installation
2
32
Item Description
1
Walkway Arm Bracket
2Walkway Arm
3Stringer
45/16 x 1'' HH Bolt galv
55/16'' Flange Nut
2
3
WhentheWalkwayis
tightened,tightenthis
Bolt first.
11

Installations While the Tower Is on the Tower Trailer BROCK® MEYER® Walkways and Ladders
10 MFH1968-5B
Floor Sections
IMPORTANT!
Do not tighten Walkway Arms until all Floor Sections are connected to form a
complete Walkway around the Tower..
Figure 11.
Floor Sections
Attach Walkway Floor
sections. Drop in 5/16 x 1''
galvanized Hex Head Bolts,
heads on top of the Walkway.
Secure with Flange Nuts
underneath. Be sure the Floor
Panel (edge) is turned UP,
toward the Tower TOP.
*
TOWARD
TOWER TOP
3
3
5
Figure 12.
Walkway Floor Sections
Item Description
1
Walkway Arm Bracket
2Walkway Arm
3Floor Section
45/16 x 1’' HH Bolt galv
55/16'' Flange Nut
2
2
3
5

BROCK® MEYER® Walkways and Ladders Installations While the Tower Is on the Tower Trailer
MFH1968-5B 11
1
3
TOWARDTOWERTOP
45
1
TOP VIEW
Figure 13.
Connect Adjacent Floor Sections
45
Connect adjacent Floor Sections
around the Tower as far as there is
clearance to do so.
TOWARDTOP
UNDERSIDE VIEW
Detail
Detail
Item Description
1
Walkway Arm Bracket
2Walkway Arm
3Floor Section
45/16 x 1’' HH Bolt galv
55/16'' Flange Nut
3
3
3

Installations While the Tower Is on the Tower Trailer BROCK® MEYER® Walkways and Ladders
12 MFH1968-5B
Handrails, Upper and Mid
When Vertical Posts are installed, attach Handrails and Handrails between Posts,
Bolt heads inside the Post (same hardware). Repeat Handrail installation all the way
around as far as you can.
Upright Posts
Attach the Upright Posts to the outer ends
of the Walkway Arms with four (4) 1''
bolts. Secure with Flange Nuts.
UNDERSIDE DETAIL
Figure 14.
Walkway Posts:
DO NOT TIGHTEN at this time!
5
6
Item Description
1
Walkway Arm Bracket
2Walkway Arm
3Floor Section
45/16 x 1’' HH Bolt galv
55/16'' Flange Nut
Figure 15.
Top and Mid Handrails

BROCK® MEYER® Walkways and Ladders Installations While the Tower Is on the Tower Trailer
MFH1968-5B 13
Ladder-and-Cage Installation Basics, Horizontal Tower
Outside Ladder Sections
Check the tightness of factory-installed Ladder Brackets on the Tower, to be sure they are
still tight after delivery.
Some Ladder sections may already be installed in the Brackets with Locking Clips.
Figure 16.
Locate Pre-Installed Ladder
Brackets and Ladder Sections
on the Tower
Detail
Figure 17.
Slide Ladder Sections
Through Brackets
Slide new Ladder Sections through the Ladder Brackets.
Figure 18.
Ladder Rail Splice
Item
Part No.
Description
1
U-23774
Ladder Rail Splicer
2
varies
Side Ladder
3
39-20072
Bolt, HHBS 5/16-18 x 3/4'' Gr. 8.2
4
39-20152
Nut, Flange 5/16''-18
Ladder Splice
Ladder Sections (3', 4', 5' and 6') are bolted
together using Ladder Rail Splicers
(U-23774) with 5/16 x 1’' Gr. 5 Hex Head
Bolts and Flange Nuts.
4
4
3
1
2
2

Installations While the Tower Is on the Tower Trailer BROCK® MEYER® Walkways and Ladders
14 MFH1968-5B
Cage Hoop Halves
Attach Cage Hoop Halves to the Ladder rail on each side with Locking Clips. Attach
the Hoop Halves in the middle front with hardware from the Bolt Kit. See Details on
pages 30-32.
Secure Ladder Sections with
Locking Clips (in the Bolt
Kit). Be sure the Ladder
DANGER Decal shown in
Figure 2 is right side up.
Figure 19.
Locking Clips and Splices
Figure 20.
Cage Installation

BROCK® MEYER® Walkways and Ladders Installations While the Tower Is on the Tower Trailer
MFH1968-5B 15
Lift the Tower to “First Stage” to Work Underneath
Afterall possible Walkways and Ladder-and-Cage sections have been installed to the
horizontal Tower Module on the Tower trailer, lift the Tower to the FIRST
STAGE. FIRST STAGE is a partially raised position that allows the remainder of
the full Access Platforms to be installed. After the remaining Access Platform(s)
have been installed, tighten the Platform and Arms.
IMPORTANT!
DO NOT TIGHTEN Walkway Arms until all Floor Sections are connected to
make a complete Walkway. DO NOT tighten the Handrails or Upright Posts.
On the ME1000S through
1600S Models, the Tower
Module and Roof Module
are shipped pre-
assembled together and
as one unit on the Tower
trailer. Some Eave
Platform assembly can
be done while the lift
truck is in First Stage lift.
Remaining Ladder-and-
Cage, and Partial Walkway
installations are done after
the Tower and Modules are
raised to vertical.
WARNING!
Use CAUTION when raising the Tower
section to First Stage. Be sure to use all
locking pins specified. Use CAUTION
when raising the Tower section to full
height. Stand clear! Follow all SAFETY
Decals. DO NOT attempt to MOVE the
truck with the hoist/Tower in a raised
position! Protect or LOCK THE
CONTROLS so that no hoist movement
can be made unintentionally. Failure to
follow this instruction could cause death,
serious injury, and/or equipment damage.
Figure 21.
Install Walkways at Tower Trailer FIRST STAGE Lift

Types of Walkways BROCK® MEYER® Walkways and Ladders
16 MFH1968-5B
Types of Walkways
Figure 22.
Eave Platform
(2 Floor Sections) 3121-00175
Figure 23.
Partial Walkway
(3 Floor Sections)
3121-00120
5
11
11
2
3
3
12 12
1
1
1
1
2
7
8
4
4
11
11
6
6
9
9
4
43
3
12
12
12
10
10
2
Figure 24.
Full OUTSIDE Walkway
(11 Floor Sections)
3121-00052
1
11
3
3
2
12
5

BROCK® MEYER® Walkways and Ladders Types of Walkways
MFH1968-5B 17
Full Outside
Walkway Partial
Walkway Eave
Platform
Item Part No. Description Qty. Qty. Qty.
1 3121-00031 Walkway Floor Section 52.75'' 11 3 2
2 3121-00032 Handrail 24 8 6
3 3121-00034 Walkway Arm 12 5 4
4 3121-00035 Walkway Arm Bracket** 12 5 4
5 3121-00055 Walkway Arm Bracket LONG 2
6 3121-00171 Brace, Roof Handrail 21'' 2
7 3121-00172 Brace, Roof Handrail RIGHT 25'' 1
8 3121-00173 Brace, Roof Handrail LEFT 25'' (not shown) 1
9 3121-00174 Platform Roof Mount 2
10 3121-00183 Rail, TPH 33 3/8'' 2
11 3321-00046 Endrail/Handrail External 42
12 3321-00035 Vertical Post, 43 1/4'' 12 4
14 *2320-00004 Screw, 5/16-18 x 1’' HWH 198 60
15 *2363-00006 Nut, Flange 5/16''-18 Serr. 198 60
*Hardware in Ship Loose Bolt Kit **This Bracket pre-installed on Tower/Modules
5
3
10
6
7
4
1
8
2
Common Parts in Walkways
9
12
Figure 25.
Eave Platform 3121-00175
FRONT VIEW
page 24.
Walkway Common Parts
4
6
11
11
10
10
3
9
9
8
7
6
1
12 12
2

Types of Walkways BROCK® MEYER® Walkways and Ladders
18 MFH1968-5B
FULL Walkway (3121-00052)
FULL Walkways are installed all the way around the Dryer with an opening for the
Ladder-and-Cage.Theremaybe several outside Walkways, depending ontheModel.
Refer to Outside Ladder Diagrams on page 36-54 for the number and placement of
Walkways on each different MEYER® model.
1
11
3
4
2
Item Part No. Description Qty.
1 3121-00031 Walkway Floor Section 52.75'' 11
2 3121-00032 Handrail 24
3 3121-00034 Walkway Arm 12
4 3121-00035 Walkway Arm Bracket** 12
12 3321-00035 Vertical Post, Walkway 43 1/4'' 12
13 *2320-00004 Screw, 5/16-18 x 1'' HWH 198
14 *2363-00006 Nut, Flange 5/16''-18 Serr. 198
*Hardware in Ship Loose Bolt Kit
**This Bracket pre-installed on Tower/Modules
Figure 26.
Full Outside Walkway
(11 Floor Sections)
3121-00052
12
**
1
1
1
TOP VIEW
*
3
Left, Figure 27.
ME1600, One (1) Platform

BROCK® MEYER® Walkways and Ladders Types of Walkways
MFH1968-5B 19
Figure 28A.
Three Platforms
First Level Walkway 3121-00052
ONE PLATFORM: Models ME1000S-1600S
Item Part No. Description Qty.
13121-00031 Walkway Floor Section 52.75'' 11
23121-00032 Handrail 24
33121-00034 Walkway Arm 12
43121-00035 Walkway Arm Bracket 12
12 3321-00035 Vertical Post 43 1/4'' 12
14 2320-00004 Bolt, 5/16-18 x 1'' HWH Whizlock 198
15 2363-00006 Nut, 5/16''-18 HWH Flange 198
THREE Walkway Assembly 3121-00054
THREE PLATFORMS: Models ME2400S Standard
and ME1600S, ME1800-2000S Optional
Item Part No. Description Qty.
13121-00031 Walkway Floor Section 52.75'''' 33
23121-00032 Handrail 72
33121-00034 Walkway Arm 36
43121-00035 Walkway Arm Bracket 36
12 3321-00035 Vertical Post, 43 1/4'' 36
14 2320-00004
*Bolt, 5/16-18 x 1'' HWH Whizlock
594
15 2363-00006 *Nut, 5/16''-18 HWH Flange 594
*Located in the Ship Loose Bolt Kit
TWO Walkway Assembly 3121-00053
TWOPLATFORMS:Models ME1800S-2000S Standard and
ME1000-1600S Optional
Item Part No. Description Qty.
13121-00031 Walkway Floor Section 52.75'' 22
23121-00032 Handrail 48
33121-00034 Walkway Arm 24
43121-00035 Walkway Arm Bracket 24
12 3321-00035 Vertical Post, 43 1/4'' 42
14 2320-00004
*Bolt, 5/16-18 x 1'' HWH Whizlock
396
15 2363-00006 *Nut, 5/16''-18 HWH Flange 396
*Located in the Ship Loose Bolt Kit
Figure 28B.
Five Platforms

Types of Walkways BROCK® MEYER® Walkways and Ladders
20 MFH1968-5B
PARTIAL Walkway (3121-00120), All Models
Locate the End Handrail Brace (Item 7) one (1) Screen directly above 3121-00035.
Use Inside Ladder Brace (Item 12, 3121-119) on the inside Screen as a reference. On
the corresponding outside Screen (see Top View), locate the second and third (2nd/
3rd) bolt counter-clockwisefrom the Screen flange to attach the first Walkway Arm.
Hardware is located in the Ship Loose Bolt Kit. The End Brace of the left Walkway
Floor Panel will mount just outside the Ladder rail below the Hi-Limit Box. There
will be ten (10) bolts between Ladder Brackets.
Figure 29.
Partial Walkway (3121-00120)
1
3
*
**
PARTIAL Walkway
Location Chart
Model Height* Module
ME2650S Screen 12 3
ME2400S Screen 4 2
ME2200S Screen 3 2
ME2000S Screen 3 2
ME1800S Screen 1 2
ME1600S Screen 3 1B
ME1400S Screen 2 1B
ME1200S Screen 1 1B
ME1000S Screen 2 1A
*Counting up from bottom of
Module
1
1
TOP VIEW
17
18
16
3
2
3
12 12
1
5
511
11
11
11
1
4
3
4
5
13
Other manuals for MEYER ENERGY MISER ME1000S
1
This manual suits for next models
3
Table of contents
Popular Construction Equipment manuals by other brands

Manitowoc
Manitowoc MLC650 Operator's manual

KRAUSE
KRAUSE ClimTec 710116C0 Assembly instructions and user's manual

Skid Pro
Skid Pro Extreme Duty Rock Grapple Operation and maintenance manual

Hilti
Hilti EXO-S Original operating instructions

hymer
hymer 6373 Instructions for use

IMT
IMT 12916 Parts & Specifications