BROCMAR CLETUS 2.4 User manual

2
VERSION 1.3

2
Please complete the form below for your future reference. Additionally, complete the
warranty registration card you received with your smokers using the information that you
filled out below and E-Mail to orders@brocmarbbq.com or send it snail mail to BMSH
Foods mailing address. Your serial number is located on the metal plate on your smoker’s
door.
Thank You Kindly for Choosing Brocmar Smokehouse Smokers
COPYRIGHT NOTICE
Copyright 2021. All right reserved. No part of this manual may be
copied, transmitted, transcribed, stored in a retrieval system, in any
form or by any means without expressed written permission of
BMSH Foods, LLC

3
SAFETY INFORMATION
MAJOR CAUSES OF APPLIANCE FIRES ARE A RESULT OF POOR MAINTENANCE AND A
FAILURE TO MAINTAIN REQUIRED CLEARANCE TO COMBUSTIBLE MATERIALS. IT IS
OF UTMOST IMPORTANCE THAT THIS PRODUCT BE USED ONLY IN ACCORDANCE TO
THE FOLLOWING INSTRUCTIONS.
Please read and understand this entire manual before attempting to assemble, operate or install the
product. This will ensure you receive the most enjoyable and trouble-free operation of your new pellet and
offset wood pellet smoker / grill. We also advise you retain this manual for future reference.
DANGERS AND WARNINGS
1.
A minimum clearance of 24 inches from combustible constructions to the sides of the smoker /grill,
and 24 inches from the back of the smoker / grill to combustible constructions must be maintained.
Do not use this appliance indoors or in an enclosed, unventilated area. This wood smoker / grill
appliance must not be placed under overhead combustible ceiling or overhang. Keep your smoker /
grill in an area clear and free from combustible materials, gasoline and other flammable vapors and
liquids.
2.
Keep electrical supply cords and the fuel away from heated surfaces. Do not use your smoker / grill in
the rain or around any water source. This applies to the pellet feeder portion of the smoker / grill.
3. After a period of storage, or non-use, check the burn grate for obstructions, the hopper for foreign
objects, and any air blockage around the fan intake or exhaust stacks. Clean before use. Regular care and
maintenance are required to prolong the lifespan of your unit. If the smoker / grill is stored outside during
the rainy season or seasons of high humidity, care should be taken to insure that water does not get into
pellet hopper. When wet or exposed to high humidity, wood pellets will expand greatly, decompose, and
may jam the feed system. Always disconnect the power, before performing any service or maintenance.
4. It is recommended to use heat-resistant barbecue mitts or gloves when operating the smoker/ grill. Do
not use accessories not specified for use with this appliance. Do not put a barbecue cover or anything
flammable in the storage space area under the barbecue.
You must contact your local home association, building or fire officials, or authority having
jurisdiction, to obtain the necessary permits, permission or information on any installation
restrictions, such as any grill being installed on a combustible surface, inspection requirements or
even ability to use, in your area.
Should a grease fire occur, turn the grill off and leave the lid closed until the fire is out. Close all
dampers on smokestacks. If you are cooking with offset fire box or as a combo smoker, make sure
to close all dampers on the fire box and leave fire box door shut. This starves fire of oxygen. Do not
unplug the power cord. Do not throw water on the smoker. Do not try to smother the fire. Use of an
all-class (class ABC) approved fire extinguisher is valuable to keep on site. If an uncontrolled fire
does occur, call the Fire Department.

4
5. Parts of the smoker / grill may be very hot, and serious injury may occur. Keep young children and pets
away while in use.
6. Do not enlarge burn grate orifices, igniter holes or burn pots. Failure to follow this warning could lead
to a fire hazard and bodily harm and will void your warranty.
7. Product may have sharp edges or points. Contact may result in injury. Handle with care.
This appliance is not recommended for children, persons with reduced physical, sensory or mental
capabilities, or lack of experience and knowledge, unless they are under direct supervision or instruction
by a person responsible for their safety.
Do not transport your smoker / grill while in use or while the grill is hot. Ensure the fire is completely out
and that the smoker / grill is completely cool to the touch before moving.
DISPOSAL OF ASHES
Ashes should be placed in a metal container with a tight-fitting lid. The closed container of ashes should
be placed on a non- combustible floor or on the ground, well away from all combustible materials,
pending final disposal. When ashes are disposed by burial in soil, or otherwise locally dispersed, they
should be retained in a closed container until all cinders have thoroughly cooled.
WOOD PELLET FUEL
This pellet cooking appliance is designed and approved for pelletized, all natural. You must only use all-
natural wood pellets, designed for burning in pellet barbecue grills. Do not use fuel labelled as having
additives. At this time of printing, there is no industry standard for barbecue wood pellets, although most
pellet mills use the same standards to make wood pellets for domestic use. Further information, can be
found at www.pelletheat.org or the Pellet Fuel Institute.
CREOSOTE
Creosote, or soot, is a tar-like substance. When burning, it produces black smoke with a residue which is
also black in color. Soot or creosote is formed when the appliance is operated incorrectly, such as:
incorrect position of the burn grate, blockage of the combustion fan, failure to clean and maintain the
burn area, or poor air-to-fuel combustion. It is dangerous to operate this appliance should the flame
become dark, sooty, or if the burn pot is overfilled with pellets. When ignited, this creosote makes an
extremely hot and uncontrolled fire, similar to a grease fire. Should this happen, turn the unit off, let it
cool completely, then inspect for maintenance and cleaning. It commonly accumulates along exhaust
areas. If creosote has formed within the unit; allow the unit to warm up at a low temperature, turn off the
appliance, then wipe away any formation with a hand towel. Similar to tar, it is much easier to clean when
warm, as it becomes liquid.
CARBON MONOXIDE (!the silent killer”)
Carbon monoxide is a colorless, odorless, tasteless gas produced by burning gas, wood, propane, charcoal
or other fuel. Carbon monoxide reduces the blood"s ability to carry oxygen. Low blood oxygen levels can
result in headaches, dizziness, weakness, nausea, vomiting, sleepiness, confusion, loss of consciousness or
death. Follow these guidelines to prevent this colorless, odorless gas from poisoning you, your family, or
others:
• See a doctor if you or others develop cold or flu-like symptoms while cooking or in the vicinity of the
appliance. Carbon monoxide poisoning, which can easily be mistaken for a cold or flu, is often detected
too late.
• Alcohol consumption and drug use increase the effects of carbon monoxide poisoning. Carbon monoxide
is especially toxic to mother and child during pregnancy, infants, the elderly, smokers, and people with
blood or circulatory system problems, such as anemia, or heart disease.
Do not use gasoline, lighter-fluid or kerosene for lighting or refreshing a fire in your grill. Keep
all such substances and liquids well away from appliance when in use.

5
Table of Contents
Safety Information………………………………………………………………………………………….…….3
Parts & Specs.......................................................................................................................7
Operating Instructions
Assembly Preparation…………………………………………………………………………………9
Grill Environment………………………………………………………....................................8
1.
Where to set-up the grill…………………………………………………………………………9
2.
Cold Weather Cooking……………………………………………………………..................9
3.
Warm Weather Cooking…………………………………………………………………………9
4.
Leveling the Smoker………………………………………………………………………….…..10
5.
Smoker Start up Procedures…………………………………………………………………..10
6.
Operating the Firebox (Offset Smoking)………………………………………………….11
7.
Operating the Pellet Smoker…………………………………………………………………..12
Trouble Shooting………………………………………………………………………………………………….13
Cleaning Instructions……………………………………………………………………………………………14
Return Policy……………………………………………………………………………………………………….14
Tips & Techniques………………………………………………………………………………………………..18
Warranty............................................................................................................................20

6
Our mission was simple…
Design the one smoker to rule them all, old-school meets new-school, something amateurs and
BBQ Champions alike would covet. They said it couldn’t be done, but our one-of-a-kind Cletus™
design proves you can indeed have it all; hardwood log and/or pellet fueled? Roger that.
Charcoal? Check. Electronic and Manual pellet hopper feed system? Yep. Heavy-duty, made in the
USA construction? 10-4.
Each Cletus™ Smoker is handcrafted in the USA by Expert BBQ Pitmasters and Pit Builders using
heavy-gauge US steel construction and comes equipped with the latest electronic BBQ tech for a
masterful blend of craftsmanship, experience, science, and red-blooded American Pride. Our
unique reverse flow, dual design provides the ease of using a wood pellet or stick burner.
Simultaneously, the innovative reverse air-flow system evenly distributes gorgeous smoky
deliciousness and heat across the cooking surface. Too good to be true, you say? Yeah, we get that
a lot.
Thank you Kindly for your support y’all now let’s get cooking!
Food is Family, Welcome to ours!

7
Parts & Specs
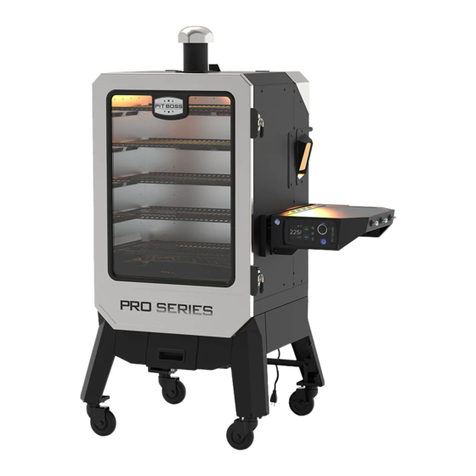
CLETUS 2.4 Pellet Only
List of Features / Dimensions / Details:
•
528 sq. in. total cooking area
•
Overall Dimensions: 59″Hx 43″Lx 34″W
•
Smoker Dimensions : 24″x 36″
•
Net Weight: 150 lbs.
CLETUS 3.0 Pellet and Off-set
List of Features / Dimensions / Details:
•
864 sq. in. total cooking area
•
Overall Dimensions: 45″Hx 69″Lx 36″W
•
Smoker Dimensions : 36″x 24″
•
Wood Fire Box Dimension: 18″x 18″
•
Net Weight: 300 lbs.
CLETUS 3.1 Pellet and Off-set
List of Features / Dimensions / Details:
•
1,769 sq. in. total cooking area
•
Overall Dimensions: 69″Hx 80″Lx 42″W
•
Smoker Dimensions : 36″x 42″
•
Wood Fire Box Dimension: 20″x 20″
•
Net Weight: 500 lbs.
Features
•
Smoke setting and grill setting
•
Stainless Steel Stay Cool Handles
•
36,000 BTU output
•
WIFI / Bluetooth controller with individual temperature charting
•
15-minute shut down cycle
Under the Hood (Smoker Body):
#
Heavy duty steel sliding heat deflectors
#
Heavy duty steel drip pans
#
9-hole burn pot with raised auger feed location to prevent burn backs
•
Included in the Box:
#
Fully Assembled Smoker
#
Two (2) 4-foot Meat Temperature Probes (6 probe capacity)
#
One (1) 6-foot RTD Temperature Probe
•
Temperature Control:
#
Temperature Range: 160ºF – 550ºF
#
600ºF Max Temperature
#
Low end smoke setting for temperatures below 200ºF
#
Smart controller regulates set temperature within 5ºF – 10ºF
#
Cloud based firmware updates, guaranteed
•
Fire Box (Offset Smoking):
#
Easy slide out ash pan in fire box
#
Dual Stack Reverse Flow Draft with heavy duty isolation dampers

8
•
Getting Started:
#
Use approximately 3 – 5 pounds of charcoal in the firebox to get it started and then add
your favorite wood chunks or split logs. Recommended log size is 10 – 14 inches.
•
Pellet (Pellet Smoking):
#
Large Pellet Hopper Capacity (35 lb.)
#
Pellet Dump for easy pellet removal
#
Manual pellet feed option
#
Heavy Duty .52 Amp Pellet Auger Motor
#
Hot flash ceramic ignition system
•
Construction Features :
#
Smoker Wall Firebox Thickness: 3/16” American Made Plate Steel
#
Heavy duty slide out/removable expanded steel grate
#
Painted with high temperature heat treated powder coating paint
#
All painted surfaces should be cleaned by using a rag and warm soapy water (for touch up
paint please E-Mail orders@brocmarbbq.com)
#
Mounted to durable steel wheels and swivel casters
#
Probe port hole to prevent wire damage
•
Power Source:
#
110v AC GFCI outlet (NEC compliant safety standard) Fuel:
#
Pellet Smoker side runs on 100% natural hardwood pellets
#
Offset Smoker side runs on dry, clean hardwoods and charcoal
Cletus 3.0
Cletus 3.1
Cletus 2.4

9
Operating Instructions
ASSEMBLY PREPARATION
Need to complete if the customer has not selected last mile delivery service for the smoker stacks
Make sure all packaging is removed.
Make sure to check inside off set fire box, pellet hopper and cooking chamber before use
Make sure burn pot heat deflector is installed and seated over burn pot.
Make sure heat baffle and sear plate are seated properly before use
Tools required for assembly
Ratchet and Socket size 9/16”
9/16” Wrench
GRILL ENVIRONMENT
1. Where to set-up the grill
With all outdoor appliances, outside weather conditions play a big part in the performance of your grill
and the cooking time needed to perfect your meals.
All Cletus units should keep a minimum clearance of 24 inches from combustible constructions, and this
clearance must be maintained while the grill is operational. This appliance must not be placed under
overhead combustible ceiling or overhang. Keep your grill in an area clear from combustible materials,
gasoline and other flammable vapors and liquids.
2. Cold Weather Cooking
As it becomes cooler outside, that does not mean that grilling season is over! The crisp cool air and
heavenly aroma of smoked foods will help cure your winter blues.

10
Follow these suggestions on how to enjoy your grill throughout the cooler months:
•If smoking at low temperatures fails, increase the temperature slightly to achieve the same results.
•Organize – Get everything you require ready in the kitchen before you head outdoors. During the
winter, move your grill to an area that is out of the wind and direct cold. Check local bylaws regarding the
proximity of your grill in relation to your home and/or other structures. Put everything you need on a
tray, bundle up tight, and get it done!
•To help keep track of the outside temperature, place an outdoor thermometer close to your cooking
area. Keep a log or history of what you cooked, the outdoor temperature, and the cooking time. This will
help later down the road to help you determine what to cook and how long it will take.
•In very cold weather, increase your preheating time by at least 20 minutes.
•Avoid lifting the lid any more than necessary. Cold gusts of wind can completely cool your grill
temperature. Be flexible with your serving time; add about 10 – 15 minutes extra cooking time each time
you open the lid.
•Have a heated platter or a dish cover ready to keep your food warm while making the trip back inside.
•Ideal foods for winter cooking are those that require little attention, such as roasts, whole chickens, ribs,
and turkey.
Make your meal preparation even easier by adding simple items such as vegetables and potatoes.
3. Warm Weather Cooking
As it becomes warmer outdoors, the cooking time will decrease.
Follow these few suggestions on how to enjoy your grill throughout the hot months:
•Adjust your cooking temperatures downward. This helps to avoid unwanted flare-ups.
•Use a meat thermometer to determine the internal temperature of your foods. This helps in preventing
your meat from over cooking and drying out.
•Even in hot weather it is still better to cook with the lid of your grill down.
•You can keep foods hot by wrapping them in foil, and placing them in an insulated cooler. Stuff
crumpled up newspaper around the foil and this will keep food hot for 3 to 4 hours.
4. Leveling the Smoker
To level the smoker, stand in front of the cooking chamber door and place a level on
the lower shelf to help you level the smoker. You need to level the smoker from front to
back and not side to side. Leveling the smoker from side to side will offset the slope
that is built in to the smoker and could cause the grease to run towards the firebox.
5. Smoker Start Up Procedures
The Brocmar smoker set up procedures are only our recommended settings. Please note, these settings
will vary based on a number of circumstances such as type of wood, outdoor temperature, area of the
country, elevation, ect. You will find your sweet spot for your unit based on your backyard and make the
adjustments that work best for you. Please use our settings as a base guide line to get started.
5.1 Wood Pellet only recommended set up
(based on standing in front of the smoker facing the lid)
Follow the pellet controller start up sequence found on 12
Adjust the baffle located on top of the smoke stack closest to pellet hopper the open position to leave
about a 1” gap between the edge of the smoke stack and the end of adjustable baffle located on top of the
smoke stack. This will control the rate of airflow through the smoker.
The opposite smoke stack adjustable baffle should be closed. When doing this make sure the fire box door
is closed and secured to include both adjustable air flow baffles on the front and back side of the wood fire
box. This applies only to the combination smoker (Cletus 3.0 or 3.1)
To set up your smoker heat baffle plate to achieve reverse flow smoking conditions. Pull the L handle
towards the pellet feeder closest to the front until the heat baffle touches the left side of the inner smoker
wall closest to the pellet feeder. This will leave a gap on the opposite side of the smoker for smoke to
flow down, up and back across the cooking surface.
Your Cletus unit has a second baffle with a series of holes that will allow for direct heat to the cooking
surface for searing or grilling. You will want to make sure these holes are closed as to not allow for smoke
or heat to escape while cooking with the reverse flow method. The second L handle allows for easy
adjustments to open and closing the sear plate. Set the desired smoking temperature on your pellet feeder
controller You are all set to smoke with your Cletus pellet smoker in reverse flow set up

11
5.2 Off Set Wood Fired only recommended set up
(based on standing in front of the smoker facing the lid)
Follow the off-set wood fired start up sequence found on 11
Adjust the baffle located on top of the smoke stack closest to wood fire box to the open position to leave
about a 3” gap between the edge of the smoke stack and the end of adjustable baffle located on top of the
smoke stack. This will control the rate of airflow through the smoker along with the fore box air intake
baffles.The opposite smoke stack adjustable baffle should be closed. This applies only to the combination
smoker (Cletus 3.0 or 3.1)You will have two (2) adjustable air intake baffles on the fire box. One (1) on the
front and one (1) one the back side. These are going to be your main airflow and heat adjustment during
the smoking process. Tip: when making these adjustments you will need to wait for the temperature to
settle. We recommend to not make a bunch of little adjustments all at the same time. You will find the
sweet spot for your backyard when smoking with the offset. Open both adjustable baffles on the fire box to
half open. Note: warmer months this may be closed to quarter open setting. Colder months this may be
full open to three quarters. The thickness of the unit and design will allow for the smoker to stay at a
stable temperature but offset smokers require adjustments throughout the smoking process To set up
your smoker heat baffle plate to achieve reverse flow smoking conditions. Push the L handle towards the
wood fire box until the heat baffle touches the right side of the inner smoker wall closest to the pellet
feeder. This will leave a gap on the opposite side of the smoker for smoke to flow down, up and back
across the cooking surface. Your Cletus unit has a second baffle with a series of holes that will allow for
direct heat to the cooking surface. This is not recommended to be open while using the offset. You will
want to make sure these holes are closed as to not allow for smoke or heat to escape while cooking with
the reverse flow method. The second L handle allows for easy adjustments to open and closing the sear
plate. You are all set to smoke with your Cletus offset smoker in reverse flow set up
5.3 Dual Combination Wood Pellet and Offset Smoking recommended set up
(based on standing in front of the smoker facing the lid)
Follow the pellet controller start up sequence found on 12
Follow the off-set wood fired start up sequence found on page xxx Adjust the baffle located on top of the
smoke stack closest to pellet hopper the open position to leave about a 2” gap between the edge of the
smoke stack and the end of adjustable baffle located on top of the smoke stack. This will control the rate of
airflow through the smoker.Adjust the second smoke stack adjustable baffle located on top of the smoke
stack closest to offset the open position to leave about a 2” gap between the edge of the smoke stack and
the end of adjustable baffle located on top of the smoke stack. This applies only to the combination
smoker (Cletus 3.0 or 3.1) To set up the Cletus smoker for the dual combination smoking setting. Use the
L handle to move the adjustable heat baffle so that it is positioned in the center to allow for smoke, heat
and airflow gaps on either side of the smoker walls. There is a heat baffle angled down on the right side
under the adjustable heat baffle located on the fire box that you can see internally. You will want to make
sure that the adjustable heat shield covers the heat baffle approximately 2”
Your Cletus unit has a second baffle with a series of holes that will allow for direct heat to the cooking
surface for searing or grilling. You will want to make sure these holes are closed as to not allow for smoke
or heat to escape while cooking with the reverse flow method. The second L handle allows for easy
adjustments to open and closing the sear plate. Set the desired smoking temperature on your pellet feeder
controller Adjust the two (2) adjustable air intake baffles on the fire box. One (1) on the front and one (1)
one the back side. These are going to be your main airflow and heat adjustment during the smoking
process. You will not require as much air flow when smoking with the dual combination smoker set up as
this is pellet assisted with the auger fan. We recommend to starting with the two (2) fire box airflow
baffles set to quarter open.
Your all set to smoke with the ease and control of a pellet feeder and the traditional flavors of a offset
smoker. Set your desired temperature, add a few lumps of natural charcoal, wood chunk’s or wood splits.
Let Cletus do the work for you. Add your lumps of natural charcoal, wood chunk’s or wood splits thought
the cooking process. The advantage is as the smoking process continues and you are ready to switch mid
smoke to either 100% pellet smoker or 100% off set smoker by making the external adjustments. This can
be accomplished by making the heat baffle adjustments as listed above or what you find as best suited for
your backyard.

12
6. Operating the Firebox (Offset Smoking)
Building Your Fire
Start with the firebox door, main damper and chimney damper in the open position. This will increase
airflow and accelerate the fire building process.
It is preferable to start with a charcoal base. Once you have a hot bed of charcoal, place two pieces of wood
onto charcoal and close the firebox doors.
Fuel Options
Natural Charcoal (Do NOT use ready to light charcoal), Wood Chunks, Wood Splits up to 14”.
7. Operating the Pellet Smoker
Initial Start-up (No Pellets in the Auger)
1. Open the door and remove any grill grates, grease drain pan and heat baffle from inside the grill.
2. Plug the power cord into an appropriate, grounded electrical outlet. 15- 20 Amp GFCI (20 Amp
preferred)
3. Open the pellet hopper lid and locate the auger. Make sure there are no foreign objects in the auger and
fill hopper with pellets. Turn the power “on,”(Bottom button on fireboard Controller). The controller will
read “stand-by mode" then push and hold the upper knob (a menu will appear ). Turn knob to highlight
“Pellet". Then push the knob to bring the pellet menu up. Turn knob to Prime pellet and push the knob.
The auger will run for 60 seconds. Repeat process until pellets feed into the burn pot. (NOTE – the screen
will automatically return to standby screen .)
4. Once a few pellets reach the burn pot, let screen return to standby and push the knob to start normal
mode . Hot Rod will glow red. DO NOT TOUCH IT!
5. Once smoke is visible, replace heat diffusor, drip pan, and grate. Close lid and set the controller
temperature to 350°F by turning the knob on the pellet controller or on your Apple or Android device in
the App.
6. Once temperature reaches 350°F, run for 15 minutes.
7. After 15 min at 350°, open lid/door and turn controller off (Bottom button on front of fireboard) to
initiate the 15 minute shutdown cycle (screen will read “Cooldown". Afterwards, be sure all pellets are
extinguished.

13
Subsequent Start-up
1.
Push power button (under the knob on front of fireboard) screen will say Normal . Push knob in one
time and release and the pellet controller will initiate start-up.

14
2.
Open lid/door until a flame is established in the burnpot. Once there is a flame, close the lid/door to
allow the temperature to increase.
3.
After the cook is finished, clean grates, open the door/lid and turn the power “off”. It will the run a 15
min shutdown cycle in order to burn off any remaining pellets.
When going from a high temperature to a lower temperature, open the lid and allow the heat to escape
in order for the grill to reach the desired temperature. If temperature is continuously higher than
desired, an increase in ventilation is required for your application.
If the auger fan and/or induction fan are not working properly please contact your dealer for further
instructions.
Although, if the grill fails to light or if the fire in the firepot goes out while cooking or smoking, follow
these steps:
1) Turn the power off. Open the lid and remove all food, porcelain grill, grease drain pan, and heat
baffle.
2) IMPORTANT: Remove all unburned pellets and ash from inside and around the firepot.
3) Before replacing the heat baffle, grease drain pan and porcelain grill, restart the grill and confirm
that the ignition cycle is working. (The hot rod should begin to turn red and pellets should fall into the
firepot from the auger tube.)
4) If this procedure is not successful, refer to the Manual Lighting Instructions.
Manual Lighting Instructions
If the hot rod only is not operating, the grill can still be used to cook and smoke using the manual
lighting procedure.
Manual Lighting Procedures
1. Making sure the power switch is set to OFF and the hot rod connector (refer to red/white wire on
wiring diagram) is disconnected, plug the power cord into an appropriate, grounded electrical outlet
and switch it back ON.
2. If the control box doesn’t power up, the fuse located on the front of the control box may need to be
replaced.
3. Open the pellet hopper and fill with BBQ PELLETS.
WARNING! Never use heating fuel pellets in the grill.
4. Remove the porcelain grill, grease drain pan and heat baffle to expose the fire pot in the bottom of
the grill.
5. Pour 1 / 4 cup of BBQ PELLETS into the fire pot.
6. Squirt 2 tablespoons of lighter fluid on the pellets in the fire pot or use a propane torch to light the
pellets.
7. Light the lighter fluid with a fireplace match or a long-reach butane lighter.
WARNING! NEVER SQUIRT LIGHTER FLUID INTO A BURNING FIRE OR A HOT FIRE POT. THE
LIGHTER FLUID CONTAINER COULD EXPLODE AND CAUSE SERIOUS INJURY.
8. Let the lighter fluid and pellets burn for approximately 4 minutes.
9. After assuring the pellets have ignited, install the heat baffle, grease drain pan and
porcelain grill back in place.
10. Turn the power switch on and set the temperature to any setting desired. With the door closed, let
the grill pre-heat for approximately 15 minutes before placing food in the grill.

15
Troubleshooting
Q: Why don’t I see much smoke?
A: Even though the smoke may not be visible at times, it will still provide the smoke flavor on the
foods being cooked. As with all other pellet grills, the amount of visible smoke is light. If you desire a
larger amount of smoke and/or a smokier flavored food, we recommend using the Smoke Daddy Cold
Smoke Generator which produces a cold smoke and can be used with any wood fuels of your choice.
Q: My Controller reads “Error,” how do I fix this?
A: When the controller reads “error,” the electrical connection within the RTD Probe wire is not being
made. Check the black plastic snap connector that runs directly from the probe itself. If the connection
is fine, take off the controller and be sure both RTD wire leads are connected to the green terminal
correctly. After checking the connection, if controller continues to read “error” contact you’re your
dealer.
Q: Controller is unresponsive or is not maintaining my set temperature. What do I do?
A: Push the “Off” button in order for it to go into the shutdown cycle. Then, either quickly remove the
fuse or unplug the hopper assembly, wait 5 seconds, then turn on the controller. This will reset the
controller to factory settings. If controller continues to malfunction, please contact your dealer.
Q: Why is there smoke coming from the hopper?
A: There is smoke coming from the hopper due to a slight burn-back with the pellets down the auger
tube. In order to solve this, set the controller to Standby (STBY) and push the “FEED” button for
approx. 2 min. Afterwards, set the controller to the temperature you had originally desired or “OFF”.
This occurs usually when starting at a high temperature to low temperature too quickly.
Cleaning and Maintenance
It is important to regularly clean and maintain your Cletus Smoker. After each use the burn pot should be
emptied and any grease build up should be removed. This will greatly reduce the chance for any unwanted
flavors or tasted on your food and any flare ups or grease fires within your unit.
It is also important to clean regularly as to not void your 5-year warranty.
Your Cletus Smoker comes equipped with greased fittings on the fire box and the lid. These fittings should
clean and re lubricated every few months.
Return Policy
If you need to make a return, please review our return + refund policies below.
Please note: We only accept returns for defective product within the manufacturer’s
warranty/expiration period, or within 90 days of order shipment, whichever is less. If you feel you qualify
for a return, read the details below and email orders@brocmarbbq.com Please include your first/last
name and order # so we can better assist you.
BINDING TERMS AND CONDITIONS OF SALE AND RETURN POLICY
The following are the terms and conditions (“Terms and Conditions”) for the sale of products (“Products”)
by brocmarbbq.com, an interactive online store operated by BMSH Foods, LLC., to its Customers
(“Customers” or “Customer”). These Terms and Conditions govern all transactions by and with the
Customer.
1.
ACCEPTANCE AND CANCELLATION OF ORDERS
All orders are subject to acceptance by BMSH Foods or a duly authorized agent of BMSH Foods and to
completion of payment in full by the Customer. Orders accepted by BMSH Foods may only be cancelled
by the Customer pursuant to the Cancellation Policy on this Website.
2.
RETURNS
The Customer must contact BMSH Foods/Brocmarbbq.com for a Return Authorization and Approval,
and receive the approval from Brocmarbbq.com, prior to any Return.
Returns are accepted only for defective product, though returns may potentially be accepted for other
reasons if agreed to by BMSH Foods/Brocmarbbq.com .To request a return, email
orders@brocmarbbq.com to start the process.

16
Authorized Returns must be made within the manufacturer warranty period, or within a maximum 90
days from the date of shipment, whichever is less. If product is returned without an email confirming the
Return Authorization from BMSH Foods/Brocmarbbq.com ,it will not be accepted and no refund will be
issued.
If BMSH Foods/Brocmarbbq.com agrees to accept a return, return freight charges must be prepaid by
Customer. Addressing/shipping instructions will be provided by BMSH Foods/Brocmarbbq.com at the
time of issuance of a Return Authorization.
BMSH Foods/Brocmarbbq.com will not accept COD shipments.
Some products may require return directly to the manufacturer.
After the expiration of the manufacturer warranty period, or after 90 days from the date of shipment,
whichever is less, the product cannot be returned to BMSH Foods/Brocmarbbq.com and no returns will
be accepted. Thereafter, any defective product issues must be raised directly with the manufacturer under
any applicable warranty, if any.
All returns must be in the original packaging and will not be accepted without original packaging.
3.
RESTOCKING FEE AND REFUND
If BMSH Foods/Brocmarbbq.com agrees to a return or refund, and an item is returned to BMSH Foods’s
warehouse for a refund or credit, you will be assessed a 10% restocking fee (ten percent of the
purchase price) before credit or refund is issued.
The 10% restocking fee will be deducted from the refund to the credit card provided during registration
and/or checkout, or the fee will be deducted prior to issuing a credit or refund. Customer is also
responsible for all shipping/delivery charges to return the order to the BMSH Foods’s warehouse.
Refunds do not include any original shipping fees, and will include the purchase price of the
product only.
Returned items must be in original, brand-new condition, showing no signs of wear or use or scrapes or
damage to the item or its collateral materials.
Returned Items must also include all original packaging, manuals, warrantees and accessories. If the item
is not returned in complete and new condition, your return may be rejected or will be subject to a return
handling charge in addition to the 10% restocking fee.
Detailed additional return handling charges are described hereinbelow. Your refund will be processed
upon evaluation of your returned item. Refunds are made for product value only, excluding shipping and
handling charges.
4.
DETAILED RETURN HANDLING CHARGES
If an item is returned damaged or missing collateral items or documentation, the return can be refused, or
a handling charge in addition to the 10% restocking fee may be assessed per the following general
guidelines.
Packaging damage: $25.00; Manual $10.00; missing or filled out and submitted warranty card $50.00;
missing collateral items and other issues: per BMSH Foods/Brocmarbbq.com evaluation and discretion.
5.
PRICES
Orders are filled at the prices in effect at the time of the order and acceptance. The online product pages
reflect the latest pricing information available. Prices are subject to change without notice. Prices are
subject to increase in the event of an increase in BMSH Foods’s costs or other circumstances beyond
BMSH Foods’s reasonable control. Prices are exclusive of taxes, impositions and other charges, including
sales, use, excise, value-added and similar taxes or charges imposed by any government authority,
international shipping charges, forwarding agent’s and broker’s fees, bank fees, consular fees, and
document fees.
6.
TERMS OF PAYMENT
All payments must be made in United States dollars, by credit card, PayPal. Credit cards accepted include
MasterCard, VISA, Discover, and American Express. Credit Card billing information must be verified on
new Customers prior to shipment of order. Customer agrees to pay by credit card the entire net amount

17
of each purchase from BMSH Foods at the time of placing the order, and the card will be charged and
payment made and received at that time. If Customer fails to make payment when due, or consideration
fails at a later time, BMSH Foods may pursue any legal or equitable remedies, in which event BMSH
Foods will be entitled to reimbursement of costs for collection and reasonable attorneys’ fees.
7.
SALES TAX
US Shipments
When required by law BMSH Foods will collect Federal, State and/or Local sale, use, excise, and other
taxes that apply to a Customer’s shipment. These taxes are in addition to the purchase price of the
Products subject to an order. Customer will remit the correct tax unless Customer is tax exempt and
BMSH Foods has a valid signed tax exemption certificate on file.
INTERNATIONAL Shipments
All applicable VAT, PST, HST, and/or GST charges along with brokerage fees will be the responsibility of
the Customer and due at the time of delivery.
8.
DELIVERY AND TITLE
All shipments by BMSH Foods are either from its facility or drop shipped direct from the
manufacturer. Shipping charges are to be paid by the Customer in advance, and at the time of placing the
order. Delivery of the Products to the carrier by BMSH Foods or the manufacturer will constitute delivery
to Customer and title and risk of loss will pass to Customer. Customer acknowledges that estimated
delivery dates provided by BMSH Foods, if any, are estimates only and that BMSH Foods will not be liable
for failure to deliver on such dates. Selection of the carrier will be made by BMSH Foods. BMSH Foods
reserves the right to make deliveries in installments. Delay in delivery of one installment will not entitle
Customer to cancel any other installment(s). Delivery of any installment of Products within thirty (30)
days after the date requested will constitute a timely delivery. Delivery of a quantity that varies from the
quantity specified shall not relieve Customer of the obligation to accept delivery and pay for the Products
delivered.
9.
BMSH FOODS/BROCMARBBQ.COM ‘LIMITED WARRANTY
BMSH Foods agrees to transfer to Customer whatever transferable warranties BMSH Foods receives from
the manufacturer of Products sold to Customer. BMSH Foods makes no other warranty, express or
implied, with respect to the Products. IN PARTICULAR, BMSH FOODS MAKES NO WARRANTY
RESPECTING THE MERCHANTABILITY OF THE PRODUCTS OR THEIR SUITABILITY OR FITNESS
FOR ANY PARTICULAR PURPOSE OR USE. BMSH Foods’s liability arising out of any sale of products
to Customer is expressly limited to either (1) Refund of the purchase price paid by Customer for such
Products (without interest), or (2) Repair and/or replacement of such Products, at BMSH Foods’s
election, with such remedies exclusive and in lieu of all others. This warranty is in lieu of any and all other
warranties, whether oral, written, expressed, implied or statutory. Implied warranties of fitness for a
particular purpose and merchantability are specifically excluded and shall not apply. Customer’s
obligations and BMSH Foods’s remedies with respect to defective or nonconforming products, are solely
and exclusively as stated herein. Furthermore, no warranty will apply if the Product has been subject to
misuse, neglect, accident, modification, sold to another party, or has been altered in any way.
10.
LIMITATION OF LIABILITIES
IN NO EVENT SHALL BMSH FOODS BE LIABLE FOR ANY SPECIAL, INCIDENTAL OR
CONSEQUENTIAL DAMAGES OF ANY NATURE including, but not limited to, damages resulting from
loss of profit or revenue, recall costs, claims for usage interruptions, installation or removal costs, costs of
substitute products, property damage, personal injury, death or legal expenses. Customer’s recovery from
BMSH Foods for any claim shall not exceed the purchase price paid by Customer for the goods,
irrespective of the nature of the claim, whether in warranty, contract or otherwise.
9.
PRODUCT SAFETY NOTICE
BMSH Foods does not determine the specifications or conduct any performance or safety testing of any
Products that it sells. Specification and instruction sheets provided to Customers are produced by the
manufacturer. BMSH Foods does not participate in any product safety engineering, product safety
review or product safety testing. BMSH Foods cannot provide any safety testing, safety evaluation or
safety engineering services.
11.
STATEMENTS AND ADVICE

18
If statements or advice, technical or otherwise, are offered or given to Customer, such statements or
advice will be deemed to be given as an accommodation to Customer and without charge. BMSH Foods
shall have no responsibility or liability for the content or use of such statements or advice. BMSH Foods
Customer support is provided by telephone and, therefore, extremely limited in scope which prevents us
from the direct participation in the design and use of any Customer products. We do not conduct product
suitability studies or engineering or safety reviews of products that we sell.
12.
FORCE MAJEURE
BMSH Foods will not be liable for delays in delivery or for failure to perform its obligations due to causes
beyond its reasonable control including, but not limited to, product allocations, material shortages, labor
disputes, transportation delays, unforeseen circumstances, acts of God, acts or omissions of other parties,
acts or omissions of civil or military authorities, Government priorities, fires, strikes, floods, severe
weather conditions, computer interruptions, terrorism, epidemics, quarantine restrictions, riots or war.
BMSH Foods’s time for delivery or performance will be extended by the period of such delay or BMSH
Foods may, at its option, cancel any order or remaining part thereof, without liability by giving notice to
Customer.
13.
GENERAL
The Terms and Conditions may not be modified or cancelled without BMSH Foods’s written agreement.
Accordingly, goods furnished by BMSH Foods are sold only on the Terms and Conditions stated herein.
The sale of Products hereunder will be governed by the Terms and Conditions, notwithstanding contrary
or additional terms and conditions in any order purchase order, planning schedule, acknowledgment,
confirmation or any other form or document issued by either party affecting the purchase and/or sale of
Products. Notwithstanding any terms and conditions on Customer’s order, the Terms and Conditions on
this Website control and all different or additional terms and conditions contained in any Customer
Documents are hereby objected to by BMSH Foods. BMSH Foods’s performance of any contract is
expressly made conditional on Customer’s agreement to BMSH Foods’s Terms and Conditions of Sale,
unless otherwise specifically agreed upon in writing by BMSH Foods. In the absence of such agreement,
commencement of performance and/or delivery shall be for Customer’s convenience only and shall not be
deemed or construed to be acceptance of Customer’s terms and conditions or any of them. If a contract is
not earlier formed by mutual agreement in writing, acceptance by Customer of any goods or services shall
be deemed acceptance by Customer of the terms and conditions stated herein. No rights, duties,
agreements or obligations hereunder, may be assigned or transferred by operation of law, merger or
otherwise, without the prior written consent of BMSH Foods. The obligations, rights, terms and
conditions hereof will be binding on the parties hereto and their respective successors and assigns. The
waiver or breach of any term, condition or covenant hereof, or default under any provision hereof, will not
be deemed to constitute a waiver of any other term, condition, or covenant contained herein, or of any
subsequent breach or default of any kind or nature. Any provision hereof which is prohibited or
unenforceable in any jurisdiction shall, as to such jurisdiction, be ineffective to the extent of such
prohibition or unenforceability without invalidating the remaining provisions hereof in that jurisdiction,
or affecting the validity or enforceability of such provision in any other jurisdiction. The Terms and
Conditions will be governed by and construed in accordance with the laws of the state of Pennsylvania and
the applicable laws of the United States. To request a return, email orders@brocmarbbq.com to start
the process.
Tips and Techniques
Follow these helpful tips and techniques, passed on from friends, our staff, and customers just like you, to
become more familiar with your smokers / grill.
1. FOOD SAFETY
• Keep everything in the kitchen and cooking area clean. Use different platters and utensils for the cooked
meat than the ones you used to prepare or transport the raw meat out to the grill. This will prevent cross
contamination of bacteria. Each marinade or basting sauce should have its own utensil.
• Keep hot foods hot 140F, and keep cold foods cold 37F
• A marinade should never be saved to use at a later time. If you are going to use it to serve with your
meat, be sure to bring it to a boil before serving.

19
• Cooked foods should not be left out in the heat for more than an hour. Do not leave hot foods out of
refrigeration for more than two hours.
• Defrost and marinade meats by refrigeration. Do not thaw meat at room temperature or on a counter
top. Bacteria can grow and multiply rapidly in warm, moist foods. Wash hands thoroughly with hot, soapy
water before starting any meal preparation and after handling fresh meat, fish and poultry.
2. COOKING PREPARATION
• When switching from a high temperature to a low temperature, lift the lid and leave it open until the
actual temperature is close to your desired temperature. This speed up the process and ensures the fire
will not go out.
• Be prepared This refers to preparing the cooking recipe, fuel, accessories, utensils, and all ingredients
you require at grill side before you start cooking. Also, read the entire recipe, start to finish, before
lighting the grill.
• A BBQ floor mat is very useful. Due to food handling accidents and cooking spatter, a BBQ floor mat
would protect a deck, patio, or stone platform from the possibility of grease stains or accidental spills.
3. GRILLING TIPS AND TECHNIQUES
• To infuse more smoke flavor into your meats, cook longer and at lower temperatures (also known as low
and slow). Meat will close its fibers after it reaches an internal temperature of 120 degrees F. Misting, or
mopping, are great ways to keep meat from drying out.
• While searing your meats, cook with the lid down. Always use a meat thermometer to determine the
internal temperature of the foods you are cooking. Smoking foods with hardwood pellets, charcoal or
wood splits will turn meats and poultry pink. The band of pink (after cooking) is referred to as a smoke
ring and is highly acknowledged by pit masters and chefs alike
• Sugar-based sauces are best applied near the end of cooking to prevent burning and flare-ups.
• Leave open space between the foods and the extremities of the barrel for proper heat flow. Food on a
crowded grill will require more cooking time.
• Use a set of long-handled tongs for turning meats, and a spatula for turning burgers and fish. Using a
piercing utensil, such as a fork, will prick the meat and allow the juices to escape.
• Foods in deep casserole dishes will require more time to cook than a shallow baking pan.
• It’s a good idea to put cooked food onto a heated platter, keeping the food warm. Red meats, such as
steak and roasts, benefit from resting for several minutes before serving. It allows the juices that were
driven to the surface by heat to ease back to the center of the meat, adding more flavor.

20
Warranty
BMSH Foods Cletus Five (5) Year
Non- Transferable Limited Warranty
This limited warranty covers the Brocmar Smokehouse Cletus Line of Pellet / Combination smoker / grill
manufactured by BMSH Foods, LLC. The Brocmar Smokehouse Cletus Line of Pellet / Combination
smoker / grill carries a five (5) year limited warranty from the date of purchase by the original owner
against defects in material and workmanship when subjected to normal residential use. Limited warranty
does not apply to paint, grill cover, or damage caused by corrosion.
Conditions of Limited Warranty
1. During the term of the limited warranty, BMSH Foods, LLC obligation shall be limited to replacement
of covered, failed components. BMSG Foods will repair or replace parts returned to BMSH Foods, freight
paid if the part(s) are found by BMSH Foods to be defective upon examination. BMSH Foods shall not be
liable for transportation, charges labor cost or export duties.
2. BMSH Foods takes every precaution to utilize materials that prevent rust including the use of high
temperature paint. In some cased with these procedures in place, the protective coatings can be damages
by various substances and conditions outside the control of BMSH Foods. High temperatures, excessive
humidity, chlorine, industrial fumes, fertilizers, lawn pesticides and salt are some of the items that can
affect paint and metal coatings. For these reasons, the limited warranties DOES NOT COVER RUST OR
OXIDATION.
3. The warranty is based on residential use. Warranty coverage does not apply to products used in
commercial applications.
This manual suits for next models
2
Table of contents