(-)
(-)
(+)
(+)
Please visit www.BrownDogGadgets.com for more great ideas & info.
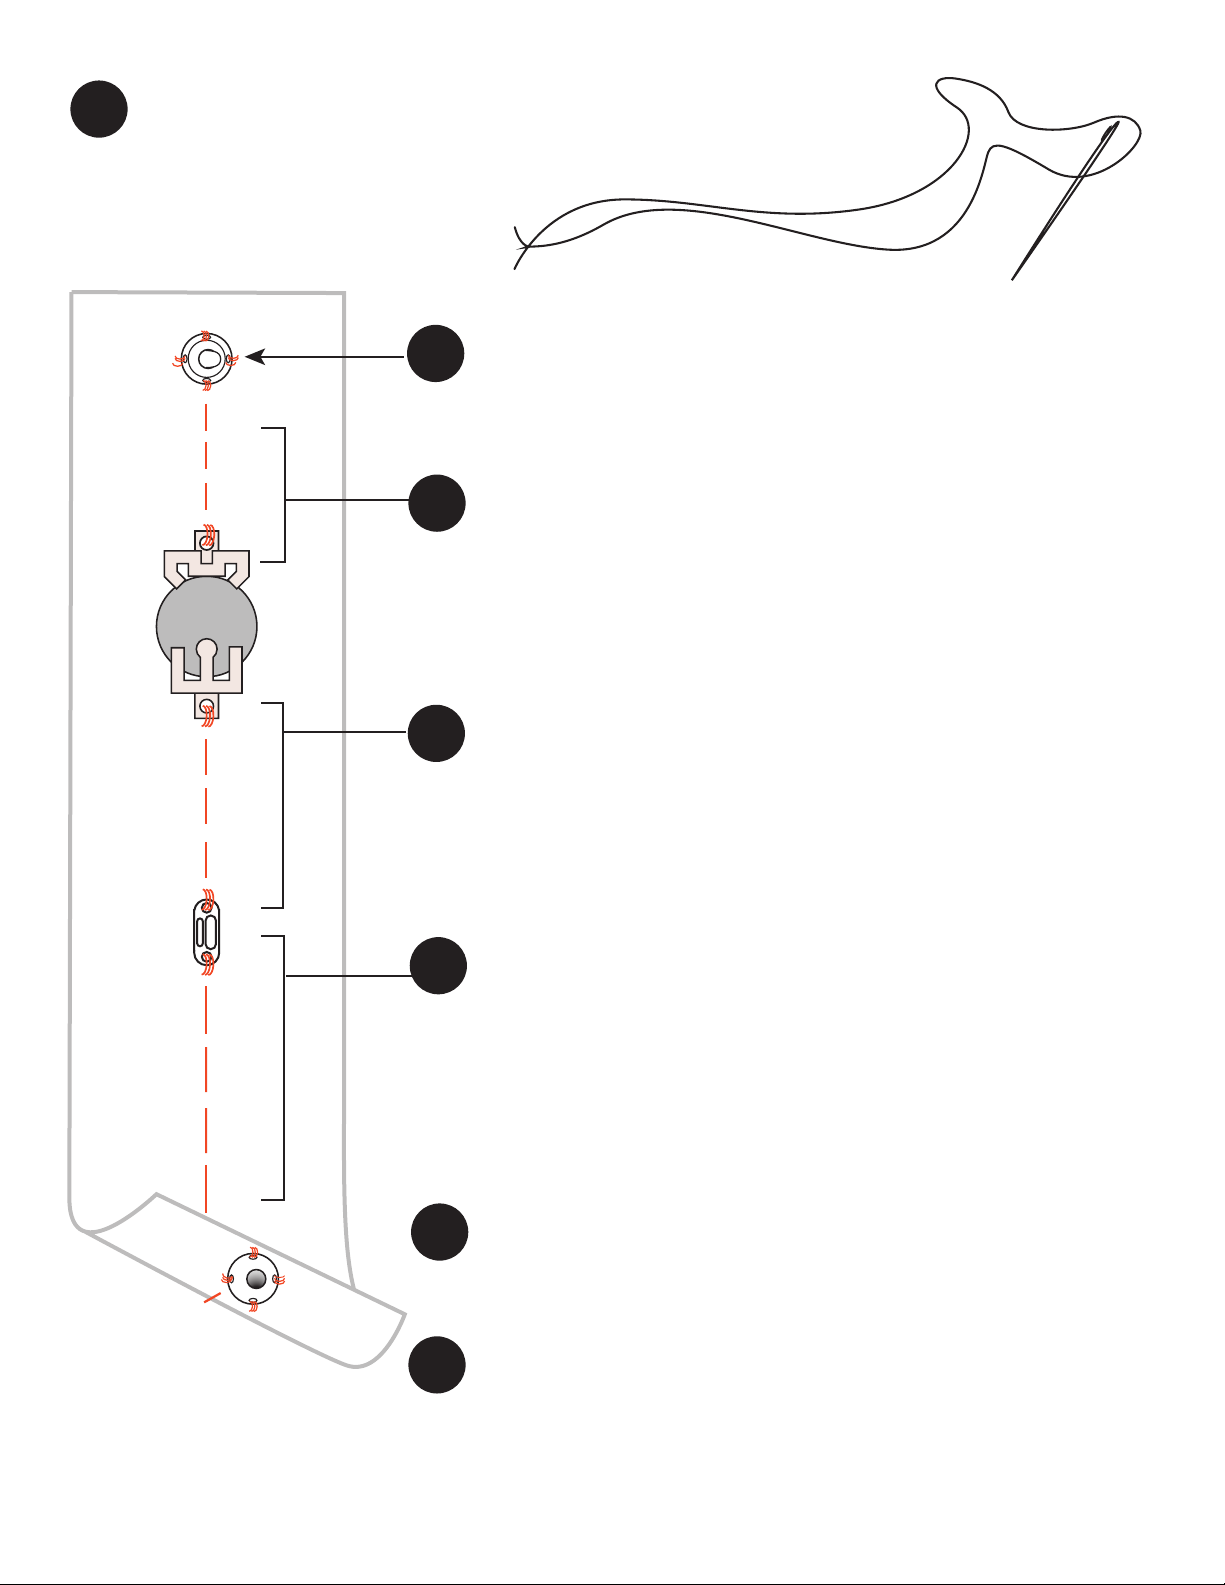
THREAD the NEEDLE
with conductive thread. Tie a knot 3 times in the end of a loop.
This will keep it from pulling out of the material.
3
SECURE the “OUTIE” SNAP
Pull the needle up through the bottom of the bracelet and then
push the needle through a hole on the snap. Loop three times.
Repeat until all four sides are sewn.
4
CONNECT the “OUTIE” SNAP
to the BATTERY HOLDER
Continue sewing with the same thread towards the
negative end of the battery holder. Sew through the
negative hole and loop the thread three times.
Knot on the bottom of the bracelet and cut the thread.
5
CONNECT the BATTERY HOLDER
to the LED LIGHT
Thread the needle with new conductive thread, as in Step 3.
Loop three times through the positive hole of the battery holder.
Sew to the positive end of the LED light and loop three times.
Knot on the bottom side of the bracelet and cut the thread.
6
CONNECT the LED LIGHT to the
“INNIE” SNAP
Thread the needle with new conductive thread, as in Step 3.
Sew through the negative hole of the LED loop three times.
Sew over to the "innie" snap. Make sure to sew "innie" snap
on the bottom side of the bracelet. Knot on the bottom side of
the bracelet and cut the thread.
7
TEST the BRACELET!
Snap the snaps together! Your bracelet should light up!
If not, check: Is the light backwards? Is there a short circuit?
8
HAPPY DECORATING
Be creative! If you embroider, be sure to use regular
thread instead of conductive thread.
9


