Buffalo Tools TWP365 Quick reference guide

TWP365
3-Inch (76.2mm) Gasoline Trash/Water Pump
Assembly & Operating Instructions
READ ALL INSTRUCTIONS AND WARNINGS BEFORE USING THIS PRODUCT.
This manual provides important information on proper operation & maintenance. Every effort has been
made to ensure the accuracy of this manual. These instructions are not meant to cover every possible
condition and situation that may occur. We reserve the right to change this product at any time without
prior notice.
IF THERE IS ANY QUESTION ABOUT A CONDITION BEING SAFE OR UNSAFE,
DO NOT OPERATE THIS PRODUCT!
HAVE QUESTIONS OR PROBLEMS? DO NOT RETURN THIS PRODUCT TO THE
RETAILER - CONTACT CUSTOMER SERVICE.
If you experience a problem or need parts for this product, visit our website
http://www.buffalotools.com or call our customer help line at 1-888-287-6981, Monday-Friday,
8 AM - 4 PM Central Time. A copy of the sales receipt is required.
FOR CONSUMER USE ONLY – NOT FOR PROFESSIONAL USE.
KEEP THIS MANUAL, SALES RECEIPT & APPLICABLE WARRANTY FOR FUTURE
REFERENCE.

TWP365 3-Inch (76.2mm) Gasoline Trash/Water Pump Assembly And Operating Instructions 2
TABLE OF CONTENTS
RECOGNIZE SAFETY SYMBOLS, WORDS AND LABELS.......................................................................... 3
IMPORTANT SAFETY INSTRUCTIONS........................................................................................................ 4
GENERAL PRODUCT SPECIFICATIONS..................................................................................................... 6
PACKAGE CONTENTS ................................................................................................................................. 6
SPECIFICATIONS.......................................................................................................................................... 6
COMPONENTS ............................................................................................................................................. 6
ASSEMBLY.................................................................................................................................................... 6
PREPARING THE GASOLINE WATER PUMP FOR USE............................................................................. 7
STEP 1 –ADD OIL......................................................................................................................................... 7
STEP 2 –ADD GASOLINE............................................................................................................................ 7
STARTING THE GASOLINE WATER PUMP................................................................................................. 8
BREAK-IN PERIOD ....................................................................................................................................... 8
OPERATION .................................................................................................................................................. 8
PRIMING THE GASOLINE WATER PUMP ................................................................................................... 8
MAINTENANCE............................................................................................................................................. 9
CHECKING THE OIL LEVEL ......................................................................................................................... 9
CHANGING THE OIL................................................................................................................................... 10
AIR FILTER MAINTENANCE....................................................................................................................... 10
SPARK PLUG MAINTENANCE ....................................................................................................................11
STORAGE.....................................................................................................................................................11
PARTS DIAGRAM........................................................................................................................................ 12
PARTS LIST................................................................................................................................................. 12

TWP365 3-Inch (76.2mm) Gasoline Trash/Water Pump Assembly And Operating Instructions 3
RECOGNIZE SAFETY SYMBOLS, WORDS & LABELS
WHAT YOU NEED TO KNOW ABOUT SAFETY INSTRUCTIONS
Warning and Important Safety Instructions appearing in this manual are not meant to cover all possible
conditions and situations that may occur. Common sense, caution and care must be exercised when
operating or cleaning tools and equipment.
Always contact your dealer, distributor, service agent or manufacturer about problems or conditions you do
not understand.
This is the safety alert symbol. It is used to alert you to potential
personal injury hazards. Obey all safety messages that follow
this symbol to avoid possible injury or death.
DANGER indicates an imminently hazardous situation, which, if
not avoided, will result in death or serious injury.
WARNING indicates a potentially hazardous situation, which, if
not avoided, could result in death or serious injury.
CAUTION indicates a potentially hazardous situation, which, if not
avoided, may result in minor or moderate injury.
CAUTION used without the safety alert symbol indicates a
potentially hazardous situation, which, if not avoided, may result
in property damage.

TWP365 3-Inch (76.2mm) Gasoline Trash/Water Pump Assembly And Operating Instructions 4
Notice Regarding Emissions:
Engines certified to comply with California and U.S. EPA emission regulations for SORE (Small Off Road
Equipment) are certified to operate on regular unleaded gasoline and may include the following emission
control systems: Three-Way Catalyst (TWC) (if equipped), and Engine Modifications (EM).
IMPORTANT SAFETY INSTRUCTIONS
STOP!
Before using this product, if you have any questions regarding the hazard and safety notices listed in
this manual and/or on this product, call 1-888-287-6981, Monday - Friday, 8 AM - 4 PM Central Time.
Carbon Monoxide Gas: When in operation, the exhaust from this product contains poisonous
carbon monoxide gas. Carbon monoxide gas is both odorless and colorless AND may be present
even if you do not see or smell gas. Breathing this poison gas can lead to headaches, dizziness,
drowsiness, loss of consciousness and eventually death.
• Use this product ONLY outdoors in non-confined areas.
• Keep at least several feet of clearance on all sides to allow proper ventilation for this product.
Chemicals: According to the State of California, the exhaust from this product contains chemicals
known to cause cancer, birth defects, or other reproductive harm.
Flammable Gasoline: This product may emit highly flammable and explosive gasoline vapors,
which can cause severe burns or even death. A nearby open flame can lead to an explosion even if
not directly in contact with gasoline.
• Do not operate this product near open flame.
• Do not smoke near this product.
• Always operate this product on a firm, level surface.
• Gasoline is highly flammable and explosive. Handling fuel can result in serious injury or burns.
• Always shut down this product before refueling. Refuel in a well-ventilated area. Keep heat, sparks and
flame away while refueling and away from the location where gasoline is stored. Never refuel indoors
where gasoline fumes may reach flames and/or sparks.
• Allow this product to cool for at least 2 minutes before removing the fuel tank cap. Loosen the cap slowly
to relieve pressure in the fuel tank.Avoid spilling fuel.
• Do not fill the fuel tank above the upper limit line. Gasoline may expand during operation. Do not fill to
the top of the tank.
• Always check for spilled gasoline and immediately wipe it up before starting this product.
• Empty the fuel tank before storing or transporting this product.
• Always handle fuel outdoors.
• Before transporting, turn the fuel valve to the “OFF” position and disconnect the spark plug.

TWP365 3-Inch (76.2mm) Gasoline Trash/Water Pump Assembly And Operating Instructions 5
High Temperatures: This product produces heat when in operation. Temperatures near the
exhaust can exceed 150 Degrees Fahrenheit (65 Degrees Celsius).
• Do not touch hot surfaces. Observe all warning placards on this product denoting hot surfaces.
• Allow this product to cool for several minutes after use before touching the engine, muffler or other
areas that are hot during operation and before storing indoors.
• Hot exhaust may ignite some materials. Keep flammable materials away from this product.
• Keep at least several feet of clearance on all sides of this product during operation. Do not enclose
this product in any structure.
In addition to the previously described safety information, familiarize yourself with all safety and hazard
placards on this product.
READ AND UNDERSTAND ALL INSTRUCTIONS. Failure to follow all instructions may result in serious
burns, fire and/or serious personal injury.
WHAT YOU NEED TO KNOW ABOUT SAFETY INSTRUCTIONS
The warning and safety instructions appearing in this manual are not meant to cover all possible conditions
and situations that may occur. Common sense, caution and care must be exercised when operating or
cleaning tools and equipment. Always contact your dealer, distributor, service agent or manufacturer about
problems or conditions you do not understand before operating the product.

TWP365 3-Inch (76.2mm) Gasoline Trash/Water Pump Assembly And Operating Instructions 6
COMPONENTS
1) Tube Frame
2) Muffler
3) Pull Starter
4) On/Off Switch
5) Oil Intake
6) Fuel Tank
7) Water Inlet
8) Water Outlet
9) Fuel Cap
GENERAL PRODUCT SPECIFICATIONS
PACKAGE CONTENTS
1) 3-Inch (76.2mm) Gasoline Water Pump
SPECIFICATIONS
Engine 4-Stroke OHV
Engine Type Gasoline, 87 Octane
Gasoline Capacity 0.95 Gallons (3.6Ltrs)
Engine Oil SAE 10W-30
Engine Oil Capacity 18.5 oz. (0.55Ltrs)
Horsepower 6.5 HP
Pump Speed 3,600 RPM
FEATURES
3-Inch (80mm) Inlet & Outlet
Max. Lift Head: 98 Ft (30m)
Max. Suction Head: 26 Ft. (8m)
Max. Flow Rate: 211 GPM (800L/Min)
6.5 HP OHV Gasoline Engine
12,660 GPH
ASSEMBLY
The Intake Filter (A) prevents damaging particles from entering the
Gasoline Water Pump.
Connect the Intake Filter to the end of a 3-inch hose with a Hose
Clamp (B).
Place a Gasket (C) onto the Hose Coupling (D) and secure it to the
other end of the hose with a Hose Clamp (E), before attaching the
entire assembly to the pump intake with a Hose Ring (F).
To attach the outlet hose, connect the hose to the pump outlet using
a Hose Clamp (G), Gasket (H), and Hose Ring (I).
Figure 1 Connection to Pump
A
B
C
E
F
D
G
I
H
INTAKE SIDE OUTLET SIDE
D
1
2
3
4
56
7
8
9
8

TWP365 3-Inch (76.2mm) Gasoline Trash/Water Pump Assembly And Operating Instructions 7
PREPARING THE GASOLINE WATER PUMP FOR USE
If this Gasoline Water Pump is being used for the first time, the following few steps are required to prepare it
for use.
STEP 1 – ADD OIL
When new from the package, this Gasoline Water Pump contains no oil in the engine crankcase. Add
the correct quantity of oil before operating this Gasoline Water Pump for the first time. This Gasoline
Water Pump requires engine oil to function. Engine oil is a major factor affecting engine performance and
service life. The correct quantity of oil is equal to the oil capacity of the engine crankcase and is listed below.
Always determine that this Gasoline Water Pump has the correct quantity of oil before use.
Oil Capacity (fluid oz.) 18.5
Oil Type Recommended SAE 5W-30
To add oil:
1. Confirm that this Gasoline Water Pump is on a level surface.
2. Open the Oil Cap (A, Figure 2).
3. Using a funnel, add oil to fill the engine crankcase to the correct quantity as
stated above.
4. Replace Oil Cap.
STEP 2 – ADD GASOLINE
Gasoline and gasoline fumes are highly flammable and explosive. Handling fuel can result in serious
injury or burns.
• Do not fill the fuel tank near a heat, sparks or an open flame. Keep gasoline away from appliance pilot
lights, barbecues, electric appliances, power tools, etc.
• Do not overfill the fuel tank. Always check for fuel spills and immediately wipe them up. Spilled fuel is a fire
hazard and causes environmental damage.
To ensure that this Gasoline Water Pump runs smoothly, use only FRESH, UNLEADED GASOLINE WITH
AN OCTANE RATING OF 87 OR HIGHER. Unleaded gasoline produces fewer engine and spark plug
deposits and extends the life of the exhaust system.
1. Confirm that this Gasoline Water Pump is on a level surface.
2. Unscrew fuel tank cap and set aside. (NOTE: The fuel tank cap may be tight and difficult to
unscrew.)
3. Slowly add fresh, unleaded gasoline to the fuel tank. Be careful not to fill the fuel tank above the
upper limit line. The fuel tank capacity for this Gasoline Water Pump is listed below. NOTE: Because
gasoline can expand, do not fill the fuel tank to the very top.
4. Securely tighten the fuel tank cap and immediately wipe up any spilled gasoline with a dry cloth.
Fuel Tank Capacity (gals) 0.95
Fuel Type Fresh, Unleaded Gasoline Octane Rating 87 or Higher
Figure 2
A

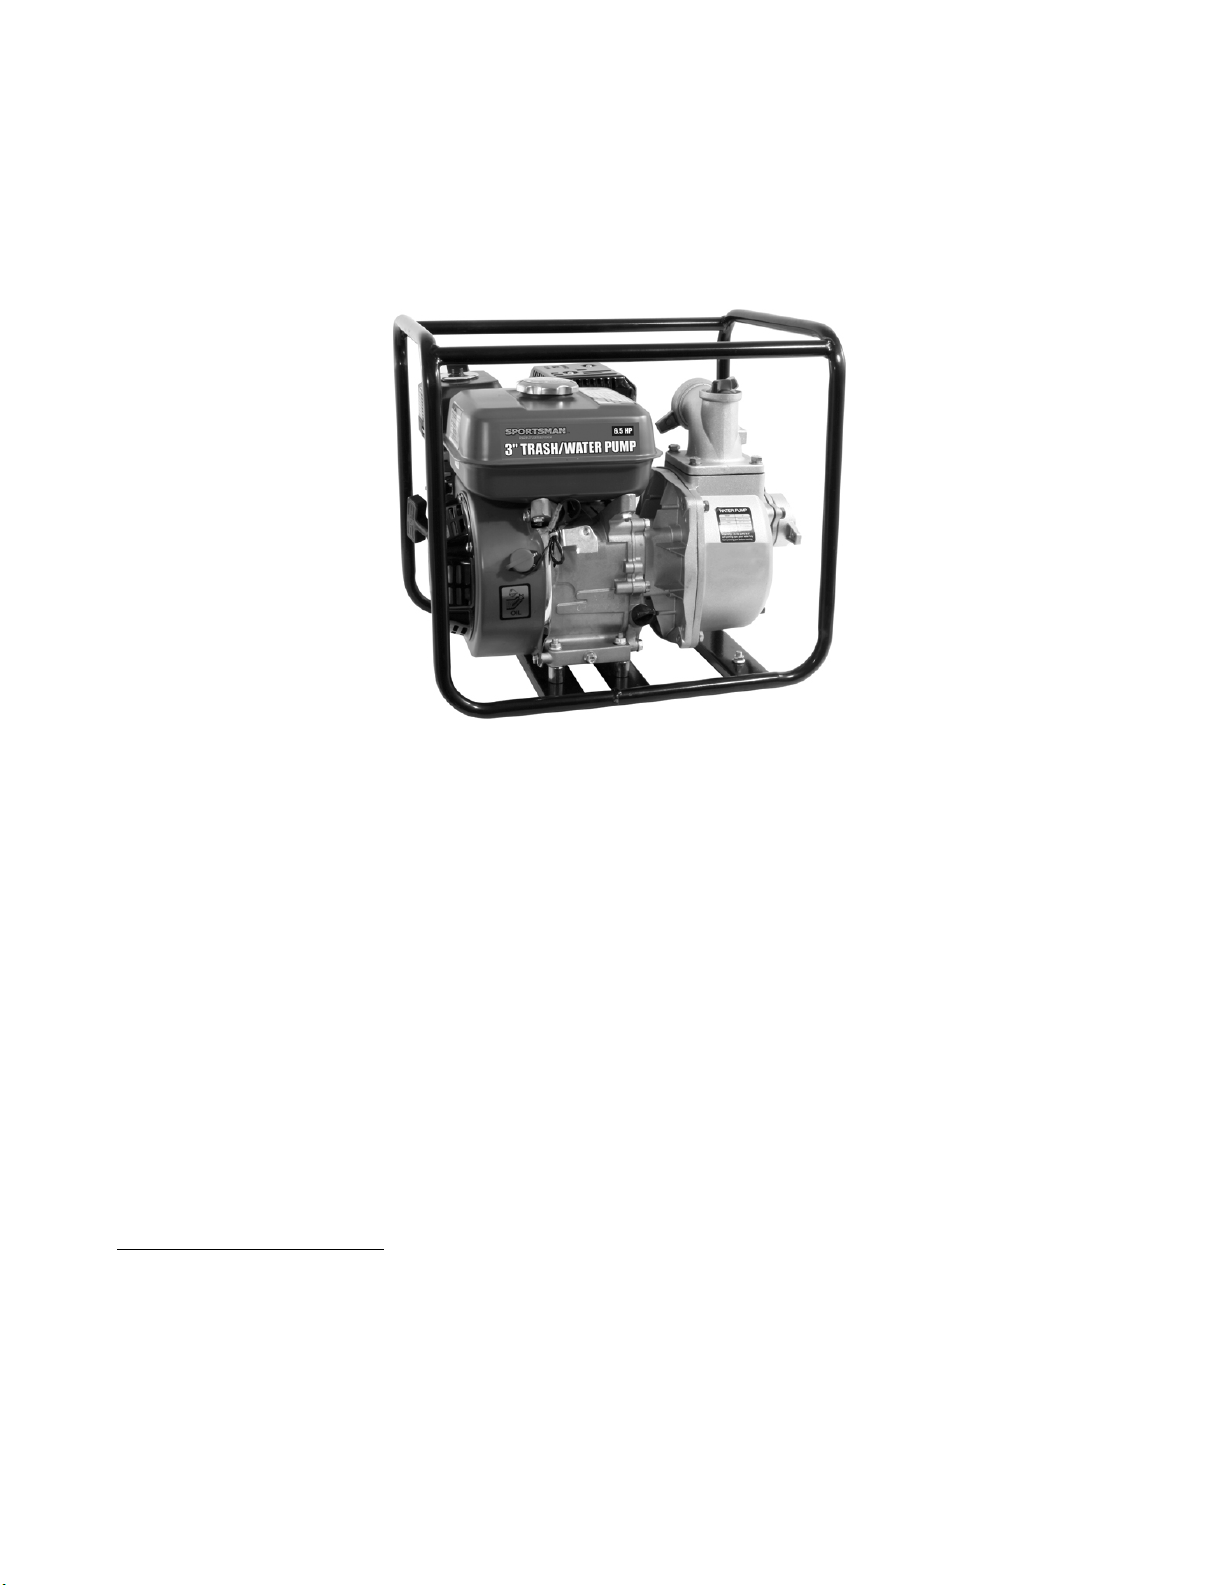
TWP365 3-Inch (76.2mm) Gasoline Trash/Water Pump Assembly And Operating Instructions 8
STARTING THE GASOLINE WATER PUMP
To start this Gasoline Water Pump:
1. Confirm that Oil has been properly added.
2. Confirm that Gas has been properly added.
3. Turn the fuel valve to the “on” position.
4. Move the choke lever to the “closed” position.
5. Set the engine switch to the “on” position. (Figure 3)
6. Slowly pull on the recoil starter handle until a slight resistance is felt. Then pull briskly to start the
engine.
7. Gently return the cord into the Gasoline Water Pump to avoid damage to the starter or housing.
Never allow the cord to snap back.
8. If the engine fails to start, repeat step 6. NOTE:After repeated attempts to start the engine, consult
the troubleshooting guide before attempting again. If problems persist, call 1-888-287-6981,
Monday - Friday, 8 AM - 4 PM Central Time.
9. Once the engine has started and runs for about a minute, move the choke lever approximately half
way towards the “open” position. Wait an additional 30 seconds and then move the choke lever
completely over to the “open” position.
10. Allow this Gasoline Water Pump to run for several minutes before beginning the project.
BREAK-IN PERIOD
Breaking in an engine of any size is important to the life of the engine. The first twenty hours of operation is
considered the break-in period for this Gasoline Water Pump. For best results and an engine with fewer
problems, it is suggested that you:
• Avoid heavy loads during the first twenty hours.
• Not run the engine at its highest speeds for extended periods.
• Change the engine oil after ten hours of operation during the break-in period only.
OPERATION
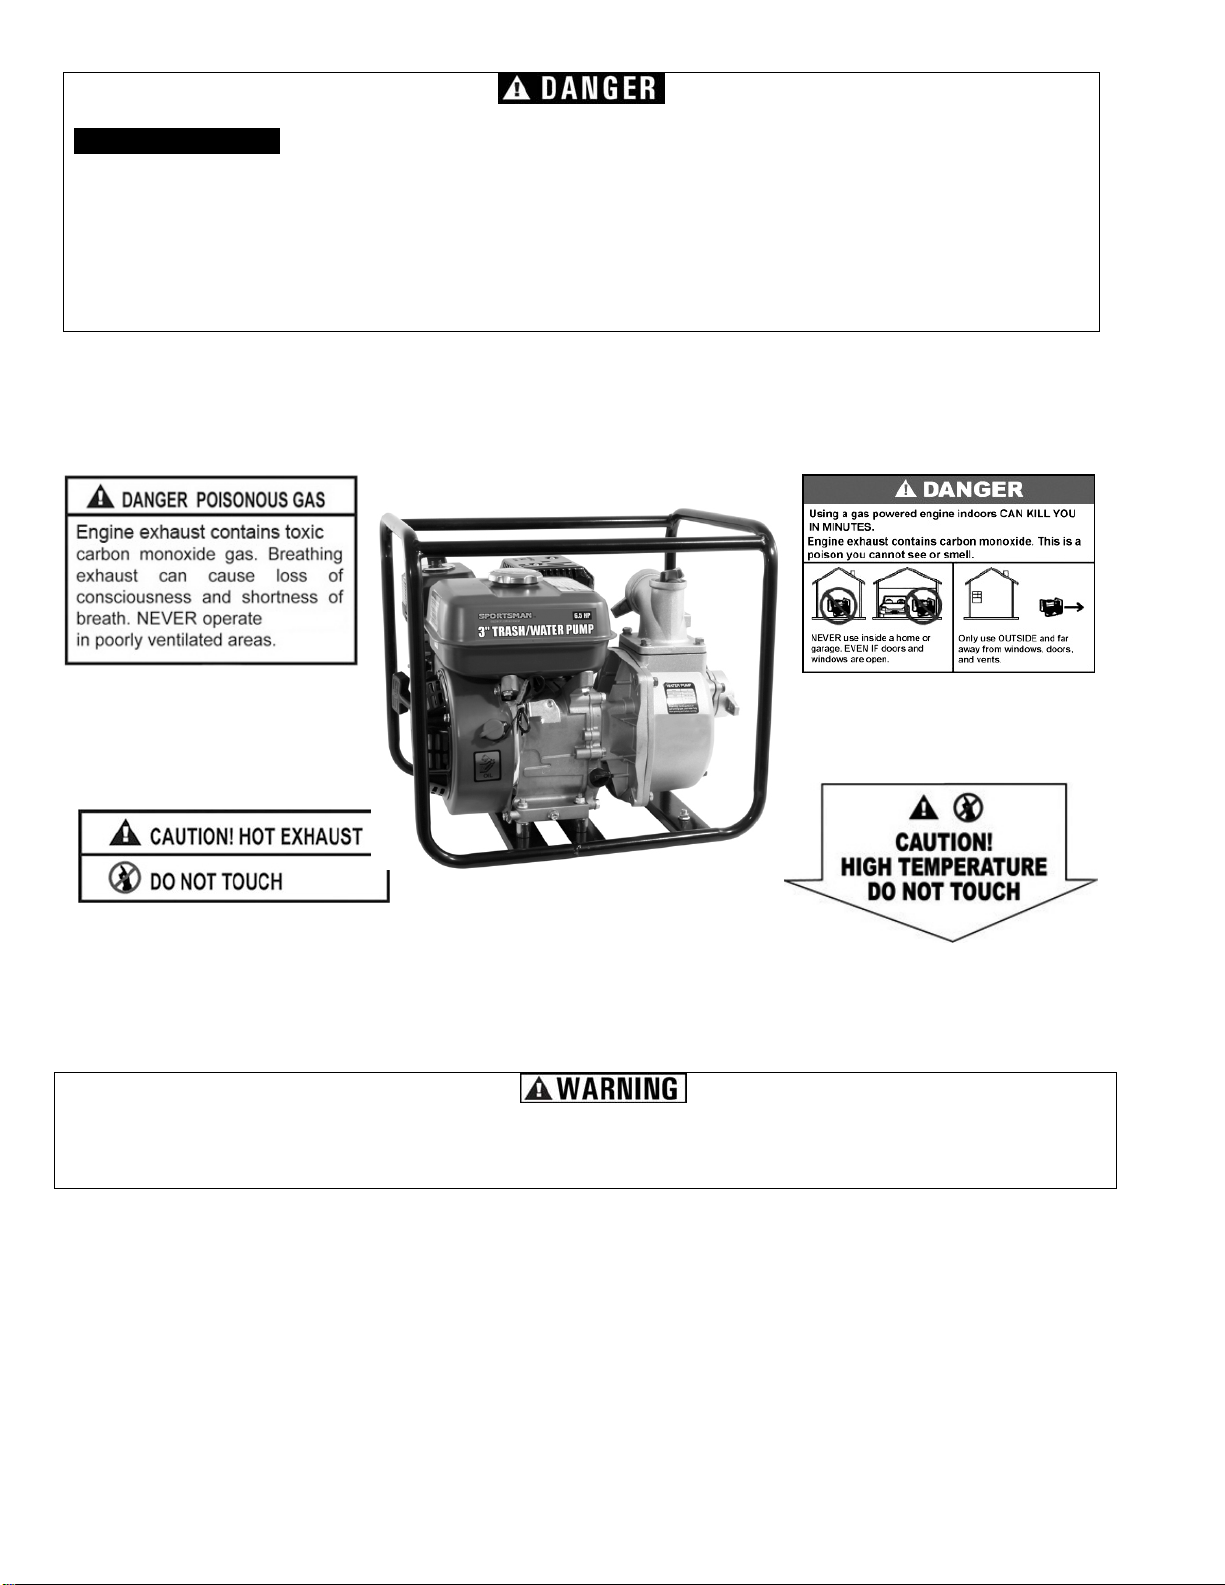
Wear eye and hearing protection when using this Gasoline Water Pump.
Moisture can condense in a unit, so it is extremely important to drain the tank after each use. If left
in the tank, moisture could cause rust and weaken the tank.
PRIMING THE GASOLINE WATER PUMP
For best results, this Gasoline Water Pump must be primed before use. Priming
forces air out of the pump allowing it to pump water more efficiently. To prime:
1. Place the Gasoline Water Pump on a solid, level surface as close to the
water source as possible.
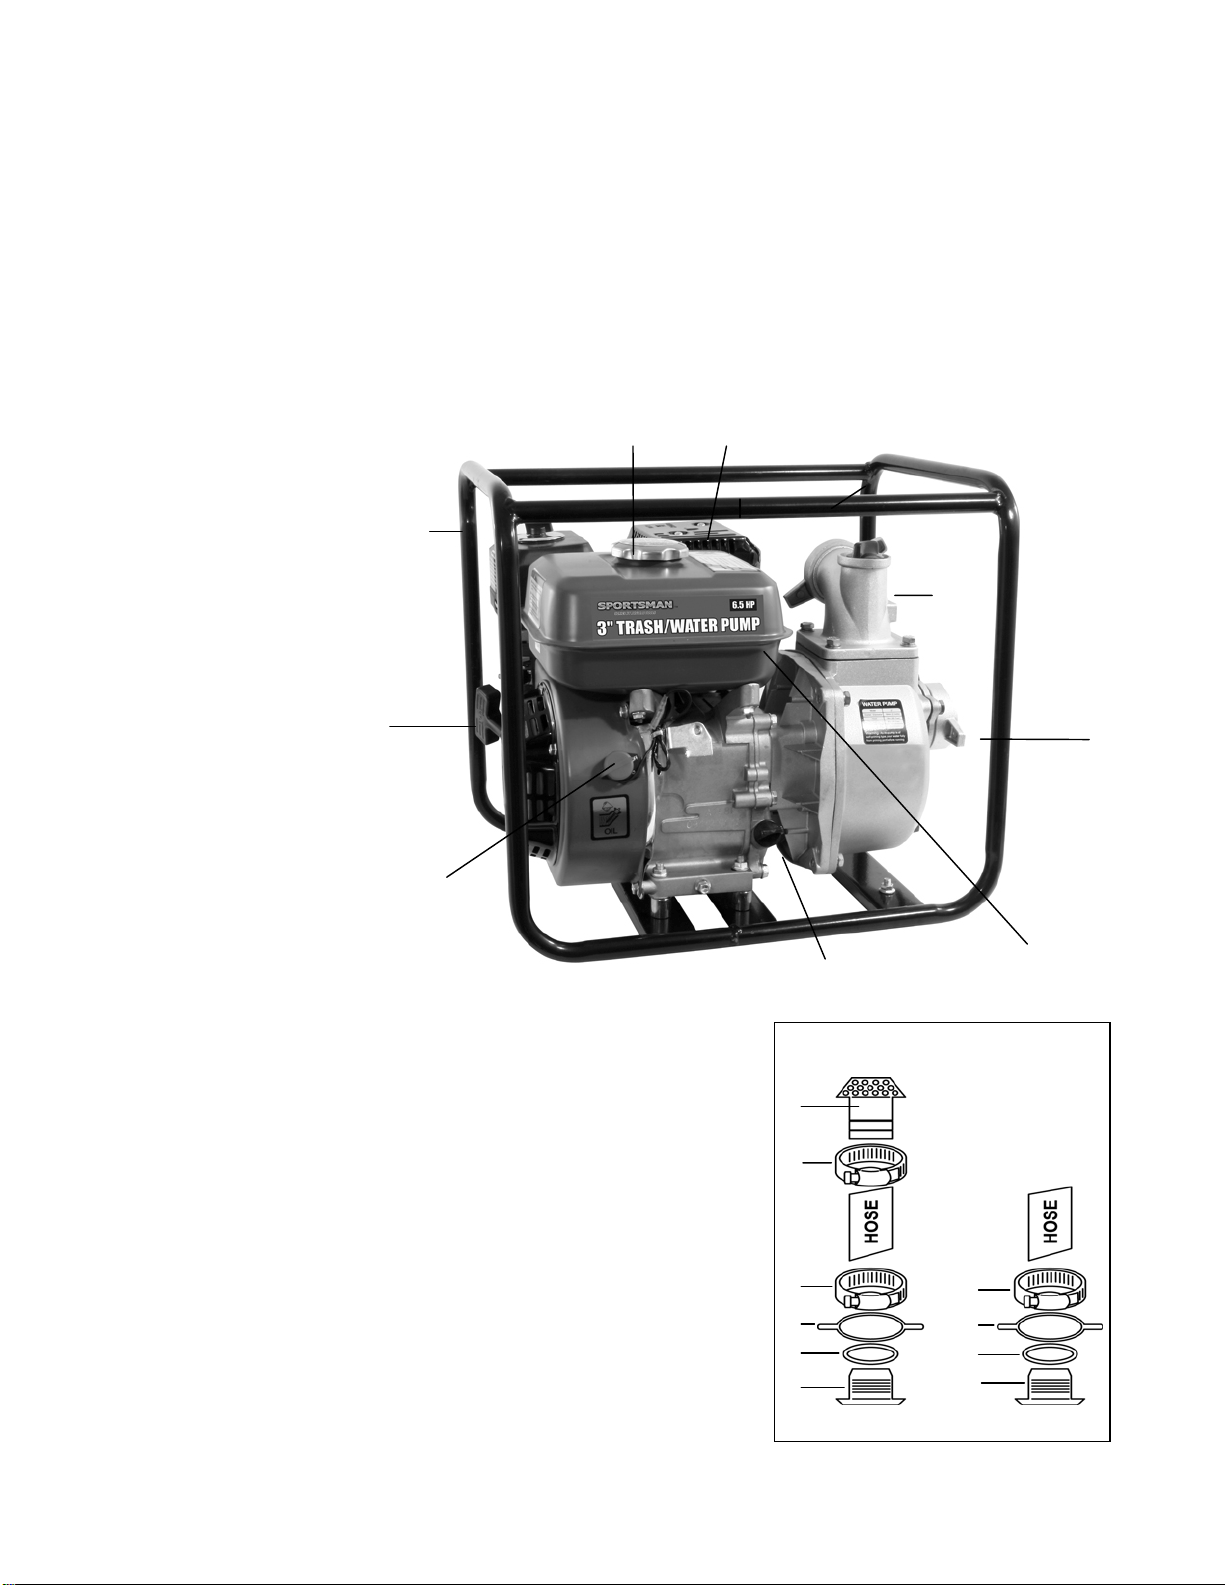
2. Remove the Priming Plug (A, Figure 3)
3. Fill the Gasoline Water Pump with water by filling through the opening.
4. Replace the Priming Plug.
5. Start the Gasoline Water Pump engine.
6. Partially restrict the discharge hose to improve priming.
7. The Gasoline Water Pump is now primed and ready for use.
A
Figure 3

TWP365 3-Inch (76.2mm) Gasoline Trash/Water Pump Assembly And Operating Instructions 9
MAINTENANCE
Routine maintenance of this Gasoline Water Pump is essential for safe, economical, and trouble-free
operation. It will help prolong the life of this Gasoline Water Pump as well as help reduce air pollution.
Never perform maintenance procedures while this Gasoline Water Pump is running. Allow this
Gasoline Water Pump to cool before commencing any maintenance procedures. Keep heat, sparks
and flame away.
Improper maintenance and/or failure to correct any problems prior to operating this Gasoline Water
Pump can cause a malfunction, which could cause death or serious injury. Always follow the
inspection and maintenance recommendations and schedules in this manual.
During colder temperatures, icing may build in the carburetor. If this develops, the engine may run rough,
lose power and possibly stall. This temporary condition can be overcome by deflecting some of the hot air
from the engine over the carburetor area.
Another method of reducing risks of freeze damage is to completely drain the Gasoline Water Pump before
placing it in storage.
CHECKING THE OIL LEVEL
It is important to check the oil level in the engine crankcase before each use to ensure that there is a
sufficient quantity.
To check the oil level:
1. Verify that this Gasoline Water Pump is shut down and on a level surface.
2. Unscrew the oil cap from the engine.
3. There should be oil in the engine. If there is no oil, add oil until the engine crankcase is filled.
4. Confirm that the oil cap is properly in place when finished verifying the oil level.
NOTE: Never dispose of used motor oil in the trash, down a drain or on the ground. Put oil in a
sealed container and contact your local recycling center or auto garage to arrange oil disposal.
Oil Capacity (fluid oz) 18.5
Oil Type Recommended SAE 5W-30

TWP365 3-Inch (76.2mm) Gasoline Trash/Water Pump Assembly And Operating Instructions 10
CHANGING THE OIL
Oil is very hot immediately after use. Use extreme caution when working with a gasoline-powered
engine and its components such as engine oil. Serious burns can result if proper care is not taken.
The engine oil should be changed every fifty hours on this Gasoline Water Pump.
To change the oil:
1. Place the Gasoline Water Pump on a solid, level surface.
2. Remove the oil drain plug. (A, Figure 4)
3. Place an oil pan beneath the oil drain.
4. Tilt the Gasoline Water Pump to drain the engine oil into the oil pan.
5. Replace the oil drain plug.
6. Refill the engine with new oil.
7. Dispose of used oil properly.
AIR FILTER MAINTENANCE
Wear ANSI-approved safety gear, including safety goggles and heavy-duty work gloves when
servicing this Gasoline Water Pump.
This Gasoline Water Pump will work more efficiently with a clean air filter. The air filter should be checked
every 25 hours of use, regardless of workload, and replaced every 100 hours regardless of workload.
To clean or replace the air filter:
1. Remove the air filter cover, which is held in place by a wing nut and is located
on top of the Gasoline Water Pump. (A, Figure 5)
2. Remove the air filter.
3. If the air filter is paper, use a vacuum to remove any trapped dirt. If this doesn’t
work, replace with a new filter.
4. If the air filter is foam, wash the filter in warm water and a mild detergent before
rinsing thoroughly.
5. Squeeze out excess moisture and dry completely.
6. Briefly soak the filter in lightweight oil, squeezing out the excess, before
replacing it in the Gasoline Water Pump.
Figure 4
A
A
Figure 5

TWP365 3-Inch (76.2mm) Gasoline Trash/Water Pump Assembly And Operating Instructions 11
SPARK PLUG MAINTENANCE
This Gasoline Water Pump will work more efficiently with a properly functioning spark plug. The spark plug
should be replaced every 100 hours of use.
To check or replace the spark plug:
1. Disconnect the spark plug wire from the spark plug.
2. Clean around the spark plug using a wire brush before removing
the plug using a spark plug wrench.
3. Check the spark plug for foreign substances. If moisture is present,
wipe it off using a clean shop towel. If there are deposits
present (A, Figure 6), use a fine grit sand paper to remove them.
If there is structural damage to the spark plug, replace it with a new
one (B, Figure 6).
4. When installing the new plug, replace it with a Type F6TC and
set the gap to 0.60–0.80mm.
STORAGE
Do not store gasoline for more than 3 months.
Never place any type of storage cover on this Gasoline Water Pump while it is still hot.
Prior to restarting, thaw out any possible ice from the Gasoline Water Pump.
The life of this Gasoline Water Pump can be extended through proper maintenance procedures. When
placing this Gasoline Water Pump in storage for over fourteen days, following these procedures will increase
its service life.
1. Allow engine to cool completely, and then clean the Gasoline Water Pump using a cloth and mild
detergent.
2. Remove any fuel from the fuel tank.
3. Disconnect the spark plug wire and remove the spark plug.
4. Pour one teaspoon of engine oil into spark plug hole and replace the spark plug but do not reconnect
the spark plug wire.
5. Gently, but firmly pull the starter cord to distribute the oil inside the cylinder, stopping when you feel
resistance.
6. Remove all water from the primer water tank.
7. Wipe all metal components with an oil-soaked rag to inhibit rust and corrosion.
8. Cover the Gasoline Water Pump with a tarp and store in a cool, dry, well-ventilated space out of the
reach of children.
Figure 6
A B

CWUP15 1 ½ Inch Clean Water General Purpose Pump 12
PARTS DIAGRAM
PARTS LIST
Part
No.
Description Part
No.
Description
1 Engine 16 Priming Plug
2 Pump Cover 17 Non-Return Valve
3 O-Ring 18 Flume
4 Washer 19 Flange Bolt
5 Hex Screws 20 Gasket
6 Casing Wear Ring 21 Joint
7 Impeller Wear Ring 22 Hose Coupling
8 O-Ring 23 Strainer
9 Impeller 24 Hose Clamp
10 Impeller Cover 25 Gasket
11 O-Ring 26 Elbow Draft Tube
12 Pump Body 27 Flange Bolt
13 Washer 28 Rubber Foot
14 Flange Bolt 29 Nut
15 O-Ring 30 Tube Frame
(TWP365201104)
Table of contents
Other Buffalo Tools Water Pump manuals
Popular Water Pump manuals by other brands

AxFlow
AxFlow Aturia ND Series Operation & maintenance manual

Crane
Crane Barnes PS Omni Grind Plus OGP2022CO Series installation manual

Orion
Orion 12626 user manual

Makita
Makita EW100R parts list

VERDER
VERDER VERDERAIR VA 25 Instructions-parts list

Liberty Pumps
Liberty Pumps HT40 Series installation manual

MATALA WATER TECHNOLOGY
MATALA WATER TECHNOLOGY G-1900 Instruction and maintenance manual

Coleman
Coleman QuickpumP 204475 Instruction leaflet

Barnes
Barnes 2020HC Installation and operation manual

Kärcher
Kärcher SP 9.000 Flat manual

Bondioli & Pavesi
Bondioli & Pavesi HPP2 Service manual

Pentair
Pentair Jung Pumpen BASICLOGO AD 4 XE instruction manual