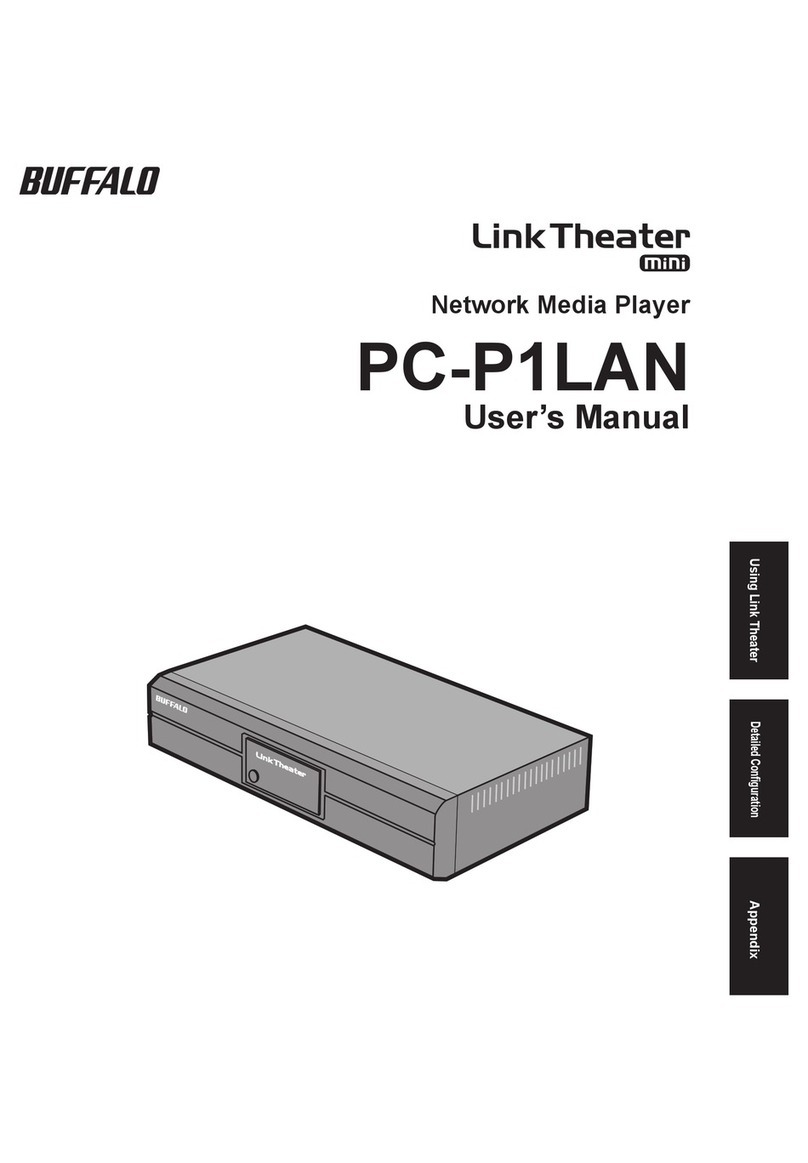
Buffalo LinkTheater P4LWAG User manual

LinkTheater – Wireless A&G Media Player
P4LWAG
v1.2

2
Introduction 3
Product Diagram 4
Connect Your Cables 5
Remote Control 10
Initial Power-On 13
Wired Setup 13
Wireless Setup 15
Intel®Viiv™ 16
AOSS 24
ManualWirelessConguration 25
Settings 28
System Preferences 30
Network Settings 32
Display Settings 46
Reset System Settings 48
Choosing your Media Sources 49
InstallingandConguringBuffaloPCUtility 52
ConguringWindowsMediaPlayer 60
Connecting to a Media Server 64
BrowsingMusic 66
BrowsingPictures 68
BrowsingVideos 69
ConnectingtoandUsingaUSBDevice 70
DigitalAudio/SurroundSound 72
HDTV/720pInformation 72
SoftwareandUpdates 72
ContactInformation 76
WarrantyInformation 77
FCCandRegulatoryInformation 78

3
Using LinkTheater
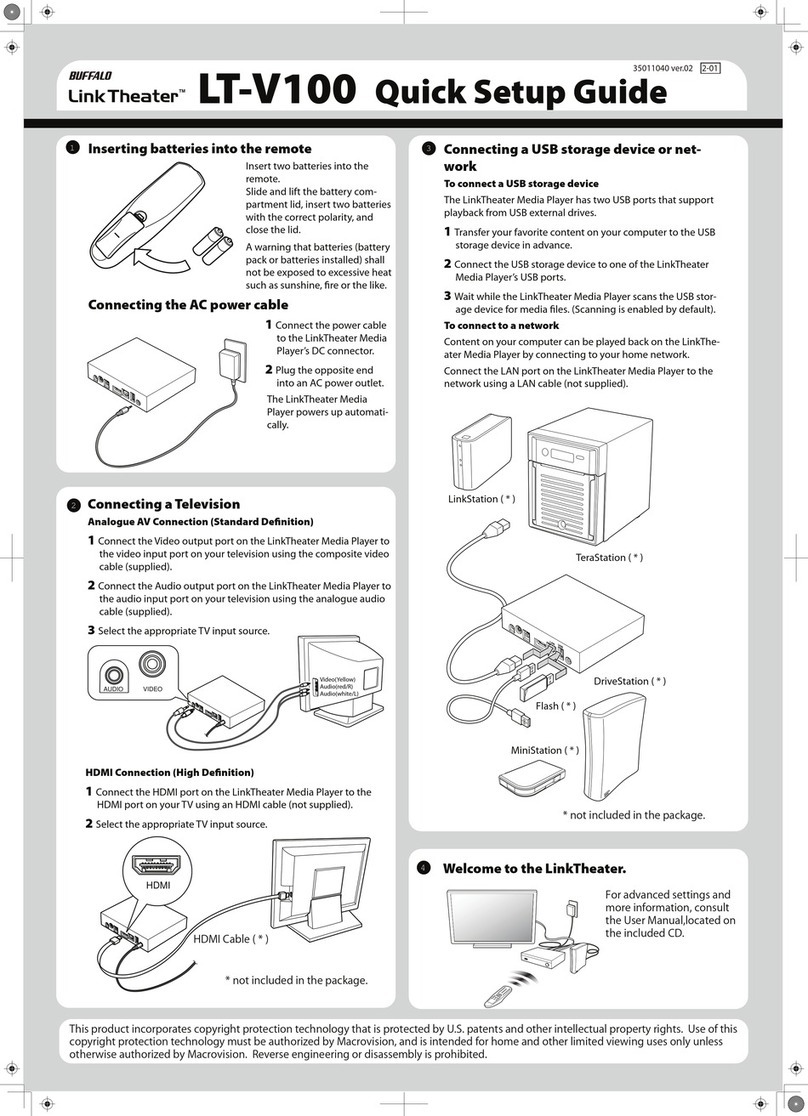
ThankyouforchoosingLinkTheater!ThismanualshouldhelpyoucongureanduseyournewLinkTheater.
BuffaloTechnology’sLinkTheater P4LWAG Wireless-A&G Network Media
Player is the missing link between your TV, home entertainment center, and
computer network. Now, you can play the movies, music, and photos stored
on your computers from the comfort of your living room, through your TV and
home entertainment center.
The LinkTheater can connect to wired or wireless networks. With 802.11g
technology, your media files can move through your wireless network at up
to 54 Mbps*, and the RJ-45 Ethernet port is good for 100 Mbps with wired
connections.
The LinkTheater has a wide variety of AV connections on the back, including
High-Definition compatible video connectors as well as digital Dolby™5.1 and
DTScompatibleaudioconnectors.LinkTheateralsosupportsUniversalPlug
& Play for easy installation.
Mostoftheindustry’smostpopularvideo,image,andaudioformatsare
supported by LinkTheater. LinkTheater includes support for the following file
types:
Video: MPEG1, MPEG2, MPEG4, XviD, WMV, H.264 (480i,
480p,and720p)
Audio: MP3,WAV,WMA,M4A(AAC),LPCM,AC3
Image:JPG,BMP,PNG
Prepare to experience one of the highest quality, most versatile media players
available!BuffaloTechnology’sLinkTheaterwillprovideseamlessaccessto
your multimedia archives.
Please check our web site (http://www.buffalotech.com)forupdatesand
additional support for this product.
4
TM
RESET
and one of it oriented to point straight up.
Please also make us drawings of an Ethernet cable, the power plug, and a set of A/V rca
plugs.
TM
RESET
and one of it oriented to point straight up.
Please also make us drawings of an Ethernet cable, the power plug, and a set of A/V rca
plugs.
Reset button; hold in with a straightened
paper clip for 5 seconds to reset.
Power/Standby switch
Hold 5 seconds to start AOSS;
10 seconds to reset unit.
USB2.0port
for use with
memory keys
andFAT32USB
hard drives
5 V dc (110-240V 50-
60Hz AC power to AC
poweradapter)
D4/Component HD
videoout(720p)
S-Video port
-
+
Composite Video port
RCA stereo audio out
Toslinkdigitalaudioout(5.1)
10/100 Ethernet
RP-SMA for wireless antennas
(attachantennasbeforeuse)

5
Package Contents:
• LinkTheater Media Player
• (2)WirelessAntennas
• RemoteControlwithBatteries
• AC Power Adapter
• LinkTheater CD-ROM
• UserManual(thisguide)
• StandardA/VCable(Red,White,andYellowRCAs)
• D4/Component Video Cable
If any items are missing from your package, please contact
BuffaloTechnology’sTechnicalSupportorcontacttheplaceyou
purchased your product from.
Prepare for Hookup:
The LinkTheater connects to a TV or video moniter with
composite(RCA),S-Video,D4,orcomponentstylevideo
connectors.
Find an appropriate place to install the LinkTheater. We
recommend that the install place is:
• within visible site of the primary seating area. This device
uses an IR remote control and requires line of sight.
• where the the antennas can be pointed directly up in an
unobstructed way if the built-in wireless radio is going to
be used to connect to the network.
• onaatsurfaceorcabinet.WedoNOTrecommend
placing it on top of a warm-running audio/video
component, due to potential overheating concerns.

6
Hookup:
The LinkTheater must be connected to a TV or monitor. Although
the LinkTheater plays mp3s and other popular music formats, a
TVormonitorisrequiredtonavigateandcongureoptionson
the LinkTheater.
Bydefault,theLinkTheaterusesthestandard4:3videomode
over the yellow analog video connector, or an S-Video connector.
Component video is supported for higher resolutions (480p and
720p);however,toinitiallyaccessthecongurationmenu,the
LinkTheater must be hooked up with the standard yellow analog
video connector. For more information on component video,
pleaseseethecomponentvideosectionofthisuser’smanual.
Please follow the procedure below:
1 - Hook up the included analog video cable to your TV or
monitor:

7
2 - Connect the other end of the analog video cable to the associated
ports on the LinkTheater:
3-(OPTIONAL):IfyouareconnectingtheLinkTheatertoawired
network, then plug in a CAT-5 Ethernet cable into the Ethernet port
on the LinkTheater and connect the other end to your network.
4-PlugtheBuffaloACadapterintoanACpoweroutlet.Buffalo
recommends connecting the AC adapter to a power-strip with
a surge protector to protect it from power surges caused by
lightning.

8
The‘POWER/STANDBY’lightonthefrontoftheLinkTheater
will turn orange, then green. You do not need to press the
power button on the front of the LinkTheater. If it does not light
up, then please check that the proper AC adapter is plugged in
and seated correctly. Also, check that your power-strip or surge
protector is on.
6-Oncethe‘POWER/STANDY’lightonthefrontofthe
LinkTheater turns green, the device has properly powered up and
is ready for use. At this point, please turn on your TV or monitor.
ChangeyourTVormonitor’ssourcesettingtocorrespond
to the input that you plugged the LinkTheater into. Once the
LinkTheater’sbluemenuappears,yourLinkTheater’svideois
properly connected.
5 - Plug the power connector from the AC adapter into the back
of the LinkTheater.

9

10
Remote Control
The LinkTheater's navigation and settings are all done via the included remote control.
To navigate through the menus, use the up, down, left and right
arrows.Tomakeaselection,pressthe‘Enter’key.Also,the
left and right arrows can be used to navigate forward and back
through the menus.
Info – Theinfobuttonwillbringupinformationregardingthele
thatiscurrentlybeingplayedback.Thisincludeslenameinfo,
format info, and in the case of movies and music, how long the
lehasbeenplaying.
Setup – The setup button will instantly take you to the System
Settings area.
Refresh – The refresh button will automatically refresh what is
onthescreen.Forexample,ifrecentleshavebeenadded
to a media server, pressing the refresh button may display the
newles.SomeDLNAserversmayneedtoberefreshedatthe
server level.
Repeat – The repeat button will simply repeat a video or music
lethat’sbeingplayedback.

11
Video – The video button will
cycle through the four supported
video modes. CAUTION:
Usingthisimproperlycould
result in losing video display.
In that event, continue to cycle
through the video modes by
pressing the VIDEO button until
the display returns.
Audio – Audio is used to select
different sound track options
that may be available in video
les.
Playback Controls – The
playback controls work similarly
to that of a VCR or DVD player.
>/II begins and pauses
playback, stops playback,
>> is fast forward, >Igoes to
the next song, etc.
Video, Music, Photo – The
three video, music, and photo
buttons can be used while
navigating a media source.
Pressing one of these buttons
will instantly change your
viewingtotheletypesthat
correspond with the button
pushed.Forexample,ifyou’re
browsing video and press the
musicbutton,you’llinstantlybe
browsing music instead.

12
Home – The home button will return you to the main navigation
hub.
Up and Down – TheupanddownbuttonsworklikePageUp
and Page Down does on a computer. This is a quick way to
browse through folders that have a lot of media.
Volume and Mute – The LinkTheater has its own independent
volume control that can be used along with or as an alternative
toyourTVorsoundsystem’sremotecontrol.Thisallowsyou
to quickly mute or raise/lower the volume without having to
necessarilyusetheTVorsoundsystem’sremotecontrol.
Stop – Thestopkeywilltemporarilypauseaslideshowthat’sin
progress.
Track – The track button will skip forward or back to the next
video,music,orpicturele.

13
Getting Started
PoweringyourLinkTheateronforthersttime
WhentheLinkTheaterturnsonforthersttime,itwillattemptto
connect you to a wired or wireless network automatically. Which
screensyouseewilldependonwhetheryou’reconnectingyour
LinkTheater with a wired or wireless internet connection.
Wired Setup: If you are using a wired network and have
plugged in an Ethernet cable, then the LinkTheater will
automatically connect to the wired network. You should receive a
message like this.
Highlight Continue and press the right control button on the
remote control.

14
Highlight Finish and press the ENTER button on the remote
control to begin using your LinkTheater.
Ifyou’reusingaIntel®Viiv™ Technology-based PC with the
LinkTheater,TheLinkTheaterwillneedtobeaddedtothePC’s
device list. Turn to page 21 for instructions.

15
Wireless Setup: If you are using a wireless network, then the
LinkTheater will give you three options to initially connect your
device.
Intel® Viiv™ Setup – If you have an Intel®Viiv™ Technology-
based PC on your network, it can instruct this device on how to
set up. Turn to page 16 for wireless setup with a Intel®Viiv™
computer.
AOSS – If your access point supports AOSS, then you can
connect your LinkTheater to it wirelessly by just pushing a couple
of buttons. Turn to page 24 for more information.
Regular Setup – Regularsetupletsyoucongureyour
LinkTheater manually. Turn to page 25 for instructions on
conguringyourLinkTheatermanually.
It’stimetomakeadecision!Turntopage16,24,or25,
dependingonhowyouwanttocongureyourLinkTheater’s
wireless connection.

16
Your Intel®Viiv™Technology-basedPCcancongureyour
LinkTheater’swirelesssettingsforyou.Beginbymakingsure
that your PC has the latest patches and updates from Microsoft
and Intel. Open the Intel®Viiv™ settings window by clicking the
Intel®Viiv™logoonyourPC’sdesktoporsystemtray.
If your LinkTheater is connected to the network with a
wiredEthernetconnectionandyou’reusinganIntel®Viiv™
Technology-based PC, then turn to page 21.
Setup with Intel® Viiv™
Setup the LinkTheater with an Intel® Viiv™ Technology-based PC.
Installation with a wireless network connection:
Select Add a device.

17
Select Start.
When you see
this screen, go to
your LinkTheater.
Select Wirelessly,
then next.

18
Your LinkTheater will give you a passcode. Write this down. You
have ten minutes to type this into your Intel®Viiv™ Technology-
based PC. If time runs out on the timer, go back to the previous
screen and select Yes again to get a new passcode.
Power on the LinkTheater and select Yes to have Intel®Viiv™
congureyourwirelessconnectionforyou.

19
BackatthePC,click
next.
Click next.
Enter the passcode
that you got from the
LinkTheater.

20
Select media device and
then next.
Your LinkTheater is now connected to the network. Click next to
begin building your media library. Turn to page 23.
Table of contents
Other Buffalo Media Player manuals

Buffalo
Buffalo LinkTheater PC-P3LWG/DVD User manual

Buffalo
Buffalo LinkTheater LT-H90 User manual

Buffalo
Buffalo LinkTheater LT-H90LAN User manual

Buffalo
Buffalo LinkTheater LT-V100 User manual

Buffalo
Buffalo LinkTheater PC-4LWAG User manual

Buffalo
Buffalo PC-P3LWG User manual

Buffalo
Buffalo LinkTheater mini PC-P1LAN User manual

Buffalo
Buffalo LinkTheater mini PC-P1LAN User manual

Buffalo
Buffalo PC-P3LWG User manual