Buffalo LinkTheater PC-P3LWG/DVD User manual

PC–P3LWG/DVD

Contents
Safety Information . . . . . . . . . . . . . . . . . . . . . . . . . . . . . . . . . . . . . . . . . . . . . . . . . 3
Introduction . . . . . . . . . . . . . . . . . . . . . . . . . . . . . . . . . . . . . . . . . . . . . . . . . . . . . . 8
High-Definition Info . . . . . . . . . . . . . . . . . . . . . . . . . . . . . . . . . . . . . . . . . . . . . . . . 8
Package Contents . . . . . . . . . . . . . . . . . . . . . . . . . . . . . . . . . . . . . . . . . . . . . . . . . . 9
System Requirements . . . . . . . . . . . . . . . . . . . . . . . . . . . . . . . . . . . . . . . . . . . . . . . 9
Remote Control . . . . . . . . . . . . . . . . . . . . . . . . . . . . . . . . . . . . . . . . . . . . . . . . . . 10
Hardware Diagrams . . . . . . . . . . . . . . . . . . . . . . . . . . . . . . . . . . . . . . . . . . . . . . . 12
Connecting LinkTheater to the Display . . . . . . . . . . . . . . . . . . . . . . . . . . . . . . . . 13
Configuring LinkTheater Settings . . . . . . . . . . . . . . . . . . . . . . . . . . . . . . . . . . . . 15
Using AOSS . . . . . . . . . . . . . . . . . . . . . . . . . . . . . . . . . . . . . . . . . . . . . . . . . . . . . . 19
External Wireless Antenna Installation. . . . . . . . . . . . . . . . . . . . . . . . . . . . . . . . . 19
Standard Controls / Important Tips. . . . . . . . . . . . . . . . . . . . . . . . . . . . . . . . . . . . 20
The Log In Screen . . . . . . . . . . . . . . . . . . . . . . . . . . . . . . . . . . . . . . . . . . . . . . . . . 21
DVD / VCD Playback . . . . . . . . . . . . . . . . . . . . . . . . . . . . . . . . . . . . . . . . . . . . . . . 22
DVD / CD File Playback . . . . . . . . . . . . . . . . . . . . . . . . . . . . . . . . . . . . . . . . . . . . . 23
USB Device Playback . . . . . . . . . . . . . . . . . . . . . . . . . . . . . . . . . . . . . . . . . . . . . . . 25
PC Playback. . . . . . . . . . . . . . . . . . . . . . . . . . . . . . . . . . . . . . . . . . . . . . . . . . . . . . 27
Configuring the LinkTheater Software . . . . . . . . . . . . . . . . . . . . . . . . . . . . . . . . 30
LinkTheater PC Software Playback . . . . . . . . . . . . . . . . . . . . . . . . . . . . . . . . . . . . 34
Windows Media Connect Setup . . . . . . . . . . . . . . . . . . . . . . . . . . . . . . . . . . . . . . 37
Windows Media Connect Playback. . . . . . . . . . . . . . . . . . . . . . . . . . . . . . . . . . . . 39
LinkStation Compatibility with LinkTheater. . . . . . . . . . . . . . . . . . . . . . . . . . . . . 40
LinkStation Playback . . . . . . . . . . . . . . . . . . . . . . . . . . . . . . . . . . . . . . . . . . . . . . 43
TeraStation Compatibility . . . . . . . . . . . . . . . . . . . . . . . . . . . . . . . . . . . . . . . . . . . 45
Future Capabilities . . . . . . . . . . . . . . . . . . . . . . . . . . . . . . . . . . . . . . . . . . . . . . . . 45
Troubleshooting . . . . . . . . . . . . . . . . . . . . . . . . . . . . . . . . . . . . . . . . . . . . . . . . . . 46
Technical Specifications . . . . . . . . . . . . . . . . . . . . . . . . . . . . . . . . . . . . . . . . . . . . 48
Warranty Statement . . . . . . . . . . . . . . . . . . . . . . . . . . . . . . . . . . . . . . . . . . . . . . 49
2

3
Safety
Using this Safety Guide
In order to use this guide correctly, the meaning of the notations and symbols used are described below.
Notations and Symbols
Caution Mark
Items to which you must pay attention when handling the product. Failure to
follow this mark may result in personal injury and/or damage the equipment.
Reference Mark
Refers to the related subject page.
Fo you safety, please be su e to follow the inst uctions given below:
To prevent unexpected injury to yourself or others, or damage to the equipment, be sure to follow all the
safety precautions given below. To use the LinkTheater correctly, first read these precautions and make sure
that you understand the contents. After reading, be sure to store this manual in a safe place so that you can
refer to it if necessary.
This manual contains instructions concerning the general operation of the computer system to which the
Linktheater is connected, as well as those concerning the LinkTheater itself.
Please note that our warranty will not cover any damage or failures of the computer, the loss or corruption
of data, or damage to the LinkTheater due to misuse.
Meaning of Notations and Symbols
Meaning of Notations
Danger
Indicates a hazardous situation, which, if not avoided, runs a high risk of death or serious injury.
Caution
Indicates a potentially hazardous situation which, if not avoided, may result in death or serious injury.
Warning
Indicates a potentially hazardous situation which, if not avoided, may result in minor or moderate personal
injury and/or damage to the equipment.
Meaning of Symbols
This symbol indicates warnings and cautions e.g. electric shock warning
This symbol indicates actions that must not be performed (prohibited actions)
This symbol indicates actions that must be performed (essential actions)
Caution
Reference

4
Dange
When handling batteries
Do not disassemble or remodel.
Do not place a metal wire between the + and – pads. Do not carry with a hairpin or necklace.
Do not place in the fire or overheat.
Do not pierce with a nail, hit with a hammer or stamp down.
Or heat will be generated and the battery will ignite and explode.
Wa ning
When handling batteries
Do not disassemble, remodel, repair or charge.
Do not use a new and a used battery or two batteries of a different make together.
Do not mistake the + and – nodes when inserting the battery.
Do not leave used batteries in the device.
Or heat will be generated and the battery will ignite and explode.
When a battery leaks do not touch the liquid.
The liquid that leaks from a battery may burn. If the liquid gets on skin or clothing wash
with clean water. If the liquid gets in your eye, wash with clean water immediately and seek
medical treatment.
When changing the batteries, only used those which have been specified.
Using batteries other than that specified may result in the leakage of fluid, and the battery may
ignite and explode.
Make sure to observe the instructions of the computer and peripheral manufacturers when
installing and using the LinkTheater.
Do not attempt to disassemble or repair the LinkTheater.
This may result in fire or electric shock
Using the device with a different voltage such as may exist overseas, may result in a short
circuit, smoke or fire.
Only insert the plug into a 100V (50/60Hz) AC socket.
Insert the AC adapter firmly into the AC Socket.
Using the equipment without the AC Adapter firmly inserted may cause a short circuit or
overheating, or result in fire or electric shock.
Do not damage, process, overheat, or attempt to repair the power supply cable, as this may
result in fire or electric shock.
- When installing the equipment, do not crimp the power supply cable between walls and racks
(shelves) etc.
- Do not place heavy objects on the power supply cable, or pull at the cable.
- Do not place the power supply cable close to heat sources, or overheat the cable in any way.
- When removing the power supply cable, be sure to remove it my holding the plug.
- Do not bend the cable past its natural bending radius.
- Do not move the LinkTheater while the power supply cable is still connected.
If the power supply cable is damaged consult your dealer.
Install the equipment in a location where children cannot reach the interior of the electrical
equipment, cables, or connectors.
Failure to do so may result in injury.
Prohibited
Prohibited
Prohibited
Contact
Prohibited
Strongly
Recommended
Strongly
Recommended
Disassembly
Prohibited
Strongly
Recommended
Strongly
Recommended
Prohibited

5
A small child should only use the LinkTheater under supervision of an adult.
Do not handle the equipment with wet hands.
This may result in electric shock if the LinkTheater is connected to the AC power supply.
Even when connected it may cause internal damage to the LinkTheater.
If you see smoke or there is a strange smell or sound, remove the plug from the AC power
supply socket.
Continuing to use the device under these conditions may result in a short circuit, fire, or electric
shock. Consult with your dealer immediately.
Do not use the LinkTheater in bathrooms or other locations with a lot of water or humidity.
Using the device under these conditions may result in fire or electric shock .
If the product is dropped or subjected to a severe shock, remove the AC adapter immediately.
Continuing to use the device under these conditions may result in a short circuit, fire, or electric
shock. Consult with your dealer immediately.
If liquid or foreign matter enters the equipment, remove the plug from the power socket.
Continuing to use the device under these conditions may result in a short circuit, fire, or electric
shock. Consult with your dealer immediately.
Do not look straight at the Laser Beam.
Do not peer into or open the casing and look straight at the Laser light, as it may be hazardous
for your sight.
To Prevent damage due to static electricity, before touching the equipment, first touch a nearby
metal object (such as a door handle or metal window blinds) to discharge any static electricity
from your body.
Static electricity from your body may result in damage to the equipment.
Only use the power cable and AC adapter provided with the LinkTheater.
The polarity and voltage of the terminal may differ between makes. Which may result in smoke
and fire.
Caution
Please remove the battery if not using the LinkTheater over a long period.
The battery may leak, which would dirty the device and may cause damage to it, or cause a fire.
Do not use the LinkTheater if there has been a leakage of battery fluid.
Continuing to use the device under these conditions may result in a fire, or electric shock. Consult
with your dealer immediately.
Strongly
Recommended
Strongly
Recommended
Strongly
Recommended
Strongly
Recommended
Remove
Power Plu
g
Remove
Power Plu
g
Remove
Power Plu
g
Water
Prohibited
Prohibited
Prohibited
Prohibited

6
Carefully read the manuals provided by the manufacturers of all other products used (i.e. PC).
Do not install the LinkTheater in the following locations, as doing so may result in an electric
shock or fire, or may adversely affect the equipment.
- Locations with strong magnetic fields (may result in damage).
- Locations with static electricity (may result in damage).
- Locations prone to vibration (may result in damage).
- Locations that are not level (may result in rolling, falling, or injury).
- Locations in direct sunlight (may result in damage or deformation).
- Locations close to fire or subject to heating (may result in damage or deformation).
- Locations where there is a danger of current leakage (may result in damage or electric shock).
- Locations where there is a danger of water leakage (may result in damage or electric shock).
Before installing or uninstalling the LinkTheater make sure to create backup files of all hard disk
data to another media (MO disk, floppy disk etc.).
When making any change to the PC environment there is always a possibility that the data on
the hard disk may be lost or corrupted, therefore it is always advisable to create a backup.
Buffalo will not be held responsible for loss or corruption of hard disk data.
Please remove any dust or dirt from the head of the connectors and do not touch with
your hands.
Dirt on the connector may cause damage.
Do not place any heavy object on top of the LinkTheater.
Doing so may damage the LinkTheater.
Care for CD or DVD media.
- Do not expose to direct sunlight
- Do not use abrasive or solvent cleaners use a slightly damp, soft, lint-free cloth to remove spots,
dust, or fingerprints. Always wipe from the center to the outer edges and never wipe in a
circular motion.
- Do not use adhesive labels or write on the disk with a pencil or ballpoint pen.
- Store discs in a cool, dry, dust free place.
- Handle the disc only by the outer edge or inner hole, to keep fingerprints and smears from
the surface.
- Store discs in protective storage cases to avoid scratches or damage while carrying.
Do not used scratched or damaged media.
Using such media may result in damage to the LinkTheater.
Please take care not to damage the reflective side of the media.
- Do not scratch the top (label surface) of the CD or DVD.
- Do not stack uncovered CDs or DVDs on top of each other.
- Do not write on the label side with a ballpoint pen or any hard object.
- Do not use adhesive labels.
Do not move the LinkTheater with a CD or DVD inside.
Do not move the LinkTheater while still operating or while a CD or DVD are inside.
Doing so may cause damage to the media or the LinkTheater. Before moving the LinkTheater
make certain to switch it off and unplug the power.
Strongly
Recommended
Strongly
Recommended
Strongly
Recommended
Prohibited
Prohibited
Prohibited
Prohibited
Prohibited

7
Regularly clean the lens.
Dust and cigarette smoke may adhere to the lens causing poor reading quality or may prevent
writing to the media Use a cleaning kit to clean the lens regularly.
Do not use abrasive or solvent cleaners.
Use a soft cloth when cleaning the LinkTheater. If very dirty, use a slightly damp cloth to remove
any dirt.
Please follow local regulations when discarding the LinkTheater.
Refer to local rules and regulations for the appropriate method to discard the contents of
this product.
Strongly
Recommended
Strongly
Recommended
Prohibited

8
Int oduction
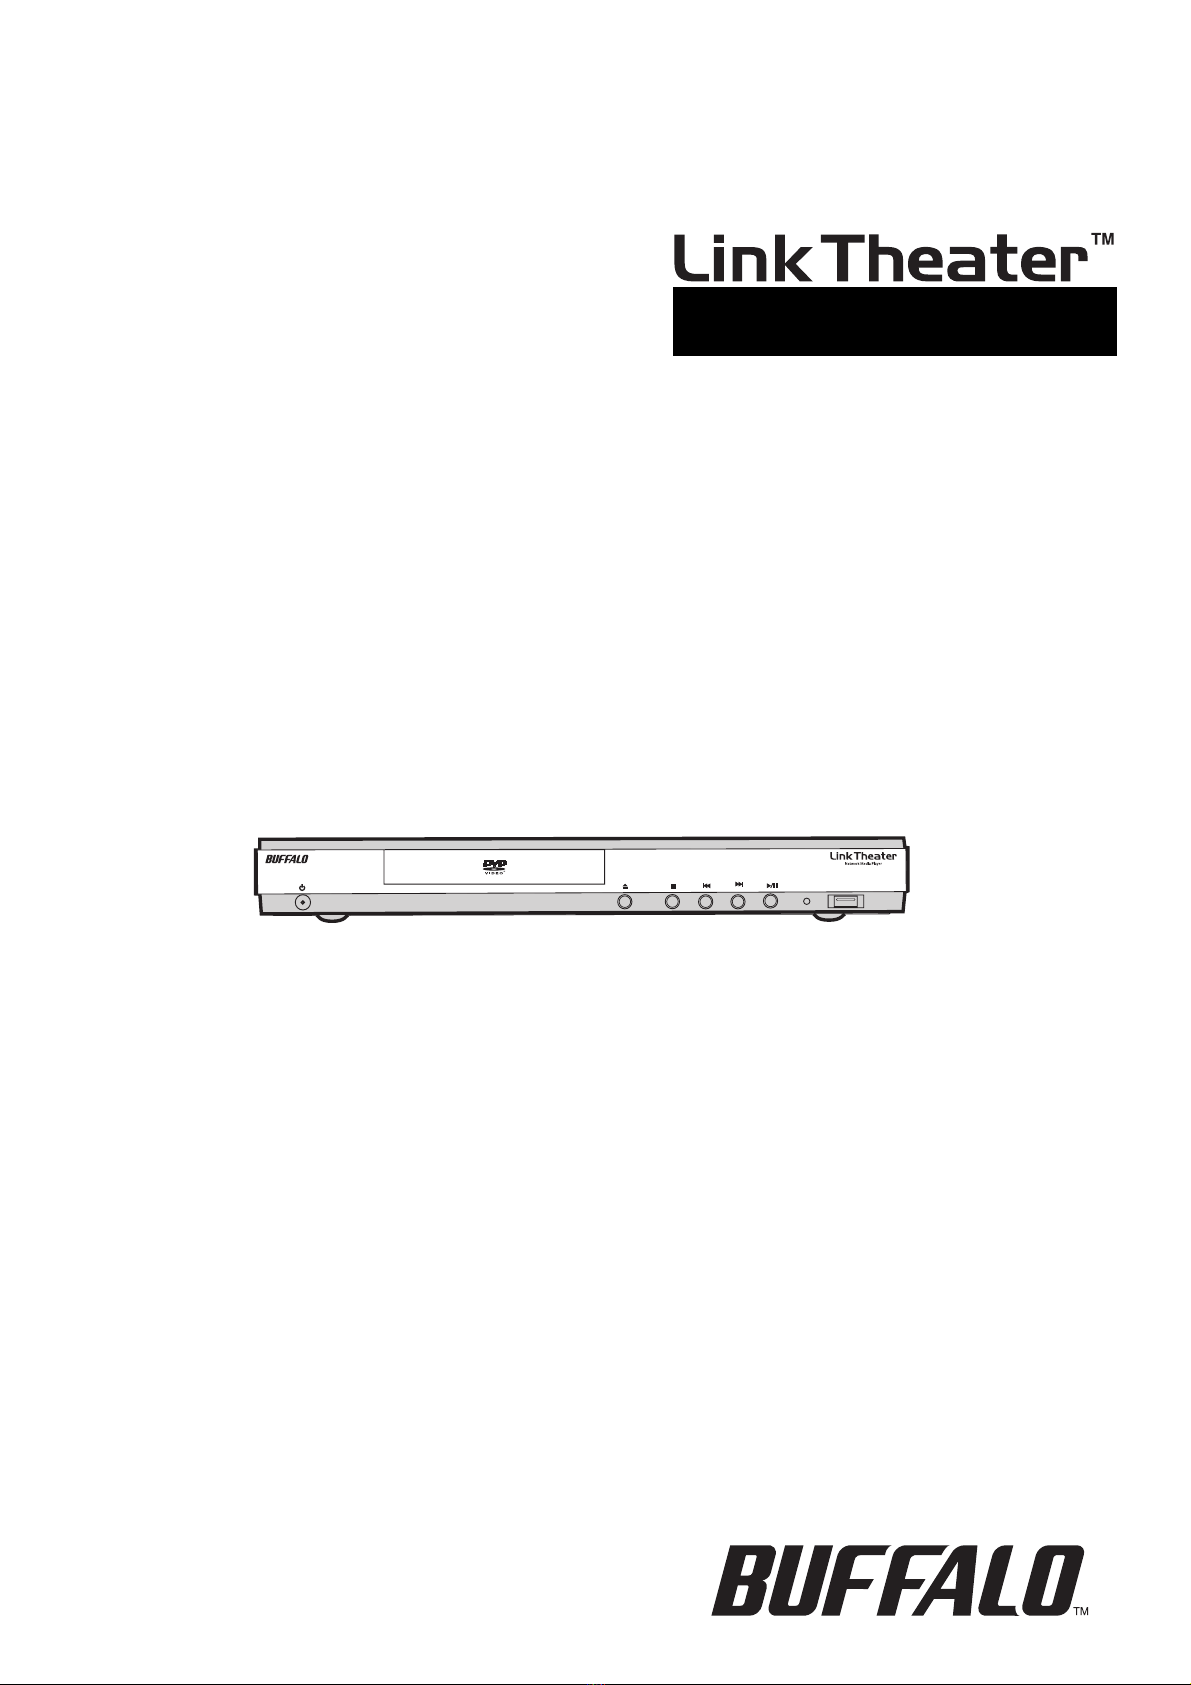
Buffalo Technology’s LinkTheater PC-P3LWG/DVD Wireless High-Definition Media Player
integrates your computer network to your TV or home entertainment center. Digital media
can be streamed from a number of sources on your network and/or computer peripherals to
the LinkTheater. LinkTheater will allow you to enjoy your movies, music, and photos from
your living room.
The LinkTheater can connect to your home’s wired or wireless network. Using 54* Mbps
802.11g technology, the LinkTheater can wirelessly connect to your home’s 802.11b or
802.11g network (802.11g recommended for best experience). Additionally, Buffalo
Technology’s AOSS™technology has been incorporated allowing for push button wireless
setup with other AOSS™compatible wireless routers and access points. There are two
internal wireless antennas which will help to maximize performance of the LinkTheater;
however, an external antenna connector is available for extending performance and range
even further. In addition to wireless, a RJ-45 wired Ethernet port is also available for quick
100 Mbps wired connections.
The LinkTheater has a wide variety of AV connections on the back, including high-end, High-
Definition compatible video connectors as well as digital Dolby™5.1 and DTS compatible
audio connectors. LinkTheater also supports Universal Plug & Play for an easy user
experience.
Most of the industry’s most popular video, image, and audio formats are supported by
LinkTheater. LinkTheater includes support for the following file types:
Video: AVI, DAT, MPEG 1, MPEG 2, MPEG 4, DivX, Xvid, WMV, WMV 9, DivX HD, WMV HD,
VOB, ASF
Image: JPEG, JPEG2000, BMP, GIF, PNG, TIF
Audio: MP3, WMA, WAV, OGG Vorbis, AIFF, PLS, M3U
Prepare to experience one of the most versatile, highest quality media players available.
Buffalo Technology’s LinkTheater will provide seamless access to your multimedia archives.
High-Definition:
The LinkTheater supports playback on high-definition displays. If a high-definition display is
being used, all of the media file playback is automatically upconverted to high-definition
(720p or 1080i). This results in enhanced image and video quality over a standard player on
high-definition displays. Additionally, the menu and browsing displays are displayed in high-
definition for a richer user experience. Unlike most other media players, the LinkTheater also
supports playback of true, native high-definition video files like DivX HD and WMV HD.
NOTE: Due to the requirements of the DVD Consortium and MPAA, DVD Video playback is
limited to 480p (Progressive Scan) and therefore is not upconverted to 720p or 1080i.
*54 Mbps is the IEEE 802.11g standard theoretical maximum data transfer rate. Actual wireless
network data transfer speed is limited by environmental and system factors and will be less.

Package Contents
The LinkTheater package should include the following items.
If any items are missing contact your retailer or reseller:
◗LinkTheater - 1
◗AAA Batteries - 2
◗Power Cable - 1
◗Ethernet Cable - 1
◗AV (Composite Cables) - 1
◗Remote Control - 1
◗CD-ROM - 1
◗Manual (This Guide) - 1
◗Warranty Card
9
System Requi ements
◗Television with one of the following connectors:
• Video: Composite (RCA), S-Video, Component Video, D4
• Audio: Composite (RCA), Coaxial Digital, Optical Digital
◗A wired or wireless network (802.11b or 802.11g)
◗One or more of the following media sources:
• Windows 98SE/ME/2000/XP PC with a CD-ROM or DVD-ROM Drive
– PC with 500 MHz or above is recommended
• LinkStation Network Storage Center
– With at least version 1.46 firmware (firmware update program included on the CD-ROM)
• TeraStation Network Storage Center
• USB Hard Drive
• USB Multi-Card Reader
• USB Memory Stick
• CD-ROM, CD-R, CD-RW, DVD-ROM, DVD-R, DVD-RW, DVD+R, DVD+RW

Remote Cont ol
10
Power
Info
Setup
Refresh
TV Clear CAPS/NUMS
Video
Top Menu Menu
Home
Stop Play Pause Slow
Previous Rewind Forward
Subtitle Search Repeat
Audio Angle Zoom Mute
Next
Return
Enter
Music Photo
Open/Close
1. Power Button 2. Open/Close Button
8.Ten Key Buttons
9. CAPS/NUM Button
10. Photo Button
11. Music Button
12.Video Button
14. Menu Button
16. Directional Pad
18. Return Button
21. Pause/Step Button
22. Slow Button
25. Next Button
26. Fast Forward Button
29. Repeat Button
30. A-B Button
32. Mute Button
34. Zoom Button
3. Info Button
4. Setup Button
5. Refresh
6.TV Mode
7. Clear Button
13.Top Menu Button
15. Enter Button
17. Home Button
19. Play Button
20. Stop Button
23. Previous Button
24. Rewind Button
27. Search Button
28. Subtitle Button
31. Audio Button
33. Angle Button

1. Power Button – Turns the LinkTheater on and off.
2. Open/Close Button – Opens and Closes the
LinkTheater’s DVD Drive Door
3. Info Button – Provides on-screen info when view-
ing or playing a file
4. Setup Button – Setup options for LinkTheater
configuration
5. Refresh – Refreshes the information and file list
on the screen
6. TV Mode – Toggles the different TV modes, the
modes are as follows
a. Composite/S-Video (Default Setting)
b. 480i Component Video / D4
c. 480p Component Video / D4 (Progressive Scan)
d. 720p Component Video / D4 (HDTV)
e. 1080i Component Video / D4 (HDTV)
Toggle the proper TV Mode button by pressing
TV Mode and then the ‘Enter’ button until the
proper display is visible on your screen.
Depending on which cables are used on a TV,
there may be times where the screen remains
black; in this case, continue to press the ‘TV
Mode’ button followed by the ‘Enter’ button
until the proper, visible display is found.
7. Clear Button – Clears the last text or numerical
entry
8. Ten Key Buttons – Used for character input. Press
the numbers multiple times to begin using alpha-
betic characters. Press the ‘1’ key multiple times
to access punctuation marks and press the ‘0’ key
to insert a space.
9. CAPS/NUM Button – Press once to lock Ten Key
entry to all capital letters, press again to lock Ten
Key entry to numeric entry only, press again to
return to normal Ten Key entry operation.
10. Photo Button – Press the Photo Button to list only
available image files on the display.
11. Music Button - Press the Music Button to list only
available audio files on the display.
12. Video Button - Press the Video Button to list only
available video files on the display.
13. Top Menu Button – Access the Top Menu in DVD
Video Playback
14. Menu Button – Access the Menu in DVD Video
Playback
15. Enter Button – Selects a file for playback, selects a
field for input, confirms on screen messages
16. Directional Pad – Selects the proper content on
the display.
17. Home Button – Returns the LinkTheater to the
Log In/Home menu
18. Return Button – Returns the display to the previ-
ously viewed screen.
19. Play Button – Plays a file, starts a slide show
20. Stop Button – Stops file playback, stops a slide
show
21. Pause/Step Button – Pauses file playback, press
again to step one frame forward
22. Slow Button – Begins slow motion playback, press
multiple times to increase slow motion effect
23. Previous Button – Skips one chapter back in DVD
playback
24. Rewind Button – Rewinds playback, press multiple
times to increase rewind speed
25. Next Button – Skips one chapter ahead in DVD
playback
26. Fast Forward Button – Fast forwards playback,
press multiple times to increase fast forward
speed
27. Search Button – Displays search menu in DVD
playback
28. Subtitle Button – Activates subtitles in DVD or
supported file playback. Press multiple times to
cycle through available subtitles
29. Repeat Button – Repeats DVD, CD, or file play-
back
30. A-B Button – Repeats a user defined segment of
CD or DVD playback. Press once to mark the
beginning of the playback, press again to mark
the end of playback, press a third time to loop
and repeat the segmented playback area.
31. Audio Button – Cycles through the available
audio playback modes including Mono and Stereo
playback.
32. Mute Button – Mutes the LinkTheater’s audio
output. Press once to mute, press again to turn
mute off.
33. Angle Button – In DVD playback press this button
to change DVD disc angle (on multi-angle DVD
discs). In photo playback or slide shows, press the
Angle button to rotate the photos display by 90
degrees.
34. Zoom Button – Zooms the display in a variety of
ways. If video or DVD playback appears as a small
window, use the Zoom button to make the dis-
play fit to screen or operate in full screen mode.
11
Remote Cont ol
Insert the included AAA batteries into
the remote control by sliding the battery
cover off of the remote control
(as shown in the illustration).
Insert both AAA batteries into
the battery sockets the proper
way, following the etched
guide underneath the
battery sockets.
This illustration shows
the angle and distance
maximums for the
remote control. The remote
control must be within a 60 degree
angle of the infrared receiver on
the LinkTheater. The infrared
receiver is located just right of the
LED display.

12
Ha dwa e Diag ams
F ont Panel
LED Display
Rea Panel
Power Button
Eject Button
AOSS Button
External Antenna Connector
Stop Button
Skip Back Button
Skip Forward Button
Play/Pause Button
DVD Drive Display USB 2.0 Port
D4 Connector
S-Video Connector
LAN Port
Digital Audio Connectors
Composite Audio Connector
Composite Video Connector
Component Video Connector
AC Power Connector
Play Mode
Pause Mode
Repeat Mode
Progressive Scan Mode
DVD Playback WMV Playback
CD Playback
MPEG-4 Playback USB Playback Audio Playback
VCD Playback JPEG Playback
Numeric Display

Connecting LinkTheate to the Display
Please follow the illustrations below to connect LinkTheater to the display. There are three methods of
connecting video and three methods of connecting audio. LinkTheater came with a Composite (RCA) cable
that will connect LinkTheater to a display. If you prefer to utilize other connectors, please purchase the
proper cables and install them following the diagrams below. It is important to note that any combination
of audio and video connectors can be used and not all combinations are illustrated below. Please consult
your sound receiver’s and/or your display or television’s user manuals to determine the best set of connectors
to use.
Please begin by connecting the included AC Power cable into the AC In port on the back of LinkTheater.
Then, plug the AC Power cable into a power outlet. If you are using an Ethernet cable to connect your
LinkTheater into your network, then plug the CAT5 Ethernet Cable into the Ethernet port on the back of
LinkTheater.
Setup Using Composite Video:
TV Mode: The default TV Mode will be used when using the composite video connector.
Setup Using S-Video:
NOTE: The included composite cable can be used for this setup, just use the red and white audio connectors only.
The yellow composite video connector can be left unplugged on both the LinkTheater and the display or TV.
TV Mode: The default TV Mode will be used when using the S-Video connector.
13
(Y)(W)(R) (Y) (R)(W)
Included Composite Cable
Video
Connector
Audio
Connector
(W) (R) (W) (R)
Composite Audio Cable
S-Video Cable
Audio
Connector S-Video

Setup Using Component Video:
TV Mode: The default TV Mode will not work when connecting the LinkTheater via Component Video. The
next section will cover how to get your display working with Component Video cables.
Setup Using Digital Audio:
If using an external sound receiver, please connect the appropriate digital cable from LinkTheater to the
sound receiver via a compatible cable. The options will need to be setup in the LinkTheater main option’s
settings to complete the digital audio setup. Please continue reading to the next page to continue setting
up LinkTheater.
14
Composite Audio Cable
Component Video Cable
(R)
(W) (R) (W) (R)
(G) (B) (R) (B) (G)
Component
Video Connector
Audio
Connector
Sound
Receiver
Optical Digital Cable
Coaxial Digital Cable
Coaxial
Optical

Configu ing LinkTheate Settings
Now that LinkTheater is connected to power and your display or TV, you can begin configuring it. Start by
powering on your display or TV, select the right TV input mode (refer to the display or TV’s documentation
to determine this), and press the Power button on the front of LinkTheater or press the ‘POWER’ button on
the remote control. The LED Display should light up immediately and say BUFFALO. If it does not, please
check that LinkTheater is plugged into a working power outlet and that the batteries in the remote control
are good and installed correctly.
Once LinkTheater has turned on, the LED Display will read LOG IN. If you are using Composite Video or S-
Video you should see a picture on your display or TV. If you are using Component Video you will need to
follow the next step.
Component Video Mode:
Press the ‘TV MODE’ button on the remote control followed by the ‘ENTER’ button on the remote control.
The display should appear as ‘Component NTSC’. Press the ‘TV MODE’ button again followed by the ‘ENTER’
button to enter additional modes (480p, 720p, and 1080i). If you cycle too far, LinkTheater may select a
mode that is not compatible with your display or TV. In this case, repeat the ‘TV MODE’ button followed by
the ‘ENTER’ button until the proper display is chosen.
Now that everything is hooked up and operating properly, the
Log In screen will be visible on your display or TV.
Press the ‘SETUP’ button on the remote control to begin
configuring LinkTheater.
There are five setup pages within LinkTheater, use the remote
control’s directional pad to navigate between the five graphical
icons inside the Setup area. Use the ‘ENTER’ button on the
remote control to select one of the five setup pages.
15

Each setup page contains settings for different LinkTheater functionality. Please read through the five setup
page summaries:
Option Settings Menu
Screen Saver – Specify the amount of time required before LinkTheater begins displaying its default screen
saver. Certain displays or TVs can burn-in if the same image is left on for too long. The screen saver helps
protect the display or TV from this burn-in.
Slide show Timer – The default time between slides when running a photo or image slide show off of the
LinkStation, the USB Port, or the DVD Drive.
Dimmer – Specifies how bright the LED Display on the front of LinkTheater should be. There are three
settings (100%, 50%, and OFF). 100% is the brightest display level, while OFF makes the display invisible.
Subtitle – Specify the default subtitle language for LinkTheater. This applies only where applicable subtitles
are available (like DVD or VCD playback). If you do not wish to use subtitles, then select the subtitles to be
Off. If you ever need to quickly enable subtitles, the ‘SUBTITLE’ button on the remote control can quickly
enable or disable subtitles.
Browser Option – Specify whether or not to run the LinkTheater
browser in High-Definition. This setting should typically only be
checked if you are running a TV or Display that is High-Definition
(720p or 1080i). It greatly enhances the way the menus and
browsers look while operating the LinkTheater. After this option
is enabled, LinkTheater will have to be restarted before the
setting takes effect.
NOTE: Some 480p progressive scan displays may benefit from
enabling this option.
Once all of the settings on this page have been applied, press
the ‘Save’ button. You may be prompted to restart LinkTheater;
please do so if prompted.
DVD Settings Menu
VCD PBC – Specifies whether VCD playback control is enabled. In
most cases this setting should be set to ‘On’.
DVD Parental Level – Specifies whether DVD parental control is
activated or not and to what degree. Some DVDs enforce
parental management levels, allowing players to play only DVDs
that meet specific requirements. The settings are as follows:
Off – Do not enforce any parental control
1 – Acceptable for children of all ages (Typically G Rated
Movies)
2-3 – Acceptable for elementary children (Typically PG
Rated Movies)
4-7 – Acceptable for middle school and high school
children (Typically PG13 Rated Movies)
8 – Acceptable for adults (Typically NC-17 and R Rated Movies)
TV Type – Select the aspect ratio that pertains to your TV or display. 16:9 is specified for wide-screen TVs or
displays while 4:3 is a conventional TV or display.
Auto Play – Specifies whether LinkTheater will automatically play DVDs or VCDs upon being inserted into
the DVD Drive. If turned off, you will be required to select the DVD Disc option from the main Log In screen
whenever you want to play a DVD. Additionally, if a DVD or VCD Movie is in the DVD Drive upon
LinkTheater startup, it will automatically begin playing. If this is not desirable operation then turn
Auto Play off.
16

Audio Setting – Specifies whether to use composite audio or digital audio input. If you installed composite
video cables then leave this setting at ‘Stereo Output’. If you used a Coaxial or a Optical digital audio cable
then please select the AC3 5.1 output; this allows for Dolby 5.1 surround sound and DTS surround sound
playback support.
Set Password – Password protect the DVD Parental controls. This prevents an unauthorized user from
changing the DVD Parental controls.
Once all of the settings on this page have been applied, press the ‘Save’ button. You may be prompted to
restart LinkTheater, please do so if prompted.
IP Add ess Settings Menu
This setup page displays your current IP Address setup depending
on your network. By default, DHCP is used to automatically
select an IP Address for you. Some advanced users may want to
specify their own address and can do so by pressing the ‘Switch
to Manual’ button.
Update Settings Menu
This setup page allows you to check for updates to the
LinkTheater firmware and software. Click the ‘Check for
firmware update’ text and you will begin the process of locating
and applying a firmware update. This option requires a network
connection that connects to the Internet. Only apply firmware
updates if you have been told to do so by Buffalo Technology’s
Technical Support or are positive that a firmware update is
required. Updating a firmware on a device improperly can cause
unexpected behavior.
Netwo k Settings Menu
Now Using – Displays whether you are currently using Wired or
Wireless network functionality.
Network – Select Wired or Wireless depending on how you wish
to connect to your network. If you make a change to this field
you will be required to reboot. After you make a change to this
field, immediately press the ‘Save’ button below, allow
LinkTheater to reboot, and then return to this page to continue
your network configuration. If you are using wireless and wish
to install an optional external antenna, please see the section
labeled ‘External Wireless Antenna Installation’.
AOSS – Specifies whether Buffalo Technology’s AOSS will work
on this product. AOSS is a wireless technology and will only work if the network mode is set to Wireless. If
both Wireless and AOSS are on, then the AOSS button on the front of LinkTheater will work. AOSS requires
an AOSS compatible access point or router; it will not work with non-AOSS compatible access points or
routers. Please see the next section labeled ‘Using AOSS’ for more information regarding AOSS.
17

Available – Provides a list of wireless networks available in the area. Only access points or wireless routers
that broadcast SSIDs will be displayed here. Once you select the proper wireless network, press the ‘Select’
button.
SSID – This field displays the SSID that LinkTheater is specified to connect to. SSIDs can be manually
inputted here in the event that they are hidden. The SSID can automatically be filled in by using the
‘Available’ option above.
Connection – Specifies whether to use Infrastructure or Ad-hoc mode. Infrastructure networks are more
common and is the recommended setting.
WEP – Specifies whether WEP encryption is used on the wireless network. If used, please select the proper
input mode from the drop down menu or follow the guide below.
WEP 64 ASCII = 5 digit WEP key
WEP 64 HEX = 13 digit WEP key
WEP 128 ASCII = 10 digit WEP key
WEP 128 HEX = 26 digit WEP key
WEP Key – Manually enter the wireless network’s WEP key if it has one. If it does not have one, then leave
this field blank.
Once all of the settings on this page have been applied, press the ‘Save’ button. You may be prompted to
restart the LinkTheater, please do so if prompted.
Congratulations, the LinkTheater has been fully configured. Press the ‘HOME’ button on the remote control
to return to the Log In screen. You can now begin using your LinkTheater to play multimedia files.
18

Using AOSS
Please skip this section if you do not wish to use AOSS or do not have an AOSS compatible wireless router or
access point.
Using the documentation that came with your AOSS wireless router or access point, press the AOSS button
on your wireless router or access point until the AOSS light begins to flash on that device. Then, press the
AOSS button on the front of LinkTheater until AOSS begins flashing on the LED Display. The AOSS session
may take up to two minutes to complete, once completed, LinkTheater will display a prompt that states the
AOSS process is complete. You will be required to restart LinkTheater before all of the settings apply. If you
receive an error message, please try the process again or contact our free 24x7 Technical Support.
Exte nal Wi eless Antenna Installation
The LinkTheater utilizes two internal diversity antennas for use with the internal 802.11g wireless radio. In
some cases it may be necessary to add a higher gain external antenna. If the signal appears weak between
the LinkTheater and your wireless router or access point, an external antenna can be used to help increase
the range and/or signal quality.
The LinkTheater has an MC Card antenna connector on it. Thus, any antenna with an MC Card connector on
it will work with the LinkTheater. For best fit and finish, Buffalo Technology’s indoor antennas are
recommended. Please visit the Buffalo Technology Web Site (http://www.buffalotech.com) for more
information regarding Buffalo Technology antennas.
Installing an antenna is easy. Follow the documentation that was included with your antenna and plug the
antenna into LinkTheater’s antenna connector which is located on the underside of the unit. The connector
is located underneath where the USB Port resides.
19

Standa d Cont ols and Impo tant Tips
(MUST READ)
Operating the LinkTheater is generally an easy task. However, due to the extensive feature
set, there are some common usage tips that are extremely helpful. Please read through the
list of tips as it will make operating the LinkTheater much easier:
◗At any menu screen, pressing the ‘HOME’ button on the remote control will return
you to the starting Log In page. If you are playing a file of some sort and wish to
return to the Log In page, please press the ‘STOP’ button and then the ‘HOME’
button.
◗The ‘RETURN’ button will typically bring you back to the page you were at previously.
If you accidentally browse to the wrong area, the ‘RETURN’ button will quickly return
you to the originating screen.
◗The ‘REFRESH’ button will immediately refresh all of the data on the current screen.
If multimedia files have been moved, reorganized, or deleted, a quick refresh will
show the changes immediately. Also, on the main Log In screen, the refresh button
will show new computers and devices available to LinkTheater.
◗When playing a video or music file, the ‘MUTE’ button on the remote control will
immediately shut down all audio output from the LinkTheater. Pressing the ‘MUTE’
button once again will un-mute the LinkTheater and resume audio playback at the
original volume level.
◗Due to the differences in video file format sizes, some video file playback may appear
to play in a smaller then usual window. In this event, pressing the ‘ZOOM’ button on
the remote control will cycle through several different enhancing modes. Continue
pressing the ‘ZOOM’ button until the optimal view setting is found.
Remembering these simple tips will help make your LinkTheater experience easier and more
enjoyable. Please return to this page to review these tips once you have completed your
LinkTheater setup.
20
Table of contents
Other Buffalo Media Player manuals

Buffalo
Buffalo LinkTheater PC-4LWAG User manual

Buffalo
Buffalo LinkTheater mini PC-P1LAN User manual

Buffalo
Buffalo LinkTheater LT-V100 User manual

Buffalo
Buffalo LinkTheater mini PC-P1LAN User manual

Buffalo
Buffalo PC-P3LWG User manual

Buffalo
Buffalo LinkTheater P4LWAG User manual

Buffalo
Buffalo LinkTheater LT-H90 User manual

Buffalo
Buffalo PC-P3LWG User manual

Buffalo
Buffalo LinkTheater LT-H90LAN User manual