manuals.online logo
Brands
  1. Home
  2. •
  3. Brands
  4. •
  5. Bulldog Security
  6. •
  7. Remote Starter
  8. •
  9. Bulldog Security DELUXE 200 Installation instructions

Bulldog Security DELUXE 200 Installation instructions

 
 
 
 
WARRANTY
For most vehicles we have a T-Harness available to make your
remote starter installation quicker and easier. To order visit us
online at www.directwholesale.net.
Additional remote transmitters can be purchased through direct
wholesale at www.directwholesale.net.
For a full list of Bulldog ecurity accessories visit our web site at
www.bulldogsecurity.com.
Your Bulldog ecurity remote starter is equipped with an interactive
install CD and installation kit. The kit will consist of a computer
friendly test light, wire ties and a roll of tape. Use only the computer
friendly test light or volt meter when testing and probing wires.
For Technical assistance www.bulldogsecurity.com can provide
a detailed wiring diagram for your vehicle including additional helpful
install tips.
JBS Technologies
225 Technology Way
teubenville Ohio 43952
INSTALLATI N TIPS AND ACCESS RIES
Bulldog Warranty Information
All Bulldog models have a Limited Lifetime Warranty on the
main control module.
All parts excluding the control module have a two year
warranty against defects in workmanship, This includes shock
sensors, remote transmitters and sirens. The control module
will be repaired or replaced at our discretion for up to a 12
month period at no charge. After 12 months a $30.00 fee
will be charged for repair or replacement of the control
module.
Removal and reinstallation charges are not the responsibility
of JB Technologies, LLC the manufacturer of Bulldog ecurity.
Warranty registration must be completed within 7 days of
the original date of purchase. Registration can be mailed in
or performed on line at www.bulldogsecurity.com. JB
Technologies makes no warranty against the theft of a vehicle
or its contents. This warranty only extends to the original
system purchaser in the vehicle it was originally installed in.
Limitation of Remedies
The purchasers remedy is limited to the repair or replacement
of the unit and in no event shall exceed the purchase price.
Incidental, consequential and or indirect damages are expressly
disclaimed. No person or entity is authorized to alter or amend
this limited lifetime warranty.
 
 
INSTALLATION TABLE OF CONTENTS
342
REQUIRED TOOLS ..........................................................................5
INSTALLATION CHECK LIST...........................................................5
TECHNICAL ASSISTANCE ...............................................................6
BEFORE YOU BEGIN .......................................................................6
PRECAUTIONS ............................................................................7-8
USING YOUR TEST PROBE..............................................................8
MAKING WIRING CONNECTIONS ..............................................8-10
COMPONENTS ..............................................................................11
WIRING DIAGRAMS ................................................................11-12
H1 - 6-PIN HEAVY GAUGE WIRING CONNECTIONS..................13-14
H1/1 Violet Wire  Starter Output ..................................................13
H1/2-3 Red Wire  +12V ower Input.............................................14
H1/4 Yellow Wire  Ignition 1 Output..............................................14
H1/5 ink Wire  Ignition 2 Output.................................................14
H1/6 Brown Wire  Accessory Output (Heater /ACC Output) ..............14
H2 - 5-PIN WIRE HARNESS ..........................................................15
H2/1 Red/White Wire  arking Light Relay ower Input ...................15
H2/2 White Wire  arking Light Relay Output .................................15
H2/3 Black Wire  System Ground .................................................15
H2/4 Brown Wire  (-) 200ma Horn Output .....................................15
H2/5 Red Wire  System ower .....................................................15
H3 - BLACK 4-PIN CONNECTOR
FOR TWO-WAY TRANSCEIVER ANTENNA MODULE...........15-16
H4 - 9-PIN BLACK WIRE HARNESS ..........................................16-18
H4/1 Violet/White Wire  Tach Input Connection..............................16
H4/2 Thin Black Wire - (-) Neutral Safety Switch or .........................17
(-) Remote Toggle Switch Input
H4/3 Brown/Red wire  (+)
ositive Safety Shut Down Brake or Handbrake...........................17
H4/4 Grey wire  (-) Negative Safety Shut Down ........................17-18
For Hood in Switch
H4/5 Red/White Wire - (-) 200mA Channel 3 Trunk Output ...............18
H4/6 Brown/Black Wire - (-) 200mA Factory Security Rearm Signal/
Key Sensor Output..................................................................18
Factory Security Rearm Signal Output
Ground Output During Start (Crank)
H4/7 Black/White Wire - (-) 200mA Dome Light Supervision Output...18
D200O/IM 6/05
Engine Starting Engine Running
Your engine is starting Your vehicles engine is
by remote control. running in remote start mode.
Timer Control Start Vibration Mode
Engine will start automatically Remote vibrates when the
the same time the or every 2 system is triggered.
to 3 hours.
Low Battery Driver paging
Your must replace the battery Lost and Found
in the remote control. Someone is paging you
from your vehicle.
LCD REMOTE CONTROL TRANSCEIVER
THE REMOTE LCD ICON DESCRIPTION CHART :
Door Lock Door Unlock
Your vehicle doors are locked. Your vehicle doors are
unlocked.
Remote Transmission In-Range Indicator
You are transmitting the signal The system is within the
to the control unit. remote control range.
 
 
TABLE OF CONTENTS
4 41
H4/8 Lt. Green/Black Wire - (-) 200mA Programmable utput ..........19
Dual Pulse Door Unlock utput
Factory Security Disarm Signal utput
Start Status (By-pass Control) utput
H4/9 Blue/Black Wire - (-) 200mA Ignition 3 Control utput .............19
GM VATS Key verride
H6 2-Pin Blue Connector for the Program Switch .........................18
6-P N DOOR LOCK CONNECT ONS ...........................................20-21
PROGRAMM NG.......................................................................22-29
Programming Transmitter .............................................................22
Feature I Programming .................................................................22-23
Feature II Programming .....................................................................24
Feature III Programming ....................................................................25
Feature IV Programming ....................................................................26
Engine Checking Tach/RPM Learning ...............................................26-27
Check Level Programming ..................................................................27
Engine Checking Voltage ....................................................................27
Start Timer Programming ...................................................................28
Return to Factory Default Setting.........................................................28
Shutdown Diagnostics........................................................................29
TEST NG YOUR NSTALLAT ON .....................................................30-34
Caution............................................................................................30
Neutral Start Safety Test ....................................................................30
Mechanical Neutral Safety Switch Considerations ...................................31
Park/Neutral ECM Input .................................................................31-32
Key In Sensor Circuits........................................................................32
Maintaining Factory Circuits ...........................................................32-34
OWNERS WARN NG ..........................................................................35
REMOTE TRANSM TTER OPERAT ON .............................................36-38
A. Transmitter Functions.....................................................................36
B. Lock Doors ...................................................................................36
C. Unlock Doors ................................................................................36
D. Car Locator ..................................................................................37
E. Panic Function...............................................................................37
F. Dome Light Convenience Delay and Supervision .................................37
G. Ignition Controlled Door Lock and Unlock .........................................37
H. Trunk Release (Channel 3) utput ...................................................37
I. Driver Paging.................................................................................37
J. Vibration/Melody Mode ...................................................................38
K. Screen Lamp n............................................................................38
OPERAT ON
LCD REMOTE TRANSCE VER:
Note: If the system is interfered with stronger radio frequency around,
sources of high voltage electric power or such or if there are obstacles like
tall buildings and so on, the transmission range may get shorter as the
system uses low out put power.
BATTERY REPLACEMENT:
A 1.5V type AAA Alkaline battery powers the Remote Transceiver. When the
battery weakens a icon shall be displayed on the LCD screen.
G. D SABL NG THE REMOTE START SYSTEM: (If installed)
This feature allows your systems remote start unit to be temporarily
disabled to prevent the vehicle from being remote started accidentally.
This feature is useful if the vehicle is being serviced or stored in an
enclosed area. To disable the remote start, move the optional remote
start enable toggle switch to the FF position.
 
 
5
REQUIRED TOOLS
40
Unless your remote starter includes a Bonus Installation Kit you will need the
following items: a sharp knife, electrical tape and a computer-friendly test light
A 5/16 inch drill bit may be needed to install the hood pin switch If the bottom
of your dash on the drivers side will come off, you must remove it If this is the
case a screwdriver or a wrench may be needed
INSTALLATION CHECK LIST
 Read the manual
 Watch the video
 Verify that you have all the parts listed in the manual
 Obtain the correct wiring chart for you vehicle
 Identify air bag and SRS wires before starting yo r installation.
Check to see if additional parts are needed These items are identified
in your manual and the wiring chart diagram for your vehicle
Possible items to review:
 Anti-theft By-pass  Relays  Diodes
 Transponder Key  EZ-Bus  Resistors
Check for optional parts to make yo r installation easier:
 T-harness  EZ-Bus
3 Rapidly depresses the button The parking light will
flash (3) times The siren or horn chirps (3) times The vehicle is now
programmed to start every 2 or 3 hours
4 Press the brake pedal to stop the vehicle running
Exit the timer start:
Timer start can be exited manually as follows:
1 Make sure the remote start system is not operating the engine
2 Turn the ignition on The LED and parking light will flash (4) times
The horn chirps (4) times
Or
1 Press the button twice to remote start the vehicle As soon as the
vehicle is running and the parking light have turned on or flashing
2 Immediately depress the button then press and hold the button
for (2) seconds The parking light will flash (4) times The siren or
horn chirps (4) times The vehicle is no longer programmed to start
automatically
E. TO TURN OFF THE REMOTE START:
When the engine is running (by remote start), if you want to
stop it,
1 Press button twice on the remote transmitter under
remote start mode
2 Move the optional remote start enable toggle switch to
OFF position (If installed)
3 Press the brake pedal
The vehicle will shut down and turn off the parking light to indicate engine
stopped
F. SHUT-DOWN INPUT FOR REMOTE STARTER:
If any of the following conditions exist while the system is operating, the
engine will not start or will shut down immediately:
1 The hood is opened
2 The brake pedal is pressed
3 Engine is over-revved (Tachometer checking type only)
4 The pre-programmed run time (5 /10 / 20 / 30 minutes) has elapsed
5 Press button twice on the remote transmitter under remote start
mode
6 Move the optional remote start enable toggle switch to OFF position
(If installed)
7 The vehicle refused to start running after (3) unsuccessful attempts
OPERATION
REMOTE START OPERATION 38-41
A To Remote Start Your Vehicle 38-39
B To Operate Your Vehicle While Running on the Remote Start 39
C Pit Stop Feature 39
D Timer Start 39-40
E To Turn Off the Remote Start 40
F Shut Down Input for Remote Starter 40
G Disabling the Remote Start System 41
LCD REMOTE TRANCEIVER 41
REMOTE LCD ICON DESCRIPTIONS 42
WARRANTY 43
TABLE OF CONTENTS
 
 
6 39
It is recommended that a carbon monoxide detector be installed in
the living area near a location where the vehicle may be garaged.
Since there are many different makes and models of vehicles, visit
our website, www.bulldogsecurity.com.
Read this manual thoroughly before starting the installation.
TAC /TAC LESS OPERATION
In most cases the decision to go with tachless mode will save time during the
installation. If your vehicle is hard-starting then you should use tach mode.
MAKE SURE YOU PLACE T E WARNING STICKER UNDER YOUR OOD.
BEFORE YOU BEGIN
This remote system is designed to start your vehicle by sending a command
signal from the remote transmitter. It is important that your installation be done
in a well-ventilated area. It is the responsibility of the owner to ensure
that the remote system is not used to start the vehicle in an undesired
location.
OPERATION
Note: The Remote Start nit will not start the vehicle if any one of the
following conditions exists:
1. The hood is opened.
2. The brake pedal is pressed.
3. Move the optional remote start enable toggle switch to OFF position.
(If installed)
4. The gear selector is in any gear other then PARK or NE TRAL.
B. TO OPERATE T E VE ICLE W ILE RUNNING ON T E REMOTE
START:
To operate the vehicle while the engine is running on the remote starter.
1. Insert the ignition key and turn it to ON (not the crank) position.
2. Press the brake pedal.
Note: If the brake pedal is pressed before the key is in the ON position,
the engine will shut down.
C. PIT STOP FEATURE:
This feature allows the vehicle to remain running after the key has been
removed from the ignition. This feature is useful for occasions when you
wish to exit and lock the vehicle for short periods of time, but would like
to leave the motor running and the climate control on.
1. Before turning off the engine, press the button twice on the transmitter
and the LED indicator will flash (3) times to confirm enter.
2. Turn the ignition key to OFF position. (The engine will stay running.)
3. The engine will run until the pre-programmed time elapsed or shutdown
input is received.
D. TIMER START:
This unit can be programmed to start and run the engine every 2 or 3
hours, the engine will run for the programmed time and then
shut down.
IMPORTANT: Timer Start should be used only in open areas, never start
and run the vehicle in on enclosed space as a garage or carport.
This feature is design for an extreme cold climate usage. The system will
auto start the vehicle every 2 or 3 hours, to prevent engine freezing and
hard to start. A MAXIM M OF SIX CYCLES CAN OCC R.
ENTER:
1. Press the button twice to remote start the vehicle. As
soon as the vehicle is running and the parking light have
turned on or flashing.
2. Immediately depress the button once, within (2)
seconds
If your vehicle has an anti-theft system, you will need an additional
module, Part #791.
Congratulations, you have purchased one of the most advanced remote starter
systems ever made. Your new remote starter is a technological breakthrough
utilizing the most advanced, state of the art technology and components. The
dependability and variety of features make Bulldog Security the leader in the
industry. Enjoy your new remote starter for years to come!
TEC NICAL ASSISTANCE
Should you need help. First check our website at www.bulldogsecurity.com
or call our toll-free Tech Support otline at 800-878-8007.
 
 
738
PRECAUTIONS
DO NOT mount the control module until all connections have been made
and tested.
PLEASE USE CAUTION: DO NOT CUT, PROBE OR DISCONNECT THE
VEHICLES AIRBAG WIRES. THESE WIRES WILL ALMOST ALWAYS
BE INSIDE A BRIGHT YELLOW TUBE LOCATED NEAR THE STEERING
COLUMN HARNESS.
WARNING! On vehicles with air bags or supplemental restraint systems
(SRS) you may notice a bright Y LLOW or R D tube with small wires in
it marked SRS underneath the steering column near the key cylinder. DO
NOT tamper or unplug these for any reason to prevent costly damages to
your vehicle or personal injury. Tampering may cause unintended deployment
of the air bags.
!
DO NOT leave the interior or exterior lights on for an extended period of time
as it may cause battery drain. Remove the dome light fuse from the fuse box.
NOTE: Starter systems do not work well with a partially discharged battery.
OPERATION
J. VIBRATION/MELODY MODE:
It is useful when you are in a noisy place.The remote
control in this mode, vibrates it if your security system is
triggered.
1. Press button first, within (5) seconds, press the
button to select the mode of vibration or melody, the
icon will displayed on the LCD screen to show the LCD remote
transceiver is on vibration mode.
2. To exit programming mode, take no action for (5) seconds. The
remote control will generate two long beeps to indicate programming
mode has been exited.
K. SCREEN LAMP ON:
Press the button once; the LCD screen lamp will turns on for (5) seconds.
REMOTE START OPERATION:
A. TO REMOTE START THE VEHICLE:
When you want to start your vehicle,
1. Press button twice on the transmitter
2. The parking light will activate to indicate the remote start
received the signal. (A melody sounding from your Remote
LCD transceiver and   icon will flashes on the LCD
screen to confirm the remote start was activated.)
3. The engine will start in approximately (5) seconds.
4. Once the engine is running, after a couple of seconds the
parking light will turn on again and climate controls will
activate and adjust the vehicles interior temperature to
your preset setting. (While the vehicle is running, the  
icon and the minutes digit on the LCD screen will flash
and it will indicate count down timer based on the 5, 10,
20 or 30 minute run time set up by your installation
center.)
5. The vehicle will run for 5 to 30 minute cycle and
automatically shut down. (When the unit shuts off the
count down timer will turn off and the transmitter will play a melody.)
Act vate
Remote
Start
Eng ne
Runn ng
Th s system s des gned for use w th veh cles equ pped w th fuel-
njected, gasol ne eng nes and automat c transm ss ons only.
SAFETY FIRST!
Never start your vehicle if it is indoors. A periodic safety check is recommended
to ensure that your system is in proper working order.
DO NOT use mechanical wiring connections, such as crimp or snap together
taps. DO NOT USE mechanical wiring connections such as a crimp or snap-
together taps except on wires that are pre-installed from the factory. For wires
that do not have the snap connectors pre-installed from the factory, wires must
be connected using the illustrations under the Making Connections section of
this manual. Failure to properly connect the wires can result in damage to your
system or your vehicle.
DO NOT disconnect the battery if the vehicle has an anti-theft-coded radio or
is equipped with an airbag. Doing so may cause a warning light to be displayed
and may require a trip to the dealer to be corrected.
 
 
8 37
To operate your test probe, connect the BLACK clip to a good chassis
ground. Then connect the RED clip to a good 12V (+) positive source.
If the test probe is connected correctly, both the GREE and the RED lights
will be dimly illuminated. If a (+) positive source is probed, the RED light
will glow bright and the GREE light will go out. If a (-) negative source
is probed, the GREE light will glow bright and the RED light will go out.
USI G YOUR TEST PROBE
1. Strip back two inches of insulation on the wire from the remote
starter.
TTwo Inches of Bare Wirewo Inches of Bare Wire
MAKI G WIRI G CO ECTIO S
OPERATIO
PRECAUTIO S
If your ehicle is equipped with air bags or a supplemental restraint systems
(SRS) and you CAN NOT identify the air bag wires, STOP THE INSTALLATION
IMMEDIATELY and ha e a professional identify the air bag wires before continuing
the installation.
WAR I G! GE ERAL MOTORS
REAR WHEEL DRIVE VEHICLES A D DODGE DAKOTAS
All General Motors rear wheel dri e ehicles and Dodge Dakotas built prior
to 1996 do not ha e an electrical Neutral Safety switch. They ha e a
mechanical neutral safety switch. The mechanical neutral safety switch
operates as follows.
a)The key will only turn to start position when the gear selector is in park
or neutral.
b)The key can only be remo ed from the ignition switch when the gear
selector is in the park position.
You must use special precautions with this system.
D. CAR LOCATOR
Press the button twice to acti e car locator function. The horn will chirp
(6) times. The parking light will flash (12) times, for you to easily locate
your car.
E. PA IC FU CTIO :
The transmitter can be used as a remote panic switch to manually trigger
the alarm in case emergency.
1. Press and hold the button for (3) seconds. The horn (if installed)
will immediately sound.
2. During panic mode, the normal function of this transmitter button
will be suspended.
3. To stop the alarm, press and hold button on the transmitter again
for (3) seconds.
4. If the button is not pressed, the alarm will automatically stop after
30 seconds.
F. DOME LIGHT CO VE IE CE DELAY & SUPERVISIO
Upon disarming, the interior light will remain on for 30 seconds.
Note: Turning on the ignition switch or locking the ehicles door will turn
off the dome light.
G. IG ITIO CO TROL DOOR LOCK/U LOCK..
If the ehicles door locks ha e been interfaced to the system, the system
will automatically lock the ehicle's doors when the ignition is turned
ON and /or unlock the ehicles doors when the ignition is turned OFF.
H. TRU K RELEASE (CHA EL 3) OUTPUT.
Press and hold button on the transmitter for (2) seconds to operate
the trunk release or other electric de ices.
I. DRIVER PAGI G / LOST & FOU D
(For two-way transcei er operation only)
It is useful in the e ent that someone wants to page the
dri er of the parked ehicle or someone cannot find his LCD
remote control transcei er. With the ignition switch off,
press and hold the alet switch for (2) seconds to page the
dri er, one chirp sound shall be emitted from the ehicle and
the paging melody sound continues sounding from the Remote LCD
transcei er and   indication flashes on the LCD screen.
 
 
936
OPERATION
B.LOCK DOORS:
1. Press button on the transmitter.
2. The horn will chirp once and parking light will flash once
indicating that the vehicles door is locking.
SILENT LOCKING / UNLOCKING DOORS: Press the transmitter
and buttons at the same time will ock or Unlock the vehicles
doors, No chirp sound will be heard, ock or Unlock confirmation
will be through the vehicles parking lights only.
C. UNLOCK DOORS:
1. Press button on the transmitter.
2. The horn will chirp twice and parking light flash twice to
indicating that the vehicles door is unlocking and the dome
light will turn on for 30 seconds.
PATHWAY ILLUMINATION: This feature turns the parking
light ON for 30 seconds upon a unlock signal and for 10 seconds
upon the lock signal.
TWO STEPS DOOR UNLOCK: This feature will independently
unlock the drivers door only. Pushing the button a second
time within 3 seconds will unlock the other doors.
A. REMOTE TRANSMITTER OPERATION:
Transmitt r
Button Syst m Function or F atur R mark
ock Doors
-
Car ocator Pr ss twic within 3 s c.
(3 s c.) Panic Pr ss and hold for 3 s c.
+
Silent ocking / Unlocking Ign. in th "Off" position.
Unlock Doors
- Two Steps Door Unlock Pr ss twic within 3 s c.
(2 s c.)
Trunk Release (Channel 3) Pr ss and hold for 2 s c.
-
Activate or Turn Off The Remote Start Pr ss twic within 3 s c.
- Melody / Vibration Mode
CD Screen amp Turns on for 5 Seconds
3. Separate the vehicle wire(s) as shown. Make the separation large enough
to fit the other wire through.
2. Strip back one inch of insulation on the wire you need to connect to.
One Inch of Bare WireOne Inch of Bare Wire
4. Insert the wire(s) from the starter through the hole as shown. If two or more
wires are inserted, wrap them in opposite directions.
5. Wrap the wire around one side then the other and finally around itself as
shown.
11
22
33
6. Use electrical tape to wrap. Be sure to cover the wire about two inches on
either side of the connection. First pull the wire that you have just connected
along side the wire you connected to, tape and wire tie them together. Use
this method for all connections.
CAUTION: All wir s must b wrapp d with tap and wir ti d.
Wire Wire TTieie
Electrical Electrical TTapeape
MAKING END TO END CONNECTIONS
Us this m thod ONLY wh n conn cting two s parat wir s nd
to nd.
MAKING WIRING CONNECTIONS
 
 
3510
IMPORTANT OWNERS NOTICE
WARNINGS:
As with any product that performs automatic functions, there are certain
safety precautions that you must
practice and be aware of.
1. Keep the transmitter out of childrens reach.
2. Do not lea e anyone in the ehicle while running on remote control.
3. Alert ser icing personnel that the ehicle can be started automatically.
4. Do not start the ehicle by remote while its in an enclosed area or
garage.
5. Always apply the parking brake and lock the ehicle as you exit the
ehicle.
6. The ehicle windows must be rolled up.
7. Should the unit malfunction, disconnect the fuse until the problem is
corrected.
8. The use and operations of this system is the sole responsibility of the
operator.
9. Some areas may ha e local ordinances that prohibit lea ing a ehicle
running on public streets.
10. Do not start the ehicle by remote while the standard transmission
ehicle is parked on a steep road.
2. Twist upper wires together, twist lower wires together as shown.
4. Use electrical tape to wrap, be sure to co er about 2 inches on either side
of connection. Secure with wire ties as shown.
Wire Wire TTieie
Electrical Electrical TTapeape
Wire Wire TTieie
3. Lay upper twisted pair of wires o er right wire as shown. Bring lower twisted
pair of wires up to meet the left wire as shown.
1. When tying two separate wires together at their ends, strip back 1 of insulation
on both wires and separate the strands of wire as shown below.
MAKING WIRING CONNECTIONS
 
 
11
34
TESTING YOUR INSTALLATION
Note: A second 1N4003 series diode may be required to maintain the
integrity of the hood open, shut down circuit. If this is the case, it must
be installed as shown in the diagram above. The anode Non Stripped) side
must be connected to the GREY (H4/4) wire of the remote start unit. The
cathode Striped) side must be connected to the hood pin switch.
To connect to t e key in sensor circuit as s own for met od 2:
A. Locate the control wire that connects the drivers door pin switch to the
key in sensor switch.
B. Cut this wire and connect the ignition cylinder side to chassis ground.
C. Locate the key in sensor switch wire that connects the chime module to
the ignition cylinder.
D. Cut this wire and connect the ignition cylinder side to the Remote Start
Negative Safety Shut down wire GREY (H4/4), using an 1N4003 series
diode as shown above.
Note: A second 4003 series diode may be required to maintain the
integrity of the hood open, shut down circuit. If this is the case, it must be
installed as shown in the diagram above. The anode Non-striped) side must
be connected to the GREY (H4/4) wire of the remote start unit. The cathode
Striped) side must be connected to the hood pin switch.
AFTER THE CONNECTION OF THE NEUTRAL START SAFETY WIRE AS
INDICATED IN ANY OF THE PREVIOUS ALTERNATE CONFIGURATIONS,
THIS CIRCUIT MUST BE TESTED FOR OPERATION.
Retest by following the steps outlined in the NEUTRAL START SAFETY TEST
shown in this manual.
GREY
METHOD 2
WIRING DIAGRAM
COMPONENTS
 1 - Main Control Model
 1 - 4-button 2-way LCD
Remote Transmitters
 1 - Antenna
 1 - Pin Switch
 1 - 6-Pin Harness
 1 - 5-Pin Harness
 1 - 9-Pin harness
 1 - 2-Pin Valet Switch
 1 - 4-Pin Antenna Harness
 1 - 6-Pin Door Lock Harness
 1 - Installation Kit
 1 - Installation and Owners Manual
 1 - Instructional DVD
 
 
12 33
TESTING YOUR INSTALLATION
Method 2 will allow the safety required for the remote start unit and prevent
the vehicle from starting while in any gear other than Park or Neutral while
the key is in the ignition cylinder however, the original factory key in chime
module will not alert the owner that the key has been left in the ignition
switch. n addition, this may also affect other warning tones such as the
light on reminder.
Note:
Additional information concerning key in sensor methods 1 and 2 are listed
below and should be reviewed before considering either alternative.
To connect to the key in sensor as shown in method :
A. Locate the control wire that connects the drivers door pin switch to the
key in sensor switch.
B. Cut this wire and connect the ignition cylinder side to a chassis ground.
C. Locate the key in sensor switch wire that connects the chime module
to the ignition cylinder.
D. Cut this wire and connect the ignition cylinder side to terminal 30 of a
P&B VF45F11 or equivalent relay.
E. Connect the cathode (striped) side of an N4003 series diode to this
same wire, and connect the (non striped) side to the negative safely
input wire (GREY) (H4/4) of the remote start unit.
F. Connect terminal 86 of the relay to a fused + 12 volt constant battery
source.
G. Connect terminal 87 of the relay to the chime module side of the
previously cut wire in step D.
H. Connect terminal 85 of the relay to the drivers door side of the pin
switch wire previously cut in step B.
GREY
METHOD
WIRING HARNESSES
Keep all wiring away from moving engine parts, exhaust pipes and high-
tension cable. Tape wires that pass through holes on the firewall to prevent
fraying. Watch out for sharp edges that may damage wires and cause
short circuits.
CAUTION: Do not connect the wire harness to the control
module until all wiring to vehicle is complete.
 
 
13
32
NOTE: If the optional remote starter enable toggle switch is installed,
connect the one side of the switch to this reference wire the other side of
to the THIN BLACK Neutral Safety Switch wire (H4/2) of the remote start
unit. The reference diagram below shows a typical G B Body EC reference
wire and how to connect it to the remote start unit.
TESTING YOUR INSTALLATION
THIN BLACK
KEY IN SENSOR CIRCUITS:
If the vehicle you are working on does not have or you cannot locate the
EC reference wire, there are two alternatives available. Although not
preferred, the vehicle Key In Sensor may be reconfigured to allow a margin
of safety and will prevent the vehicle with a echanical Neutral Start Switch
from starting in gear.
WE ADVISE THAT YOU MAINTAIN THE FACTORY CIRCUIT WHENEVER
POSSIBLE. The following two circuits may be used only if the above circuit
is not available.
NOTE: When completing an installation using either of the following key in
sensor circuits, if the operator inserts the ignition key while the vehicle is
running under the control of the Remote Start, the vehicle will shut down.
This must be explained to the operator as it is in contrast to the normal
operation of a vehicle utilizing an electrical neutral start switch and is
inconsistent with the operators manual.
Additional information concerning Key in Sensor methods 1 and 2 are listed
below and should be reviewed before considering either alternative.
Me hod 1 will allow the safety required for the remote start unit and prevent
the vehicle from starting while in any gear other than Park or Neutral while
the key is in the ignition cylinder however, if the key is left in the ignition
switch and the door is left opened, the added relay will be energized causing
a 150mA drain on the battery.
WIRING CONNECTIONS
H1: 6-PIN HEAVY GAUGE WIRING CONNECTIONS:
Remember that the system duplicates the functions of the ignition key
switch! Below, we will explain the three basic functions of the ignition switch.
Since this installation will require analysis of the ignition switch functions,
we recommend making the three connections below at the ignition switch
harness directly.
H1/1 - Viole wire  S ar er Ou pu
Careful consideration for the connection of this wire must be made to
prevent the vehicle from starting while in gear. The connection of the
VIOLET wire will be made to the low current start solenoid wire of the
ignition switch harness. This wire has +12 vol s (red LED on the test
light) when the ignition switch is turned to the START (CRANK) position
only. This wire will not show +12 volts in all other ignition switch positions.
NOTE: This wire must be connected to the vehicle side of the starter cut
relay (when used). For the electrical neutral switch configuration, this
connection must be made between the starter inhibit relay (when used)
and the neutral safety switch as shown in the following diagram.
Failure to connect this wire to the ignition switch side of the neutral safety
switch can result in personal injury and property damage. SEE NEUTRAL
START SAFETY TEST FOR FURTHER DETAILS.
 
 
14 31
TESTING YOUR INSTALLATION
MECHANICAL NEUTRAL SAFETY SWITCH CONSIDERATIONS:
Mechanical neutral safety switch configurations differ slightly in that they
do not offer the same level of safety when installing a remote start device.
Often when the ignition switch is turned off while the gear selector is in any
position other than park or neutral, the mechanical function will not allow
the key to be turned to the start position or be removed from the ignition
cylinder. This configuration prevents mechanical operation while the vehicle
is in gear but offers no consideration for electrical operation. ecause of
this potential problem, this installation requires the additional connection
of a safety wire from the remote start device to the vehicle PARK/NEUTRAL
ECM input or the vehicle key in sensor. This connection will prevent remote
start operation if the key is left in the ignition switch regardless of the gear
selector position.
Understanding the difference between a mechanical and an electrical Neutral
Start Switch will allow you to properly identify the circuit and select the
correct installation method. The connection of the safety wire is required
for all mechanical switch configurations. Failure to make this connection
properly can result in personal injury and property damage. In all installations
it is the responsibility of the installing technician to test the remote start
unit and assure that the vehicle can not start via RF control in any gear
selection other than park or neutral. In both mechanical and electrical
neutral start switch configurations.
PARK/NEUTRAL ECM INPUT:
The Park/Neutral ECM input is the preferred method of installation. This not
only maintains the integrity of the factory circuit, it is also the easiest to
install, provided the vehicle you are working on has this ECM input.
The installation required for this application (shown below), is a slight
reconfiguration of the control switch wiring. Shown is a typical GM Park/Neutral
ECM input circuit. To connect the Remote Start unit to the GM Park/Neutral
ECM input:
1. Locate the Orange/Blac reference wire in the C2 connector found
at the ECM in GM ody vehicles or, locate the equivalent reference
wire in the vehicle you are installing the Remote Start Unit in.
2. Connect the THIN BLACK (H4/2) Neutral Safety Switch wire to this
reference wire. NOTE: If the optional remote starts enable toggle switch
is installed, connect the one side the enable switch to this reference wire
and connect the other side of the enable switch to the THIN BLACK
(H4/2) Neutral Safety Switch wire of the Remote Start unit.
WIRING CONNECTIONS
H1/2, H1/3 - Red wires  +12V Power Input 
Remove the (2) 20A fuses prior to connecting these wires and do not
replace them until the satellite has been plugged into the control module.
These wires are the source of current for all the circuits the relay satellite
will energize. They must be connected to a high current source. Since
the factory supplies (+) 12V to the key switch that is used to operate
the motor, it is recommended that these wires be connected there.
Note: If the factory supplies two separate (+) 12V feeds to the ignition
switch, connect one RED wire of the satellite to each feed at the switch.
H1/4 - Yellow wire  Ignition Output 
Connect the YELLOW wire to the ignition wire from the ignition switch.
The ignition wire should receive "12 volts" when the ignition key is in
the "ON" or RUN and "START" or CRANK position. When the
ignition is turned "OFF", the ignition wire will not show +12 volts. The
YELLOW wire must be connected.
H1/5 - Pin wire  Ignition 2 Output
Some vehicles have (2) ignition wires that must be connected. Connect
the PINK wire to the ignition 2 wire from the ignition switch. The ignition
wire will show "12 volts" when the ignition key is in the "ON" or RUN
and "START" or CRANK position. When the ignition is turned "OFF",
the ignition wire will not show +12 volts. If the PINK wire is not used,
cap the end of the wire.
H1/6 - Brown wire  Accessory Output (Heater /ACC Output) 
Connect the BROWN wire to the accessory wire in the vehicle that powers
the climate control system.
An accessory wire will show + 12 volts when the ignition switch is turned
to the ACCESSORY or ON and RUN positions, and will show 0
Volts when the key is turned to the OFF and START or CRANK
position. There will often be more than one accessory wire in the ignition
harness. The correct accessory wire will power the vehicles climate
control system. Some vehicle may have separate wires for the blower
motor and the air conditioning compressor. In such cases, it will be
necessary to add a relay to power the second accessory wire.
 
 
15
30
TESTING YOUR INSTALLATION:
Caution!! The follow procedure must be performed after the installation
of the Remote Start Device. It is the responsibility of the installin technician
to complete these tests. Failure to test the unit in the followin manner
may result in personal injury, property dama e, or both.
1. Test the BRAKE shutdown circuit: With the vehicle in park (P), start the
vehicle usin the remote transmitter. Once the en ine is runnin , press
the brake pedal. The vehicle should shut down immediately. If the vehicle
continues to run, check the brake circuit BROWN/RED H4/3 wire
connection.
2. Test the HOOD PIN shutdown circuit: Start the vehicle usin the remote
transmitter. Once the en ine is runnin , pull the hood release and raise
the hood. The vehicle should shut down immediately. If the vehicle
continues to run, check the hood pin GREY H 4/4) wire connection.
3. NEUTRAL START SAFETY TEST:
A. Set the vehicle parkin brake.
B. Block the drive wheels to prevent vehicle movement.
C. Sittin in the vehicle, turn the i nition switch to ON or RUN position.
But do not start the en ine.
D. Step on the brake pedal and shift the ear selector into DRIVE (D).
E. Put your foot over the brake pedal but do not press down on it. Be ready
to step on the brake to shut down the Remote Start Device.
F. Start the vehicle usin remote transmitter.
1. If the starter does not en a e, the test is complete.
2. If the starter en a es, immediately step on the brake pedal to shut
down the system, recheck your VIOLET H1/1) wire (starter output
wire) connection. The heavy au e VIOLET H1/1) wire must be
connected to the i nition switch side of the Neutral Start Switch. If
the vehicle you are workin on does not have an Electrical Neutral
Safety Switch, it will be necessary to reconfi ure the Remote Starter
Wirin to accommodate this vehicle. The information concernin the
Mechanical Neutral Safety Switch provided below will help you to
determine if the vehicle you are workin on has this type of safety
switch and will provide alternate wirin methods to accommodate this
situation.
TESTING YOUR INSTALLATION WIRING CONNECTIONS
H2: 5-PIN WIRE HARNESS:
H2/1 - Red/White wire  Parking Light Relay Power Input 
The RED/WHITE wire is the input to the flashin parkin li ht relay.
The connection of the RED/WHITE wire will determine the output
polarity of the flashin parkin li ht relay. If the vehicle you are workin
on has +12volt switched parkin li ht, you dont need connect this wire.
This wire is already connected to +12 volt red wire. If the vehicles
parkin li ht is a switch, cut the RED/WHITE wire and connect the wire
to chassis round.
H2/2 - White wire  Parking Light Relay Output 10A power output)
Connect the WHITE wire to the parkin li ht wire comin from the
headli ht switch. Do not connect the WHITE wire to the dashboard
li htin dimmer switch. (Dama e to the dimmer will result). The limitation
of the WHITE wire is 10 AMP max. Do not exceed this limit or dama e
to the alarm and parkin relay will result.
H2/3 - Black wire  System Ground 
This is the main round connection of the alarm module. Make this
connection to a solid section of the vehicle frame. Do not connect this
wire to any existin round wires supplied by the factory wire loom,
make the connection to the vehicle's frame directly.
H2/4 - Brown wire  -) 200mA Horn Output 
This wire is provided to use the existin vehicle's horn as the keyless
entry system's optional's warnin audible device. It's a transistorized
low current output, and should only be connected to the low current
round output from the vehicle's horn switch.
H2/5 - Red wire  System Power +12V Constant) 
The RED wire supplies power to the system. Connect this wire to a
constant +12 volt source.
H3: BLACK 4-PIN CONNECTOR.  TWO-WAY TRANSCEIVER/ANTENNA
MODULE
The Two-way transceiver/antenna mounts on the location above the
dashboard of the vehicle for best reception. We su est you mount it on
the lower left or upper left-hand side of windshield.
Warning! Do not mount in such a manner that it obstructs the drivers
view.
- Remove the protective tape backin .
- Carefully ali n the two-way transceiver/antenna and apply to windshield.
 
 
16 29
3. Press and hold the and buttons at the same time on the transmitter
for 5 seconds, there will be a confirmation of (6) chirps with (3) long
chirps and the ED turns On for (2) seconds to confirm the system
Feature Programming all returns to factory default setting.
PROGRAMMING
SHUTDOWN DIAGNOSTICS:
The unit has the ability to report the cause of the last shutdown of the
remote start system.
1. Turn the Ignition switch to ON position.
2. Press the button on the transmitter.
3. The ED will now report the last system shutdown by flashing for (1)
minute in the following grouped patterns:
LED
Flashes Shutdo n Mode
1 (-) Safety Shutdown 1.Close the Hood
Input (Hood) 2.Check GREY wire connection
2 (+) Safety Shutdown input 1. Check BROWN/RED wire connection
(Brake) or Neutral Safety 3. Move the Enable Toggle Switch to
Switch input fail ON position. (If installed.)
4. Move the gear selector to PARK/
NEUTRA  position.
5. Check THIN B ACK wire connection.
3 No RPM (Engine Checking Check VIO ET/WHITE wire connection
TACH) or Hi Voltage. (Engine Program the CHECK EVE  from
Checking Voltage.) Hi Check evel to  ow Check evel
5 Over-rev
6 System timed out
7 Transmitter
8 Tach Signal has not Re-learning the RPM
been learned (Feature IV  2 )
WIRING CONNECTIONS
- Route the black connector wire behind the trim and connect to the two-
way transceiver/antenna.
- Connect the other end to the control module.
- Special considerations must be made for windshield glass as some
newer vehicles utilize a metallic shielded window glass that will inhibit
or restrict RF reception. In these vehicles, route the two way
transceiver/antenna module away from metallic shielded window glass
as far as possible.
H4: 9-PIN WIRE CONNECTORS:
H4/1 - Violet / White ire  Tach. Input Connection 
Note: You should connect this wire if you program the Feature IV  2
to Engine Checking TACH otherwise do not connect this wire and tape
the end. Note: No connection of this ire is required, if you use
the voltage checking type mode.
This input provides the remote start system with information about the
engines revolutions per minute (RPM). It can be connected to the negative
side of the coil in vehicle with conventional coils. In multi-coil and high
energy ignition system locating a proper signal may be more difficult.
Once connected, test the a tachometer wire, a multi-meter capable of
testing AC voltage must be used. The tach wire will show between 1V
and 6V AC at idle, and will increase as engine RPM increases. In multi-
coil ignition system, the system can learn an individual coil wire. Individual
coil wires in a multi-coil ignition system will register lower amounts of
AC voltage. Also, if necessary, the system can use a fuel injector control
wire for engine speed sensing. Common locations for a tach wire are the
ignition coils itself, the back of the gauges, engine computers, and
automatic transmission computers.
IMPORTANT! Do not test tach ires ith a test light or logic probe.
The vehicle ill be damaged.
How to find a tach wire with your multi-meter:
1. Set the ACV or AC voltage (12V or 20V is fine.)
2. Attach the (-) probe of the meter to chassis ground.
3. Start and run the vehicle.
4. Probe the wire you suspect of being the tach wire with the red
probe of the meter.
5. If this is the correct wire the meter will read between 1V and 6V.
IMPORTANT NOTE: You must program the Tach Signal before
trying to remote start.
 
 
1728
PROGRAMMING
START TIMER PROGRAMMING: (TEST and ADJUST)
1. Press the button twice on the transmitter to start the vehicle.
2. If everything goes well: Wait for 15 seconds:
a. If the engine is still running.
I. Press the button twice on the transmitter to sto the engine
from running. You have com leted this rogramming
successfully.
II. Press button on the transmitter to exit the rogram mode. There
will be (3) long chir s and (3) arking light flashes for confirmation.
b. If the engine shut down after the vehicle was started.
I. Press the button twice on the transmitter to remotely turn off
the ignition.
II. Press button on the transmitter to set Check Level to LOW
osition. (2) LED flashes, (2) chir s to confirm this setting
III. Re eat the ste 1  2.
3. If the crank time is too long, (Engine already successfully running, while
starter remains engaged):
a. Press the button twice on the transmitter to sto the engine from
running.
b. Press button on the transmitter to set ro er Start Timer. The
chir and LED ause will confirm that you have entered this mode.
(Decrease Start Timer as necessary.)
c. Re eat the ste 1  4.
4. If the crank time is too short, (Engine is not running, starter did not stay
engaged long enough):
a. Press the button twice on the transmitter to sto engine running.
b. Press button on the transmitter to set ro er Start Timer. The
chir and LED ause will confirm this enters. (Increase Start Timer
is necessary.)
c. Re eat the ste 1  4.
RETURN TO FACTORY DEFAULT SETTING:
1. Turn the ignition ON then OFF (3) TIMES and stay in OFF
osition.
2. Push the Program switch (12) times and hold in on the 12th ush until
(6) chir s with a long chir is heard then release the Program switch.
You are now in the Return To Factory Default Setting rogramming
mode.
WIRING CONNECTIONS
This wire rovides an instant shutdown for
the remote start, whenever it receives
+1 volts. If the brake lights switch in the
vehicle switches +1 volts to the brake light circuit,
connect this wire to the out ut side of the brake
switch. This will allow the remote start to shut
down if an attem t is made to o erate the vehicle without
the key while running under the control of the remote start. In most vehicles,
in order to shift gear, the brake edal must be ressed. The brake in ut will
in turn cause the remote start unit to shut off. (See diagram.)
2.If needed, This wire will connect to the PARK/NEUTRAL switch
in the vehicle. (See the TESTING YOUR INSTALLATION GUIDE)
IMPORTANT NOTE: Directly connect the THIN BLACK wire to
the GROUND when this wire is not used.
H4/3 - Brown / Red wire  (+) Positive Safety Shut Down For Brake
H4/ - Thin Black wire  (-) Neutral Safety Switch or (-)
Remote Toggle Switch Input 
When the THIN BLACK wire is grounded, the remote start unit
is o erable. When this wire is o en from ground, the remote start
is disabled.
1. The o tional remote start toggle switch can be added on to
tem orarily disable the Remote Start Device, it can revent the
vehicle from being remote started accidentally. This feature is
useful if the vehicle is being serviced or stored in an enclosed
area. To disable the remote start, move the remote start enable
toggle switch to the OFF osition. To enable the remote start,
move the o tional remote start enable toggle switch to the
ON osition.
H4/4 - Grey wire  (-) Negative Safety Shut Down For Hood Pin
Switch
This wire rovides an instant shutdown for the remote start, whenever
it is grounded. Connect the wire to the hood in switch reviously installed.
This wire must be routed through a grommet in the firewall and connected
to the hood in switch.
 
 
18 27
PROGRAMMING
4. Within (10) seconds, start the vehicle with the key. (While the engine
is running, the parking lights and ED will flash, If they are not flashing
please check VIOLET/WHITE wire connection.
5. Press and hold the Program switch for (2) seconds until a long chirp and
the ED light will glow constantly on for two seconds. The RPM signal
is now learned.
6. Turns off the ignition switch to stop engine from running.
Once you complete step 6, you can adjust and test Check evel as below:
CRANK TIME ADJUST / HI OR LOW LEVEL CHECK
1. Press the button twice on the transmitter to start the vehicle.
2. If everything goes well:
a. Press the button twice on the transmitter to stop engine running.
You have completed this programming successfully.
b. Press button on the transmitter to exit the program mode. There
will be 3) long chirps and 3) parking light flashes for confirmation.
3. If the crank time is too short, (Engine not running, before the starter
stops cranking):
a. Press the button twice on the transmitter to turn the ignition off.
Press button on the transmitter to set proper Check Level to
Hi position. 1) LED flash and 1) chirp will confirm this setting.
b. Repeat the steps 1  4.
ENGINE CHECK VOLTAGE:
Important Note: The Check evel for most vehicles should be set in Hi
Check evel, while in Engine Check Voltage mode, the Check evel
must be set at HI position before proceeding.
1. Turn the Ignition switch ON/OFF 3) TIMES and leave in the OFF
position.
2. Push the Program switch (8) times and hold in on the 8th push until
(4) chirps with a long chirp is heard then release the Program switch.
3. Press the transmitter and buttons at the same time to set the Engine
Check Voltage. (1) ED flash, (1) chirp to confirm this setting
Once you complete step 3, you can adjust and test Start Timer
as below:
WIRING CONNECTIONS
This wire provides an instant
shutdown for the remote start,
whenever it is grounded. Connect
the wire to the hood pin switch
previously installed. This wire must
be routed though a grommet in the
firewall and connected to the hood
pin switch. If the pin switch is to
be used with an alarm system,
connect this wire with a diode.
H4/5 - Red / White wire  -) 200ma Channel 3 Trunk) Output 
This will become a 1 second pulse ground by activateing channel 3 on
transmitter for (2) seconds. The current capacity of this wire is 200 mA.
This feature allows you to remote control trunk release or other electric
device.
H4/6 - Brown / Black wire  -) 200mA Factory Security Rearm
Signal / Key Sensor Output 
Factory Security Rearm Signal Output Factory default setting.)
This output is programmable. If programmed it can rearm a factory
installed security system. This wire will supply a pulse whenever the
remote start times out or is shut down using the transmitter and remote
door locking..
Ground Output During Start Crank)
This wire will provide a 200mA ground output while the starter output of
the remote start unit is active. This output can be used to activate the
Crank ow/Bulb Test wire found in some GM vehicles. This wire is also
referred to as the ECM wake up wire in some vehicles.
H6 2-PIN BLUE CONNECTOR FOR THE PROGRAM SWITCH:
Select a mounting location for the switch that is easily accessible to the
driver of the vehicle. The switch does not have to be concealed. however,
concealing the switch is always recommended. Route the program switch
wires to the control module.
H4/7 - Black/White wire  -) 200mA Dome Light Supervision Output
This wire becomes grounded when the dome light controls circuit is active.
The current capacity of this wire is 200mA. This wire can control the
operation of the interior lights. An optional 10 Amp relay can be used for
systems which draw more than 200mA and/or positive voltage systems
interior lights operation. Upon disarming, the interior lights will remain
on for 30 seconds.
 
 
1926
PROGRAMMING
FEATURE IV PRORAMMING:
1. Turn the Ignition 'switch ON/OFF (3) TIMES and leave in the OFF
position.
2. Push the Program switch (8) times and hold in on the 8th push until ( )
chirps with a long chirp is heard then release the Program switch. You
are now in the Start feature IV programming mode.
3. Press and release the transmitter button that corresponds to the feature
you desire to program.
FEATURE CHART #IV
One Chi p with
P ess One LED Pulse
T ansmitte Facto y Default Two Chi ps with
Th ee Chi ps with
Fou Chi ps with
Button Setting Two LED Pulses
Th ee LED Pulses
Fou LED Pulses
1 Exit the programming mode. (3 long chirps and 3 parking light flashes
to confirm this exit.)
2 +
Engine Checking
Engine Checking
Voltage TACH / RPM
Learning Mode
3 Start Timer: 0.8-second (2 chirps), 1.0-second (3 chirps) 1.2-second
0.6-second ( chirps), 1. -second (5 chirps), 1.6-second (6 chirps),
1.8-second (7 chirps), 2.0-second (8 chirps), 3.0-
second (9 chirps), .0-second (10 chirps.
Hi check level Low check level
Exit: Press the button on the transmitter. (3) long horn chirps and (3)
parking light flashes to confirm exit.
ENGINE CHECKING TACH/RPM LEARNING:
IMPORTANT NOTE: You must p og am the Tach Signal befo e
t ying to emote sta t.
1. Turn the Ignition switch ON/OFF (3) TIMES and leave in the OFF
position.
2. Push the Program switch (8) times and hold in on the 8th push until
( ) chirps with a long chirp is heard then release the Program switch.
3. Press and release the transmitter and
buttons at the same time
the LED will flash twice and the horn will chirp twice to confirm the
system is in RPM Learning mode.
WIRING CONNECTIONS
H4/8 - LT. G een / Black wi e  (-) 200ma P og ammable Output
Dual Pulse Doo Unlock Output  (Facto y default setting)
The dual pulse door unlock feature will work for the most fully electronic
door lock circuits. The vehicle must have an electronic door lock switch
(not the lock knob or key switch), which locks and unlocks all of vehicle's
doors. When wired for this feature, pressing the disarm (or unlock) button
one time will disarm the alarm and unlock the driver's door only. Pressing
the disarm (or unlock) button two times within (3) seconds, will disarm
the alarm and all doors will unlock.
Facto y Secu ity Disa m Signal Output 
This wire is designed to disarm a factory installed security system. This
wire sends a negative (-) 1 seconds pulse upon a remote start and remote
door unlocking. Some factory systems must be disarmed to allow remote
starting. In most cases, this wire may be connected directly to the factory
alarm disarm wire. The correct wire will show negative ground when the
key is used to unlock the doors or trunk. This wire is usually found in the
kick panel area in the wiring harness coming into the car body from the
door.
Sta t Status (Shock Senso By-Pass Cont ol) Output
This wire is designed to by-pass shock sensor module. This wire will supply
an output at all times the remote start is operating plus an additional (3)
seconds after the remote start unit is turned off.
H4/9 - Blue/Black wi e  (-) 200mA Ignition 3 Cont ol Output 
This wire provides a 200mA (-) ground output that becomes active ( )
seconds before the remote start unit initialize, and remains grounded
while running.
Ignition 3 output:
Some newer vehicles use a third
ignition wire which is required to
start and keep the vehicles engine
running. If this is the case, wire an
IGN 3 relay (not supplied) as shown.
Do not connect any vehicle circuits
together, they are isolated for a
reason.
On vehicles that equi e a facto y secu ity bypass, connect the
Blue/Black (H4/9) wi e to the secu ity bypass module.
 
 
20 25
PROGRAMMING
FEATURE #III PROGRAMMING CHART
One Chirp with
Press One LED Pulse
Transmitter Fa tory Default Two Chirps with Three Chirps with Four Chirps with
Button Setting Two LED Pulses Three LED Pulses Four LED Pulses
1 Gasoline N/A N/A N/A
Engine
2 20 minute 30 minute 5 minute 10 minute
run time run time run time run time
3 Factory alarm Without this
disarm with feature
all out ut
channels
4 3 Hour Time 2 Hour Time
Start Start
FEATURE III PRORAMMING:
1. Turn the Ignition 'switch ON/OFF (3) TIMES and leave in the OFF
osition.
2. Push the Program switch (6) times and hold in on the 6th ush until
(3) chir s with a long chir is heard then release the Program switch.
You are now in the feature III rogramming mode.
3. Press and release the transmitter button that corres onds to the feature
you desire to rogram.
Exit: Turn Ignition to ON osition, or leave it for 15 seconds. (3) long
horn chir s and (3) arking light flashes will confirm exit.
WIRING CONNECTIONS
6-PIN DOOR LOCK CONNECTOR:

Other manuals for DELUXE 200

1

Other Bulldog Security Remote Starter manuals

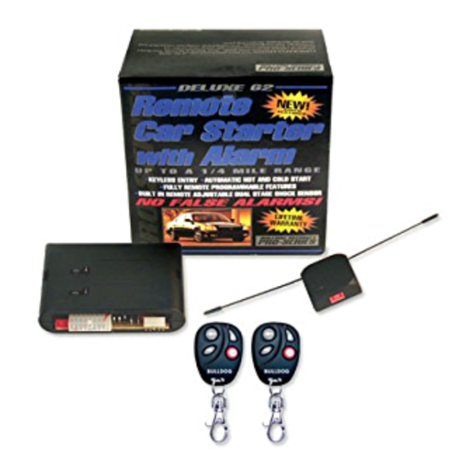
Bulldog Security Deluxe 62 Instruction Manual

Bulldog Security

Bulldog Security Deluxe 62 Instruction Manual

Bulldog Security RS82 User manual

Bulldog Security

Bulldog Security RS82 User manual

Bulldog Security Deluxe 62I Instruction Manual

Bulldog Security

Bulldog Security Deluxe 62I Instruction Manual

Bulldog Security RS1300E Instruction Manual

Bulldog Security

Bulldog Security RS1300E Instruction Manual

Bulldog Security RS202 Instruction Manual

Bulldog Security

Bulldog Security RS202 Instruction Manual

Bulldog Security RS82P User manual

Bulldog Security

Bulldog Security RS82P User manual

Bulldog Security RS1100 User manual

Bulldog Security

Bulldog Security RS1100 User manual

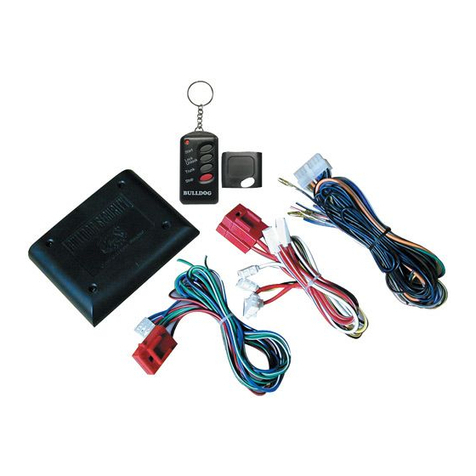
Bulldog Security DELUXE 12 Instruction Manual

Bulldog Security

Bulldog Security DELUXE 12 Instruction Manual

Bulldog Security 1200E Instruction Manual

Bulldog Security

Bulldog Security 1200E Instruction Manual

Bulldog Security RS1200 User manual

Bulldog Security

Bulldog Security RS1200 User manual

Bulldog Security RS1100 Instruction Manual

Bulldog Security

Bulldog Security RS1100 Instruction Manual

Bulldog Security RS102 User manual

Bulldog Security

Bulldog Security RS102 User manual

Bulldog Security RS92 Instruction Manual

Bulldog Security

Bulldog Security RS92 Instruction Manual

Bulldog Security RS102 Instruction Manual

Bulldog Security

Bulldog Security RS102 Instruction Manual

Bulldog Security Deluxe 22I Instruction Manual

Bulldog Security

Bulldog Security Deluxe 22I Instruction Manual

Bulldog Security RS82 Instruction Manual

Bulldog Security

Bulldog Security RS82 Instruction Manual

Bulldog Security DELUXE 12 User manual

Bulldog Security

Bulldog Security DELUXE 12 User manual

Bulldog Security RS1200 User manual

Bulldog Security

Bulldog Security RS1200 User manual

Bulldog Security Deluxe 12I Instruction Manual

Bulldog Security

Bulldog Security Deluxe 12I Instruction Manual

Bulldog Security RS82P User manual

Bulldog Security

Bulldog Security RS82P User manual

Bulldog Security RS79 Instruction Manual

Bulldog Security

Bulldog Security RS79 Instruction Manual

Bulldog Security Remote Starter User manual

Bulldog Security

Bulldog Security Remote Starter User manual

Bulldog Security Deluxe 22I Instruction Manual

Bulldog Security

Bulldog Security Deluxe 22I Instruction Manual

Bulldog Security RS302 Instruction Manual

Bulldog Security

Bulldog Security RS302 Instruction Manual

Popular Remote Starter manuals by other brands

Command Start CS-396i user guide

Command Start

Command Start CS-396i user guide

Troy-Bilt 49MRBESP966 Operator's manual

Troy-Bilt

Troy-Bilt 49MRBESP966 Operator's manual

TriMark e-ASK UM 36 instructions

TriMark

TriMark e-ASK UM 36 instructions

Perfomance Tool W1665 owner's manual

Perfomance Tool

Perfomance Tool W1665 owner's manual

Directed Electronics READY REMOTE 24921 installation guide

Directed Electronics

Directed Electronics READY REMOTE 24921 installation guide

Siemens SIRIUS 3RW40 operating instructions

Siemens

Siemens SIRIUS 3RW40 operating instructions

Code Alarm CA 5051 owner's guide

Code Alarm

Code Alarm CA 5051 owner's guide

iDataLink DBI-AL(DL)-CH5-EN install guide

iDataLink

iDataLink DBI-AL(DL)-CH5-EN install guide

Code Alarm Professional Series CA 4050 owner's guide

Code Alarm

Code Alarm Professional Series CA 4050 owner's guide

Ultra Start 22 SERIES owner's guide

Ultra Start

Ultra Start 22 SERIES owner's guide

Voxx Electronics PurSuit PRO9776Z Quick installation guide

Voxx Electronics

Voxx Electronics PurSuit PRO9776Z Quick installation guide

Würth JUMP PACK ULTRA operating instructions

Würth

Würth JUMP PACK ULTRA operating instructions

Streetwize SWPP14 quick start guide

Streetwize

Streetwize SWPP14 quick start guide

AstroStart RS-113 user manual

AstroStart

AstroStart RS-113 user manual

AutoCommand 20023 installation manual

AutoCommand

AutoCommand 20023 installation manual

Clarion Ungo Pro Security K10 owner's guide

Clarion

Clarion Ungo Pro Security K10 owner's guide

Subaru H011SAJ400 installation instructions

Subaru

Subaru H011SAJ400 installation instructions

VOLTCRAFT VC-CJS71 operating instructions

VOLTCRAFT

VOLTCRAFT VC-CJS71 operating instructions

manuals.online logo
manuals.online logoBrands
  • About & Mission
  • Contact us
  • Privacy Policy
  • Terms and Conditions

Copyright 2025 Manuals.Online. All Rights Reserved.