3
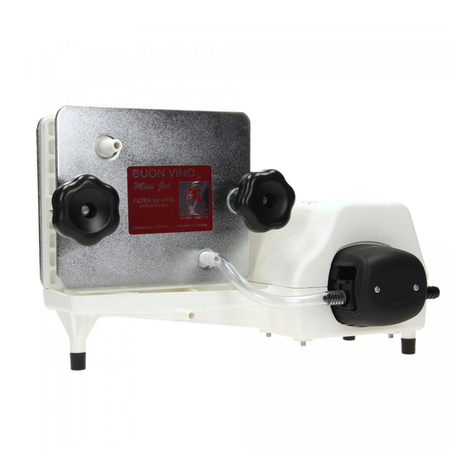
2. Insert the clear hose with the red antisediment tip or intake hose (No. 2 in diagram) to the fitting on
pump marked B in diagram.
3. Detach the 2 white clamps located on the frame next to the motor. This is done by sliding each side in
opposite directions at the point where the clamp joins.
Place one on each of the fittings to ensure against air intake or leakage. A set of pliers may be used to
tighten the clamp around the fitting if you cannot tighten with your fingers. (Note: Once you hear a
snap the clamp has tightened sufficiently.)
4. Loosen the filter body screw, located on the rear (No. 3 in the diagram) and remove the steel concave cover
plate and the first three plastic filtering plates.
The last plate will not come out.
5. Read filter pad description before continuing to be sure which of the three Buon Vino pads you
should use. Also note gauge directions.
6. Remove the pads from the package and place them in a clean container with enough fresh water to
cover the pads and allow them to soak for approximately 1 minute. Make sure the pads are not
bunched together while soaking, allow the water to saturate on both sides of the 3 pads. Grades
cannot be inter-changed i.e., use all #1 pads, or all #2 pads, or all #3 pads.
8. Insert one of the pads, making sure that the coarse side is facing towards the motor (see diagram).
Ensure the holes on the pads are aligned with the holes on the plastic plates.
9. Insert one of the two central plastic plates, making sure that the half moon on the top part of the
plate lines up with the half-moon on the nonremovable plastic plate.
Insert the next pad and the second plastic plate in the same manner, followed by the last pad and the
plastic plate with the support pins. Place the steel concave plate in position last. All 4 half moons
should now be in a straight line, the three pads should all have the coarse side facing the motor and
all the holes should be aligned, with the pads being as square to the plastic filtering plates as possible.
10. Tighten the filter body screw well, in order to ensure an airtight closing.
11. Insert the intake tube (No. 2) into the wine to be filtered and place the drainage tube (No.1) into a
clean container which will house the filtered wine. You are now ready to filter.
12. We have also included a small drip tray located under the filtering area. Ensure that this tray sits
properly in position. If an excess amount of wine is trapped in the filter pads when dismantling, the
tray will not collect all the wine. It has been designed to collect any small amount of leakage that
normally occurs in a plate and frame filtering system.
IMPORTANT: the first liquid to come out of the drainage tube will be the water being pushed out of the
pads. Allow this water to flow out and discard, before placing the drainage tube in the clean housing
container.
It is normal for the bottom of the pads to saturate and drip, and spillage will occur due to entrapment of wine
between the plates when you change the pads. It is advisable to have some kind of container under the filter
body during these times.
12. YOU MUST KEEP THE FILTER PUMP CLEAN. Remove the filter pads, along with the 2 central plastic
plates, end plastic plate and steel concave plate.
Discard filter pads and wash plastic plates with clean water. Dry the steel concave plate. Flush out the pump
with 5 gallons (20 litres) of clean water. This is simply done by placing the intake tube in the water. Start the
pump and allow the water to flow through the pump and out.


