Burmester Ambience 71 User manual

AMBIENCE 71
Operating Manual


Ambience 71 Operating Manual 3
I
A T D
A T O I
2.1 Symbols and text labels used 6
2.2 Meaning of warning symbols and words 6
I S I
3.1 Unpacking 7
3.2 Set-up 7
3.3 Connecting 7
3.4 Start-up 7
3.5 Operation 7
U S U L
4.1 Unpacking 8
4.1.1 Scope of delivery 8
4.1.2 Packaging 8
4.2 The speaker at a glance 9
4.3 Set-up 10
4.3.1 Correct positioning 10
4.3.2 Using spikes 11
C L
5.1 Connection terminals 12
5.2 Connection cables 13
5.3 Requirements for amplifiers 13
5.4 Classic connection 13
5.5 Bi-wiring connection 14
5.6 Bi-amping connection 15
5.6.1 Vertical bi-amping 15
5.6.2 Horizontal bi-amping 16
5.7 Bi-amping with mono power amplifiers 17

4
O L
6.1 Improving your audio — ambience tweeter 18
M, R, C
D
W
T
T D

ABOUT THIS DEVICE
Ambience 71 Operating Manual 5
A T D
The Burmester Ambience 71 owes its lean elegance but elemental bass power to the
partitioning of its diaphragm surface area into four identical, compact, front-firing
woofers. A bass reflex port provides support in the lowest range. Two woofer/mid-
range drivers per loudspeaker guarantee masterful, well-balanced sound reproduction
up to the treble register. A new Air Motion Transformer (AMT) was custom-developed
for the upper range. For many years, the Burmester AMTs have been regarded as a
benchmark for ultimate precision, neutrality, power handling, and dynamics in the high
frequency range.
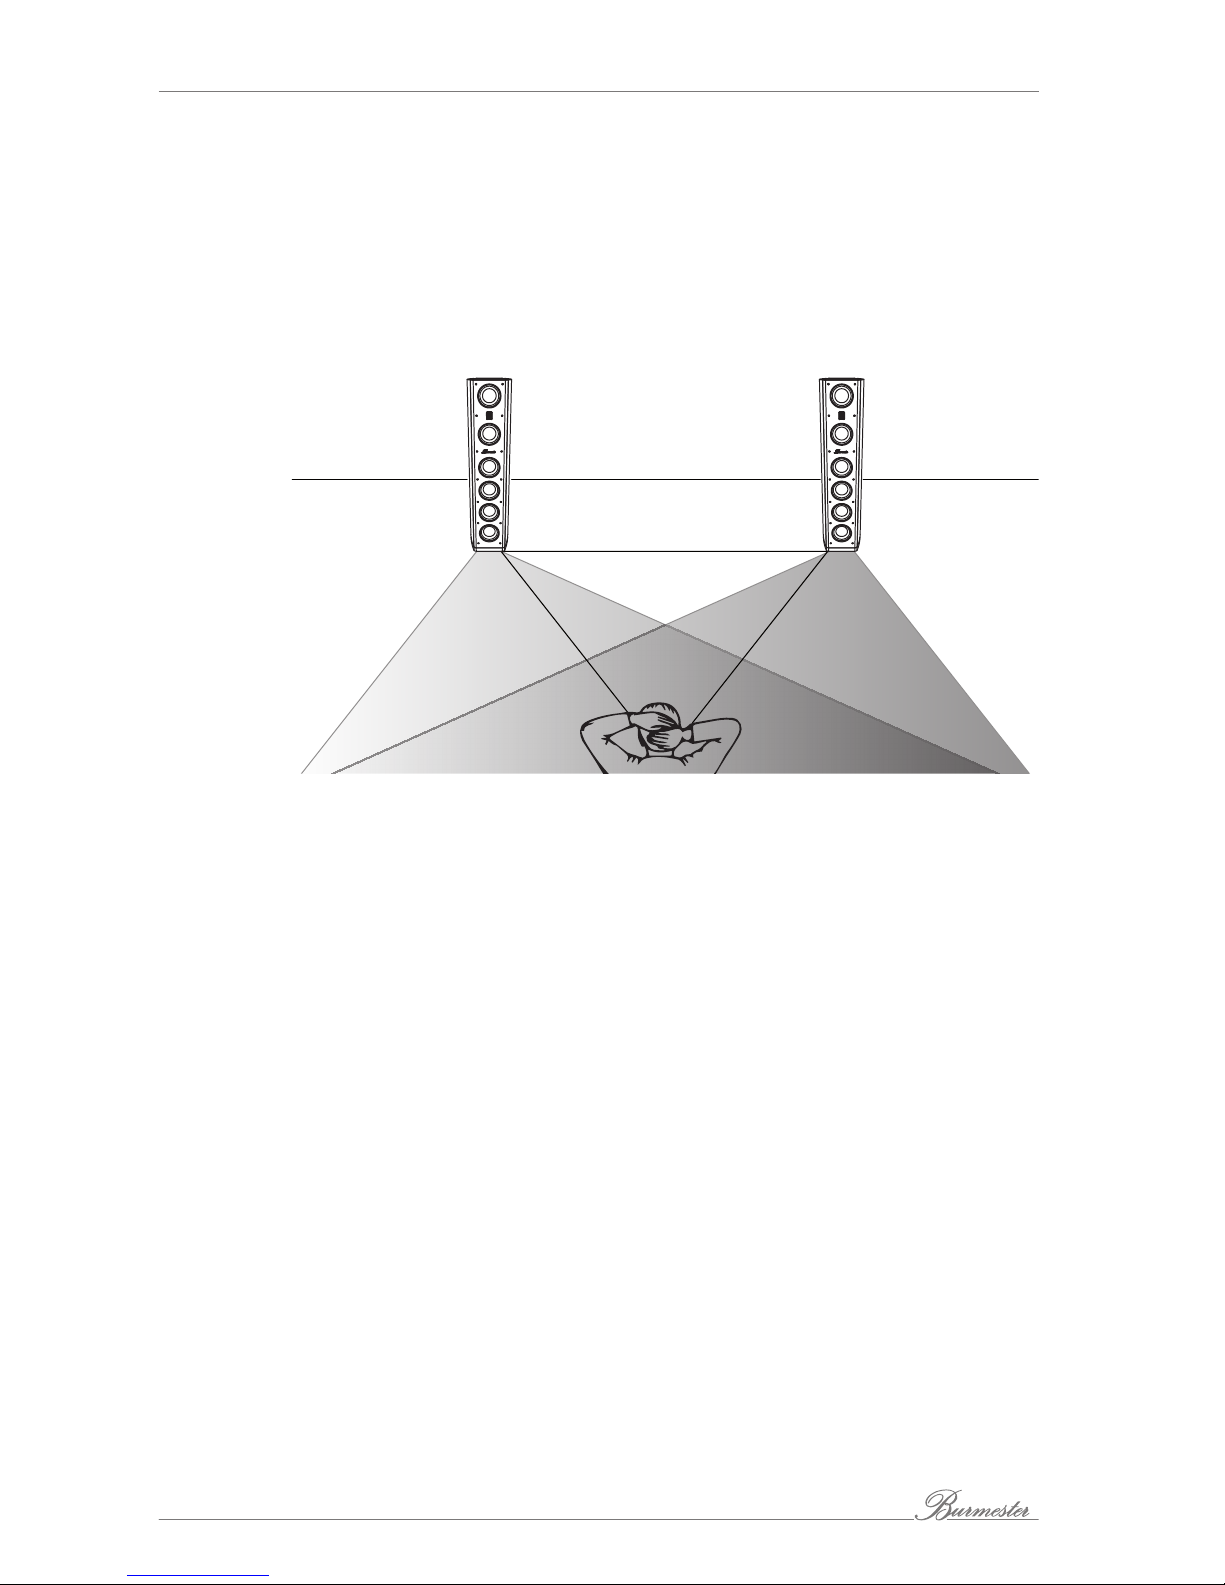
The Burmester Ambience 71 owes its spacious sound talents to a second, back-firing
AMT on the rear of the cabinet, which optimizes the omnidirectional behavior and
makes the listening room an even more integral part of the sound experience. With
continuous level adjustment, the Burmester Ambience 71 can be optimally adjusted to
the individual space and your sound preferences.
Highlights:
•
Custom-developed Air Motion Transformer (AMT)
•
Second AMT tweeter (Ambience tweeter), back-firing and continuously adjustable
•
Four front-firing woofers for strong bass paired with a lean silhouette
Dear Music Enthusiast,
Congratulations on your selection and thank you for your trust.
You have chosen a product that combines absolute fidelity and uncompromising
quality with technical innovation and maximum flexibility.
Please read through these operating instructions at least once before initially installing
the product so you can fully benefit from all the functions of this truly high-fidelity
device. Should any of your questions remain unanswered, please contact your
specialist dealer or us directly.
Talk to us about any special requests you may have – even if they seem exceptional. We
love accepting technically feasible challenges.
We wish you many hours of high-fidelity listening.
The Burmester Team

ABOUT THESE OPERATING INSTRUCTIONS
6
A T O I
These operating instructions describe the set-up, connection and operation of the
BurmesterAmbience71 loudspeaker (referred to in the following as “loudspeaker”,
“speaker”, or “BA71”).
Please note the following:
►
Read and follow the information given, in particular the safety information and
warnings.
►
Save these operating instructions.
2.1
Symbols and text labels used
Prerequisite
Designates a requirement which must be fulfilled before a subsequent action
can be taken.
►
Action step
Designates an individual action step.
1.
2.
3.
Sequence of actions
Designates a sequence of action steps which have to be performed in the given
order.
Result
Designates the outcome of an action.
2.2
Meaning of warning symbols and words
This document uses the following warning symbols and words:
The general danger symbol, in conjunction with the warning words
CAUTION, WARNING, and DANGER, serves to warn against the risk
of severe injuries. Follow all subsequent
instructions to prevent serious or fatal injuries.
The lightning symbol, in conjunction with the warning word
DANGER, serves to warn against lethal voltage.
NOTICE
The warning word NOTICE indicates a danger that can lead to
damage to or destruction of the device.
CAUTION
The warning word CAUTION indicates a danger that poses a low or
medium risk of injury.
WARNING
The warning word WARNING indicates a danger that can lead to
death or severe injuries.

IMPORTANT SAFETY INFORMATION
Ambience 71 Operating Manual 7
I S I
Please read through the operating instructions for your speaker completely and save
them.
Should you have any questions, please contact your specialist dealer.
3.1
Unpacking
The speakers are very heavy components. To prevent injuries, the speakers should only
be unpacked and set up by individuals who are experienced in handling heavy loads.
To prevent damage to the housings, do not use sharp or pointed objects to remove the
packaging.
The speakers are enclosed in a plastic bag on delivery. Keep this bag out of the reach
of children to prevent suffocation.
3.2
Set-up
Observe the following during set-up:
•
The spikes provided on delivery can result in injuries and can damage flooring.
Exercise caution when installing the spikes and use the protective disks provided on
delivery.
•
Avoid direct sunlight.
•
Avoid excessive heat, cold, moisture, and dust.
•
Do not expose the speaker to dripping water or spray water and do not place any
containers holding liquids on your speaker.
•
Do not place any open ignition sources, such as burning candles, on the speaker.
3.3
Connecting
►
Switch off amplifiers before connecting them to the speakers.
3.4
Start-up
►
After connecting the amplifier, adjust its volume to a low setting before switching it
on.
3.5
Operation
►
Do not listen to music at a high volume for extended periods. Very loud signals can
cause hearing damage.

UNPACKING AND SETTING UP THE LOUDSPEAKERS
8
U S U
L
CAUTION
Heavy weight of speakers
The speakers are very heavy and can result in injuries in case of falling or toppling.
►
The speakers should only be unpacked and set up by individuals who are
experienced in handling heavy loads.
►
Allow a second person to help you during unpacking and set-up if need be.
4.1
Unpacking
►
Please make sure the package contents are complete and undamaged.
Should parts be missing or if you detect damage while unpacking the speaker, please
do not connect it. Instead, contact your authorized specialist dealer.
4.1.1
Scope of delivery
The scope of delivery includes:
•
BA71 speaker with packaging
•
4 spikes
•
4 protective disks
•
1 pair of gloves
•
1 set of operating instructions
•
1 set of warranty documents
4.1.2
Packaging
WARNING
Danger of suffocation
The speakers are packaged in a plastic bag on delivery. This bag can present a
suffocation hazard for children.
►
Keep the plastic bag out of the reach of children.
We recommend saving the original packaging for transportation, such as when moving,
etc.

UNPACKING AND SETTING UP THE LOUDSPEAKERS
Ambience 71 Operating Manual 9
4.2
The speaker at a glance
1
2
3
4
5
6
7
1
Woofers
2
Mid-range drivers
3
Tweeter
4
Second tweeter
Back-firing tweeter to reinforce the acoustic environment
With control for continuous level adjustment
5
Connector panel
Separate connections for woofer and mid-range/tweeter units with terminals for
cable lugs and sockets for banana plugs
6
Jumper plugs
The jumpers are installed on delivery.
7
Base plate
With threaded inserts for spikes

UNPACKING AND SETTING UP THE LOUDSPEAKERS
10
4.3
Set-up
Carefully remove the speakers from the transportation packaging and place them in a
suitable location. Avoid direct sunlight, dust, and moisture.
4.3.1
Correct positioning
The speakers can be easily integrated in virtually any interior. Optimal acoustics can be
achieved by positioning your speakers so that they create an equilateral triangle, with
the third point being the listener (as seen from above).
The spatial audio reproduction increases with a greater distance between the speakers
and the wall, while the bass reproduction decreases. The BA71 speakers are designed
so that they do not need to be positioned near a wall to accentuate the bass. However,
since listening spaces have very different acoustic properties, positioning near a wall
may improve the acoustics in some cases.
The two speakers should be placed 2.50m to 4.00m apart. Ideally, the space between
them should remain free of any other objects. In a room with a rectangular floor space,
it is preferable to place the speakers on the longer wall instead of the shorter wall.
Similarly, positioning in the “hard” acoustic area (along smooth walls and windows) of
the room is preferable to the “soft” acoustic area (muted by upholstered furniture,
books and carpet). This especially applies for the ambience tweeter (see „Improving
your audio – ambience tweeter“ on page18).
NOTE
If you have a television set with a cathode ray tube, maintain a minimum distance of
50cm between the speakers and the TV set. Otherwise, the magnetic fields of the
speakers can cause isolated color changes in your TV image.

UNPACKING AND SETTING UP THE LOUDSPEAKERS
Ambience 71 Operating Manual 11
4.3.2
Using spikes
CAUTION
Danger of injuries and damage caused by spikes
Combined with the heavy weight of the speakers, the spike tips can cause injuries
and damage.
►
Be careful when mounting the spikes in order to prevent injuries.
►
Always work together with at least one other person to position the speakers.
►
Place the protective disks under the spikes before moving the speaker into an
upright position.
When using the speakers on resonant flooring (such as parquet or laminate floors),
Burmester recommends the use of spikes for acoustic decoupling from the floor.
Suitable spikes are included in the scope of delivery.
The undersides of the housings are each equipped with five threaded inserts for
screwing in the spikes. Four spikes (A, B, C, D) are ideal for even surfaces. Uneven
surfaces can be compensated for by using three spikes (A, B, E).
You can adjust the height of the spikes to improve speaker stability.
A
A
A
A
B
B
E
A
B
D
C
F
G
H
I
Installing the spikes:
1.
Lay the speaker down on a soft surface (e.g. carpet or blanket).
2.
Screw the spike threads (F) into the inserts/bushings in the housing base plate.
3.
Together with an assistant, carry the speaker to the planned position in your
listening room.
4.
Position the small protective disks (I) directly under the spikes and then move the
speaker into an upright position. This prevents damage to the flooring.
If the speakers are not stable and steady, the spike with the least contact to the floor
should be unscrewed slightly.
Adjusting the height:
1.
Insert the small adjusting rod into the opening (H) at the tip of the spike that you
would like to adjust.
2.
Turn the spike counterclockwise (as seen from below) until the speaker stands
securely without wobbling.
3.
Then tighten the knurled nuts (G) on all spikes manually by turning them clockwise
(as seen from below) so that the spikes rest in a stable position on the housing.

CONNECTING THE LOUDSPEAKERS
12
C L
►
Read the operating instructions for the other connected components before
connecting the speakers.
►
Make sure the polarity is correct: red = positive, blue or black = negative
WARNING
Dangerous voltage on the connection terminals
The terminals may carry dangerous voltage during operation.
►
Switch off all of your audio system components and do not switch them back on
until all connections are properly established.
►
Do not touch the terminals while the amplifier power is on and the speaker is
connected.
NOTICE
Damage caused by improper connections
A short circuit or an improper connection can damage the speakers and other
components.
►
Switch off the power amplifiers before connecting the speakers. This prevents
short circuits due to cables that are not yet connected at both ends.
►
First connect the cables to the speakers and then to the power amplifiers.
►
Only connect the speaker cables to the proper terminals on an audio amplifier.
Never insert the connection cables into an electrical outlet, since this will destroy
the speakers.
5.1
Connection terminals
Burmester uses the same terminals for its speakers as it does for its power amplifiers.
These terminals have proven their worth many times over in terms of function and
sound quality. Cable lugs soldered to the stripped speaker cable ends ensure optimal
contact and minimal contact resistance. Sockets (1) for banana plugs are also provided.
1
Both variants enable bi-wiring and bi-amping.

CONNECTING THE LOUDSPEAKERS
Ambience 71 Operating Manual 13
5.2
Connection cables
Burmester recommends the use of cables with a large cross-sectional area to connect
the speakers to the power amplifiers. The large cable cross-sectional area preserves the
damping factor of the amplifiers for optimal speaker control.
For the best results, we recommend the use of original Burmester speaker cables,
which have the same electrical and acoustic properties as the wiring inside Burmester
speakers and amplifiers.
5.3
Requirements for amplifiers
The BA71 can produce superior acoustics, even in large spaces. Nonetheless, high-
quality power amplifiers are required to prevent clipping (distortion caused by
overdriving an amplifier) and speaker damage.
5.4
Classic connection
This is the most common connection type. Each power amplifier channel is connected
to a speaker using a 2-wire cable. A dual-channel (stereo) amplifier is then required for
stereo sound reproduction.
R
R
L
L
+
–
+
–
1.
2.
3.
Connecting the speakers:
1.
The speakers are equipped with bi-wiring jumpers on delivery. Make sure that the
woofer terminals (LOW) are connected to the tweeter/mid-range terminals (HI/MID)
via these jumpers.
2.
Connect the right speaker to the right amplifier output.
3.
Connect the left speaker to the left amplifier output.
After connecting the speakers, continue by reading „Operating the Loudspeakers“ on
page18.

CONNECTING THE LOUDSPEAKERS
14
5.5
Bi-wiring connection
Bi-wiring is a means of separately connecting the woofers and mid-range/tweeters of a
loudspeaker to one amplifier channel. Stereo reproduction with bi-wiring therefore also
only requires one dual-channel (stereo) amplifier. Bi-wiring has acoustic advantages
over the classic connection type.
R
+
–
+
–
R
L
L
1.
1.
1.
1.
1.
1.
1.
1.
1.
1.
2.
3.
4.
Connecting the speakers:
NOTE:
To connect the loudspeaker to the amplifier, you can use either one 2-wire speaker
cable or two 1-wire speaker cables.
1.
Remove the bi-wiring jumpers between the woofer terminals (LOW) and the
tweeter/mid-range terminals (HI/MID) located above them.
2.
Connect the two positive poles (red) on the right speaker to the positive speaker
terminal on the right output of the amplifier.
3.
Connect the two negative poles (blue) on the right speaker to the negative speaker
terminal on the right output of the amplifier.
4.
Follow the same procedure to connect the left speaker to the left amplifier output.
After connecting the speakers, continue by reading „Operating the Loudspeakers“ on
page18.

CONNECTING THE LOUDSPEAKERS
Ambience 71 Operating Manual 15
5.6
Bi-amping connection
While bi-wiring merely splits the signal paths to the loudspeaker, bi-amping connects
both the woofers and mid-range/tweeters to two separate power amplifier channels.
Bi-amping provides additional acoustic advantages, since it frees the amplifier channel
for the mid-range/tweeter unit from the high power requirements of the woofers.
However, this connection type also requires twice as many amplifier channels.
Bi-amping can be accomplished in either a vertical or a horizontal arrangement.
5.6.1
Vertical bi-amping
When using dual-channel (stereo) amplifiers, a single amplifier is connected to a single
speaker in a vertical bi-amping arrangement. One channel is responsible for the woofer
unit, the other for the mid-range/tweeter unit. The advantage of this variant is that each
of the amplifiers is situated near the speaker and only short speaker cables are
required.
R
L
R L
+
–
+
–
R L
+
–
+
–
1.
1.
4.
4.
2.
2.
3.
3.
5.
Connecting the speakers:
1.
Position the two stereo amplifiers near the speakers.
2.
Connect the preamplifier to the stereo amplifiers as shown above. You will need two
optional Burmester bi-amp adapters or adapter cables. Please contact your
specialist dealer for assistance.
3.
Remove the bi-wiring jumpers between the woofer terminals (LOW) and the
tweeter/mid-range terminals (HI/MID) located above them.
4.
Connect the woofer unit on the right speaker to the left amplifier output and the
mid-range/tweeter unit to the right output.
NOTE:
It is also possible to connect the woofer unit to the right amplifier output and the mid-
range/tweeter unit to the left output.
5.
Follow the same procedure to connect the left speaker to the second amplifier.
After connecting the speakers, continue by reading „Operating the Loudspeakers“ on
page18.

CONNECTING THE LOUDSPEAKERS
16
5.6.2
Horizontal bi-amping
When using dual-channel (stereo) amplifiers, in a horizontal bi-amping arrangement,
one amplifier is connected to the woofer units and one amplifier to the mid-range/
tweeter units on both speakers. The advantage of this variant is that the amplifier for
the (acoustically important) mid-range/tweeter unit no longer has to furnish the high
power required by the woofer unit. The disadvantage is that this variant requires the
same cable lengths as those for the classic connection option and for bi-wiring.
3.
R
L
R L R L
+
–
+
–
+
–
+
–
1.
1.
2.
4.
5.
6.
7.
3.
Connecting the speakers:
1.
Center the two stereo amplifiers between the loudspeakers.
2.
Connect the preamplifier to the stereo amplifiers as shown in the diagram. You will
need two optional Burmester bi-amp adapters or adapter cables. Please contact
your specialist dealer for assistance.
3.
On the speaker connector panel, remove the bi-wiring jumpers between the woofer
terminals (LOW) and the tweeter/mid-range terminals (HI/MID) located above them.
Right speaker:
4.
Connect the woofer unit to the right output of the right amplifier.
5.
Connect the mid-range/tweeter unit to the right output of the left amplifier.
Left speaker:
6.
Connect the woofer unit to the left output of the right amplifier.
7.
Connect the mid-range/tweeter unit to the left output of the left amplifier.
8.
After connecting the speakers, continue by reading „Operating the Loudspeakers“
on page18.

CONNECTING THE LOUDSPEAKERS
Ambience 71 Operating Manual 17
5.7
Bi-amping with mono power amplifiers
Mono power amplifiers make it possible to combine the advantages of vertical and
horizontal bi-amping: short cable lengths and decoupling the mid-range/tweeter
amplifiers from the bass range. Four mono amplifiers are required for this option.
R
L
+
–
+
–
+
–
+
–
1.
1.
1.
1.
4.
4.
4.
4.
3.
3.
2.
2.
Connecting the speakers:
1.
Position two mono power amplifiers near each of the two speakers.
2.
Connect the preamplifier to the mono power amplifiers as shown above. You will
need two optional Burmester bi-amp adapters or adapter cables. Please contact
your specialist dealer for assistance.
3.
On the speaker connector panel, remove the bi-wiring jumpers between the woofer
terminals (LOW) and the tweeter/mid-range terminals (HI/MID) located above them.
4.
Separately connect the woofer and mid-range/tweeter units of each speaker to the
mono amplifier outputs.

OPERATING THE LOUDSPEAKERS
18
O L
NOTICE
Incorrect wiring or excessive sound levels
Incorrect wiring or excessive sound levels can damage the system components.
►
Before switching on the system, check all cable connections for correct polarity
(positive, negative).
►
After re-wiring, slowly increase the volume until you are certain that everything is
connected correctly.
NOTE:
All chassis in this speaker are burned in and selected as pairs using a digital measuring
system. However, like all mechanical systems, the speakers need an initial burn-in
period to develop their full acoustic potential.
6.1
Improving your audio — ambience tweeter
At higher frequencies, loudspeakers emit an increasingly bundled sound field. On
conventional loudspeaker systems, this results in very precise, yet sometimes restricted
spatial reproduction.
To counteract this effect, the BA71 is equipped with an additional, back-firing tweeter.
This ensures a broader stage, with more depth, which you can adjust according to your
personal preferences using the continuous level control.
►
Adjust the level of the back-firing tweeter to suit your individual sound preferences.
Ideally, a good balance is achieved between spaciousness and the precise
reproduction of individual instruments and voices.
►
You can also vary the exact position of the speakers as well as the angle of the
speakers to your listening space.
M, R, C
NOTICE
Damage to the speaker surface
Liquids and chemical agents can damage the housing surface.
►
Make sure that no liquids enter the loudspeaker.
►
Do not use chemical agents to clean the speaker.
D
Legislation prohibits the disposal of this device by means of normal household waste
(residual waste, recycling, organic waste, paper, glass). The device must be handed
over to a communal collection point or voluntary take-back system.

WARRANTY
Ambience 71 Operating Manual 19
W
All Burmester loudspeakers come with a five-year warranty. The warranty requires
proper connection without overloading, the mechanical integrity of the loudspeakers,
and the submission of a warranty claim.
The warranty does not apply if unauthorized modifications are made, the chassis or
terminals are dismantled, or the loudspeakers are opened.
T
Malfunction
Probable cause
Remedy
No sound from one or
both speakers
Electronics are not
switched on
►
Switch on the amplifier and/
or audio source.
Short circuit or open circuit
in wiring
►
Check the wiring and
eliminate any faults.
Poor bass response or
diffuse sound quality
Polarity error in the wiring
for a channel
►
Swap the positive and
negative wires on the affected
channel
Extremely loud and
sloppy bass
Speakers are located too
close to the walls
►
Increase the spacing between
the speaker and the wall.
Increasing the distance to
your listening position can
also produce an
improvement.
Treble range is quieter
than normal
Tweeters are not directed
toward the listening
position
►
Angle the loudspeaker
somewhat more toward the
listening position.
T D
Transmission range (±3dB)
35Hz — 40kHz
Rated power
300 W
Efficiency (2.83V, 1m)
89 dB
Impedance
4 — 8 ohms
Nominal impedance
4 ohms
Crossover frequencies
180 Hz, 2600 Hz
Dimensions (WxHxD)
303 x 1232x 500 mm
Weight
60 kg
Subject to technical changes

BURMESTER AUDIOSYSTEME GMBH
Wilhelm-Kabus-Strasse 47
D-10829 Berlin
Tel. +49 (0) 30 787968 – 0
Fax +49 (0) 30 787968 – 68
E-mail: mail@burmester.de
www.burmester.de
Version 2.2/1704
Table of contents
Other Burmester Speakers manuals

Burmester
Burmester B 18 User manual

Burmester
Burmester AMBIENCE 31 User manual

Burmester
Burmester B100 User manual

Burmester
Burmester BC150 User manual

Burmester
Burmester BC350 User manual

Burmester
Burmester B28 User manual

Burmester
Burmester InWall User manual

Burmester
Burmester B38 User manual

Burmester
Burmester B 18 User manual

Burmester
Burmester B10 User manual