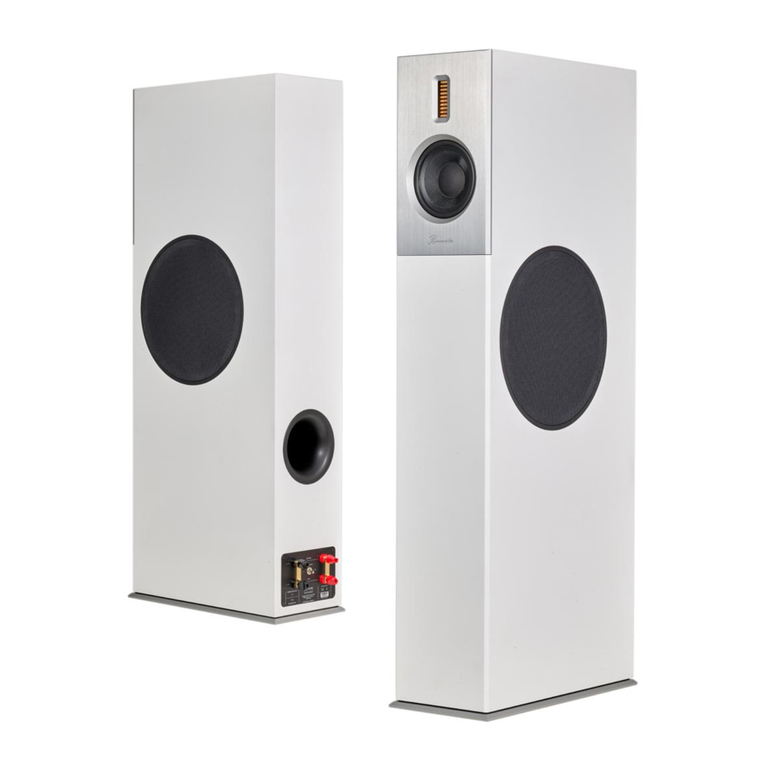
Burmester B100 User manual


Dear Audiophile,
Thank you for choosing this Burmester audio component. We sincerely appreciate your trust in us.
You have purchased a loudspeaker which excells in musical fidelity and combines uncompromising
manufacturing quality with technical innovation and the highest degree of operating flexibility. This speaker
is capable of filling even large spaces with dynamic sound. To sound its best and to avoid clipping, it should
be driven by a power amplifier of the highest quality.
We recommend reading this user manual at least once in its entirety before setting up the speaker for the
first time. This will enable you to make full use of all capabilities of this outstanding audiophile instrument.
Should you have any further questions, please contact your dealer or us directly.
You decide if we meet the demands of producing high-end components. We offer an additional service which
also demonstrates high-end quality.
Talk to us about your special requests, even if they seem out of the ordinary. We happily accept technically
reasonable challenges.
Enjoy your enhanced listening pleasure.
Your Burmester Team

C O N T E N T S
UNPACKING 1
VIEWS OF LOUDSPEAKER 2
SETTING UP 3-4
CONNECTING 5
WIRING OPTIONS 6-7
PRECAUTIONS 8
TECHNICAL DATA 8
VERSION 1.0 from 10/15/2009

1
UNPACKING
PLEASE NOTE: The loudspeakers B 100 weigh 128kg (281.6lbs) each. To avoid injury during unpacking and
set-up, this should only be done by persons who are accustomed to handling such weights.
The loudspeakers B 100 are delivered wrapped in plastic bags. Keep these bags away from children to avoid
danger of suffocation.
Unpacking To avoid damaging of the loudspeaker´s housing or drivers please do not use sharp or spiky
objects for opening the packing case.
Please check the completeness of delivery. If you miss something from the list below or
should you discover damages to the loudspeaker upon unpacking, please do not connect
the loudspeaker but contact your authorized dealer.
Contents of delivery The shipping carton contains:
•2 packing cartons with the loudspeakers B 100
•2x2 BI-WIRING BRIDGES (connected at speaker terminals)
•2x1 CIRCUIT BRIDGE (connected at speaker terminals)
•8 spikes with screw nuts
•1 owner´s manual
We recommend keeping the original packaging material in case of a move or future
shipping.

2
VIEWS OF LOUDSPEAKER
front view side view

3
SETTING UP
Set-up position Carefully remove the loudspeakers from the packing cartons and set them up in an
appropriate location. Avoid direct sunligth, dust and humidity to the loudspeakers by
choosing the final placement. The loudspeakers can easily be integrated into any living
environment. The sound will be best if the speakers form an equilateral triangle with the
listening position when seen from above.
Ideal listening position
Speaker Enclosures
The bass-speakers (behind the slit side panel) should point here to the center, which
amounts to distance of the loudspeakers to each other approx. 2.5 m to 3.5 m (98.4 inches
to 137.8 inches), and the area between the loudspeakers should remain as free as possible,
in order to feast early, sound-falsifying reflections.
To the distance to the space walls in the proximity of the loudspeakers it applies that the
spatial illustration with increasing distance to the wall increases and the bass rendition tauter
and more outlined becomes. The loudspeakers B 100 are in such a way conceived that they
do not require a bass rise through wind near list! They should be set up thus as freely as
possible. It applies to keep a minimum distance from 0.7 m (27.6 inches) to the lateral and
0.5 m (19.7 inches) to the rear wall, in order to achieve a good sound balance. The more
largely the distances to be selected, the more airily, more highly detailed and more balanced
the sound, since the room acoustics less influence on the sound takes. If one attaches
importance to a pronounced deep representation, then the distance to the rear wall of the
area should be largely selected according to, so that reflections of the area come as late as
possible and do not affect the locatableness of the sound negatively.
For the perfect "sweet spot" for listening, the crossover of the loudspeaker radiation behind
the listener is recommended. That means, the loudspeakers are in-bent so far to the hearing
place, until the focus and the symmetry of the space illustration stand to each other in a
good relationship. Starting from a certain point one loses however the focus of the
illustration, here is in demand a compromise of individual hearing. One can determine the
optimal focus very well with a mono admission or a newscaster. The loudspeaker thereby
gradually (inch by inch) pre and pushed back to the sound presentation of both transducers
from the center comes on the whole. If this is the case, then the loudspeaker degree by
degree is turned, until the sound takes only a minimum area.
Experiences show that the loudspeakers should be in-bent so far inward, until one can see
straight still the lateral slots of the loudspeakers. If one wants to hear with several listeners,
then a crossover of both loudspeakers before the listeners is recommended. Here it applies
to find with easy experimenting, the optimal personal taste of the presentation.
4
The list of the loudspeakers at the longer wall of an area with rectangular surface area is to
be preferred at the shorter space wall and the list within acoustically the "hard" range (at
smooth walls and window areas) of the area of the list in acoustic "yields" to range (by
poster furniture, books and carpets absorbed).
Thus the loudspeaker list is finally final - the trouble wages a clear and dragging along
hearing benefit should be.
PLEASE NOTE: Keep a minimum distance of 0.5 m (19.7 inches) between speakers and
your television set. Otherwise the magnetic fields of the speakers could cause local colour
distortions in the T.V.
base of the speaker with wiring terminal and threaded insets
Spikes If the loudspeakers stand on a floor which tends to react to the music and swing, we
recommend using spikes (9) to decouple the loudspeakers from extraneous vibrations.
The base of each loudspeaker contains four sets of threads. The supplied spikes may be
screwed into them and fixed in place with a lock nut to increase stability.
Helpfully it is here to attain with a leveling indicator or a spirit level an accurate adjustment.
SPIKE
9

5
CONNECTING
Binding posts We utilize the same binding posts for our loudspeakers as for our power amplifiers. These
high-grade terminals for speaker cables have proven their sonic excellence and functional
convenience a thousand times over. Speaker cables can be connected via pure-copper
spade lugs (included) or via angled 4 mm banana plugs.
CAUTION: The binding posts of loudspeakers may carry dangerously high voltages. Do not
touch them while the speaker is connected to a switched-on power amp.
Speaker cables The wiring inside the loudspeakers consists of 4 mm
2
silver cable for the tweeter, of 4 mm
2
oxygen-free copper litz wire for the midrange driver and of 10 mm
2
oxygen-free copper litz
wire for the bass driver. We recommend using high quality cables of large cross section
between the loudspeakers and power amps as well to ensure optimal control of the
speakers by the damping factor of the amplifier.
Best results will be obtained by using original BURMESTER pure-silver loudspeaker cable
(99.97%) 2x4 mm
2
.
Connecting CAUTION: We stronlgy recommend leaving the power amplifiers switched off while
connecting the loudspeakers. This will avoid shorting out cables that have not yet been
completely hooked up. Connect the speaker cables to the power amplifiers only after
ensuring that they are hooked up correctly to the speakers.
Before turning the amps back on, make sure that all cables have been connected firmly and
correctly with respect to polarity (plus, minus) as well as frequency (LOW, HIGH/MID). After
a new hook-up, we recommend increasing the volume slowly until you are sure that
everything is connected correctly.
IMPORTANT: Only connect the speaker cables to the intended binding posts of the
audio amplifier.
Never insert the speaker cables into a wall socket/AC mains, since this will destroy
the speaker.

6
WIRING OPTIONS
The loudspeakers B 100 offer the following wiring options (also see graphic display on next page):
STANDARD HIGH/MID binding posts (1), (2) and LOW binding posts (3), (4) are bridged using copper
BI-WIRING BRIDGES (7). (POS to POS and NEG to NEG respectively).
For practical purposes, the speaker cables should be connected to the LOW terminals (3),
(4) by either spade lugs or by angled banana plugs.
CHECK POLARITY CAREFULLY!
BI-WIRING BRIDGE
To enhance performance of our loudspeakers B 100 we suggest to use:
BI-WIRING Seperate speaker cables for MID/HIGH and for LOW are connected in parallel to the output
terminals of the power amplifier.
Remove the BI-WIRING BRIDGES (7) from the binding posts of the loudspeaker.
Now connect the speaker cable for the HIGH/MID range to the HIGH/MID binding posts
(1), (2) of the speaker.
Connect the speaker cable for low frequencies to the LOW binding posts (3), (4) of the
speaker.
CHECK POLARITY CAREFULLY!
BI-AMPING Two power amps are driven in parallel by a preamp. The two power amps could also be the
two seperate channels of a stereo power amp. This way you have the option of setting up
one stereo power amp each directly next to a loudspeaker, which results in shorter speaker
cables and therefore a better sound quality.
Remove the BI-WIRING BRIDGES (7) from the binding posts of the speaker.
Connect the speaker cable of the HIGH/MID range power amp with the HIGH/MID binding
posts (1), (2).
Connect the speaker cable of the LOW range power amp with the LOW binding posts (3),
(4).
CHECK POLARITY CAREFULLY!
Please contact your dealer if you have additional questions on Bi-Wiring or Bi-Amping.
BASS ADJUSTMENT The bass intensity of the B100 can be reduced by taking out the CIRCUIT BRIDGE (8)
between the blue binding posts (5), (6) (-3dB betweeen 80Hz and 120Hz). This helps to
achieve a clean and transparent bass intensity in rooms with critical acustic.
This connection variant should be selected however only under really critical spaceacoustic
conditions!
CIRCUIT BRIDGE
8
Don’t ever connect your amplifier to the blue binding posts
!

7

8
PRECAUTIONS
Interconnects We custom-make speaker cables of any length to ensure highest-quality signal paths for our
loudspeakers. The impedance of our cables is ideally matched to all Burmester components.
Burn-In All drivers used in this loudspeaker have been thouroughly burnt-in and afterwards computer
selected. However, all mechanical systems need a certain break-in period to achieve peak
performance. You may know this phenomenon from a new car, which also needs a certain
running-in time.
Performance This speaker is capable of filling large rooms with richly dynamic music. To sound its best
and to avoid clipping (distortions of an amp operating at the limit of its capacities), it should
be driven by power amplifiers of the highest quality.
Cleaning Only use a humid or dry cloth to clean loudspeaker´s housing. For cleaning the membrane
use only a dry cloth and be very carefully. Never use a wet cloth or chemical liquids to clean
the loudspeaker.
TECHNICAL DATA
Dimensions Width x Height x Depth 310 x 1,495 x 620mm
(12.2 x 58.9 x 24.4 inches)
Weight 128kg
(281.6 lbs)
Frequency Response +3 dB 30Hz – 45kHz
Rated Power Handling 400W
Sensitivity 2.83V, 1m 91dB
Rated Impedance DIN 3Ohm
Crossover Points 160Hz; 2,700Hz
The technical datas and design of this product are subject to change without notice.

Table of contents
Other Burmester Speakers manuals

Burmester
Burmester InWall User manual

Burmester
Burmester B 18 User manual

Burmester
Burmester B10 User manual

Burmester
Burmester B 18 User manual

Burmester
Burmester B28 User manual

Burmester
Burmester AMBIENCE 31 User manual

Burmester
Burmester B38 User manual

Burmester
Burmester BC150 User manual

Burmester
Burmester BC350 User manual

Burmester
Burmester Ambience 71 User manual