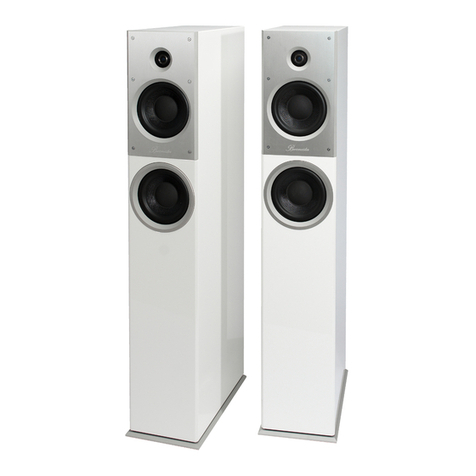
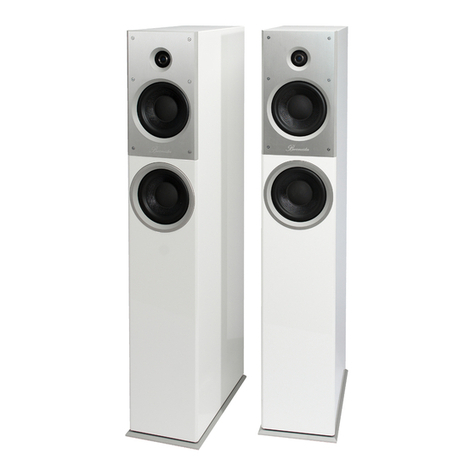
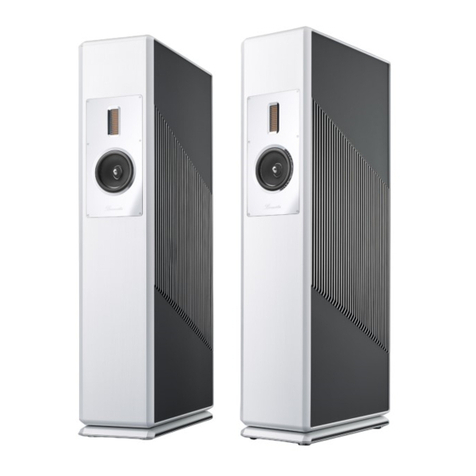
Burmester B38 User manual

OPERATION MANUAL
38


T C
A L ............................................
A O M .........................................
Symbols and text labels used ........................................................6
Meaning of warning symbols and words ..............................................6
I S I.........................................
When unpacking ...................................................................7
When setting up ...................................................................7
When connecting ..................................................................7
During start-up ....................................................................7
During operation...................................................................7
Children ..........................................................................7
U ..........................................
Scope of Delivery........................................................................8
O L .........................................
S U L L E..............
A B B ........................................
C L ........................................
O L .........................................
M, R C ........................................
D............................................................
W...........................................................
T ....................................................
S.......................................................


About these LoudspeAkers
B 38 Loudspeaker 5
A L
The B38 loudspeaker is a three-way loudspeaker with lateral woofers mounted in a
bass reflex cabinet. This “side-firing” design provides astonishing dynamic range and
powerful sound – thanks to the individual loudspeakers with very large diaphragms –
while still maintaining a slim and elegant appearance.
A low-midrange driver provides accurate and authentic reproduction from the upper
bass range up to the high frequencies, which are then handled by an AMT tweeter.
AMT stands for Air Motion Transformer with pleated diaphragms.
The B38 loudspeaker delivers clean sound at both low and very high levels,
homogeneous reproduction across all timbres, and impressive spatial sound with
precise imaging of instruments and voices both in width and depth. This is also made
possible by the sophisticated crossover, which ensures that the woofer, midrange
driver and tweeter are in perfect harmony. The crossover is contained in a separate
housing at the bottom of the cabinet to protect it from outside interference. Other
special features of the B38 loudspeaker include a bass switch on the rear panel and a
foam cylinder for sealing the bass reflex tube, both of which can be used to adapt the
bass to the listening environment and your taste.
The highlights:
• Burmester AMT tweeter (Air Motion Transformer) for particularly fine resolution and
excellent level stability in the high frequency range.
• Large low-midrange drivers for precise and three-dimensional playback in the
frequency range containing the majority of music signals.
• Powerful bass speakers for punchy but clean bass all the way down to the lowest
frequencies.
• Option to adjust the sub-bass level (room adaption).
• Separate connections for the bass and midrange/treble branches enable bi-amping
for maximum stability of the sound image.
• Sophisticated, vibration-damped cabinet with multi-layered walls and separate
housings for midrange drivers, tweeters and crossovers.
Dear music lover,
Congratulations on your purchase and thank you for choosing Burmester.
You have chosen a product that combines absolute fidelity and uncompromising
quality with technical innovation and maximum versatility.
Before using the product for the first time, we recommend that you read through this
operation manual completely so that you can make full use of the capabilities of this
exceptional audiophile product. Should you still have questions, please contact your
dealer or contact us directly.
We’re always happy to discuss your special requests, no matter how unusual. We love a
good technical challenge.
We wish you an exceptional listening experience.
Your Burmester team
About this operAtion MAnuAL
6
A O M
This operation manual describes how to install, connect and operate the Burmester
B38 loudspeaker (hereinafter referred to as “loudspeaker,” “speaker” or “B38”).
Please observe the following instructions:
►Read and follow the instructions in this manual, particularly the warnings and safety
instructions.
►Keep this operation manual.
Symbols and text labels used
Prerequisite
Indicates a requirement that must be met before a subsequent action can be
performed.
►Action
Indicates a single action.
1.
2.
3.
Sequence of actions
Indicates a sequence of actions that must be performed in the given order.
Result
Indicates the result of an action.
Meaning of warning symbols and words
The following warnings, symbols and warning words are used in this document:
The general hazard symbol, in conjunction with the warning words
CAUTION, WARNING or DANGER, warns of the risk of serious
injury. Follow all of the subsequent instructions to avoid injury or
death.
The lightning symbol, in conjunction with the warning word
DANGER, warns of potentially fatal electrical voltage.
ATTENTION The word ATTENTION indicates a hazard that could damage or
destroy the device.
CAUTION The word CAUTION indicates a hazard that poses a low or
moderate risk of injury.
WARNING The word WARNING indicates a hazard that could cause serious
injury or death.

iMportAnt sAfety instructions
B 38 Loudspeaker 7
I S I
►Please read the operation manual for your loudspeaker in full and keep it in a safe
place.
When unpacking
►To avoid damaging the housing, do not use any pointed or sharp objects to open
the packaging.
When setting up
Observe the following when setting up the device:
• Avoid exposure to direct sunlight.
• Avoid excessive heat, cold, moisture and dust.
• Do not expose the loudspeakers to dripping or splashing water, and do not place
containers of liquid on the loudspeakers.
• The loudspeaker is not suitable for outdoor use.
• The surface on which the loudspeaker is installed must provide a stable base.
• Make sure that the loudspeaker is as perpendicular to the floor as possible.
When connecting
►Switch off the amplifier before connecting it to the loudspeakers.
During start-up
►Set the connected preamplifier or integrated amplifier to a low volume before
switching it on.
During operation
►Do not listen for long periods at too high a volume level. Excessively loud signals
can damage your hearing.
Children
WARNING
Suffocation hazard
The loudspeakers are delivered packed in a protective cover, which can pose
a suffocation hazard for children.
►Keep the protective cover out of the reach of children.
The loudspeaker poses various injury risks if used improperly. Never leave your
children unattended with the loudspeaker.
This device is not intended for use by children.

unpAcking the LoudspeAkers
8
U
CAUTION
High speaker weight
The loudspeakers are heavy and may cause injury if they fall.
►The loudspeakers should only be unpacked and set up by persons who are
experienced in handling heavy loads.
►If necessary, have a second person help you unpack and set up the speakers.
Unpacking
►Please check the delivery for completeness and damage. If parts of the delivery are
missing or if you notice any damage when unpacking the speakers, please do not
connect them and consult an authorised dealer instead.
Scope of Delivery
The following is included with delivery:
• Package with the B38 loudspeakers
• 1 operation manual
• 1 set of warranty documents
• Bass reflex plugs
• Cable bridges (pre-installed)
Packaging
WARNING
Suffocation hazard
The loudspeakers are delivered packed in a protective cover, which can pose a
suffocation hazard for children.
►Keep the protective cover out of the reach of children.
We recommend keeping the original packaging for future transport, moving, etc.

overview of the LoudspeAker
B 38 Loudspeaker 9
O L
5
2
3
6
4
7
1
1 AMT tweeter
2 Low-midrange driver
3 Woofer
4 Room adaption
Switch for adjusting the bass according to the particular space.
5 Connector panel
6 Base plate
7Port

setting up the LoudspeAkers in the Listening environMent
10
S U L L
E
Speaker Spacing
For an optimal audio experience, the loudspeakers should be placed more than 50cm
away from walls and large pieces of furniture. Otherwise, reflected sound will reach the
listeners so early and with such intensity that it will significantly affect the direct sound
from the loudspeakers.
The distance between the two loudspeakers should be smaller than the distance to the
listeners. The farther apart the loudspeakers are, the wider the imaginary soundstage
seems, which is quite pleasant for large orchestra or choir recordings but may seem
unrealistic for solo instruments and voices.
Angling the Loudspeakers
Instead of aligning the fronts of the loudspeakers parallel to the wall behind you, you
can angle them inwards to direct them at the listeners. This does not change anything
for the bass range, on account of the long wavelengths, but it has a significant effect on
the midrange and treble frequencies. This is because angled speakers create stronger
reflections off the wall behind them and slightly weaker reflections off the side walls.
The imaginary stage on which the musicians are located (known as the “soundstage”)
thus seems to have a more precise centre and depth, while the width seems to diminish
only a little. Higher notes also sound more pronounced with angled speakers, which is
due to the smaller wavelengths of high frequencies.
Speaker Fronts Parallel to the Wall
►Arrange the speakers facing straight ahead at a distance of about 2 to 3 metres.
The soundstage seems wide but less deep, and the high brilliance range sounds
more subtle.
Angled Loudspeakers
►Arrange the speakers at an angle at a distance of about 2 to 3 metres.
The soundstage seems deep but less wide, and the high brilliance range is more
powerful.

Adjusting the bAss on the b38
B 38 Loudspeaker 11
Reflections in the Listening Environment
In the midrange, an unwanted and distracting spatial phenomenon known as “flutter
echo” can occur. Large reflective surfaces such as floors, walls and ceilings can cause
the sound to flutter back and forth. You can easily recreate flutter echoes by clapping
your hands, especially in empty rooms (the bathroom, for example).
Flutter echoes can be minimised by placing diffusers throughout the room, such as
furniture or large plants that reflect sound waves in different directions. You can also
use absorbers, which are materials that “swallow” sound rather than reflecting it.
Common absorbers include curtains, tapestries, carpets and upholstered furniture.
In every listening environment, standing waves will also develop in the bass range.
Standing waves are low-frequency sound that is reflected many times between walls,
floors and ceilings, causing the bass to sound “boomy.” The frequencies (or pitches)
ofthis booming depend on the dimensions of the room. As a general rule, however,
the closer the speakers and the listeners are to the walls of the room, the louder the
booming usually seems. For this reason, the loudspeakers and the listeners should be
50cm or more away from all walls – and more than 100cm in the corners of the room.
A B B
The standing waves mentioned above can considerably impair playback in normal
living rooms, especially between 35 and 70 Hz, that is, in the sub-bass range. However,
the B38 can reduce the “one-note” or booming effect of these standing waves. There is
usually a drop in level between the boom frequencies in a room, which the B38 can fill
in if necessary.
Such room adjustments can be made using the switch near the binding posts on the
back of the cabinet, as well as the foam cylinder for the bass reflex tube. The sub-bass
is most powerful when the switch is in the “+” position and the reflex tube is open.
When the cylinder is inserted into the reflex tube and the switch is moved to “-”, the
level in the critical range is significantly reduced. You can also achieve an intermediate
effect by moving the switch to “-” and positioning the cylinder more or less deep in the
bass reflex tube, or moving the switch to “+” and removing the cylinder from the tube.
You should try out the various configurations to determine which is best for your
listening environment. With the loudspeakers in their final position, test how the
different configurations affect the sound in the precise location where you will listen.
This is easier to do with a helper or two rather than alone. It is certainly worth the effort.

connecting the LoudspeAkers
12
C L
►Before connecting the loudspeakers, please also read the operation manuals for the
components you plan to connect.
►Pay attention to the correct polarity: red = positive, black = negative
WARNING
Hazardous voltage at the binding posts
Hazardous voltages may be present at the binding posts during operation.
►Before connecting the loudspeaker, switch off all components of your music
system and do not switch them on until you have made all the connections
properly.
ATTENTION
Damage due to faulty connections
A short circuit or a faulty connection can damage the loudspeakers and other
components.
►Switch off the power amplifiers before connecting the loudspeakers. This will
prevent possible short circuits caused by cables that are not yet connected at both
ends.
►Connect the cables to the loudspeakers first, then to the power amplifiers.
►Connect the speaker cables only to the appropriate binding posts of a power
amplifier. Never insert the speaker cables into a power outlet, as this will destroy
the loudspeakers.
Connection cables
Burmester recommends using cables with a large cross-section to connect the
loudspeakers to the power amplifier. A large cross-section allows you to maintain the
damping factor of the power amplifiers for optimal control of the loudspeakers. Best
results are achieved by using original Burmester speaker cables, which have the same
electrical and tonal characteristics as the internal wiring of Burmester loudspeakers and
amplifiers.
These cables have been optimised and tested for the loudspeakers.
ATTENTION: The insulation on your selected speaker cable must match that of the original
Burmester loudspeaker cable and must have a flame rating of at least VW-1.1
Binding Posts
The binding posts used on this loudspeaker are milled from a solid piece of oxygen-
free copper (OFC). The posts are also gold-plated to prevent oxidation and are proven
to deliver reliable function and excellent sound. The solid binding post bridges are also
made of gold-plated OFC copper and have a conductor cross-section of approximately
55mm², which reduces unwanted contact resistance to a minimum.
1Flammability class VW-1 (vertical wire burn) according to UL1581.EN

connecting the LoudspeAkers
B 38 Loudspeaker 13
Attaching the Binding Post Bridges
1. Switch off the power amplifier.
2. Completely loosen the binding posts by turning them anticlockwise.
3. Place the bridge on the binding posts.
4. Re-tighten the binding posts by turning them clockwise.
Removing the Binding Post Bridges
1. Switch off the power amplifier.
2. Loosen the posts completely by turning them anticlockwise.
3. Remove the bridge.
4. Re-tighten the binding posts by turning them clockwise.
Correct Polarity
►When connecting the loudspeakers, make sure that the connections have the
correct polarity. It is important that you make all connections in phase:
— positive output of the power amplifier = positive input of the loudspeaker
— negative output of the power amplifier = negative input of the loudspeaker
note: Connecting the two channels out of phase causes poor bass and diffuse playback.
Ifyou are unsure, please ask your dealer.

connecting the LoudspeAkers
14
Classic Connection
This is the most common connection method. With this method, each channel on
the power amplifier is connected to a loudspeaker via a 2-pole cable. A two-channel
(stereo) amplifier is therefore required for stereo playback.
R
R
L
L
+
–
+
–
1.
2. 3.
Connect the loudspeakers as follows:
1. The loudspeakers are delivered with binding post bridges already installed. Make
sure that the bridges are connecting the bass binding posts (LOW) to the midrange/
treble posts (HI/MID) above them.
2. Connect the right loudspeaker to the amplifier’s right output.
3. Connect the left loudspeaker to the amplifier’s left output.

connecting the LoudspeAkers
B 38 Loudspeaker 15
Bi-wiring Connection
With bi-wiring, the loudspeaker’s woofer and midrange driver/tweeter are separately
connected to a single power amplifier channel. For stereo playback with bi-wiring, you
therefore need only a two-channel (stereo) amplifier. Bi-wiring offers acoustic benefits
over the classic connection method.
R
+
–
+
–
R
L
L
1. 1.
2.
3.
4.
Connect the loudspeakers as follows:
note: You can use either one two-core or two single-core speaker cables to connect the
speaker and amplifier.
1. Remove the bridges between the bass binding posts (LOW) and the midrange/
treble posts (HI/MID) located above them.
2. Connect the two positive poles (red) on the right loudspeaker to the positive
terminal on the amplifier’s right output.
3. Connect the two negative poles (blue) on the right loudspeaker to the negative
terminal on the amplifier’s right output.
4. Connect the left loudspeaker to the amplifier’s left output in the same way.

connecting the LoudspeAkers
16
Bi-amping Connection
While bi-wiring merely splits the signal paths to the loudspeaker, bi-amping connects
the woofer and the midrange driver/tweeter to their own power amplifier channels.
Bi-amping provides even further benefits in terms of sound quality, as the power
amplifier channel for the midrange driver/tweeter is relieved of the high power
requirements of the woofers. However, this type of connection also requires double
the number of power amplifier channels. Speakers can be bi-amped either vertically
or horizontally.
Vertical bi-amping
When using two-channel (stereo) amplifiers, vertical bi-amping involves connecting
one amplifier to each loudspeaker. One channel controls the woofer, while the other
channel controls the midrange driver and tweeter. The advantage of this configuration
is that the amplifiers are located close to the loudspeakers, so only short loudspeaker
cables are required.
R
L
R L
+
–
+
–
R L
+
–
+
–
1. 1.
4.4.
2. 2.
3. 3.
5.
Connect the loudspeakers as follows:
1. Place the two stereo amplifiers near the loudspeakers.
2. Connect the preamplifier to the stereo amplifiers as shown above. You will need
two Burmester bi-amp adapters or adapter cables, which are available separately.
Please contact your specialist dealer.
3. Remove the bridges between the bass binding posts (LOW) and the midrange/
treble posts (HI/MID) located above them.
4. Connect the right speaker’s woofer to the left output of the amplifier and the
midrange driver/tweeter to the right output.
note: You can also connect the woofer to the right amplifier output and the midrange driver/
tweeter to the left output.
5. Connect the left loudspeaker to the second amplifier in the same way.

connecting the LoudspeAkers
B 38 Loudspeaker 17
Horizontal Bi-amping
When using two-channel (stereo) amplifiers, horizontal bi-amping involves connecting
one amplifier to the woofers of both loudspeakers and one amplifier to both midrange
drivers/tweeters. The advantage of this configuration is that the amplifier for the
midrange driver/tweeter (important for sound quality) is relieved of the high power
requirements of the woofer. The disadvantage is that it requires the same cable lengths
as for the classic connection method and bi-wiring.
3.
R
L
R L
R L
+
–
+
–
+
–
+
–
1. 1.
2.
4.
5.
6.
7.
3.
Connect the loudspeakers as follows:
1. Place the two stereo amplifiers equidistant from the loudspeakers.
2. Connect the preamplifier to the stereo amplifiers as shown in the figure. You will
need two Burmester bi-amp adapters or adapter cables, which are available
separately. Please contact your specialist dealer.
3. On the speaker’s connection panel, remove the bridges between the bass binding
posts (LOW) and the midrange/treble posts (HI/MID) located above them.
Right loudspeaker:
4. Connect the woofer to the right output of the right amplifier.
5. Connect the midrange driver/tweeter to the right output of the left amplifier.
Left loudspeaker:
6. Connect the woofer to the left output of the right amplifier.
7. Connect the midrange driver/tweeter to the left output of the left amplifier.
3. 1.
1.

connecting the LoudspeAkers
18
Bi-amping with Mono Power Amplifiers
Mono power amplifiers combine the advantages of vertical and horizontal bi-amping:
they offer short cable lengths while also relieving the midrange/treble power amplifiers
of the high power requirements of the bass range. This configuration requires four
mono power amplifiers.
R
L
+
–
+
–
+
–
+
–
1. 1.
1. 1.
4. 4.4. 4.
3. 3.
2. 2.
Connect the loudspeakers as follows:
1. Place two mono power amplifiers near each loudspeaker.
2. Connect the preamplifier to the mono power amplifiers as shown above. You will
need two Burmester bi-amp adapters or adapter cables, which are available
separately. Please contact your specialist dealer.
3. On the speaker’s connection panel, remove the bridges between the bass binding
posts (LOW) and the midrange/treble posts (HI/MID) located above them.
4. Separately connect the woofer and midrange driver/tweeter of each loudspeaker to
the outputs on the mono power amplifiers.

operAting the LoudspeAkers
B 38 Loudspeaker 19
O L
ATTENTION
Incorrect wiring or excessive level
Incorrect wiring or levels that are too high can damage the components of the
system.
►Before switching on the system, check all cable connections for correct polarity
(plus, minus).
►After changing cable connections, slowly increase the volume until you are sure
that everything is connected correctly.
CAUTION
High-intensity sound
Loud output signals can damage your hearing.
►Set the connected amplifier to a low volume before switching it on.
►To prevent hearing loss, avoid listening at high volumes for long periods of time.
note: All the chassis used in this loudspeaker have been burned in and matched in pairs
using a computer-aided measuring system. Nevertheless, like all mechanical systems,
the loudspeakers need a certain break-in time before they can achieve their full
acoustic potential.

MAintenAnce, repAir And cAre
20
M, R C
ATTENTION
Damage to the surface
Liquids and chemical agents can damage the surface of the housing.
►Ensure that no liquids get into the loudspeakers.
►Do not use chemical agents when cleaning.
D
German law stipulates that this device must not be disposed of with
household waste (grey bin, yellow bin, compost bin, paper or glass),
but must be handed in at municipal collection points or to voluntary
recycling programmes.
W
Burmester provides a five-year warranty on its loudspeakers. For the
warranty to be valid, the loudspeaker must have been properly
connected and operated without overloading, the mechanical integrity
of the loudspeakers must not have been comprised and the warranty
application must have been properly submitted.
The warranty is voided in the case of unauthorised modifications, such
as removal of the chassis, or if the loudspeaker is opened.
T
Problem Typical cause Solution
There is no sound coming
from one or more speakers.
The electronics are not
switched on
►Switch on the amplifier
and/or the audio source.
Short circuit or open circuit
in the wiring
Skilled persons:
►Check the wiring and fix
any problems.
The sound has poor bass or
is spatially diffuse.
Incorrect wiring polarity for
one channel
►Swap the positive and
negative cables on the
amplifier for the channel
in question.
Table of contents
Other Burmester Speakers manuals

Burmester
Burmester BC150 User manual

Burmester
Burmester B 18 User manual

Burmester
Burmester AMBIENCE 31 User manual

Burmester
Burmester B28 User manual

Burmester
Burmester InWall User manual

Burmester
Burmester BC350 User manual

Burmester
Burmester B 18 User manual

Burmester
Burmester B10 User manual

Burmester
Burmester Ambience 71 User manual

Burmester
Burmester B100 User manual