Bush CDV-03965 User manual

Instruction manual
CDV-03965
134250099

If you require any technical guidance or find that your product is not operating as intended, a simple solution can often be found in the Troubleshooting section of these instructions,
You’ll soon be enjoying your new DVD Player .
It all begins here, with your instructions. Don’t worry,
there’s nothing too technical coming up. Just simple,
step-by-step guidance to get you up and running
quickly. Sound good? Then let’s get started.
Help and Guidance
We’re here to help you get the most from your DVD Player. Should you require any
guidance, a simple solution can often be found online at:
www.bush-support.com
If you still require further assistance, call one of our experts on 0345 600 3021.

3
or online at www.bush-support.com If you still require further assistance, call one of our experts on 0345 600 3021.
Contents
1 Safety information
General safety information 6
Power source 6
Moisture and water 7
Heat sources and flames 7
Ventilation 7
Care and cleaning 7
2 Getting to know your DVD Player
Setting up 10
Your DVD player 11
Remote control 12
Making the connections 14
HDMI cable connection to the TV 14
SCART cable connection to the TV 14
RCA cable connection to the TV 14
Installing the remote batteries 14
Remote control working range 15
Connecting the mains power 15
Standby mode 15
3 Using your DVD Player
Getting started 18
Adjust the volume 18
Mute 18
Repeat play (DVD/CD/JPG) 18
Zoom (DVD, Images) 19
Multi-angle (DVD) 19
Subtitles (DVD) 19
Numeric keypad (DVD/CD) 19
DVD/USB 19
System setup 20
4 Other information
Technical specification 24
USB Port Supported Media 25
5 Product support
Troubleshooting 28
Help and assistance 29
Your Bush Guarantee 31
Important Data Protection Information 31

This page is left intentionally blank

1
Safety information

Safety information
Important - Please read these instructions fully before
installing or operating
Safety information
6
If you require any technical guidance or find that your product is not operating as intended, a simple solution can often be found in the Troubleshooting section of these instructions,
General safety information
• Keep the product and all its parts out of reach of
small children.
• This product is not intended for use by persons
(including children) with reduced physical, sensory
or mental capabilities, or lack of experience
and knowledge, unless they have been given
supervision or instruction concerning the use of the
appliance by a person responsible for their safety.
• Disconnect your DVD Player from the mains power
supply during thunderstorms or electrical storms.
• Always check that you have completely switched
off your DVD Player, before you change or
disconnect the power supply.
• Do NOT attempt to open the product. This product
does not contain any use
• Do NOT place foreign objects into the DVD
compartment.
• This product is for Indoor use only.
CAUTION
Never touch or look into the optical lens
within the DVD compartment.
This is a CLASS-1 laser product.
Use of controls or adjustments other
than those specified herein, may result in
hazardous laser light beam exposure. Do
NOT open the cover and do NOT attempt to
repair it yourself. Refer servicing to qualified
personnel. This product does not contain any
user serviceable parts. Unauthorised handling
of the device may damage it and will void
your warranty.
Power source
• Only use the power supply that came with the
product. Using an unauthorised power supply will
invalidate your guarantee and may irrecoverably
damage the product.
• In order to avoid electric shock, do not bend,
stretch, pinch or pull the power supply cable.
• Disconnect your DVD Player from the mains power
supply during thunderstorms.
• Always check that you have completely switched
off your DVD Player, before you change or
disconnect the power supply.
• Where the mains power plug or an appliance
coupler is used as the disconnect device, the
disconnect device shall remain readily operable.
• The power socket must be within easy reach.
• Switch the DVD Player off at the mains power
socket and unplug it if you are leaving it unattended
for a long period of time (holidays etc).
• Do not attempt to open the product. This product
does not contain any user serviceable parts.
Unauthorised handling of the product may damage
it and will void your warranty.
CAUTION
Danger of explosion if batteries are
incorrectly replaced. Replace only with the
same or equivalent type.
CAUTION
Do not ingest the battery, Chemical Burn
Hazard.
• If you think batteries might have been swallowed or
placed inside any part of the body, seek immediate
medical attention.
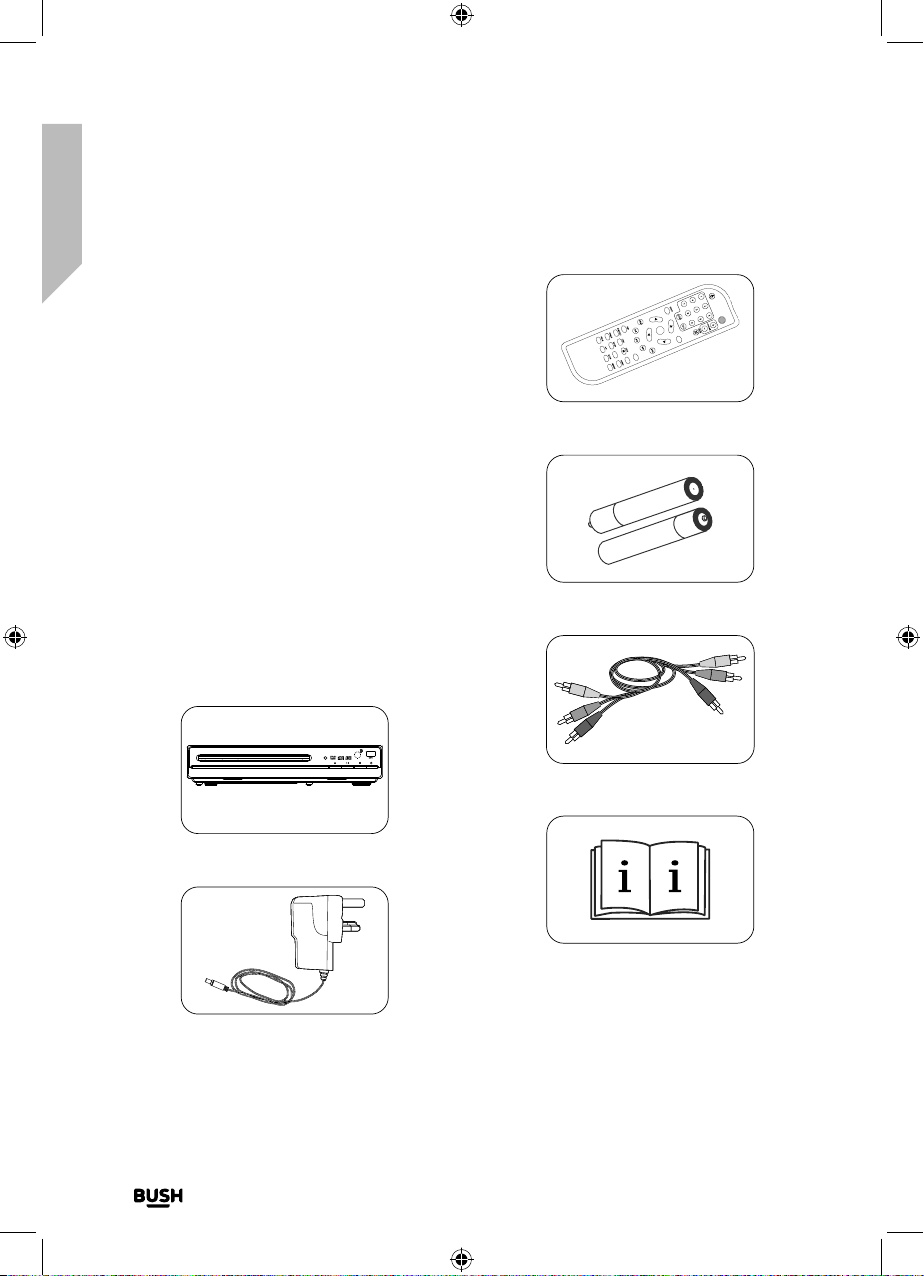
• The remote control supplied with this product
contains 2 x AAA batteries. Keep new and used
batteries away from children.
• Only use recommended batteries or those of the
same or equivalent type. Do not mix old and new
batteries or batteries of different types.
• Batteries are to be inserted with the correct polarity.
• The supply terminals are not to be short-circuited.
• Remove the batteries from the remote control if
they will not be used for an extended period of
time.

Safety information
Important - Please read these instructions fully before
installing or operating
Safety information
7
or online at www.bush-support.com If you still require further assistance, call one of our experts on 0345 600 3021.
• Never throw batteries in a fire or attempt to open
the outer casing.
• Do not expose batteries to excessive heat, such as
sunshine.
• Batteries are harmful if swallowed, so keep away
from young children.
• If the battery compartment does not close securely,
stop using the product and keep it away from
children.
Moisture and water
• To reduce the risk of fire or electric shock, do not
use this product near water or moisture.
• Do not use this product near a bath or sink, near
a swimming pool or anywhere else that water or
moisture is present.
• Do not place objects filled with water, such as a
vase, on or near the product.
• Keep it dry. Avoid exposure to precipitation,
humidity and liquids which could all affect the
product circuitry.
Heat sources and ames
• Do not leave this product in high temperatures as
electronic devices and plastic parts may warp in
heat.
• Keep it away from bright sunlight or heat sources,
such as a radiator.
• Never place any type of candle or naked flame on
top of, or near the product.
Ventilation
• Do not install this product in a confined space.
• Allow adequate ventilation to prevent heat build-up.
• Do not block or cover slots, holes or openings on
the product by placing on soft furnishings such
as carpets, rugs or beds as these are provided
for functionality and/or ventilation to ensure safe
operation of the product.
Care and cleaning
• All care and cleaning operations should be carried
out with the DVD Player unplugged from the mains
power.
• Occasionally wipe the cabinet with a lint free cloth.

This page is left intentionally blank

2
Getting to know your DVD Player

Getting to know your DVD Player
You’ll be up and running in no time
Getting to know your DVD Player
10
If you require any technical guidance or find that your product is not operating as intended, a simple solution can often be found in the Troubleshooting section of these instructions,
Ready? Let’s begin...
Please read these instructions carefully. They contain
important information which will help you get the best
from your DVD Player and ensure safe and correct
installation and operation.
If you require any further assistance, our technical
experts are happy to help. For full details, refer to
the product support section at the end of these
instructions.
Check the package contents
The package contains:
• 1 x DVD player
• 1 x Mains power adapter
• 1 x RCA cable
• 1 x Remote control
• 2 x AAA Remote control batteries
• 1 x Instruction manual
1 X DVD player
1 X Mains power adapter
Fig 18.
Fig 19.
1 X Remote control
2 X AAA Remote control batteries
RCA cable
1 X instruction manual
Setting up
If you require any technical guidance or find that your
product is not operating as intended, a simple solution
can often be found in the Troubleshooting section of
this guide
Fig 20.
STANDBY
OK
OPEN/CLOSE
MENU
DVD/USB
TITLE
GOTO
Fig 21.
Fig 22.
Fig 23.

Getting to know your DVD Player
You’ll be up and running in no time
Getting to know your DVD Player
11
or online at www.bush-support.com If you still require further assistance, call one of our experts on 0345 600 3021.
1
1. HDMI socket (HDMI cable not included)
2. Left and Right audio RCA sockets.
3. CVBS (Composite Video) socket
4. Mains power socket
5. SCART out socket (SCART cable not included)
6. DVD disc drawer
7. Power on/Standby LED
8. Remote control sensor
9. DVD Disc drawer Open/Close button
10. Play/Pause button
11. Stop button
12. Power on/Standby button
13. USB Port
Your DVD player
2 3 4 5
6 7 8 9 10
Fig 24.
Fig 25.
11 12 13

Getting to know your DVD Player
You’ll be up and running in no time
Getting to know your DVD Player
12
If you require any technical guidance or find that your product is not operating as intended, a simple solution can often be found in the Troubleshooting section of these instructions,
Fig 26.
Remote control
STANDBY
OK
OPEN/CLOSE
MENU
DVD/USB
TITLE
GOTO
14
15
16
17
18
19
20
21
23
24
25
26
27
28
29
1
2
3
4
5
6
7
8
9
10
11
12
13
22

Getting to know your DVD Player
You’ll be up and running in no time
Getting to know your DVD Player
13
or online at www.bush-support.com If you still require further assistance, call one of our experts on 0345 600 3021.
1. DVD disc drawer Open/Close
2. Numeric 0-10 and 10+
3. Setup - Press to enter/exit the Setup menu
4. Navigation (Up/Down/Left/Right)
5. Skip back
6. Fast backward
7. On screen display (OSD) -During a movie, press to
display on screen information (if available), or to
turn this information off
8. Subtitle - During a movie, press to access the
subtitle menu (if available)
9. Step - During a movie, press repeatedly to display
frame by frame. Press Play/Pause to resume
normal playback.
10. Angle -During a movie with multi-angle options,
press repeatedly to select your required viewing
angle
11. Zoom -During a movie or image display, press
repeatedly to zoom in or zoom out
12. Program - Press to enter/exit programming.
13. A-B - During a movie (if available), press to define
the start point, press again to define the end point;
the selected section will play repeatedly and
continuously. Press again to cancel.
14. Power on/Standby
15. Volume up
16. Volume down
17. Mute - Press to turn the sound off/on
18. Menu - Press to display the DVD Menu screen (if
available)
19. Enter/Select an option
20. Skip forward
21. Fast forward
22. Play/Pause
23. DVD/USB- Press to access DVD or USB mode
24. DVD title menu (if available)
25. Stop - During a movie, press once to stop,
press again to stop completely
26. Audio - During a movie, press repeatedly to select
the language/audio channels required (if available)
27. GOTO
During a movie, press the GOTO button once, the
Title, Chapter and Time selection menu will be
displayed. Use the direction and numeric buttons
to select, then press the OK button to start playing
from that point
- When playing a CD, press the GOTO button
once, the Track and Time selection menu will be
displayed. Use the direction and numeric buttons
to select, then press the OK button to start playing
from that point
28. Repeat - During a movie, press repeatedly to
switch to different repeat options
29. Slow - During a movie, press repeatedly to set a
different playback speed. Press Play/Pause to
resume normal playback.

Getting to know your DVD Player
You’ll be up and running in no time
Getting to know your DVD Player
14
If you require any technical guidance or find that your product is not operating as intended, a simple solution can often be found in the Troubleshooting section of these instructions,
Making the connections
HDMI cable connection to the TV
HDMI cable (not supplied)
An HDMI cable connection carries uncompressed
high speed video, audio and other digital information
in 100% digital form. It enables transmission of crystal-
clear digital video, multi-channel surround audio, and
advanced control data through a single cable.
Connecting your DVD player to a TV with an HDMI
cable:
SCART cable connection to the TV
SCART cable (not supplied)
A scart cable connection will carry both video and
audio and will provide you with good picture quality,
widescreen switching and stereo audio.
Connecting your DVD player to a TV with a SCART
cable:
HD M I
S C A R T O UT
DC 5 V, 1 .5 A
L
R
C V B S
WARNING: HIGH VOLTAGE INSIDE.TO PREVENT
ELECTRICAL SHOCK DO NOT REMOVE ANY COVER
OR SCREW. REFER ALL SERVICING TOQUALIFIED
SERVICE PER SONNEL. DO NOT ALL OW THIS
PRO D U C T TO BE E X P O S E D TO RAI N OR
MOISTURE. DISCONNECT THIS MAINS PLUG FROM
THE SUPPLYSOCKET WHEN NOT IN USE.
HDMI IN
Fig 27.
Fig 28.
HD M I
S C A R T O UT
DC 5 V, 1 . 5 A
L
R
C V B S
WARNING: HIGH VOLTAGE INSIDE.TO PREVENT
ELECTRICAL SHOCK DO NOT REMOVE ANY COVER
OR SCREW. REFER ALL SERVICING TOQUALIFIED
SERVICE PER SONNEL. DO NOT ALL OW THIS
PRO D U C T TO BE E X P O S E D T O RAIN O R
MOISTURE. DISCONNECT THIS MAINS PLUG FROM
THE SUPPLYSOCKET WHEN NOT IN USE.
RCA cable connection to the TV
Using the RCA cable (supplied), the red and white
plugs should be connected to the audio left and right
channels. The yellow plug should only be connected
to the video CVBS socket.
Note: When using this type of RCA plug and socket
connection, they are always colour coded e.g. red
plug to red socket etc.
Installing the remote batteries
1. Press down the tab on the remote control battery
door, in the direction of the arrow, to remove it.
2. Insert the 2 x AAA batteries supplied, taking care to
the +and - markings and position the batteries the
correct way around.
3. Replace the battery cover, making sure that it
‘clicks’ shut.
HD M I
S C A R T O UT
DC 5 V, 1 .5 A
L
R
C V B S
WARNING: HIGH VOLTAGE INSIDE.TO PREVENT
ELECTRICAL SHOCK DO NOT REMOVE ANY COVER
OR SCREW. REFER ALL SERVICING TOQUALIFIED
SERVICE PER SONNEL. DO NOT ALL OW THIS
PRO D U C T TO BE E X P O S E D TO RAI N OR
MOISTURE. DISCONNECT THIS MAINS PLUG FROM
THE SUPPLYSOCKET WHEN NOT IN USE.
L
R
Video
Fig 29.
AAA
+
-
AAA
+
-
Fig 30.

Getting to know your DVD Player
You’ll be up and running in no time
Getting to know your DVD Player
15
or online at www.bush-support.com If you still require further assistance, call one of our experts on 0345 600 3021.
Remote control working range
The remote signal may not be received if there is an
obstacle between the remote control and the remote
sensor on your DVD Player.
Note: Direct sunlight or other bright light sources
shining on the remote sensor may affect the
performance of the remote control.
Connecting the mains power
1. Connect the mains power lead into the socket on
the back of the DVD Player (fig 7).
2. Plug the power adapter into the mains power wall
socket and switch on.
Note: Do not connect the mains power until ALL
other connections have been made.
3. The Red LED on the front right of your DVD Player
will turn on and your DVD Player will now be in
Standby mode.
Standby mode
Note: This DVD Player has been designed to go to
Standby mode automatically after approximately
20 minutes of inactivity. Please press the Power
button on the product or the STANDBY button on
the remote control, to turn the DVD Player back on
again.
1. Press the Power button on the DVD Player or
the STANDBY button on the remote control to
Power on the product. The LED on the front right
of your DVD Player will change to green.
Fig 31.
16 Feet (5M)
STANDBY
OK
OPEN/CLOSE
MENU
DVD/USB
TITLE
GOTO
2. Press the Power button on the DVD Player or
the STANDBY button on the remote control to go
to Standby mode. The LED on the front right of
your DVD Player will change to red.

This page is left intentionally blank

3
Using your DVD Player

Using your DVD Player
Let’s get started
Using your DVD Player
18
If you require any technical guidance or find that your product is not operating as intended, a simple solution can often be found in the Troubleshooting section of these instructions,
Getting started
1. Check that you have correctly connected all
the cables and have installed the batteries in the
remote control.
2. Switch on your TV/Monitor and check that it is set
to the correct input, which for this DVD Player is
HDMI, SCART.or RCA phono/CVBS (composite
video).
3. With the DVD Player in Standby mode, press the
Power button on the DVD Player or the STANDBY
button on the DVD Remote control to turn the
product on. The LED on the front right of the DVD
Player will change to green.
4. Press the Open/Close button on the DVD
Player or on the remote control to open the DVD
drawer.
5. Place the disc that you wish to play, label side up,
on the DVD tray. Please ensure that the disc is
laying flat within the recessed disc shaped area on
the tray.
6. Press the Open/Close button to close the
drawer. The disc will start to play.
Adjust the volume
Volume +
Press and release to increase the volume in steps.
Press and hold to progressively increase the volume.
Volume -
Press and release to decrease the volume in steps.
Press and hold to progressively decrease the volume
Note: To gain optimal volume levels, adjust the
volume on both the DVD Player and on the TV.
Mute
Press the Mute button to turn off the sound.
Press the Mute button again to turn the sound back
on again.
Controls during playback
Play/Pause
Skip back
Fast backward
Skip forward
Fast forward
Stop - Press once to pre-stop, Your DVD Player
will remember the place where the disc was stopped.
Press the Play/Pause button to resume playback
from this point. Press the Stop button twice to stop
play completely.
Repeat play (DVD/CD/JPG)
DVD
If available on your DVD disc, your DVD player has
repeat options of CHAPTER, TITLE, REPEAT ALL and
OFF.
1. Repeatedly press the REPEAT button to display
and activate each available option.
CD
If available on your CD disc, your DVD player has
repeat options of REPEAT 1 (single track) and REPEAT
ALL (repeats all the tracks on the disc) and REPEAT OFF.
1. Repeatedly press the REPEAT button to display
and activate each available option.
Note: Some discs may not allow repeat functions.
JPG images
Your DVD player has repeat options of
• REPEAT 1 (single image)
• REPEAT DIR (repeat all images in a folder)
• REPEAT ALL (to repeat all images on the disc)
• REPEAT OFF.
1. Repeatedly press the REPEAT button to display
and activate each available option.

Using your DVD Player
Let’s get started
Using your DVD Player
19
or online at www.bush-support.com If you still require further assistance, call one of our experts on 0345 600 3021.
Zoom (DVD, Images)
With your DVD Player you can zoom into an image or
part of an image on the screen. Options of X2, X3, X4
and 1/2, 1/3 and 1/4 size are available.
1. Press the ZOOM button to activate the Zoom
feature. Repeatedly press the ZOOM button to
cycle through and display the available options.
2. When you are in Zoom mode, you can use the
up, down, left and right buttons to scroll
to the part of the picture that you wish to Zoom
into.
3. To turn the Zoom feature off, repeatedly press the
ZOOM button until ZOOM: OFF is displayed.
Note: Zooming into an image will degrade the
quality as the pixels of the image are being enlarged.
Multi-angle (DVD)
Some DVDs contain scenes which have been shot
simultaneously from a number of different angles. For
these discs, the same scene can be viewed from each
of these different angles by using the ANGLE button.
1. During playback, repeatedly press the ANGLE
button to cycle through the available angles.
Note: If different angles are not available on your
DVD ‘Invalid key’ will be displayed.
Subtitles (DVD)
1. Press the Subtitle button to turn the subtitles in a
movie (if available), on or off.
Numeric keypad (DVD/CD)
You can use the numeric keys to go to a particular
Chapter or Track when playing a DVD or CD disc.
1. Enter the chapter or track number using the
numeric keypad.
2. For chapter or track number 10, press the 10+,
followed by the 0button. For chapters or tracks
higher than 10, such as track 24, press the 10+
button twice and then the 4button.
DVD/USB
You can switch between DVD and USB mode to view
images or play music files from a USB stick.
1. Insert the USB stick into the USB socket on the
front of your DVD Player.
2. Press the DVD/USB button and use the down
button to highlight USB. Press the OK button.
3. Your DVD Player will now read the content on
your USB stick. Please wait for a few moments.
4. When the content on your USB stick is displayed,
you can use the up, down, left and
right buttons to move to the image or music file
that you want, then press the OK button.
5. To go back to DVD mode, press the DVD/USB
button and use the up button to highlight DVD.
Press the OK button.
Programming (DVD/CD)
During DVD or CD playback, you can program the
order of the Chapter, Title, or Track that you watch.
1. Press the PROG button. The program setting
menu will be displayed:
DVD
Fig 32.
T C T C
5 -- :--
T C
9 -- :--
T C
13 -- :--
2 -- :-- 6 -- :-- 10 -- :-- 14 -- :--
3 -- :-- 7 -- :-- 11 -- :-- 15 -- :--
4 -- :-- 8 -- :-- 12 -- :-- 16 -- :--
PROGRAM PLAY CLEAR
1 -- :--

Using your DVD Player
Let’s get started
Using your DVD Player
20
If you require any technical guidance or find that your product is not operating as intended, a simple solution can often be found in the Troubleshooting section of these instructions,
CD
2. Use the direction and numeric buttons to enter
and set the desired Title, Chapter or Tracks
3. After you have finished programming, use the
direction buttons to highlight PLAY and then press
the OK button.
4. To reset the programmed entries and start again.
Use the direction buttons to highlight CLEAR and
then press the OK button.
System setup
The SETUP menu enables you to set your preferences
for the different options available on your DVD Player.
You can use the Up, Down, Left and Right
buttons to highlight each function or option and then
press the OK button to confirm.
1. Press the SETUP button, to display the SETUP
menu options.
2. Use the Right and Left buttons to move
across the 4 Setup menu option screens. A yellow
bar will appear under the current menu option
screen.
PROGRAM PLAY CLEAR
1
2
3
4
5
6
7
8
9
10
11
12
13
14
15
16
----
----
----
----
----
----
----
----
----
----
----
----
----
----
----
----
Fig 33.
TV SYSTEM
SCREEN SAVER
TV SHAPE
PASSWORD
RATING
DEFAULT
LAST MEMORY
ANGLE MARK
Fig 34.
3. You can then use the Up, Down, Left
and Right buttons to highlight each function or
option and then press the OK button to confirm.
Setup - Last Memory
There are two options available, ON or OFF. If you set
the Last Memory feature to ON and you play a disc
that you have played before, the disc will start from the
place it was last stopped.
Setup - TV Shape
The TV Shape option enables you to set the aspect
ratio of the DVD Player to match to the connected TV.
The following options are available:
• 4:3/PS (pan and scan)
• 4:3/LB (letter box)
• 16:9 (widescreen).
Setup – Angle Mark
There are two options available, ON or OFF. If you set
the Angle Mark feature to ON and you play a disc that
has multi angle viewing options, the Angle icon will
appear in the display when this option is available
Setup - Password
You can set the viewing rating for your DVD Player and
protect this with your own password:
Setting your own password:
1. Within the SETUP menu, scroll down and highlight
PASSWORD and press the OK button. The 4 digit
password and lock symbol will be highlighted .
2. Enter the default password of 0000 and press the
OK button. The lock symbol will change to be
unlocked .
3. Use the right arrow to highlight the 4 digit
password and unlock symbol again. Enter your
own 4 digit password and press the OK button.
The lock symbol will changed to be locked
again and your new 4 digit password has been
saved.
This manual suits for next models
1
Table of contents
Other Bush DVD Player manuals