Bush BDVD72708M User manual

BDVD72708M
7" Twin Mobile
DVD Player
OWNER'S MANUAL

GB - 1
SAFETY PRECAUTIONS
* SEE BACK OF UNIT FOR GRAPHIC
SYMBOLS *
The lightning flash with an arrowhead symbol,
within the equilateral triangle, is intended to
alert the user to the presence of uninsulated
"dangerous voltage" within the product's
enclosure that may be of sufficient magnitude
to cause an electric shock.
WARNING: TO REDUCE THE RISK OF ELECTRIC
SHOCK, DO NOT REMOVE COVER (OR BACK).
NO USER-SERVICEABLE PARTS INSIDE. REFER
SERVICING TO QUALIFIED SERVICE PERSONNEL.
WARNING: TO PREVENT FIRE OR SHOCK HAZARD,
DO NOT EXPOSE THIS APPLIANCE TO RAIN OR
MOISTURE.
CAUTION: DANGER OF EXPLOSION IF BATTERY IS
INCORRECTLY REPLACED. REPLACE ONLY WITH
THE SAME OR EQUIVALENT TYPE.
On Placement
• Donotusetheunitinplacesthatareextremelyhot,cold,dusty,orhumid.
On Safety
• WhenconnectingordisconnectingtheACadaptor,griptheplugandnotthecorditself.Pullingthecordmay
damage it and create a hazard.
• Whenyouarenotgoingtousetheunitforalongperiodoftime,disconnecttheACadaptorfromtheACwall
outlet.
On Condensation
• Whenleftinaheatedroomwhereitiswarmanddamp,waterdropletsorcondensationmayforminsidetheunit.
Whenthereiscondensationinsidetheunit,theunitmaynotfunctionnormally.Lettheunitstandfor1to2hours
before turning the unit on, or gradually heat the room up and allow the unit to dry before use.
Ventilation Warning
• Donotblocktheventilationopeningsorholes.(Iftheventilationopeningsorholesareblockedbyanewspaper
or cloth, etc., the heat may not be able to get out.)
• Leaveaminimumof5cmaroundtheapparatusforsufcientventilations.
Rating Plate Location
• Theratingplateislocatedatthebackoftheunit.
The exclamation point within the equilateral
triangle is intended to alert the user to
the presence of important operating and
maintenance (servicing) instructions in this
owner manual.
CAUTION
INVISIBLELASERRADIATIONWHEN
OPENANDINTERLOCKSDEFEATED.
AVOIDEXPOSURETOBEAM
DO NOT EXPOSE THIS UNIT TO RAIN OR MOISTURE
CAUTION
RISK OF ELECTRIC SHOCK
DO NOT OPEN
This symbol means that the unit
complies with European safely and
electrical interference directives.
This product contains a low
power laser device.
WARNING: THE APPARATUS SHALL NOT BE
EXPOSED TO DRIPPING OR SPLASHING AND
THAT NO OBJECTS FILLED WITH LIQUIDS, SUCH
AS VASES, SHALL BE PLACED ON APPARATUS
WARNING:
• Shouldanytroubleoccur,disconnecttheACadaptorandreferservicingtoaqualiedtechnician.
• Donotallowtheunittobeexposedtodrippingorsplashing.Noobjectslledwithliquids,suchasvases,shall
be placed on the unit.
• TheACadaptorisusedasthedisconnectdeviceanditshallremainreadilyoperable.Ifamalfunctionoccurs,
disconnecttheACadaptorfromtheACwalloutletatonce.

GB-2
IMPORTANT SAFETY INSTRUCTIONS
SAFE USE OF YOUR EQUIPMENT
Hereareafewtipstohelpyoudothis:
READ this instruction manual before you attempt to use the equipment.
NEVER t make shift stands or legs with woodscrews. Use only approved supports and fasteners specially
designed for the equipment.
NEVERletanyone,especiallychildren,pushobjectsintoholes,ventilationslotsoranyotheropening;thiscould
result in fatal electric shock!
ENSUREthatallelectricalconnections(includingthemainsplug,extensionleadsandinterconnectionsbetween
piecesofequipment)areproperlymadeinaccordancewiththeinstructionsgiven.Switchoffthemainsupplywhen
making or changing connections.
CONSULT your dealer if you are ever in doubt about the installation, operation or safety of your equipment.
DON'T continue to operate the equipment if it is damaged in any way or if it does not function normally.
DON'T leave equipment switched on when it is unattended unless it is part of it's normal function to operate in your
absence,forexampleavideocassetterecorderwithtimedrecordingfacility.
LISTENtoheadphonesatmoderatevolumelevels;highvolumelevelscanpermanentlydamageyourhearing.
Notes on Copyright
Itisforbidden bylaw to copy, broadcast, show,broadcastoncable, playin public,or rent copyrightedmaterial
without permission.
Apparatus Claims of U.S. Patent Nos. 6,836,549; 6,381,747; 7,050,698; 6,516,132; and 5,583,936 licensed for
limited viewing uses only.
ThisproductincorporatescopyrightprotectiontechnologythatisprotectedbyU.S.patentsandotherintellectual
propertyrights.UseofthiscopyrightprotectiontechnologymustbeauthorizedbyMacrovision,andisintended
forhomeandotherlimitedviewingusesonlyunlessotherwiseauthorizedbyMacrovision.Reverseengineeringor
disassembly is prohibited.
SAFETY PRECAUTIONS
WARNING:
• AC adaptor isused as the disconnect device. Itshall remain readily operable and shouldnot be obstructed
duringintendeduse.Tobecompletelydisconnectedtheapparatusfromsupplymains,theACadaptorofthe
apparatusshallbedisconnectedfromtheACwalloutletcompletely.
• NeveruseanACadaptorthatisdamaged,routepowerleadinasafemannerandmakesureitisnotsubjected
totrappingorpinching.Ifthepowerleadisdamagedrefertoaqualiedserviceagent.
• Placetheunitonaatandevensurface.
• Donotrestricttheairowoftheunitbyplacingitinaplacewithpoorairow,bycoveringitwithacloth,orby
placing it on carpeting.
• Toavoidmagnetized,donotplacetheunitnearspeakerormagnet.
• Donotusethisunitindirectsunlightorleavetheunitinaclosedautomobilewhereitwouldbeexposedtohigh
temperaturesabove40°C.
• Italsoshouldnotbeplacedintemperatureslessthan5°Corgreaterthan35°C.
• No naked ame sources such as lighted candles should be placed on the AC power adaptor and the
apparatus.
• WhenthesignallampLEDisoff,itindicatesthattheapparatusiscompletelydisconnectedfromthecarcigarette
lighter socket.

GB-3
TABLE OF CONTENTS
SafetyPrecautions ...........................1
ImportantSafetyInstructions.............2
TableofContents...............................3
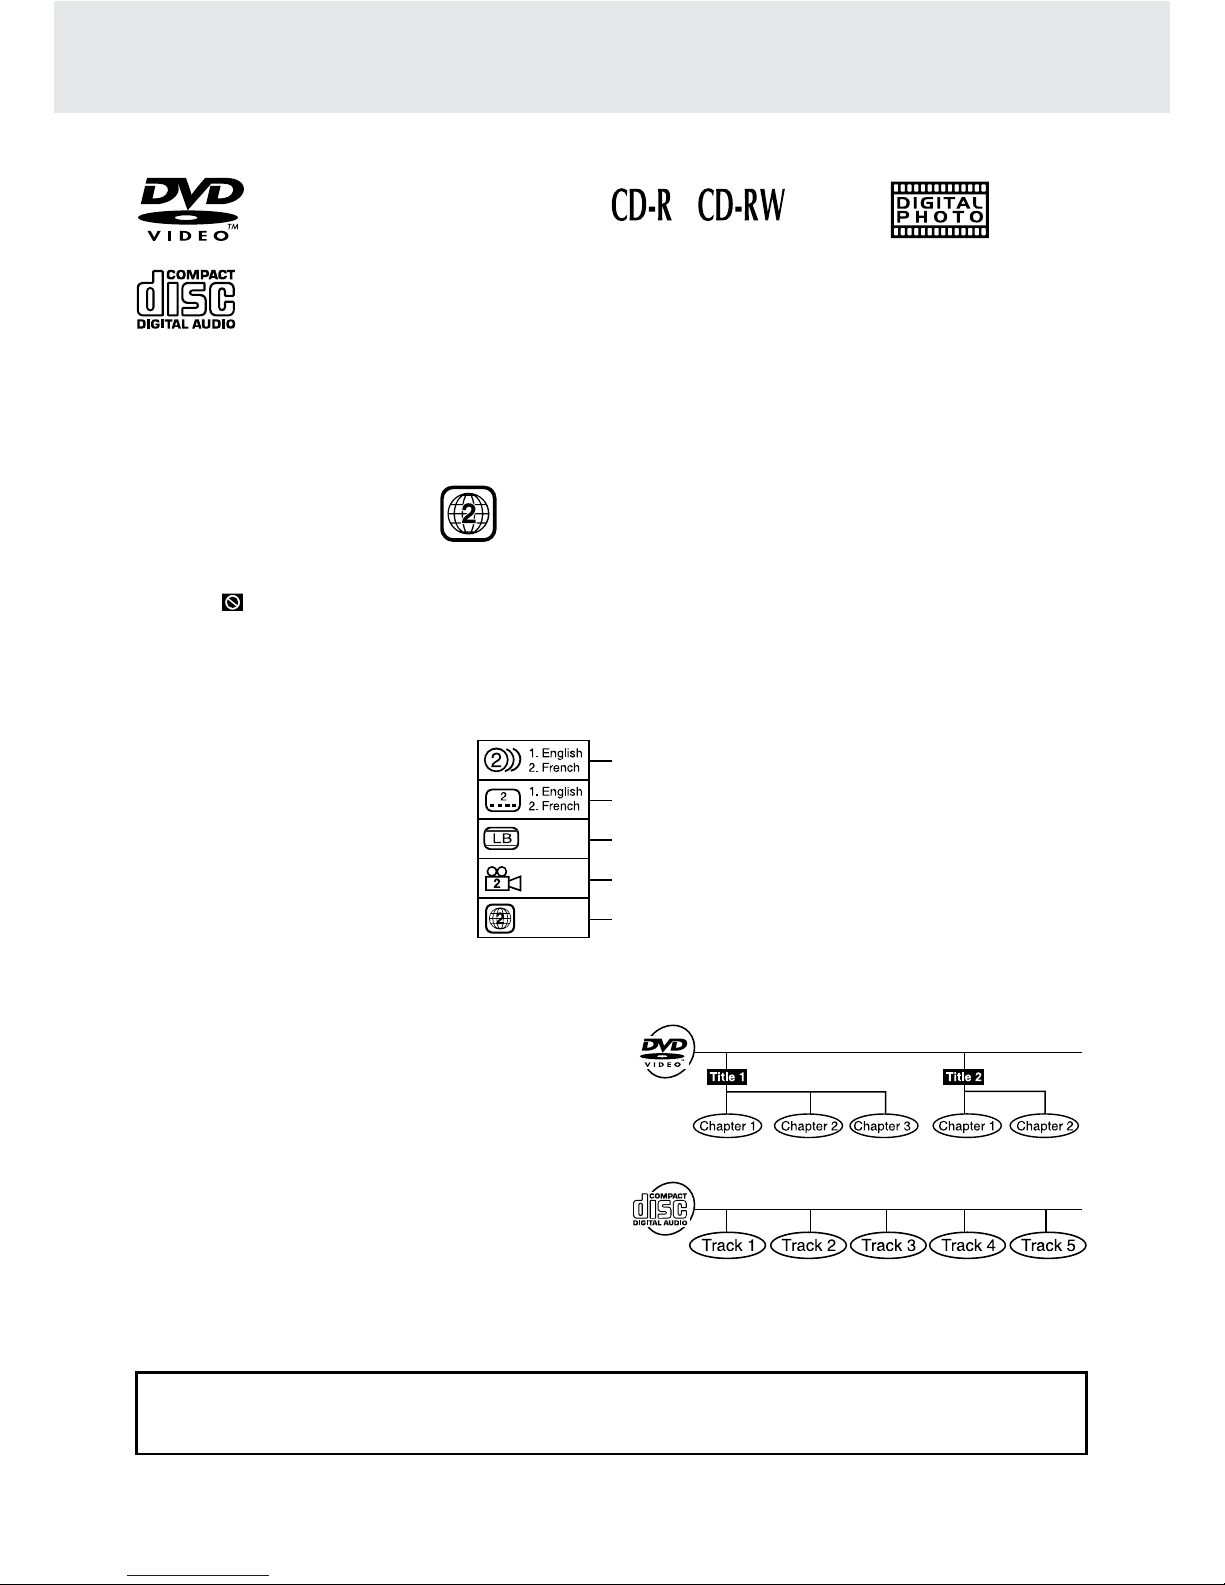
DiscFormats .....................................4
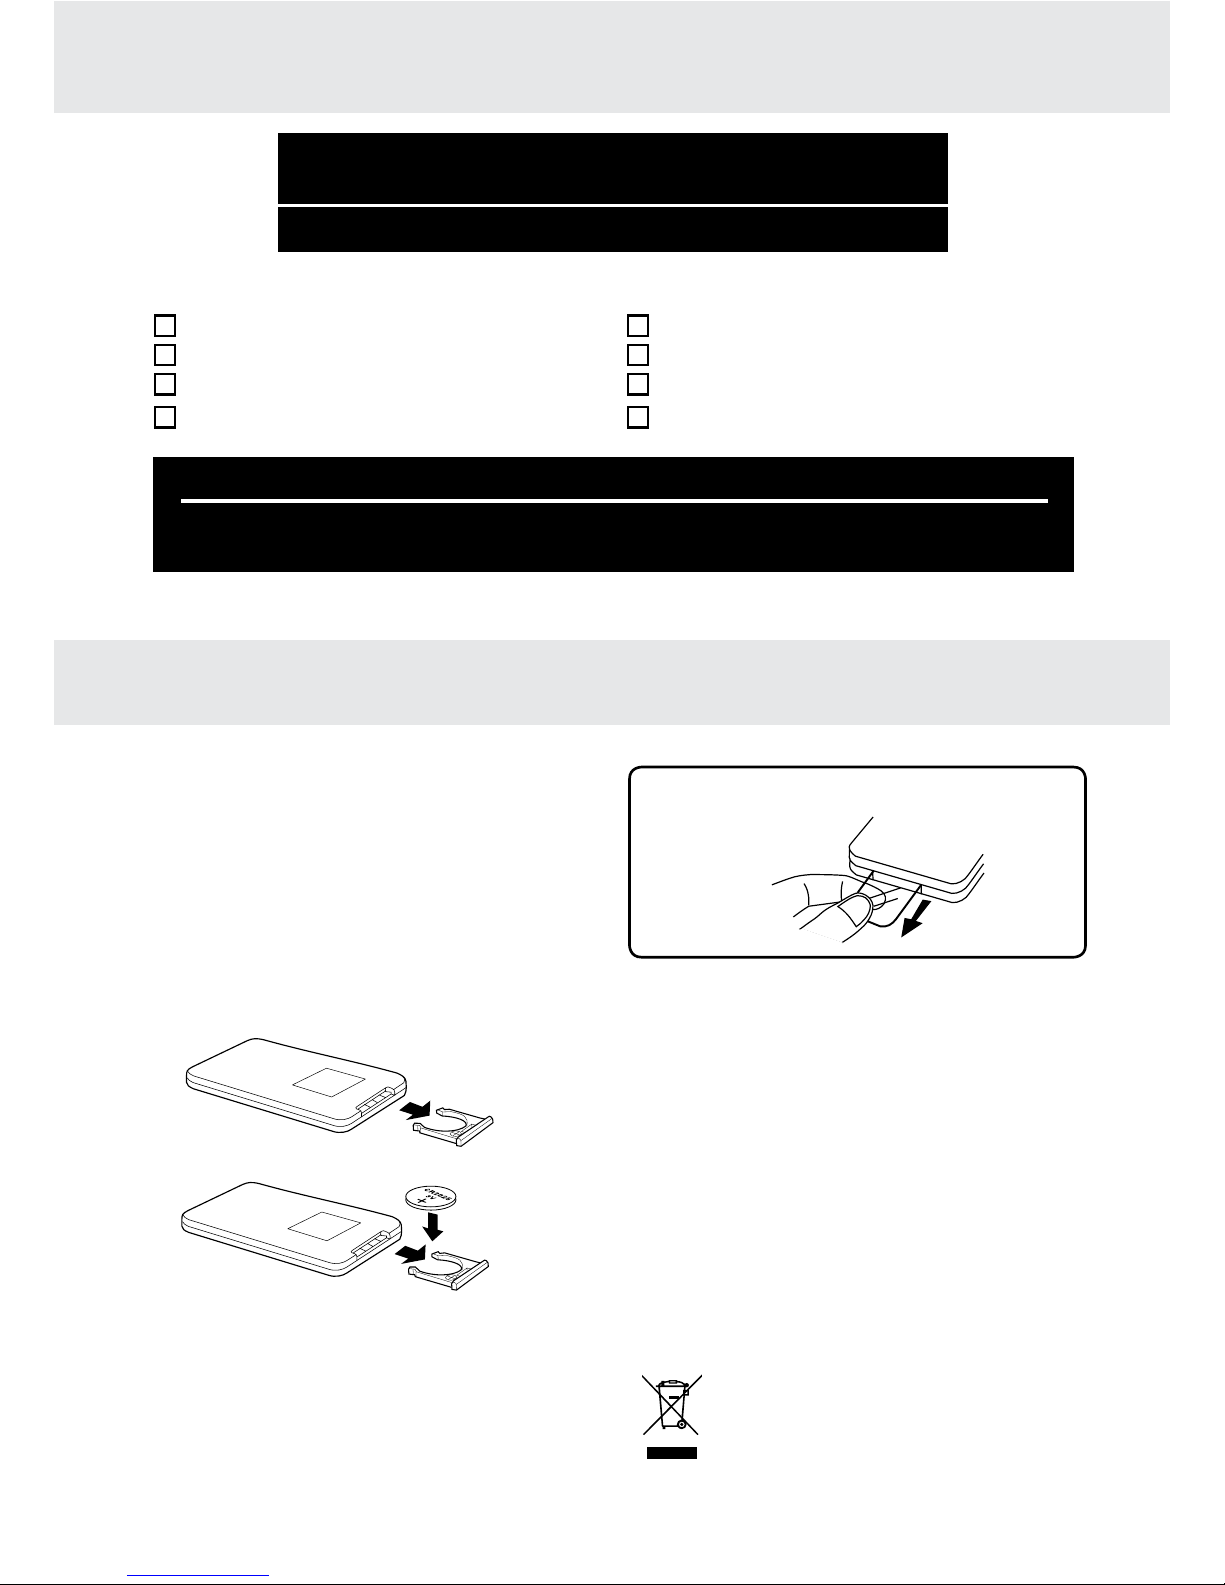
Accessories ......................................5
RemoteControl ................................5
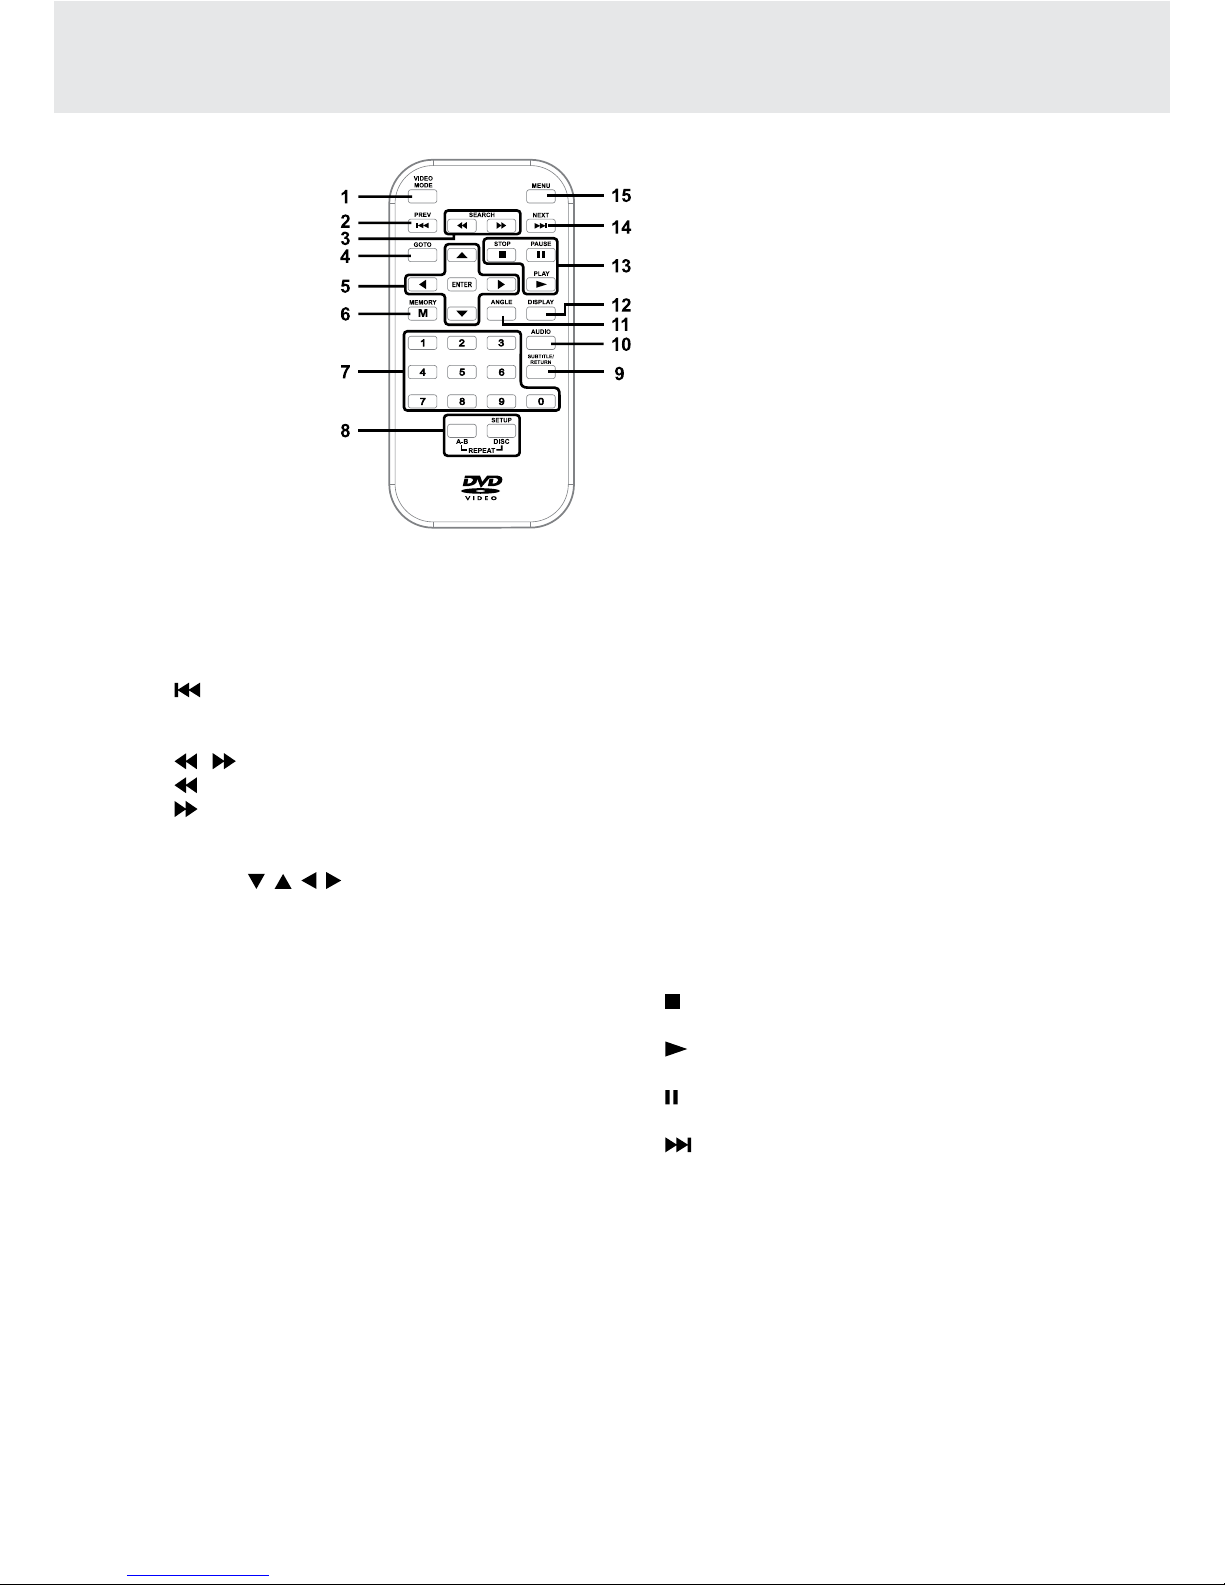
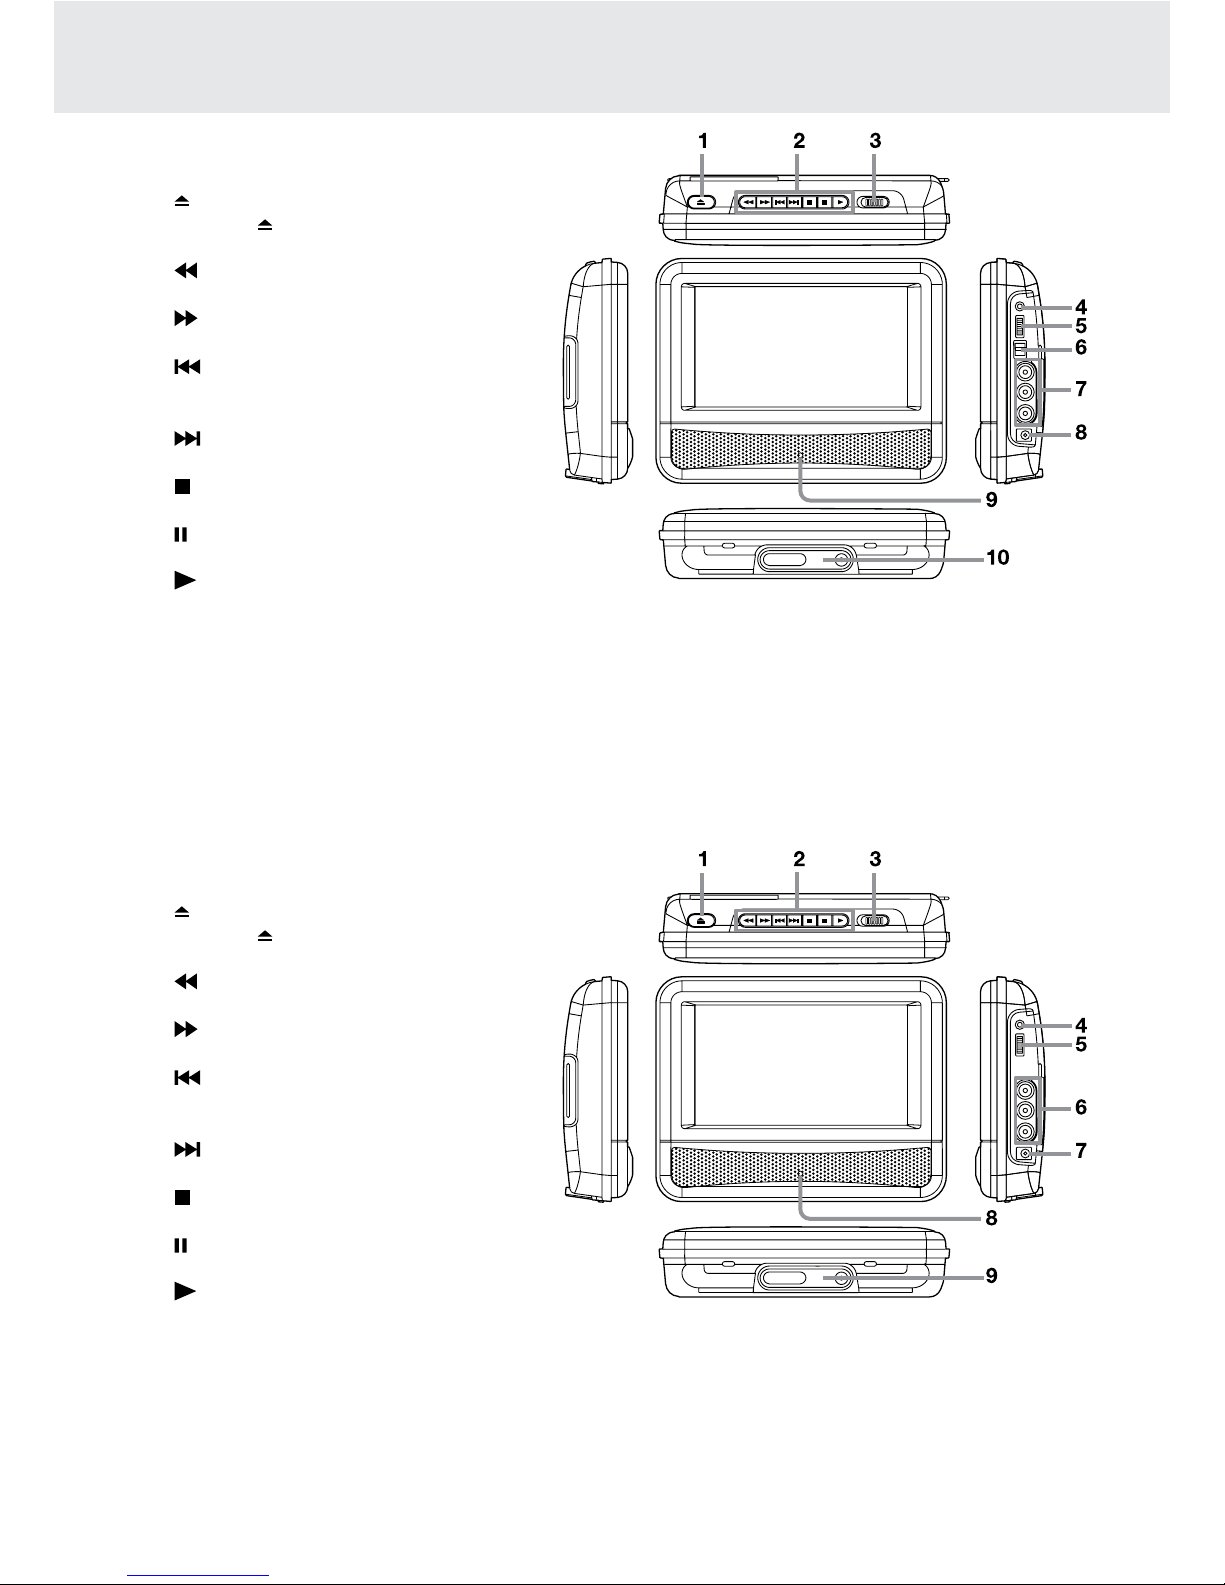
ControlReferenceGuide...............6-7
RemoteControl ........................................... 6
DVDPlayer .................................................. 7
PowerSupply....................................8
UsingtheCarPowerAdaptor...................... 8
UsingtheACPowerAdaptor....................... 9
Connections................................10-12
ConnectingtoaTV.................................... 10
ConnectingtoaStereoReceiveror
Amplier .................................................... 10
ConnectingtoGameSystem/Video
Equipments ............................................... 11
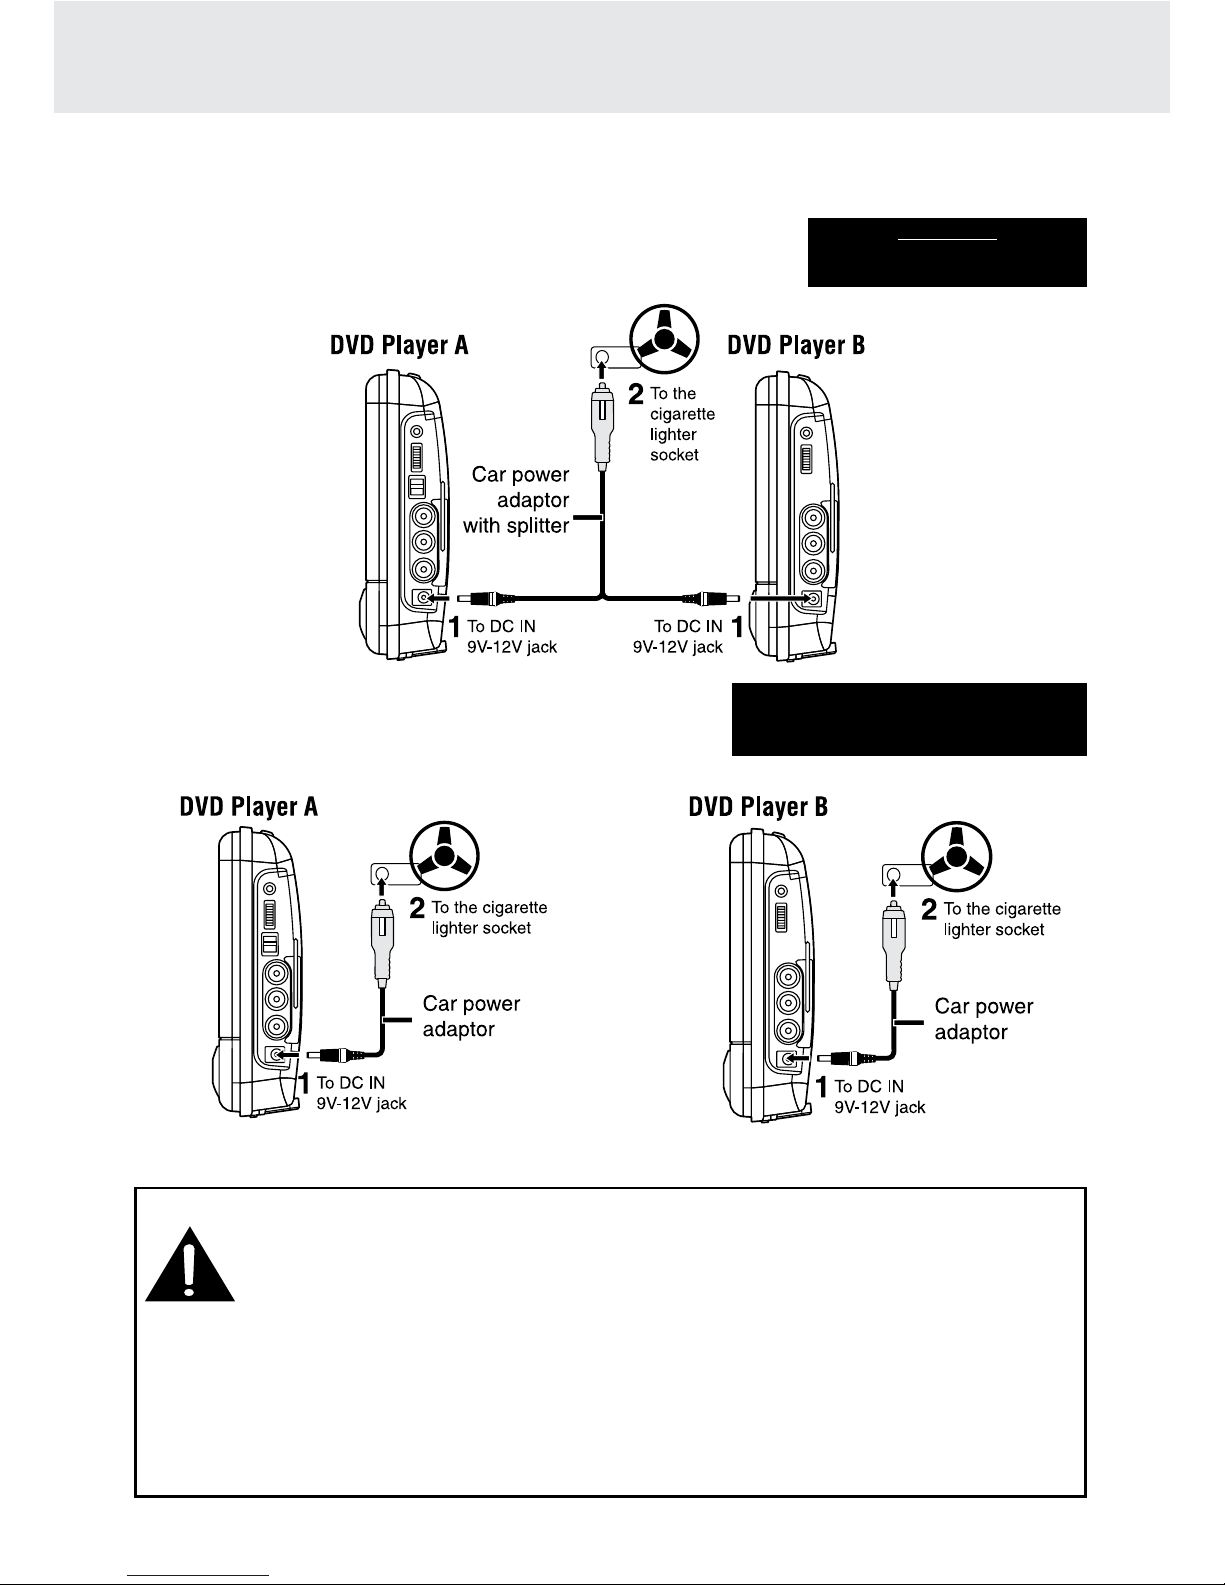
WatchingaDVDonbothplayers............... 11
UsingHeadphones/Earphones ................. 12
UsingtheStandforDesktopUse ....12
MountingintheVehicle....................12
Installationguide ....................................... 12
SoundSystem .................................13
UnitOperation ................................13
PlayingaDisc.............................14-15
PlayingaDisc............................................ 14
PausingPlayback(StillMode) ................... 14
StoppingPlayback..................................... 14
FastForward/FastReverse...................... 14
Skip(Forward/Reverse)........................... 14
AudioSelection......................................... 14
SubtitleSelection....................................... 15
AngleSelection ......................................... 15
DisplayFunction ........................................ 15
AdjusttheLCDScreen.............................. 15
LocatingaDesiredSection..............16
LocatingaSpecicTitle............................. 16
LocatingaSpecicChapter ...................... 16
LocatingaSpecicTime ........................... 16
DVDProgrammableMemory...........17
PlayingTitles/ChaptersinaFavourite
Order ......................................................... 17
RepeatPlayback..............................17
RepeatingaChapter/Title ........................ 17
RepeatingaSingleTrack/WholeDisc....... 17
RepeatingaSpecicSection ................... 17
ViewingJPGFiles ...........................18
PlayModesforCDorJPEG
Disc..................................................18
CustomizingtheFunction
Settings.......................................19-22
LanguageSetup ........................................ 19
VideoSetup............................................... 20
RatingSetup.............................................. 20
MiscSetup................................................. 21
Maintenance....................................22
CleaningtheDisc ...................................... 22
CleaningtheUnit....................................... 22
ImportantNote.......................................... 22
Troubleshooting Guide.....................22
ProductGuarantee ..........................23

GB-4
DISC FORMATS
ThisDVDplayercanplaybackdiscsbearinganyofthefollowingmarks:
Region Management Information
RegionManagementInformation:ThisunitisdesignedandmanufacturedtorespondtotheRegionManagement
InformationthatisencodedonDVDs.IftheregionnumberprintedontheDVDdoesnotcorrespondtotheregion
number of this unit, this unit cannot play that disc.
Theregionnumberofthisunitis2.
Disc Function or Operation that is Not Available
Whenthe symbolappearsontheTVscreen,itindicatesthatthefunctionoroperationattemptedisnotavailable
atthattime.ThisoccursbecausetheDVDmanufacturerdeterminesthespecicfunctions.Certainfunctionsmay
not be available on some discs. Be sure to read the documentation provided with the disc.
Titles, Chapters and Tracks
• DVDsaredividedinto“titles”and“chapters”.Ifthedisc
has more than one movie on it, each movie would be a
separate“title”.“Chapters”aresectionsoftitles.
• AudioCDsaredividedinto“tracks”.A“track”isusually
onesongonanAudioCD.
Note:
• Numbersidentifyeachtitle,chapter,andtrackonadisc.Mostdiscshavethesenumbersrecordedonthem,but
some do not.
Icons Used on DVDs
Samplelcons
Note:
• Whenplaying backaCD-G(Graphics)or CD EXTRA disc,theaudioportionwillbeplayed,butthe graphic
images will not be shown.
Notes on Unauthorized Discs
You may not be able to play back some DVDs on this unit if they were purchased from outside your
geographic area or made for business purposes.
DVDs
[8cm(3")/12cm(5")disc]
AudioCDs
[8cm(3")12cm(5")disc]
Languageselectionsforaudio
Languageselectionsforsubtitles
Screenaspectratio
Multiplecameraangles
Regioncodeindicator
Compatible

GB-5
ACCESSORIES
REMOTE CONTROL
Using the Remote Control
• PointtheremotecontrolattheREMOTESENSOR
located on the unit.
• When there is a strong ambient light source, the
performance of the infrared REMOTE SENSOR
may be degraded, causing unreliable operation.
• The recommended effective distance for remote
operationisabout16feet(5meters).
To Change Remote Battery
1. Openthebatterydoor.
Take out the plastic sheet before operating the
RemoteControl.
2. InsertoneCR2025(3V)sizebattery.
RemoteControl(withbattery) ..........................x2
ACPowerAdaptor ............................................x2
CarPowerAdaptor ...........................................x1
CarPowerAdaptorwithsplitter ........................x1
AVCable...........................................................x1
MountingStrap .................................................x2
CarryingBag ....................................................x1
Earphones ........................................................x2
Please check and identify the supplied accessories.
BATTERY REPLACEMENT
Whenbatterybecomesweak,theoperatingdistanceof
theRemoteControlwillgreatlyreducedandyouwillneed
to replace the battery.
Note:
• IftheRemoteControlisnottobeusedforalongtime,
remove the battery to avoid damage caused by battery
leakage corrosion.
• Corrosion, oxidation, battery-leakage and any other
gradually acidic defect of this nature will invalidate the
guarantee.
• When discarding batteries, environmental problems
must be considered and local rules or laws governing
the disposal of these batteries must be followed
strictly.
Waste electrical and electronic products
must not be disposed of with household
waste. Please refer to the retailer from
whom you purchased this item for disposal
instructions.
TECHNICAL HELP ON THE OPERATION OF THIS PRODUCT IS AVAILABLE
MONDAY TO FRIDAY 1 PM TO 9 PM
PLEASE CALL 0845 307 5537
IF YOU REQUIRE ANY OTHER ACCESSORIES FOR THIS PRODUCT
PLEASE CALL 01302 872207
MONDAY TO FRIDAY 9 AM TO 5 PM
WARNING:
• DONOTDISPOSEOFBATTERYINFIRE;BATTERY
MAYEXPLODEORLEAK.
• Batteriesshouldnotbeexposedto excessiveheat
such as sunshine, fire or the like.
CAUTION
Danger of explosion if the battery is incorrectly
replaced. Replace only with the same or equivalent
type.
Argos MK9 2NW

GB-6
CONTROL REFERENCE GUIDE
Remote Control
1) VIDEO MODE Button
AdjustsBrightness,Contrast,ColourorViewMode
oftheLCDscreen.
2) PREV Button
Movesbackthroughtitles,chaptersortracksona
disc.
3) / SEARCH Buttons
SEARCH:Fastreverseplayback.
SEARCH:Fastforwardplayback.
4) GOTO Button
SkipsdirectlytoalocationonaDVD.
5) Cursor ( , , , ) Buttons
Movesbetweenselectionsonamenuscreenand
adjustscertainsettings.
ENTER Button
Conrmsselectionsonamenuscreen.
6) MEMORY Button
In STOP mode, sets titles/chapters in a favorite
order.
7) Number (0 - 9) Buttons
Use when creating programs, entering parental
controlpasswordorlocatingatitle/chapter/trackor
specific time.
8) REPEAT A-B Button
Performspoint-to-pointrepeatplaybackonaDVD
orCD.
REPEAT DISC Button
RepeatsaDVDchapterortitle.
RepeatsaCDtrackortheentiredisc.
SETUP Button
Instopmode,itbringsuptheunit’sSETUPmenu.
9) SUBTITLE Button
Selectsoneofthesubtitlelanguagesprogrammed
onaDVD(ifavailable).
RETURN Button
ReturnstonormaloperationafterusingtheSETUP
menuofaDVD.
10) AUDIO Button
Selectsone of the audio soundtrackson a DVD
(ifmorethanoneisavailable)orselecttheaudio
outputmodeonaCD.
11) ANGLE Button
Switches between multiple camera angles when
the DVD you are playing has been programmed
with multiple camera angles.
12) DISPLAY Button
Showsstatusinformationonthescreen.
13) STOP Button
Stopsplayingadisc.
PLAY Button
Startsorresumesplaybackofadisc.
PAUSE Button
Pausesplaybackandframeadvance.
14) NEXT Button
Movesforwardthroughtitles,chaptersortrackson
a disc.
15) MENU Button
EntersandexitsthemainDVDmenu.
Note:
The included remote controls have different color
keys to identify which unit they operate. The remote
controlwithbluekeysoperatesUnitAwhich has
a blue stripe on the front of the unit. The remote
control with green keys operates Unit B, with a
similar green stripe on the front of the unit.

GB-7
CONTROL REFERENCE GUIDE
DVD Player A
(withbluestripeonthefront
panel)
1) OPEN Button
Pressthe OPENbuttonandholdthefront
panel to open the disc door.
3) SEARCH Button
Performsfastreverseplayback.
SEARCH Button
Performsfastforwardplayback.
PREV Button
Goes backwards to previous chapters/
tracks/titles.
NEXT Button
Advanceschapters/tracks/titles.
STOP Button
Stopsplayingadisc.
PAUSE Button
Pausesplaybackandframeadvance.
PLAY Button
Startsorresumesplaybackofadisc.
3) STANDBY(power off) / ON Switch
4) Headphone Jack
5) VOLUME Control
Adjuststhevolume.
6) DVD / AV IN switch
7) AUDIO / VIDEO OUT Jacks
8) DC IN 9V-12V Jack
9) Remote Sensor
Receivestheremotecontrolsignal.
POWER ON Indicator
When the STANDBY / ON switch is in the ON
position, the light will illuminate.
10) Stand
DVD Player B
(withgreenstripeonthe
front panel)
1) OPEN Button
Pressthe OPENbuttonandholdthefront
panel to open the disc door.
3) SEARCH Button
Performsfastreverseplayback.
SEARCH Button
Performsfastforwardplayback.
PREV Button
Goes backwards to previous chapters/
tracks/titles.
NEXT Button
Advanceschapters/tracks/titles.
STOP Button
Stopsplayingadisc.
PAUSE Button
Pausesplaybackandframeadvance.
PLAY Button
Startsorresumesplaybackofadisc.
3) STANDBY(power off) / ON Switch
4) Headphone Jack
5) VOLUME Control
Adjuststhevolume.
6) AUDIO / VIDEO OUT Jacks
7) DC IN 9V-12V Jack
8) Remote Sensor
Receivestheremotecontrolsignal.
POWER ON Indicator
When the STANDBY / ON switch is in the ON
position, the light will illuminate.
9) Stand

GB-8
POWER SUPPLY
Using the DVD Player A and B together
Using DVD Player A or B separately
A. Using the Car Power Adaptor
Theincluded12Vcarpoweradaptorisdesignedforusewithvehiclesthathavea12V,negativegroundelectrical
system.
Cautions:
•Usethisunit only with the included 12V carpoweradaptor. Use with othercaradaptorscould
damage the unit, or even your vehicle.
•The included12Vcarpoweradaptor is forusewiththisunitonly. Do not use it with any other
equipment.
•Intheinterestoftrafcsafety,driversshouldnotoperatetheunitorviewvideoswhiledriving.
• Whentheinsideofthe12Vcarsocketisdirtywithashesordust,theplugsectionmaybecomehotduetopoor
contact.Besuretocleanthe12Vcarsocketbeforeuse.
• Afteruse,disconnectthe12Vcarpoweradaptorfromboththeunitandcigarettelightersocket.
• Iftheunitisnotproperlyattachedtoavehicle,itmaybecomeairborneintheeventofanaccidentandcause
damage,injury,ordeath.
• Checkyourlocaltrafclawsforrulesgoverningtheuseofvideodevicesinvehicles.
IMPORTANT
This car adaptor is for use with
12 volt batteries only.
WARNING:
Disconnect this car power adaptor when
not in use. Not for use in 24V vehicles.

GB-9
B. Using the AC power Adaptor
TheincludedACpoweradaptoroperatesonACbetween100V-240V.
• ThesuppliedACpoweradaptorissuitableforuseonACmainssuppliesof100-120VoltsACandshouldonly
be connected to a mains supply within these parameters.
Cautions:
• TurnofftheunitbeforeunpluggingtheACpoweradaptortoavoiddamagetotheunit.
• Whentheunitisnotgoingtobeusedforalongtime,disconnecttheACpoweradaptorfromtheAC
outlet.
• TheACpoweradaptorincludedwiththisunitisforitsuseonly.Donotuseitwithotherequipment.
IMPORTANT
• Be sure to use the unit close to the wall outlet and make it is easily accessible. If a malfunction occurs,
disconnect the plug from the wall outlet at once.
• WhentheACpoweradaptorispluggedin,theapparatusisnotcompletelydisconnectedfromthemainpower
source, even when the unit is turned off.
POWER SUPPLY

GB-10
CONNECTIONS
Watching a DVD on your TV
1.ConnectyourTVtotheDVDPlayersusingaAVCable.
2. TurnontheDVDPlayer.SlidetheDVD/AVINswitchonDVDPlayerAtoDVD.
3. TurnontheTVandfollowtheinstructionsincludedwithittoplaytheDVD.
Note:
• MakesuretousethecorrectAudio/Videocable.Connectingtheplugsincorrectlymaycauseaweaksignal.
• IfyourTVdoesnothaveAudio/Videoinputs,youwillneedtopurchaseanRFmodulator(soldseparately)and
followtheinstructionsincludedwithittoconnecttheunittoyourTV.
A. Connecting to a TV
IfyourTVhasAudio/Videoinputs,youcanconnecttheDVDPlayerstoyourTVusingtheincludedAVcable.
or
B. Connecting to a Stereo Receiver or Amplifier
TheDVDPlayerscanplaytwochannelsDolbyDigital.
Listening on External Audio Equipment
1.ConnecttheDVDPlayerstotheleft/rightAudioInjacksontheotherequipmentusingaAVcable
2. Turnonyouraudioequipment.SlidetheDVD/AVINswitchonDVDPlayerAtoDVD.
3. TurnonyouraudioequipmentandfollowtheinstructionsprovidedwithittoselecttheAUDIOINfunction.
Note:
• MakesuretousethecorrectAudiocable.Connectingtheplugsincorrectlymaycauseaweaksignal.
• IfyouhaveastereoVCR,makesureyousetittostereomode.
• Dueto copyrightprotection, DVD movies cannot be copied. If you copya DVD movieonto a videotape,the
resultingcopywillbeunclear,withpoorsoundquality.ThisisNOTcausedbyadefectiveDVDsystem.
or

GB - 11
CONNECTIONS
C. Connecting Game Systems/Video Equipments (for DVD Player A only)
Youcanconnectgamesystemorothervideoequipmentsforplayback.
Watching video equipment
1. ConnecttheotherequipmenttothemonitorusingaAVCable.
2. TurnontheDVDPlayerA.SlidetheDVD/AVINswitchtoAVIN.
3. Turnonthevideoequipmentandfollowtheinstructionsprovidedwithittoplayback.
Notes:
• MakesuretousethecorrectAVcable.Connectingtheplugsincorrectlymaycauseaweaksignal.
• IfyouhaveamonoVCR,thevolumelevelfromthespeakerswillbelow.
D. Watching a DVD on DVD Player A and B together
YoucanwatchthesameDVDonPlayerAandB.
Watching on Player A and B
1. ConnectPlayerAandBusingtheincludedAVcable.
2. TurnonPlayerAandB.SlidetheDVD/AVINswitchonPlayerAtoAVIN.
3. PlayaDVDonPlayerA;theotherplayerwillplayatthesametime.

GB-12
CONNECTIONS
E. Using Earphones
Turn down the volume before connecting the earphones. Slowly
raise the volume with the earphones on until you reach your
desired volume.When earphones are connected, the speaker is
automatically disabled.
Caution:
• Avoid listening to sound at excessive levels which could be
harmfultoyourears.Atfullpower,theprolongedlisteningofthe
walkman can damage the ear of the use.
Maximum output voltage < 150mV
HEADPHONE VOLUME WARNING
USING THE STAND FOR DESKTOP USE
YoucanstandtheDVDplayersuponadeskortableusingthestandonthebottom.

GB-13
MOUNTING IN THE VEHICLE
Mounting in the Vehicle
UsethesuppliedmountingstrapstoinstalltheDVDPlayersonthebackofthevehicle'sheadrests.Tightlywrapthe
mounting strap around the headrest.
SAFETY WARNING!
• Thisunitshouldneverbeusedbythevehicle'sdriverorleftunsecuredinthevehiclewhiledriving.
• Ifthisunitisbeingusedinyourvehicle,besurethatitissecuredorheldsafely,anddoesnotobstructanysafety
device, including air bags or seat belts.
• Allpassengersshouldwearseatbeltswhenusingthisunitinamovingvehicle.
• Ifindoubt,pleasecontactyourvehiclemanufacturerforfurtheradvice.
INSTALLATION GUIDE

GB-14
UNIT OPERATION
Turning on the DVD Player
1. SlidetheSTANDBY / ONswitchontheDVDPlayertotheONposition.
2. Thestart-uppicturewillappearonbothscreens.
3. Afteruse,slidetheSTANDBY / ONswitchontheDVDPlayertoSTANDBY.
Note:
Whentheplayerisnotgoingtobeusedforalongtime,disconnecttheACpoweradaptorfromtheACwalloutlet.
SOUND SYSTEM
Dolby Digital
DolbyDigitalisatechnologydevelopedbyDolbyLaboratories.SoundtracksencodedinDolbyDigitalcanreproduce
fromoneto5.1discretechannelsofexcellentqualityaudio.
Theunitautomaticallyrecognizesthe DolbyDigital bitstream and providesadownmixsuitable fortwo-channel
listening.AnadditionalDolbyDigitaldecoderisrequiredforreproductionofthediscretemulti-channelsoundtracks
availableonmanyDVDs.
ManufacturedunderlicensefromDolbyLaboratories.
'Dolby'andthedouble-DsymbolaretrademarksofDolbyLaboratories.

GB-15
Playing a Disc
1. SlidetheSTANDBY / ONswitchtotheONposition.SeeCUSTOMIZING THE FUNCTION SETTINGS before
proceedingtostep2.
2. Pressthe OPEN button and hold the front panel to open the disc door.
3. Holdthediscbyitssidesandgentlypushitontothespindle,withlabelsidefacingtowardyouuntilyouheara
“click”.
4. Gentlypushthediscdoorclosed.Ittakesashortwhileforyourunittoloadthedisc.Afterloading,formostDVDs,
theunitwillautomaticallytakeyoumainmenuorstartplaying.Iftheunitdoesnotautomaticallystartplayingthe
DVD,pressthe PLAY button.
Pausing Playback (Still Mode)
Pressthe PAUSE button. To resume normal playback, press the PLAY button.
Eachtimeyoupressthe PAUSE button, the picture advances one frame.
Stopping Playback
Pressthe STOP button at the location where you want to interrupt playback. To resume playback at the position
where the disc was stopped, press the PLAY button.
Ifyoupressthe STOPbuttontwice,theunit’smemorywillbeclearedandpressingthe PLAY button will reset
the disc to the beginning.
Fast Forward / Fast Reverse
1. PresstheSEARCH or SEARCHbuttonwhenadiscisplaying.EachtimeyoupresstheSEARCH or
SEARCHbutton,theplaybackspeedchangesinthefollowingsequence:
2. Pressthe PLAY button when you reach the desired point to resume normal playback.
Note:
• TheDVDplayermutessoundandsubtitlesduringreverseandforwardscanofDVDs.
• Thefastplaybackspeedmaydifferdependingonthedisc.
Skip (Forward / Reverse)
• Pressthe PREVbuttontogobacktocurrentorpreviouschapters/tracks/titles.
• Pressthe NEXTbuttontoadvancechapters/tracks/titles.
• ForaudioCDs,usethenumberbuttonsontheremotecontroltojumpimmediatelytothedesiredtracknumber.
Audio Selection
OnsomeDVDs,thesoundisrecordedintwoormoreformats.Followthedirectionsbelowtoselectthepreferred
language and sound system.
1. Whileadiscisplaying,presstheAUDIO button to show the current audio format number.
e.g.
2. PresstheAUDIO button repeatedly to select the desired audio format.
Note:
• IfonlyoneaudioformatisrecordedontheDVD,thenumberdoesnotchange.
• SomeDVDsallowyoutochangeaudioselectionsusingthediscmenuonly.Ifthisisthecase,presstheMENU
button and choose the appropriate language on the disc menu.
• Youcanselectdifferentaudiochannels(Stereo,LeftorRight)onanAudioCDbypressingtheAUDIO button
repeatedly.
This owner’s manual explains the basic instructions
for operating this unit. Some DVDs are produced in
a manner that allows specific or limited operation
during playback. Therefore, this unit may not respond
toalloperatingcommands.THISISNOTADEFECT.
Please refer to the instructions accompanying the
specicDVDin questionformoreinformationabout
theoptionsavailableonthatDVD.
“ ”mayappearonthescreenduringoperation.A“
”meansthatthedesiredoperationisnotpermitted
by the unit or disc.
PLAYING A DISC
Basic playback

GB-16
PLAYING A DISC
Subtitle Selection
1. WhileaDVDisplaying,presstheSUBTITLE button to display the current language setting, as shown in the
example.
2. Press theSUBTITLEbuttonrepeatedlytoselect the desiredsubtitle language.You canturnsubtitles off by
pressing the SUBTITLEbuttonrepeatedlyuntilthe“ ”isdisplayed.
Note:
• SomeDVDsaresettodisplaysubtitlesautomatically,andyoucannotturnthemoffevenifyousetthesubtitle
function to off.
• Duringsomescenes,thesubtitlesmaynotappearimmediatelyafteryouselectyourdesiredscene.
• Thenumberofsubtitlelanguagesrecordeddiffersdependingonthedisc.Ifonlyonelanguageisrecorded,the
language does not change.
• Thisfunctioncanonlybeusedfordiscsonwhichsubtitleshavebeenrecordedinmultiplelanguages.
• SomeDVDsallowyoutochangesubtitlesusingthediscmenuonly.Ifthisisthecase,presstheMENU button
and choose the appropriate subtitle on the disc menu.
Angle Selection
SomeDVDscontainsceneswhichhavebeenshotfromanumberofdifferentangles.Forthesediscs,thesame
scene can be viewed from each of these different angles.
1. While youareplayingaDVD withdifferentangles recorded,
press the ANGLE button to view the number of current angles
available.
2. PresstheANGLE button repeatedly to change the scene to
thenextrecordedangle.
• Afterapproximatelytwoseconds,playbackwillcontinuefrom
the new angle you selected.
• Ifnobuttonispressedwithin10seconds,playbackcontinues
without changing the current angle.
Note:
• Thisfunctioncanonlybeusedfordiscsonwhichscenesshotfrommultipleangleshavebeenrecorded.
• Ifonlyoneangleisrecorded,“ ”isdisplayed.
Display Function
Whilethediscisplaying,presstheDISPLAY button repeatedly to display information
on operation status.
Elapsed Time: Elapsedtimefromthebeginningofthetitlewhichis
currently playing.
Remain Time: Remainingtimeofthetitlewhichiscurrentlyplaying.
Adjust the LCD Screen
YoucanadjustBrightness,Contrast,ColourorViewModeoftheLCDscreen.
1. PresstheVIDEO MODE button.
2. Pressthe / buttontoselectBrightness,ContrastorColour.
3. Thenpressthe / buttontochangethesetting.(ForViewMode,presstheENTERbuttontochangethe
setting).
4. Pressthe VIDEO MODEbuttontoexitthemenu.
Note:
Forthemonitor,youcanadjusttheLCDscreenbytheBRIGHTNESScontrol,COLOURcontrolandScreen(WIDE
/NORMAL)switchonthemonitor.
Basic playback
e.g.

GB-17
Locating a Specific Title
IfaDVDcontainstitlenumbers,youcanlocateaspecictitlebydirectlyselectingitstitlenumber.
1. PresstheGOTO button.
2. Pressthecorrespondingnumberbutton(s)forthetitleyouwant.
3. PresstheENTERbuttontoconrm.Playbackstartsfromtheselectedsection.
Note:
• IfthetitlenumbersyouenteredisnotpermittedbytheDVD,afteryoupresstheENTER button, it will restore
to---.Youshouldre-entercorrectnumbers.
• Somediscsmaynotrespondtothisprocess.
• ThismethodoflocatingatitleisavailableonlyonaDVDthatcontainstitlenumbers.
Locating a Specific Chapter
Ifyouknowthechapternumberforthechapterthatyouwanttoplay,youcanlocateitbydirectlyselectingthat
number.
1. PresstheGOTO button.
2. Press or button to display Chapter and press the corresponding number button(s) for the chapter you
want.
3. PresstheENTERbuttontoconrm.Playbackstartsfromtheselectedsection.
Note:
• IfthechapternumbersyouenteredisnotpermittedbytheDVD,afteryoupresstheENTER button, it will restore
to---.Youshouldre-entercorrectnumbers.
• Somediscsmaynotrespondtothisprocess.
• ThismethodoflocatingachapterisavailableonlyonaDVDthatcontainschapternumbers.
Locating a Specific Time
Youcanmovetoaspeciclocationbyenteringitscorrespondingtime(hours,minutes,seconds).
1. PresstheGOTO button.
2. Press or button to display Time and press the corresponding number buttons for the setting point you
want.
3. PresstheENTERbuttontoconrm.Playbackstartsfromtheselectedsection.
Note:
• IfthetimenumbersyouenteredisnotpermittedbytheDVD,afteryoupresstheENTER button, it will restore
to--:--:--.Youshouldre-entercorrectnumbers.
• Somediscsmaynotrespondtothisprocess.
• Somescenesmaynotbelocatedaspreciselyasyouspecied.
• ThismethodforaccessingspeciclocationsisavailableonlywithinthecurrenttitleoftheDVD.
LOCATING A DESIRED SECTION

GB-18
You can play a specific title or chapter repeatedly. (Title
repeat, chapter repeat, A-B repeat)
Repeating a Chapter
1. WhiletheDVDisplaying,presstheREPEAT DISC
button until the Repeat Chapter indicator displays on the
screen. The current chapter is played repeatedly.
Repeating a Title
2. WhiletheDVDisplaying,presstheREPEAT DISC
button until the Repeat Title indicator displays on the
screen. The current title is played repeatedly.
To Resume Normal Playback
3. WhiletheDVDisplaying,presstheREPEAT DISC
button until the Repeat Off indicator displays on the
screen.
You can play a single track or the whole disc
repeatedly.
Repeating a Single Track
1. While the CD is playing, press the REPEAT DISC
button until the Repeat single indicator displays on the
screen. The current track is played repeatedly.
Repeating a Whole Disc
2. While the CD is playing, press the REPEAT DISC
button until the Repeat all indicator displays on the
screen. The whole disc is played repeatedly.
To Resume Normal Playback
3. Press theREPEAT DISC button until the Repeat Off
indicator displays on the screen.
You can play a specific section repeatedly.
Repeating a Specific Section
1. While the disc is playing, press the REPEAT A-B
buttonatthebeginningofthesection( Rep A- is
displayed) you want to play repeatedly.
2. PresstheREPEAT A-B button again at the end of
thesection( Rep A-B is displayed).
3. The Unit will immediately begin replaying your
selection.
To Resume Normal Playback
4. While the disc is playing, press the REPEAT A-B
button until the RepAB off indicator displays on the
screen.
Note:
• SomediscsmaynotpermitA-Brepeatoperation.
• YoucannotsettheA-Brepeatfunctionforasegment
that includes multiple camera angles.
• You can specify a segment only within the current
title or track.
• There may be a slight difference between point A
and the location where playback actually resumes
depending on the disc.
Playing Titles/Chapters in a Favourite Order
Youcancombineyourfavouritetitles/chaptersandplaythemintheorderyoudetermine.
1. WhenaDVDisstopped,presstheMEMORY button and the following display appears.
2. Selecttheitemsintheorderyouwantbypressingthenumberbuttons.EachtimeyoupresstheCursorbuttons
(, , , ),thespaceishighlighted.Highlightwhereyouwanttoenter,thenpressthecorrespondingnumber
buttons.
3. PresstheCursorbuttons( , , , )tomovethehighlightedbartoPlay
Memory,thenpresstheENTERbutton.TheDVDplayerstartsmemory
playback.
4. Toresumenormalplaybackfrommemoryplayback
(a) PresstheMEMORY button in stop mode.
(b) PresstheCursorbuttons( , , , ) to move the highlighted bar
to“ClearAll”,thenpresstheENTERbutton.Alltheinputprograms
will be cleared.
(c) Pressthe PLAY button to resume normal playback.
Note:
• IfthetitleorchapternumbersyouenteredisnotpermittedbytheDVD,afteryoupresstheENTER button, it will
restoreto---.Youshouldre-entercorrectnumbers.
• Somediscsmaynotpermitmemoryplaybackoperation.
• Ifyouselectrepeatduringmemoryplayback,theDVDplayerrepeatsthecurrentmemoryplayback.
• IfyoupresstheMEMORYbuttonwhilethedisplayappearsontheTVscreen,thedisplaydisappears.
• TheprogrammedselectionswillbeclearedwhenyouopenthedisctrayorturnofftheDVDplayer.
DVD PROGRAMMABLE MEMORY
REPEAT PLAYBACK

GB-19
VIEWING JPG FILES
ThisunitcanplayJPGlesrecordedonaCD-RorCD-ROMdisc(CD-RWisnotrecommendable).
Viewing JPG Files
1.Openthediscdoor.
2.HoldaJPGlediscbyitsedgeandgentlypushitontothespindlewiththelabel
sidefacingupuntilyouheara“click”.
3. Closethediscdoor.Alistoffolders/leswillappearonthescreen.
4. Pressthe or button to select your desired file. The selected picture will appear
atthelowerright corner.Pressthe PLAY buttontostartplayback. Press the
STOP button to display a folder list.
Note:
• Youcanpressthe PAUSEbuttontointerruptplayback.Pressthe PLAY button
to resume playback.
• Youcanpressthe STOP button to quit playback.
• Youcanpressthe PREV or NEXT button to change the picture.
• YoucanpresstheANGLEbuttontorotatedirectionofthepictureby90°.
• Somediscsmaynotpermitthisoperation.
WhenplayingCD/JPGdiscs,youcanmodifythePlayModesthroughtheToolkitwhichappearsonthepictureon
thescreen.Pressthe / button to navigate between the windows and the / buttontoselectles/tracksor
play mode items. Then press the ENTER button.
1. InStopmode,presstheCursorbuttons( , , , )toselect"Editmode"thenpresstheENTER button.
2. UsetheCursorbuttons( , , , )toselecttracks/lesshownonthelefthandsideofthewindow.Pressthe
ENTERbuttontoconrmtheselectedtracks/les." "willappearinfrontoftheselectedtracks/les.
3. Select"Addtoprogram",thenpresstheENTER button. " "willdisappearfromthescreen.Itmeansthatthe
tracks/lesyouhaveselectedareaddedintothe"Programview".
4. Select"Programview"toviewprogrammedles.Toaddmorelesby"Browserview"followabovesteps.
5. Pressthe PLAY button to start the program playback.
TheToolkithasthefollowingplaymodeitems:
• Repeat(Off/Single/All):
Off:Resumesnormalplayback.
Single:Repeatsthecurrenttrack/le.
All: Repeatsalllesonthecurrentfolderoralltracksonthedisc.
• Mode(Normal/Shufe/Musicintro):
Normal:Resumesnormalplayback.
Shuffle:Playbackstrack/leinrandomorder.
Music intro (for Audio CD only):Onlyplaysbacktherst10secondsofallthetracksonthecurrentfolder/disc.
• Editmode:Programoperationworksonlywhen"Editmode"isselected.
• Program view:To view tracks/les in the "Program view" list. It is disabled when the "Program view" list is
empty.
• Addtoprogram:Addles/trackstothe"Programview"list.Itisdisabledifthe"Editmode"isnotselected.
• Browserview:Toviewles/tracksintheoriginalviewlist.
• Clearprogram:Deletetheles/tracksinthe"Programview"list.
Selectale/trackormoreyouwanttodeleteincompletestopmode(pressthe STOP button twice). " " will
appearbesidethedeletedle/track.Select"Clearprogram"andthenpresstheENTERbutton.Itisdisabledif
the"Editmode"isnotselected.
Note:
Theprogramwillbedeletedifthediscdoorisopened,orselectedlesaredeletedbyselecting"Clearprogram".
PLAY MODES FOR CD OR JPEG DISC
This manual suits for next models
1
Table of contents
Other Bush DVD Player manuals