Bush DVD9957BUK User manual

DVD9957BUK

1
Table OfContents
Safety Precaution 1
Package 2
Main Features 2
Main Unit Controls 3
System Connection 4
The Remote Control 9
Basic operation 11
System Setup 20
Specification 24
Troubleshooting 24
Warning: To reduce therisk of fireor electric shock,do not exposethis
apparatus to rainor moisture.
1) Please readthe instruction manualcarefully and followall the
requirements of safeoperation to operatethe device.
2) Do notuse this unitnear water.Do not placeover the unitany container
with liquid inside.
3) Do notinstall near anyheat sources suchas radiators, heatregisters,
stoves, or otherapparatus (including amplifiers)that produce heat.
4) Unplug thisunit during lightningstorms or whenunused for longtime.
5) AboutCleaning: Unplug thesystem, use onlywet cloth toclean. Do not
use liquid detergentor aerosol.
6) Only useaccessories specified bythe manufacturer.
7) Refer allservicing to qualifiedservice personnel, servicingis required
when the unithas been damagedin any way, such aspower supply cord
or plug isdamaged, liquid hasbeen spilled orobjects have falleninto the
unit, exposed tomoisture, does notoperate normally. Don't tryto repair
the machine byyourself because ofthe danger of high voltage and
electric shock.
8) Do notuse irregular shapeddiscs such asheart or star-shapeddiscs as
they may causethe unit tomalfunction.
Safety Precaution

3
2
Main Features
High brightness color9" LCD screen
Compatible with discof DVD, MP3,XVID , CD,JPEG, etc.
Built-in stereo speaker
Support PALor NTSC system
Support speed forward/backward,repeat function
Zoom in/out function
Package
1
1
1
1
1
1
2
Remote Control withbattery
Audio/Video Cable
AC/DC Power Adapter
Cigarette LighterAdapter
User Manual
Earphone
9 '' LCDMonitor & DVDPlayer
1
DC+Audio/Video Cable
2
Straps
Main UnitControls
1. Open knob
2. Power ON/OFFswitch
3.SETUP button
4. MODE button
5.
6.OK button Function same as
“ ENTER ”on Remote control
7. Play/Pause
8. STOPbutton
9. DC IN 9-12V
10.DC OUT
11. AV OUT
12. Earphone jack
13. Volume knob
14. SD card slot
15. USB Port
16. Rating Label Position
17. Bracket
Monitor View
1. Power ON/OFF
2. Volumeknob
3. Earphone jack
4. AV I N
5. DC IN9-12V
6. Brightness Knob
7. Rating Label Position
8. Bracket
12
345678
9
10
11
12
13
14
15
16
2
3
4
5
1
AVO U T DCOUT
6
7
17
8

AV OU T DC OUT
AV OU T DC OUT
5
4
Powering and installation
Plug one endof theAC/DC power adaptorinto the DCIN 9-12V jackon the rightof the
main unit, thenplug the otherend into theAC powerreceptacle. Please referto the
following illustration.
If using carcigarette lighter adaptorto connect tothe power:
Plug one endof the cigarettelighter adaptor intothe DC IN9-12V jack onthe unit, plug
the other endinto the carcigarette lighter socket.See illustration below.
System Connection
Note
Car cigarette lighter adaptor is available to use only when the car cigarette lighter with DC
12V negative grounding.
The mains plug is used as the disconnect device, the disconnect device should remain
readily operable.
AV OU T DC OUT
AV OU T DC OUT
AV OU T DC OUT
Connecting tothe monitor
The unit canalso be connectedto the externalLCD monitor.
Connect the unitto power byAC/DC adapteror cigarette lighteradapter.
Then connect theunit DC OUTjack to DCIN 9-12V Jackof the LCDMonitor by aDC/AV
cable. Alsouse this DC/AV cable toconnect theAV OUTjack of theunit toAV IN
jack of theMonitor.
Please refer tothe illustration below.
Note: You're advised tosupply both unitsthe power bythe cigarette lighteradapter
only.The AC/DCadapter is usedto supply powerof one unitonly and asthe charger
to charge themain unit ifit's with built-inbattery.
Using SD/MMC card
Upon using anSD or MMCcard, insert itinto the correspondingslot flatly withthe label
side frontward untilyou hear aclick.
Using USB
Upon using anUSB, insert itinto the USBslot directly.

7
6
1. Fit thestraps to theDVD Player /Monitor as required.
In Car Installation
The DVD playerwill fit tothe mount inthis
position, as shownbelow.
Turn theplayer around sothe backs arefacing you.
2. Fitting thestraps to theheadrest.
a. Fitting thestraps to theheadrest.
Fit the strapsaround the headrestand
engage the 2trident clips.
Ensure clips aresecurely fastened.
Pull the strapstight using theadjustment.
Tuck theloose ends intothe strap tidy.
A
B
Turn theplayer around, slidethe strap athrough
the strap lockupon the rightbottom of theDVD
player, thenslide the strapthrough the strapB
and the leftbottom player asshown. Enter the
strap B mountedcentrally.
A
B
NOTE:
Be sure tocomplete the installationthen use DVD9957BUKin the car.
For DVD9957BUK installationis recommended thatthe DVD Player
is on theLEFT headrest, toensure a neatcable run tothe monitor,
as shown below:

+
AV OU T DC OUT
Connecting with externalSpeaker
The unit canbe connected withexternal speaker.Please see thefollowing illustration.
AMPLIFIER
TV
SUBWOOFER
Left front speaker Right front speaker
Center speaker
Left rear speaker Right rear speaker
Notice:There is no 5.1channel in the unit,however, after connectingto APM itis available to
output audio in5.1 channel.
AUDIO INVIDEO IN
AV CABLE
Not supplied
The RemoteControl
1. Number button
2. TITLE (Todisplay title information)
3. AUDIO(Toselect audio language)
4. SETUP (To go toor exit setupmenu)
5. Previous/Next button(Togo to
previous/next chapter orscene
during playing)
6. Fast forward/backwardbutton
(Toscan forward/backward at2, 4,
8, 16, or32 times )
7.OSD ( To display discinformation
during playing suchas elapsed and
remaining time)
8. Play/pause
9. Stop (press once tostop playback,
then press toresume playback
from the pointwhere you stopped;
press stop buttontwice to stop
playback completely)
10. Enter (Toconfirm)
11. ZOOM(To zoom inthe image during
the playback)
12. Menu (To enter orexit menu root)
13. Subtitle (To select subtitlelanguage
when playing DVDdisc)
14. Angle(Tochange viewing angle
when playing discwith multi-angle)
15. A-B(Repeat a specificportion from
point Ato B, pressit again tocancel
repeat playing)
16. Repeat (To repeat playingtitle,
chapter or track)
17. Return (To return tothe main menu)
18. MUTE(To turn tomute)
19. Slow
20. MODE
1
2
3
4
5
6
7
8
9
10
11
12
13
14
15
16
17
18
19
20
89

+ +
10 11
Playing disc ofDVD, XVID ,CD, MP3.
1.
2. Open thedisc door andinsert a discinto the doorwith the labelside facing
up.
3. Close thedisc door.The unit will load thedisc and startplaying.
4. Press toonce to stopplayback; then press to resume playbackfrom
the point whereyou stoped; press twice to stopplayback completely).
5. During playback,press to pause;press it againto resume playback.
6. When theplaying is finished,please turn off the powerby sliding ON/OFF
switch to OFF.
7. For someDVD disc with Title or Chapter menu, press “ MENU” button to
enter menu page,and use to select. Press ENTER to confirm.
Basic Operation
Play/pause
DVD XVID CD MP3
Cursor button
ENTER
Title Menu
Note: Please donot disconnect USBdevices or plugout SD/MMC cards
while they areworking with theunit. Functional failuremay occur in
case of wrongoperations.
In the SourceMode ,you canpress " "," ",to select and"ENTER" key toenter the
source you want.
DVD SD USB
1
2
CR2025 CR2025
Please put thebattery into theremote control asper below illustration.
When using remote control, make sure the infrared window is pointed to infrared receiving
window of the machine. The distance between machine and remote control must be within 3
metres. Please refer to the following illustration.
Notice
1.To avoid fallingoff or placenear damp environment.
2.To avoid infraredreceiving window ofthe unit beingunder direct sunlight.
3.Please usea new batteryto replace oldone if theremote control doesn'twork.
The Use ofRemote Control
0
30
0
30
+

+
+
12 13
When playing discof DVD, XVID, CD, MP3, user can repeatedlyplay a specificsection.
During playback, press"A-B" button ata pointA, then press
this button againin point B,the unit willautomatically repeat
playing the partbetween A-B
Press it thethird time, theunit will returnto normal playback.
1 /4
2 /4
3 /4
4 /4
AB
A
Number
Angle
During playing DVDdisc with multi-angle,press“Angle”
button, the followingswill be displayedon screen:
Press number buttonsto select theangle you desire
Toreturn to normalplaying, please press“Angle” .
The unit willplay the discin the defaultangle.
Notice
The function isavailable only fordiscs with multi-angle.
Angle
A-B
Repeat playing offavorite scene
MP3CD
XVID
DVD
DVD XVID CD
2X 4X
8X16X32X
2X 4X
8X16X32X
DVD XVID CD
Search forward
Fast forward and fast backward
When playing disc of DVD, XVID , CD, the unit can search forward or backward.
1. Press , the unit will search forward. Press it repeatedly ,the unit will play at 2, 4, 8, 16,
32 times of speed.
2. Press , the unit will search backward. Press it repeatedly ,
the unit will play at 2, 4, 8, 16, 32 times of speed.
When playing discof DVD, XVID, CD, usercan repeat playingone chapter,title or all
the whole disc.
For DVD disc,press "repeat" button,user can repeatplaying one Chapter;press it
again to repeatplaying Title;press it thethird time torepeat playing thewhole disc.
For MP3 disc,press "repeat" torepeat playing presentfile; press itagain to repeat
playing the folder;press it thethird time tocancel repeat playing.
Search backward
Chapter Title All
Repeat off
Repeat one Repeat folder
Repeat off
Repeat playing

+
14 15
1. Place a JPEG disc into the tray, the unit will start reading and play.
2. Press “MENU” to browse JPEG files.
3. Press to select a JPEG file and press “ENTER ” button to confirm.
Note: you can press MENU to return to the folder list. Press or “ ENTER ” to preview
the file selected
4. Press“ ” to rotate the picture counter-clockwise, Press “ ”to rotate the picture
clockwise. Press“ ” to reverse the picture horizontally and press“ ”to reverse
the picture vertically.
5. Press OSD button when viewing pictures, you can select different refresh mode as
follows:
from top to bottom
from bottom to top
from left side to right side
from right side to left side
from left top to right bottom
from right top to left bottom
from left bottom to right top
from right bottom to left top
from horizontal center to both sides
from vertical center to both sides
From top and bottom to center.
from right and left to center.
from four window's top side to bottom side.
from four window's left side to right side.
From 4 edges to center.
6. During viewing files, “”may appear when pressing“Angle”or “Subtitle”or “Audio”
or “A-B”or “Title”etc; in this situation these options are unavailable to operate.
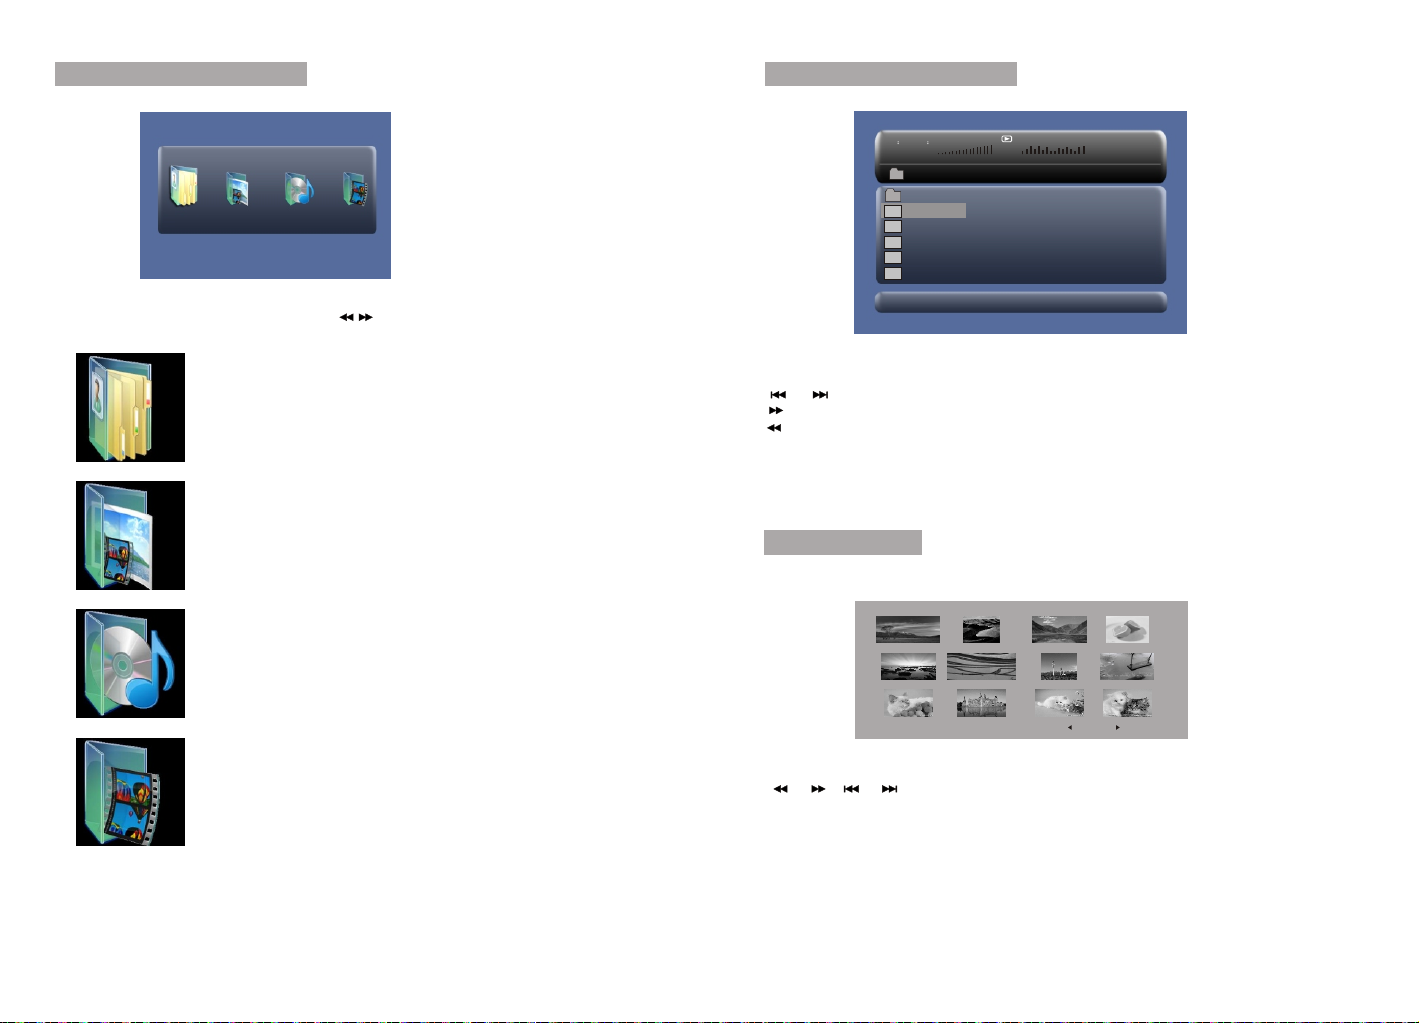
7. When viewing JPEG files, press “”, pictures will be displayed in thumbnail mode,
press or “ENTER”button to select one picture to view
00 36 03 43
Dir 001
\Ctyy\
......
Mp3 TRACK01
Mp3 TRACK02
Mp3 TRACK03
Mp3 TRACK04
Mp3 TRACK05
/
1.Place MP3 disc into the disc door .
Press “ ” or “ENTER”button to choose a MP3 file; Press “ ” or “ ENTER” button to
play the file selected.
Playing MP3 filesin data disc
Zoom in/out
When playing discof JPEG usercan zoom inor
zoom out theimage.
During playback,press Zoombutton,the image
will be enlarged;pressit again theimage will be
enlarged again;press itfifth time,the image
will zoom out,pressit repeatedly and the image
will return tonormal status.
When playing discof DVD usercan zoom in/out
the image.
During playback,press Zoombutton,the image
will be enlarged;pressit again theimage will be
enlarged again;press itfourth time theimage
will zoom out,pressit repeatedly and the image
will return tonormal status.
When the imageis enlarged,user canpress[ ]
to move theimage.
100%
125%
150%
200%
75%
50%
2X
3X
4X
Zoom in
½
/
¼
13
1
2
3
4
5
6
7
8
9
10
11
12
13
14
15
Playing JPEG file in data disc

16 17
00 00 03 43
001/008
\Ctyy\
......
Mp3 TRACK01
Mp3 TRACK02
Mp3 TRACK03
Mp3 TRACK04
Mp3 TRACK05
In the BrowserMode ,the systemwill show thelist of file and folder.
" "," “,”ENTER”key:select and play
" " :Enterthe folder
" " :Quitthe folder
Note : ifyou want toreturn to theMain Menu , first, the system must be in
List of fileand folder status,and you canpress"RETURN" KEY toreturn
to the MainMenu.
Browser mode
Photo mode
Slide Show Menu Prev Next
In the PhotoMode , theSystem will showthe thumbnail Mode first.
“ ”,“ ”,“ ”,“ ”,“ENTER”:select and play.
Slide Show :play the JPEG
Menu : Enterthe Help Menu.
Prev : PageUp.
Next : PageDown.
SD/MMC/USB main menu
After Enter theSD/MMC or USB,the system willshow Main Menu which includes 4
Function ICONS. You can select them by " and press “ENTER” key to confirm."
Photo Mode
Detail explanation pleaserefer to P17-18
Browser Mode
Detail explanation pleaserefer to P17
Music Mode
Detail explanation pleaserefer to P18
Movie Mode
Detail explanation pleaserefer to P19
Note:
Media cards formattedin exFAT file systemnot supported.

18 19
When playing JPEG :
1.To rotate the picture counter-clockwise, press " "; Press " " to rotate the picture
clockwise
2. Press OSD button when viewing pictures, you can select different refresh mode as
follows:
from top to bottom
from bottom to top
from left side to right side
from right side to left side
from left top to right bottom
from right top to left bottom
from left bottom to right top
from right bottom to left top
from horizontal center to both sides
from vertical center to both sides
from top and bottom to center.
from right and left to center.
from four window's top side to bottom side.
from four window's left side to right side.
From 4 edges to center.
3. During viewing files, " " may appear when pressing " Angle " or "Subtitle" or "Audio"
or "A-B" or "Title" etc; in this situation these options are unavailable to operate.
4. When viewing JPG files, press " " or "RETURN" key , pictures will be displayed in
thumbnail mode, press or “ENTER” button to select one picture to view.
Note : If want to return the Main Menu , you can Press "Return" key in the thumbnail mode.
1
2
3
4
5
6
7
8
9
10
11
12
13
14
15 In the MovieMode ,the systemwill show thelist of Movie file, like AVI andso on.
“ ”,“ ”,“ENTER” Key :Selectand Play.
When playing movieyou can press"MENU" and "Return"Key to backto the list of movie
file status.And if youwant to Returnto the Main Menu, Please Press "Return" key inlist
of Movie filestatus.
Movie mode
001/006
AVI MOVIE01
MOVIE02
MOVIE03
MOVIE04
MOVIE05
MOVIE06
AVI
AVI
AVI
AVI
AVI
In the MusicMode , thesystem will showthe list of music file, like
Mp3 and soon.
Press " "," ",”ENTER”,select and play.
Page-: Page Up.
:play
Page+:Page Down
Note: Press "Return"Key to Returnto the MainMenu
Music mode
00 00 03 43
001/008
Repeat Off
Mp3 TRACK01
Mp3 TRACK02
Mp3 TRACK03
Mp3 TRACK04
Mp3 TRACK05
128Kbps
PP
Press" / "to fastward/backward Mp3during playing.
Press" / "to select thebottom function whenin “stop” status.
During playing theCD/HDCD disc, youcan enter CDRipping function. Bypressing
subtitle button, DVDplayer will beable to changethe CD formatinto MP3 format,
and then storeit in theUSB.
CD RIPPING
CD RIP
Options Track
Track 01 03:36
SUMMARY
Selected Track 0
Selected Time 00:00
Track 02 03:36
Track 03 03:36
Track 04 03:36
Track 05 03:36
Track 06 03:36
Track 07 03:36
Speed Normal
Bitrate 128kbps
Create Id3 Yes
Device USB 1
Start Exit Selected all Selected nono

21
20
CD RIP
Ripping Selected track
Track Progress
Total Progress
Track 01 9%
Cancel
SUMMARY
Now ripping
Track 01/01
During the changing,you can selectCANCEL to stop thechanging.
Speed: In this item,you can setthe rip speed:Normal or Fast.
Bitrate: In this item,you can setthe bitrate. Ithas 6 choices,96Kbps,112Kbps,128Kbps,
196Kbps,256Kbps and 320Kbps.
Create ID3: In this item,you can createID3.
Device: This item indicateswhether USB isconnected with DVDplayer.
Exit: Exit to theprevious menu.
Select all:Select all thefiles in thedisc for changingand storing.
Select none: Remove all thefiles in thedisc.
Start: Move the cursorto the itemand pressEnter button, the changingbegins.
OSD Language:
In the optionuser can setOSD menu
language English.
The default: English
General Setup
TV Display Wide
Angle Mark ON
OSD Lang ENG
Screen Saver ON
English
:Move :Return :Entry
General Setup Page
TV display:
Enter this option,usercan set screendisplay
format(Nomal/PS,Nomal/LB,Wide)
The default is Wide
Note
The function dependson the displayratio
with which theDVD disc isrecorded.
Please choose Wide(16:9) when using
a 16:9 wide screenTV set.
“”
“”
Angle Mark:
Enter this optionto set theangle during
playback.
Optional setting:ON,OFF
The default is ON
Screen Saver
Enter this option toset whether to activate
the screen saverfunction.
The default isON.
System Setup
General Setup
Video Setup
Preference Setup
Setup Menu -- Main Page Press Setup”button,the main menu will be
displayed on thescreen
In the GeneralSetup Page, Press button
to highlight this item.
Press ENTER button toaccess.
Press button toselect the setting.
Press ENTER buttonto confirm yourselection.
Press button to exit.
“
General Setup
TV Display Wide
Angle Mark ON
OSD Lang ENG
Screen Saver ON
Normal/PS
Normal/LB
Wide
:Move :Return :Entry
General Setup
TV Display Wide
Angle Mark ON
OSD Lang ENG
Screen Saver ON
On
Off
:Move :Return :Entry
TV Display Wide
Angle Mark ON
OSD Lang ENG
Screen Saver ON
On
Off
:Move :Return :Entry
General Setup

22 23
:Entry
English
:Move :Return
Audio ENG
Subtitle Off
Disc Menu ENG
Parental
Default
Preference Setup
Preference Setup
:Move :Return :Entry
Audio ENG
Subtitle Off
Disc Menu ENG
Parental
Default English
Off
Preference Setup
:Move
:Return
:Entry
Audio ENG
Subtitle Off
Disc Menu ENG
Parental
Default
English
Video Setup
:Move :Return :Entry
TV Type PAL
Quality
Panel Quality
Video Setup
:Move :Return :Entry
TV Type PAL
Quality
Panel Quality
Video Setup
:Move :Return :Entry
Quality
Panel Quality
TV Type PAL PAL
NTSC
Video SetupPage
Set the VideoQuality ofAV OUT
Set the VideoQuality of PANEL
Preference Page
TV Type:
Enter this optionto select TVtype(PAL,NTSC)
The default isPAL.
Audio:
Enter this option,usercanselect preferred
audio language for DVDs.
Note
The audio languagedepend on thematerial
on each disc.
:Entry
Reset
Preference Setup
:Move :Return
Audio ENG
Subtitle Off
Disc Menu ENG
Parental
Default
1 KID SAFE
2 G
3 PG
4 PG 13
5 PGR
6 R
7 NC 17
8 ADULT
:Entry
:Move :Return
Audio ENG
Subtitle Off
Disc Menu ENG
Parental
Default
Preference Setup
Default:
Select this item and press “ button to
reset.
ENTER”
Parental:
Enter this optionto set theparental control
level to someunsuitable disc scenesbeing
watched by thechildren.
Optional parental control levels:KID SAFE,
G, PG,PG 13,PGR,R, Nc17,ADULT.
The default isADULT.
The default password:8888.
Disc Menu
This function allowsyou to choosethe menu
language stored on thedisc.
Note:
the disc menulanguages depend onthe
information available on thedisc.
Subtitle
Select your preferredlanguage to showthe
subtitles on thescreen.
The default is OFF

24
Troubleshooting
PROBLEM SOLUTION
No sound or
distorted sound
Make sure themachine is connectedproperly.
Make sure allcables are securelyinserted into
the appropriate jacks.
The icon
appears on
screen
Can't advance
through a movie
Picture is distorted
No forward or
reverse scan
Youcan't advance throughthe opening credits
and warning informationthat appears atthe
beginning of moviesbecause the discis
programmed to prohibitthat action.
The feature oraction cannot becompleted at
this time because:
1. The disc'ssoftware restricts it.
2. The disc'ssoftware doesn't supportthe
feature (e.g., angles)
3. The featureis not availableat the moment.
4. You've requested atitle or chapternumber
that is outof range.
Some discs havesections that prohibitrapid
scanning or chapterskip;
If you tryto skip throughthe warning information
and credits atthe beginning ofa movie, you
won't be ableto. This partof the movieis often
programmed to prohibitskipping through it.
The disc mightbe damaged. Try another disc;
It is normalfor some distortionto appear during
forward or reversescan.
If at anytime in thefuture you shouldneed to disposeof this product
please note thatwaste electrical productsshould not bedisposed of
with household waste.Pleaserecycle where facilitiesexist.Check
with your LocalAuthority orretailer for recyclingadvice.(Waste
Electrical and Electronicequipment Directive)
Owing to continuousimprovement,no prior noticewill be givenregarding
changes on abovefeature and spec.
We trust youare completely satisfiedwith this productfrom ArgosLtd, however
please feel freeto contact usif you experienceany difficulties, orif you wouldlike
to express yourviews regarding ourproducts.
Please write to:
Customer Services
Argos Ltd
489-499 Avebury Boulevard
Saxon Gate West
Central Milton Keynes
MK9 2NW
Telephone:0870 600 3030
Through the processof continuous improvement,Argos Ltd.reserves the rightto
change or alterspecifications without priornotice. E&OE
Specification
Compatible disc: DVD/XVID/CD/MP3
Signal system: PAL/NTSC
Panel size: 9 inch
Picture resolutio:640x234 (RGB) or 640x220(RGB)
Frequency response: 20 Hz to 20 kHz
Video output: 1 Vp-p/75 Ohm, unbalanced
Audio output: 1.4Vrms/10kOhm
Audio S/N: Better than 80 dB
Dynamic range: Better than 85 dB
Laser: Semiconductor Laser, Wave Length: 650 nm/795 nm
Power source: DC 9-12V
Power consumption: 10 W
Operating temperature: 0~40°C
Weight( ): 0.6 / 0.81 kg
Dimensions ( (W x D x H): 246.5x191.6x30/247x191.8x41.9mm
Monitor/DVD Player
Monitor/DVD Player)
25
Table of contents
Other Bush DVD Player manuals