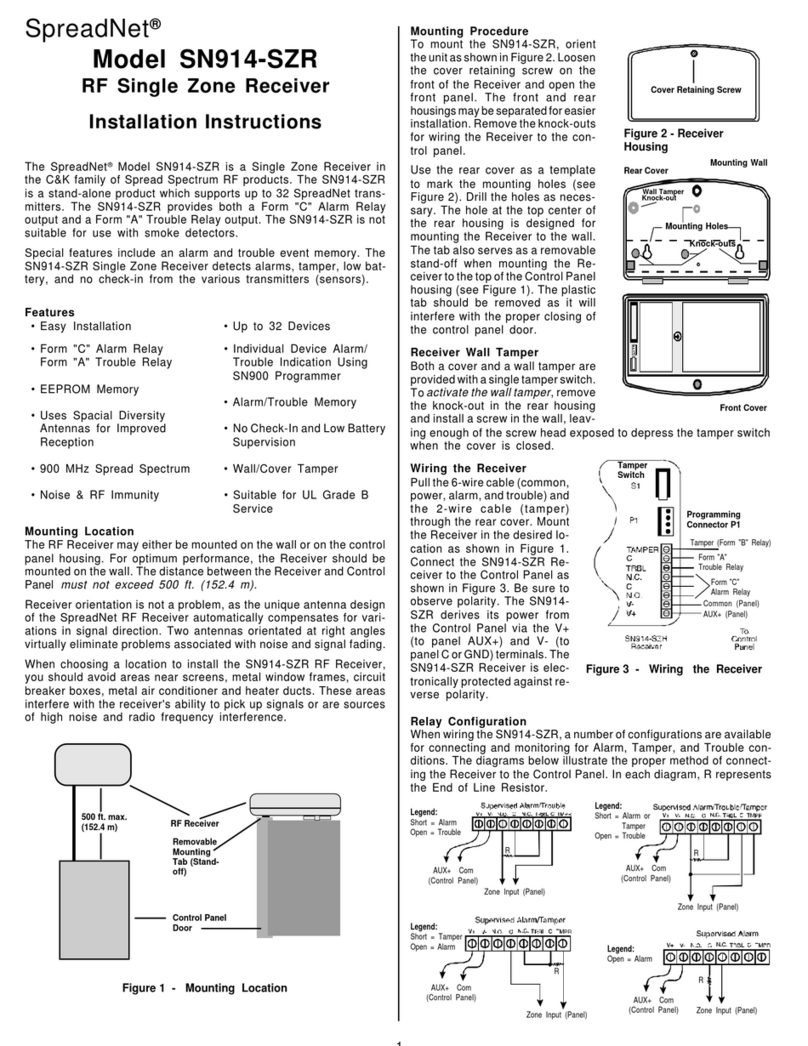
C & K Systems 236i-WRX User manual

The RED button is used for disarming from either home or away modes, so that there is no need for the owner to recall
which mode the system has been armed in.
The Panic feature is activated by pressing the GREEN & BLUE buttons together.. This sets off the siren.
To cancel “panic”, press the RED disarm button.
Wiring the 236i - WRX to your C & K 236i Panel
Narrowband Wireless Receiver with 2 x Code Hoppin
g
Remote
Controls
Green: ARM Red: DISARM
Blue: Activate HOME Mode
To Activate Panic Mode,
Press Green & Blue Buttons
T
oget
h
e
r
10: Fault Output (Supervision / Low Battery) - Zone 6
9: Tamper Output (Open Case of PIR / Reed)
8: Available Wireless Zone Output - (Zone 5)
7: Wireless Smoke Sensor Output - (Zone 4)*
6: Wireless PIR Output (Zone 3)*
5: Wireless PIR Output (Zone 2)*
4: Wireless PIR Output (Zone 1)*
3: Keypad Data Output - Connect to DATA
2: Connect to C
1: Connect to KEY+
Antenna Wire:
Do Not Cut.
Optimum operation
range will be
achieved when
antenna is vertical &
straight. Run the wire
out of the top of your
metal panel box.
N517 Build Date:
Sticker showing User PIN Number (Refer to Page 2 for details).
• * When purchasing the 236i - WRX Kit, sensors supplied in the kit will be pre-programmed as detailed
above.
NOTES: 1) Your 236i Panel should use the default Master PIN Number 1234.
2) The 236i - WRX uses the fixed keypad address 11.
1
3) The 236I - WRX already has inbuilt 2k2 end of line resistors, so no additional
WARNING! - Do Not Have Another Key
p
ad On The Same Address
resistors need to be configured on the zone panel inputs.
4) You must enter the User PIN Number for your receiver, as detailed on Page 2.

During the normal operation of the unit and when it is first powered, the LED lights located near the outputs of the
236i -
WRX
will light up sequentially (scrolling). If the unit has a fault, all 4 channel select LED's will flash. If a problem occurs
contact your C & K dealer.
YOU MUST ENTER YOUR 236I - WRX USER PIN, SHOWN ON THE STICKER NEAR THE CONNECTOR
BLOCK ON THE RECEIVER. FOLLOW THE PROCEDURE DETAILED BELOW
TO ENTER THE NEW PIN NUMBER
!
1. Enter your Panel Master Pin, then push the * key, enter the digit "0", then push the # key.
1 2 3 4
* 0 #
The Power, Service, & Arm lights will slowly flash on your keypad.
2. Enter the User number (1-6), and push the # key.
1 #
3. Enter the 4 digit 236I - WRX User Pin Number, located on the white sticker near the connector on the receiver module,
and then push the # key.
#
4. Enter the new PIN again and push the # key.
#
Note: This will make the Master PIN number the same as the User PIN of your receiver. User 1 can use his Master
PIN to delete the PIN's of Users 2-6. Follow steps 1 through 4 for changing a User PIN. To delete a user PIN, enter
4 zeros in place of a new PIN number in steps 3 & 4.
If the new PIN is accepted, the keypad will beep twice. If you make a mistake while programming, or if the system
rejects the new PIN, the keypad will beep five times. Try again if necessary.
If no key is pressed for 5 minutes, the system will automatically exit the programming mode.
2
5. Exit the programming mode by pushing the *key, then the # key.
* #

6. Your 236I - WRX Receiver will now be able to communicate with your 236i Panel. Test all functions via remote i.e.
arm/disarm, panic etc, and then test all wireless sensors that have been programmed into your 236i - WRX Receiver.
42 1
Channel 1 2 3 4 5 6 7 8
8421
STICKER SHOWING
4 DIGIT PIN NUMBER
MODE CHANNEL SELECT
Zone 3 Detector Output
Zone 4 Detector Output
Zone 5 Detector Output
Tamper Output
Fault Output
Zone 2 Detector Output
Keypad Data Output
Zone 1 Detector Output
TO ENTER PROGRAMMING MODE:
1. Disconnect power from the receiver.
2. Press & keep holding down the green (left) button.
3. While still holding down the green button, reconnect power to the receiver.
4. Keep holding the green button down until the LED lights stop scrolling.
5. You are now in Programming Mode.
TO EXIT PROGRAMMING MODE:
1. Press & keep holding down the green (left) button, until the LED lights begin to scroll again (approx. 5 seconds).
SELECTING THE CHANNEL YOU WISH TO PROGRAM:
IMPORTANT
When programming,
make sure that no
detectors are
transmitting, as they
will interfere with your
programming
p
r
ocedu
r
e
.
!
Each of the four channel LED lights represent a channel number (8, 4, 2 or 1). Each press of theBLUE button will increase
by one the channel number. To select the channel you want, add the values of the lights that are on. That is, if you want
channel 5 then you should press the blue button until channel lights 4 and 1 will be on (4+1=5). When selecting a channel
disregard the three (3) feature mode LED lights. The Channel Select LED's can indicate up to Channel 15 (8+4+2+1). The
channel value will loop back to channel 1 after it reaches channel 15 (the highest channel).
8421
8421
8421
8421
3
CHANNEL 2
(
Zone 1
)
CHANNEL 1 CHANNEL 3 (Zone 2) CHANNEL 4 (Zone 3)
8421
8421
8421
8421

CHANNEL 5
(
Zone 4
)
CHANNEL 6
(
Zone 5
)
AFTER SELECTING THE CHANNEL, NOW CHOOSE THE FEATURE:
The Feature Mode LED indicator lights work in the same way as the Channel Select LED's. When you need to select a
certain feature setting, press the GREEN (left) button. Each press of the GREEN button will increase the feature selected
by one feature number. Some LED's may be flashing, some may not. This does not matter. The Feature Mode value will
loop back to 1 after it reaches Feature 8 (all LED's OFF), and the Channel number will automatically increase by 1
Channel.
NOTE: YOU WILL ONLY BE USING FEATURE 8 - LEARN NEW DETECTOR OR REMOTE CONTROL. Refer to Learning
Detector & Learning Remote Control sections detailed later in this manual.
TO PROGRAM A NEW REMOTE CONTROL
A. Enter programming mode.
B. Select Channel 1.
C. Select Feature 8.
D. Press and hold the red button on a remote control that is already programmed into your receiver until Channel light 1
begins to flash (approx. 5 sec). As it begins to flash, immediately (within 1 sec) release the red button. Within 1 sec of
releasing the button, press the red button of the new remote control on & off 4 times in quick succession.
E. Channel 1 light will stop flashing to confirm that the remote has been successfully learnt.
F. To exit programming mode, hold down the GREEN button until the LED’s begin to scroll again (approx. 5 sec).
Note: If you are unsuccessful with this procedure, remove power & enter programming mode again.
To Program A New Wireless PIR, Wireless Reed Switch, Or Wireless
Smoke Sensor:
FEATURE 1
421
FEATURE 2
421
FEATURE 4
421
FEATURE 3
421
FEATURE 5
421
FEATURE 6
4
21
FEATURE 8
421
FEATURE 7
421
When triggering or mounting any wireless device, make
sure that it is at least 5 METRES AWAY from the receiver.
!
A. Enter programming mode.
B. Select the desired Channel (2-6).
C. Select Feature 8.
D. Press and hold the red button on a remote control that is already programmed into your receiver until the respective
Channel light(s) begin to flash (approx. 5 sec). As it begins to flash, immediately (within 1 sec) release the red button.
E. Now trigger the Detector. Notes: PIR must be in Test Mode (i.e. LED's active). For Smoke Sensor Press & Hold Test
Button on sensor until it begins to sound. Make sure detectors are at least 5m away from the receiver when triggering.
F. The respective Channel light(s) will stop flashing to confirm that the detector has been successfully learnt.
4

G. To exit programming mode, hold down the GREEN button until the LED’s begin to scroll again (approx. 5 sec).
If you are unsuccessful with this procedure, remove power & enter programming mode again.
Learning a new detector into a channel which already had a detector learnt into that channel, will erase the original
detector code & replace it with the new detector's code.
!
After learning in a new detector, if you are utilising the supervision function, you have to
turn on the su
p
ervision function for that Channel. Please refer to instructions on next
p
a
g
e.
5

SUPERVISION
All of your individual wireless detectors (PIR's, Reeds or Smoke Detectors) can send a supervision report to your 236i -
WRX receiver to confirm that they are fully functional.
If you have purchased the 236i Kit, supervision has already been enabled for each detector programmed in at the factory.
NOTE: If you remove a detector, you must disable the supervision report for that channel, otherwise the fault output will be
activated as detailed below.
If supervision mode is enabled for a particular channel, the receiver will be expecting to receive the supervision code from
the detector learnt into that respective channel every 2.4 hours i.e. at least 10 reports per day, per detector.
The 236i - WRX only requires one report from each detector during the 24 hour period to satisfy the supervision criteria. An
extra 9 reports are still given to ensure that the supervision report is received.
If all 10 supervision reports are missed from one detector during the 24 hour time frame, then the fault output will be
activated (it will switch low for 2 seconds).
TURNING SUPERVISION REPORTS ON OR OFF FOR CHANNELS 2 - 6
(Zones 1 - 5)
1. Enter programming mode.
2. Select Channel 12.
3. Via FEATURE MODE lights, press the GREEN Button to select the desired Channel / Zone that you wish to enable or
disable supervision for as shown in diagram below.
FLASHING MODE LIGHTS indicate supervision is OFF for that Channel / Zone.
MODE LIGHTS ON indicate supervision is ON for that Channel / Zone.
4. Select first the lowest Channel / Zone that you wish to change the supervision setting for, press the RED button on your
remote to toggle the LED lights from ON to Flashing, depending on whether you wish to enable or disable supervision
for that Channel / Zone.
5. Press the green button to move to the next channel as per Step 3, if there is another Channel / Zone that you wish to
enable / disable supervision. NOTE: Once you have passed Channel 7, you will not automatically loop back to Channel
2 / Zone 1. You must exit supervision programming & restart procedure.
6. To exit supervision programming mode, hold down the GREEN button until the LED’s begin to scroll again (approx. 5
sec).
LOW BATTERY & TAMPER WARNING
CHANNEL 12
8421
Channe1 2 / Zone 1
421
Channel 4 / Zone 3
421
Channel 5 / Zone 4
421
Channel 3 / Zone 2
421
Channel 6 / Zone 5
421
Your detectors will automatically transmit a low battery report to your 236i - WRX receiver when the batteries are nearly
flat.
The low battery report code is transmitted every time a detector sends a supervision report, or whenever the detector is
triggered.
6

The 236i - WRX will activate the fault output (it will switch low for 2 seconds) to indicate that the detector has a flat
battery.
The tamper output will switch low for 2 seconds whenever the front case is removed and the tamper switch is released
on a Wireless PIR Detector or Wireless Reed Switch.
®
7
Table of contents
Other C & K Systems Receiver manuals
Popular Receiver manuals by other brands
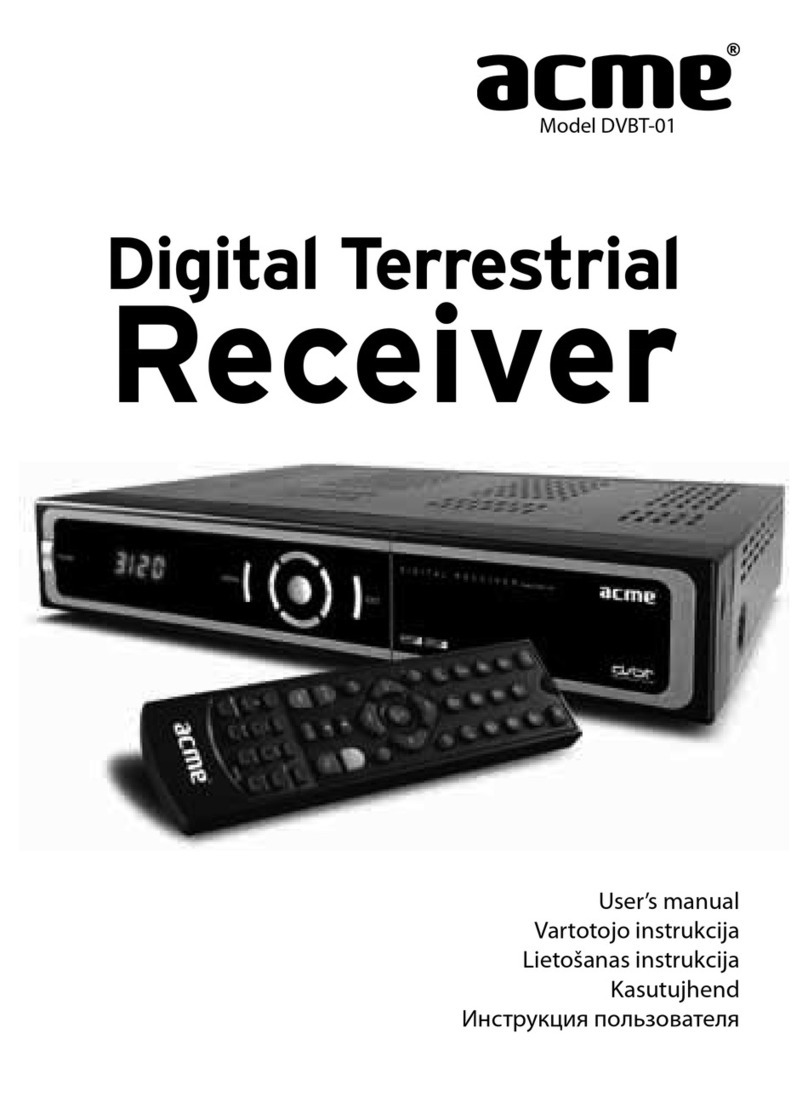
ACME
ACME DVBT-01 user manual
Sirius Satellite Radio
Sirius Satellite Radio Sportster 3 user guide
Harman Kardon
Harman Kardon AVR 155 Handleiding
Multi-code
Multi-code Multi-Code 3089 installation instructions
Samsung
Samsung DTB-B260Z Instructions for use
Comnet
Comnet FVR1C1B Installation and operation manual
