C-me U6MIDI Pro User manual

[English] U6MIDI Pro - QUICK START GUIDE
U6MIDI Pro is a professional USB MIDI interface and standalone MIDI router that
provides a very compact, plug-and-play MIDI connection to any USB equipped Mac
or Windows computer, as well as iOS (via the Apple USB Connectivity Kit) and
Android tablets or phones (via Android OTG cable).
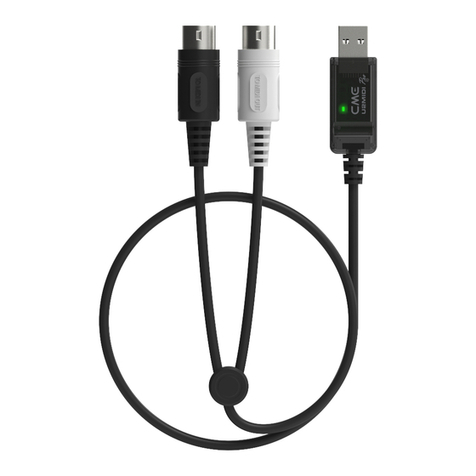
The device comes with 3x MIDI IN and 3x MIDI OUT via standard 5-pin MIDI ports. It
supports 48 MIDI channels, and is powered by a standard USB bus or USB power
supply.
Instructions:
1. Connect the U6MIDI Pro to a computer or USB host device using the USB
cable (included). When using the U6MIDI Pro in stand-alone mode, you can
connect it directly to a USB power supply or USB power bank, without
connecting to a computer.
2. Connect the MIDI IN port(s) of the U6MIDI Pro to the MIDI OUT or THRU of
your MIDI device(s) using a standard MIDI cable. Next, connect the MIDI OUT
port(s) of the U6MIDI Pro to the MIDI IN of your MIDI device(s) using standard
MIDI cable.
3. When the power is on, the LED indicator of the U6MIDI Pro will light up, and
the computer will automatically detect the device. Open the music software,
set the MIDI input and output ports to U6MIDI Pro on the MIDI settings page,
and get started.
4. U6MIDI Pro comes with the free software UxMIDI Tool for macOS or Windows
(compatible with macOS X and Windows 7 or higher). You can use it to
upgrade the firmware of U6MIDI Pro to get the latest features. Also, you can
adjust advanced functions such as settings for MIDI routing and data filtering.
For detailed instructions and related software, please visit the official website of
CME: www.cme-pro.com/support/
************************************************************************************************
[Deutsch] U6MIDI Pro - SCHNELLSTARTANLEITUNG
U6MIDI Pro ist ein professionelles USB MIDI Interface und ein eigenständiger MIDI
Router, der eine sehr kompakte Plug-and-Play MIDI Verbindung zu jedem mit USB
ausgestatteten Mac oder Windows Computer sowie zu iOS (über das Apple USB
Connectivity Kit) und Android Tablets oder Telefone (über Android-OTG-Kabel).
Das Gerät verfügt über 3x MIDI IN und 3x MIDI OUT über standardmäßige 5-polige
MIDI Ports. Es unterstützt 48 MIDI Kanäle und wird über einen Standard USB Bus
oder ein USB Netzteil mit Strom versorgt.
Anweisungen:
1. Schließen Sie das U6MIDI Pro mit dem USB Kabel (im Lieferumfang
enthalten) an einen Computer oder ein USB Host Gerät an. Wenn Sie das
U6MIDI Pro im eigenständige Modus verwenden, können Sie es direkt an ein

USB-Netzteil oder eine USB-Powerbank anschließen, ohne eine Verbindung
zu einem Computer herzustellen.
2. Verbinden Sie die MIDI IN Ports des U6MIDI Pro über ein Standard MIDI
Kabel mit MIDI OUT oder THRU Ihres MIDI Geräts/Ihrer MIDI Geräte.
Verbinden Sie als Nächstes den/die MIDI OUT Port(s) des U6MIDI Pro über
ein Standard MIDI Kabel mit dem MIDI IN Ihres MIDI Geräts/Ihrer
MIDI-Geräte.
3. Wenn das Gerät eingeschaltet ist, leuchtet die LED-Anzeige des U6MIDI Pro
auf und der Computer erkennt das Gerät automatisch. Öffnen Sie die
Musiksoftware, stellen Sie die MIDI Eingangs und Ausgangsports auf der MIDI
Einstellungsseite auf U6MIDI Pro ein und legen Sie los.
4. U6MIDI Pro wird mit der kostenlosen Software UxMIDI Tool für macOS oder
Windows geliefert (kompatibel mit macOS X und Windows 7 oder höher). Sie
können damit die Firmware von U6MIDI Pro aktualisieren, um die neuesten
Funktionen zu erhalten. Außerdem können Sie erweiterte Funktionen wie
Einstellungen für das MIDI Routing und die Datenfilterung anpassen.
Detaillierte Anweisungen und zugehörige Software finden Sie auf der offiziellen
Website von CME: www.cme-pro.com/support/
************************************************************************************************
[Français] U6MIDI Pro - GUIDE DE DÉMARRAGE RAPIDE
U6MIDI Pro est une interface MIDI USB professionnelle et un routeur MIDI
autonome qui fournit une connexion MIDI plug-and-play très compacte à n'importe
quel ordinateur Mac ou Windows équipé d'un port USB, ainsi qu'iOS (via le kit de
connectivité USB Apple) et Tablettes ou téléphones Android (via câble Android
OTG).
L'appareil est livré avec 3x MIDI IN et 3x MIDI OUT via des ports MIDI standard à
5-broches. Il prend en charge 48 canaux MIDI et est alimenté par un bus USB
standard ou une alimentation USB.
Des instructions:
1. Connectez le U6MIDI Pro à un ordinateur ou à un périphérique hôte USB à
l'aide du câble USB (inclus). Lorsque vous utilisez le U6MIDI Pro en mode
autonome, vous pouvez le connecter directement à une alimentation USB ou
à une banque d'alimentation USB, sans vous connecter à un ordinateur.
2. Connectez le(s) port(s) MIDI IN de l' U6MIDI Pro à la sortie MIDI OUT ou
THRU de votre/vos appareil(s) MIDI à l'aide d'un câble MIDI standard.
Ensuite, connectez le(s) port(s) MIDI OUT de l' U6MIDI Pro à l'entrée MIDI IN
de votre/vos appareil(s) MIDI à l'aide d'un câble MIDI standard.
3. Lorsque l'alimentation est allumée, le voyant LED de l' U6MIDI Pro s'allume et
l'ordinateur détecte automatiquement l'appareil. Ouvrez le logiciel de musique,
réglez les ports d'entrée et de sortie MIDI sur U6MIDI Pro sur la page des
paramètres MIDI et lancez-vous.

4. U6MIDI Pro est livré avec le logiciel gratuit UxMIDI Tool pour macOS ou
Windows (compatible avec macOS X et Windows 7 ou supérieur). Vous
pouvez l'utiliser pour mettre à niveau le micrologiciel de U6MIDI Pro afin
d'obtenir les dernières fonctionnalités. Vous pouvez également régler des
fonctions avancées telles que les paramètres de routage MIDI et de filtrage
des données.
Pour des instructions détaillées et les logiciels associés, veuillez visiter le site Web
officiel de CME : www.cme-pro.com/support/
************************************************************************************************
[Italiano] U6MIDI Pro - GUIDA RAPIDA
U6MIDI Pro è un'interfaccia MIDI USB professionale e un router MIDI autonomo che
fornisce una connessione MIDI plug-and-play molto compatta a qualsiasi computer
Mac o Windows dotato di USB, nonché a iOS (tramite l'Apple USB Connectivity Kit)
e Tablet o telefoni Android (tramite cavo Android OTG).
Il dispositivo viene fornito con 3 MIDI IN e 3 MIDI OUT tramite porte MIDI standard a
5-pin. Supporta 48 canali MIDI ed è alimentato da un bus USB standard o da un
alimentatore USB.
Istruzioni:
1. Collega l' U6MIDI Pro a un computer o a un dispositivo host USB utilizzando il
cavo USB (incluso). Quando si utilizza l' U6MIDI Pro in modalità standalone, è
possibile collegarlo direttamente a un alimentatore USB oa un power bank
USB, senza collegarlo a un computer.
2. Collega le porte MIDI IN dell' U6MIDI Pro al MIDI OUT o THRU dei tuoi
dispositivi MIDI usando un cavo MIDI standard. Quindi, collega le porte MIDI
OUT dell' U6MIDI Pro al MIDI IN dei tuoi dispositivi MIDI utilizzando un cavo
MIDI standard.
3. Quando l'alimentazione è accesa, l'indicatore LED dell' U6MIDI Pro si
accenderà e il computer rileverà automaticamente il dispositivo. Apri il
software musicale, imposta le porte di ingresso e uscita MIDI su U6MIDI Pro
nella pagina delle impostazioni MIDI e inizia.
4. U6MIDI Pro viene fornito con il software gratuito UxMIDI Tool per macOS o
Windows (compatibile con macOS X e Windows 7 o versioni successive).
Puoi usarlo per aggiornare il firmware di U6MIDI Pro per ottenere le ultime
funzionalità. Inoltre, puoi regolare funzioni avanzate come le impostazioni per
il routing MIDI e il filtraggio dei dati.
Per istruzioni dettagliate e relativo software, visitare il sito Web ufficiale di CME:
www.cme-pro.com/support/
************************************************************************************************

[Español] U6MIDI Pro - GUÍA DE INICIO RÁPIDO
U6MIDI Pro es una interfaz MIDI USB profesional y un enrutador MIDI
independiente que proporciona una conexión MIDI plug-and-play muy compacta a
cualquier computadora Mac o Windows equipada con USB, así como iOS (a través
del kit de conectividad USB de Apple) y Tabletas o teléfonos Android (a través del
cable Android OTG).
El dispositivo viene con 3x MIDI IN y 3x MIDI OUT a través de puertos MIDI
estándar de 5-pines. Admite 48 canales MIDI y funciona con un bus USB estándar o
una fuente de alimentación USB.
Instrucciones:
1. Conecte el U6MIDI Pro a una computadora o dispositivo host USB usando el
cable USB (incluido). Cuando utilice el U6MIDI Pro en modo independiente,
puede conectarlo directamente a una fuente de alimentación USB o a un
banco de energía USB, sin conectarlo a una computadora.
2. Conecte los puertos MIDI IN del U6MIDI Pro a MIDI OUT o THRU de su(s)
dispositivo(s) MIDI usando un cable MIDI estándar. A continuación, conecte el
puerto(s) MIDI OUT del U6MIDI Pro a la entrada MIDI IN de su(s)
dispositivo(s) MIDI utilizando un cable MIDI estándar.
3. Cuando esté encendido, el indicador LED del U6MIDI Pro se encenderá y la
computadora detectará automáticamente el dispositivo. Abra el software de
música, configure los puertos de entrada y salida MIDI en U6MIDI Pro en la
página de configuración MIDI y comience.
4. U6MIDI Pro viene con el software gratuito UxMIDI Tool para macOS o
Windows (compatible con macOS X y Windows 7 o superior). Puede usarlo
para actualizar el firmware de U6MIDI Pro para obtener las funciones más
recientes. Además, puede ajustar funciones avanzadas como la configuración
de enrutamiento MIDI y filtrado de datos.
Para obtener instrucciones detalladas y software relacionado, visite el sitio web
oficial de CME: www.cme-pro.com/support/
************************************************************************************************
[Nederlands] U6MIDI Pro - SNELSTARTGIDS
U6MIDI Pro is een professionele USB MIDI interface en standalone MIDI router die
een zeer compacte, plug-and-play MIDI verbinding biedt met elke met USB
uitgeruste Mac of Windows computer, evenals iOS (via de Apple USB Connectivity
Kit) en Android tablets of telefoons (via Android OTG kabel).
Het apparaat wordt geleverd met 3x MIDI IN en 3x MIDI OUT via standaard 5-pins
MIDI poorten. Het ondersteunt 48 MIDI kanalen en wordt gevoed door een
standaard USB bus of USB voeding.

Instructies:
1. Sluit de U6MIDI Pro aan op een computer of USB host apparaat met behulp
van de USB kabel (meegeleverd). Wanneer u de U6MIDI Pro in standalone
modus gebruikt, kunt u deze rechtstreeks aansluiten op een USB voeding of
USB power bank, zonder verbinding met een computer.
2. Sluit de MIDI IN poort(en) van de U6MIDI Pro aan op de MIDI OUT of THRU
van uw MIDI apparaat(en) met behulp van een standaard MIDI kabel. Verbind
vervolgens de MIDI OUT poort(en) van de U6MIDI Pro met de MIDI IN van uw
MIDI apparaat(en) met behulp van een standaard MIDI-kabel.
3. Wanneer de stroom is ingeschakeld, zal de LED indicator van de U6MIDI Pro
oplichten en zal de computer het apparaat automatisch detecteren. Open de
muzieksoftware, stel de MIDI invoer en uitvoer poorten in op U6MIDI Pro op
de MIDI instellingen pagina en ga aan de slag.
4. U6MIDI Pro wordt geleverd met de gratis software UxMIDI Tool voor macOS
of Windows (compatibel met macOS X en Windows 7 of hoger). U kunt het
gebruiken om de firmware van U6MIDI Pro te upgraden om de nieuwste
functies te krijgen. U kunt ook geavanceerde functies aanpassen, zoals
instellingen voor MIDI routing en gegevensfiltering.
Bezoek voor gedetailleerde instructies en gerelateerde software de officiële website
van CME: www.cme-pro.com/support/
************************************************************************************************
[日本語] U6MIDI Pro - クイックスタートガイド
U6MIDI Pro は、プロ仕様の USB MIDI インターフェイスおよびスタンドアローン MIDI ルー
ターであり、USB を搭載した Mac または Windows コンピュータ、および iOS (Apple USB
Connectivity Kit 経由) およびAndroid タブレットまたはスマートフォン (Android OTG ケー
ブル経由)。
このデバイスには、標準の 5 ピン MIDI ポートを介して 3x MIDI IN と 3x MIDI OUT が付
属しています。 48 の MIDI チャンネルをサポートし、標準の USB バスまたは USB 電源か
ら給電されます。
指示:
1. USB ケーブル (付属) を使用して、U6MIDI Pro をコンピューターまたは USB ホスト
デバイスに接続します。 U6MIDI Proをスタンドアロンモードで使用する場合、コン
ピューターに接続せずに、USB電源またはUSBモバイルバッテリーに直接接続でき
ます。
2. 標準の MIDI ケーブルを使用して、U6MIDI Pro の MIDI IN ポートを MIDI デバイス
の MIDI OUT または THRU に接続します。次に、標準の MIDI ケーブルを使用し
て、U6MIDI Pro の MIDI OUT ポートを MIDI デバイスの MIDI IN に接続します。
3. 電源を入れると、U6MIDI Pro の LED インジケーターが点灯し、コンピューターが自
動的にデバイスを検出します。音楽ソフトウェアを開き、MIDI 設定ページで MIDI 入
出力ポートを U6MIDI Pro に設定して、開始します。

4. U6MIDI Proには、macOSまたはWindows用のフリーソフトウェアUxMIDI Toolが付
属しています(macOS XおよびWindows 7以降と互換性があります)。これを使用し
て、U6MIDI Pro のファームウェアをアップグレードし、最新の機能を入手できます。
また、MIDI ルーティングやデータフィルタリングの設定など、高度な機能を調整する
こともできます。
詳細な手順と関連ソフトウェアについては、CME の公式 Web サイト
(www.cme-pro.com/support/) を参照してください。
************************************************************************************************
[中文]U6MIDI Pro快速入门指南
U6MIDI Pro是一台专业的USB MIDI 接口和可以独立使用的MIDI路由器,可为任何配备
USB 的 Mac 或 Windows 电脑提供非常紧凑的、即插即用的MIDI连接,同时也可通过苹
果USB连接套件或安卓OTG转接线与iOS和安卓平板电脑或手机一起使用。它具有3个
MIDI IN和3个MIDI OUT的标准五芯MIDI端口,支持48个MIDI通道,并使用标准USB总
线或USB电源供电。
使用方法:
1. 使用配套的USB线将U6MIDI Pro连接到电脑或USB主机设备。在将U6MIDI Pro作
为独立的MIDI路由器或过滤器使用时,可直接连接USB电源或USB充电宝,无需连
接电脑。
2. 根据需要使用MIDI线连接U6MIDI Pro的MIDI IN端口到其它MIDI设备的MIDI Out或
Thru,以及连接U6MIDI Pro的MIDI OUT端口到其它MIDI设备的MIDI In.。
3. 当电源接通后,U6MIDI Pro的LED指示灯会亮起,电脑会自动识别设备。打开音乐
软件,在MIDI设置页面将MIDI输入和输出端口设置为U6MIDI Pro,并开始使用。
4. U6MIDI Pro配有免费的macOS或Windows版本设置软件【UxMIDI Tool】。您可通过
它随时升级U6MIDI Pro的固件程序,以获得最新功能;同时还可调整MIDI路由设置
和数据过滤等高级功能。
详细使用说明和相关软件请访问CME官方网站获取:www.cme-pro.com/support/
************************************************************************************************
Other manuals for U6MIDI Pro
1
Table of contents
Other C-me Media Converter manuals