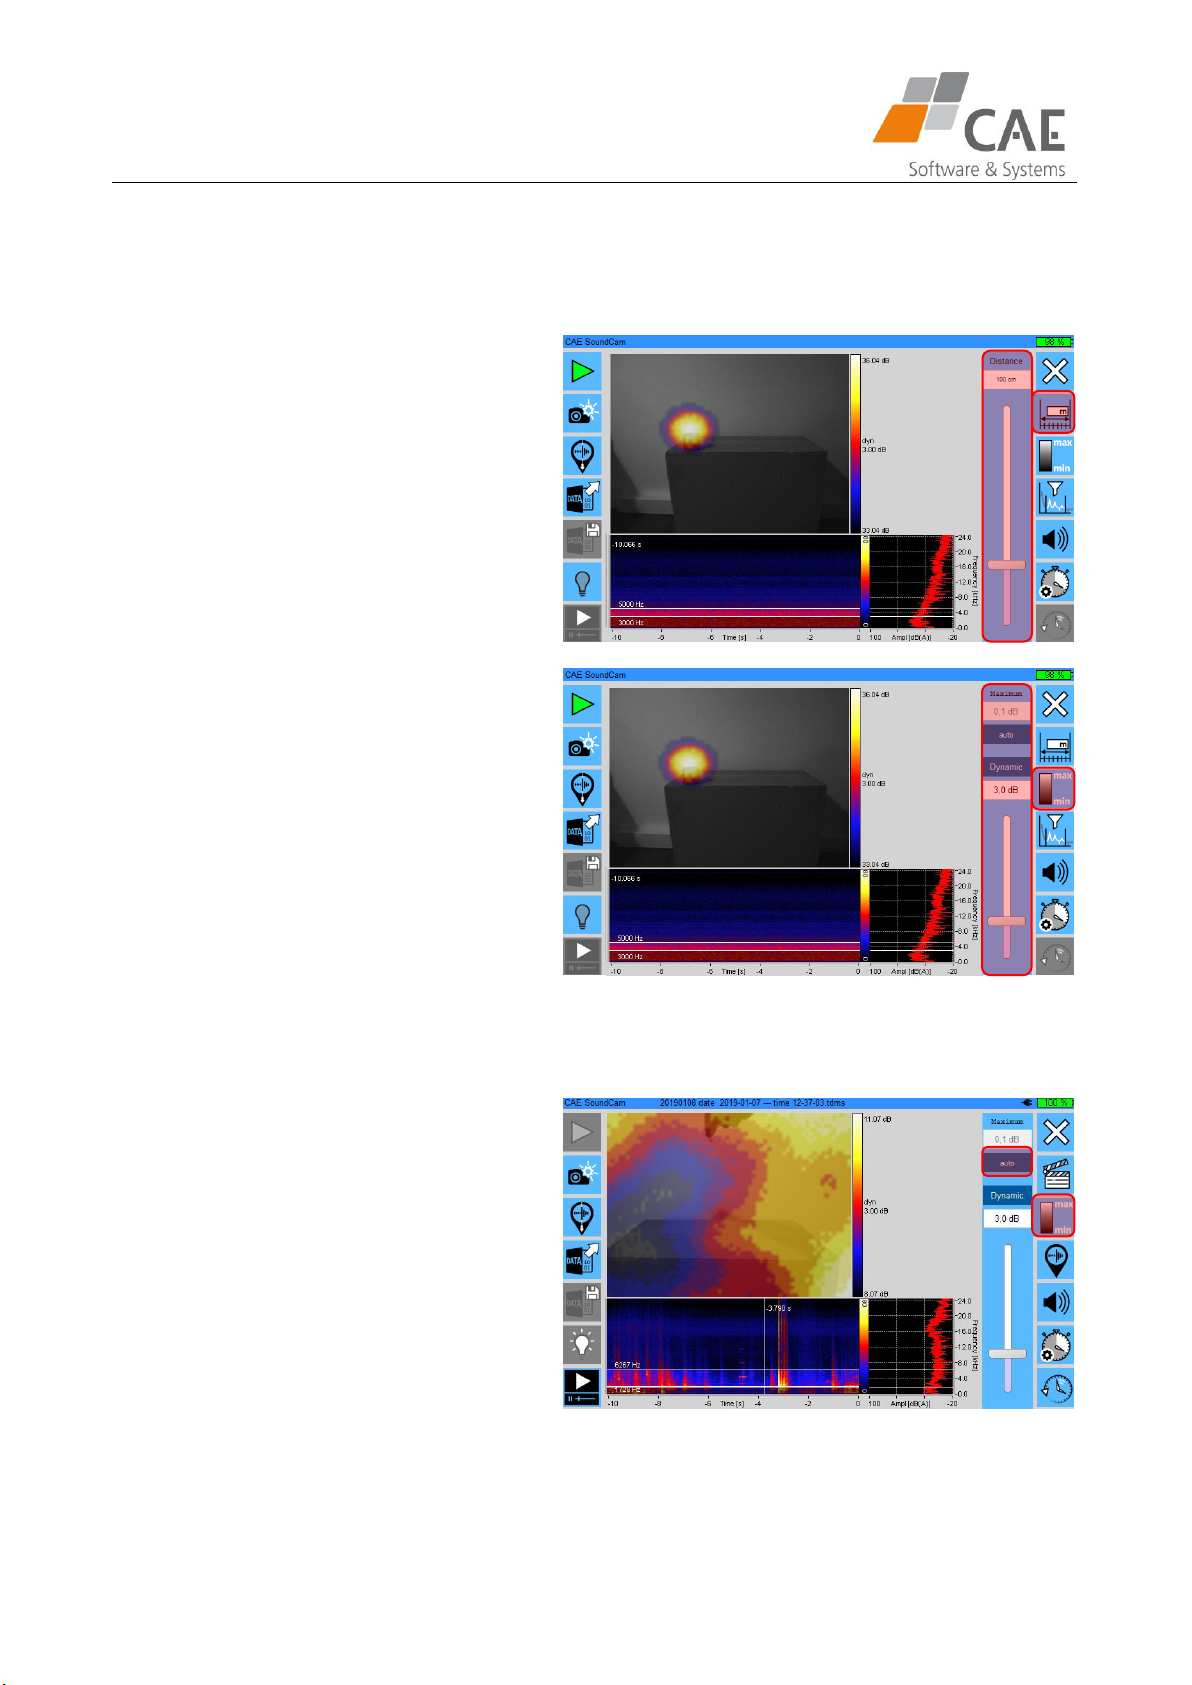
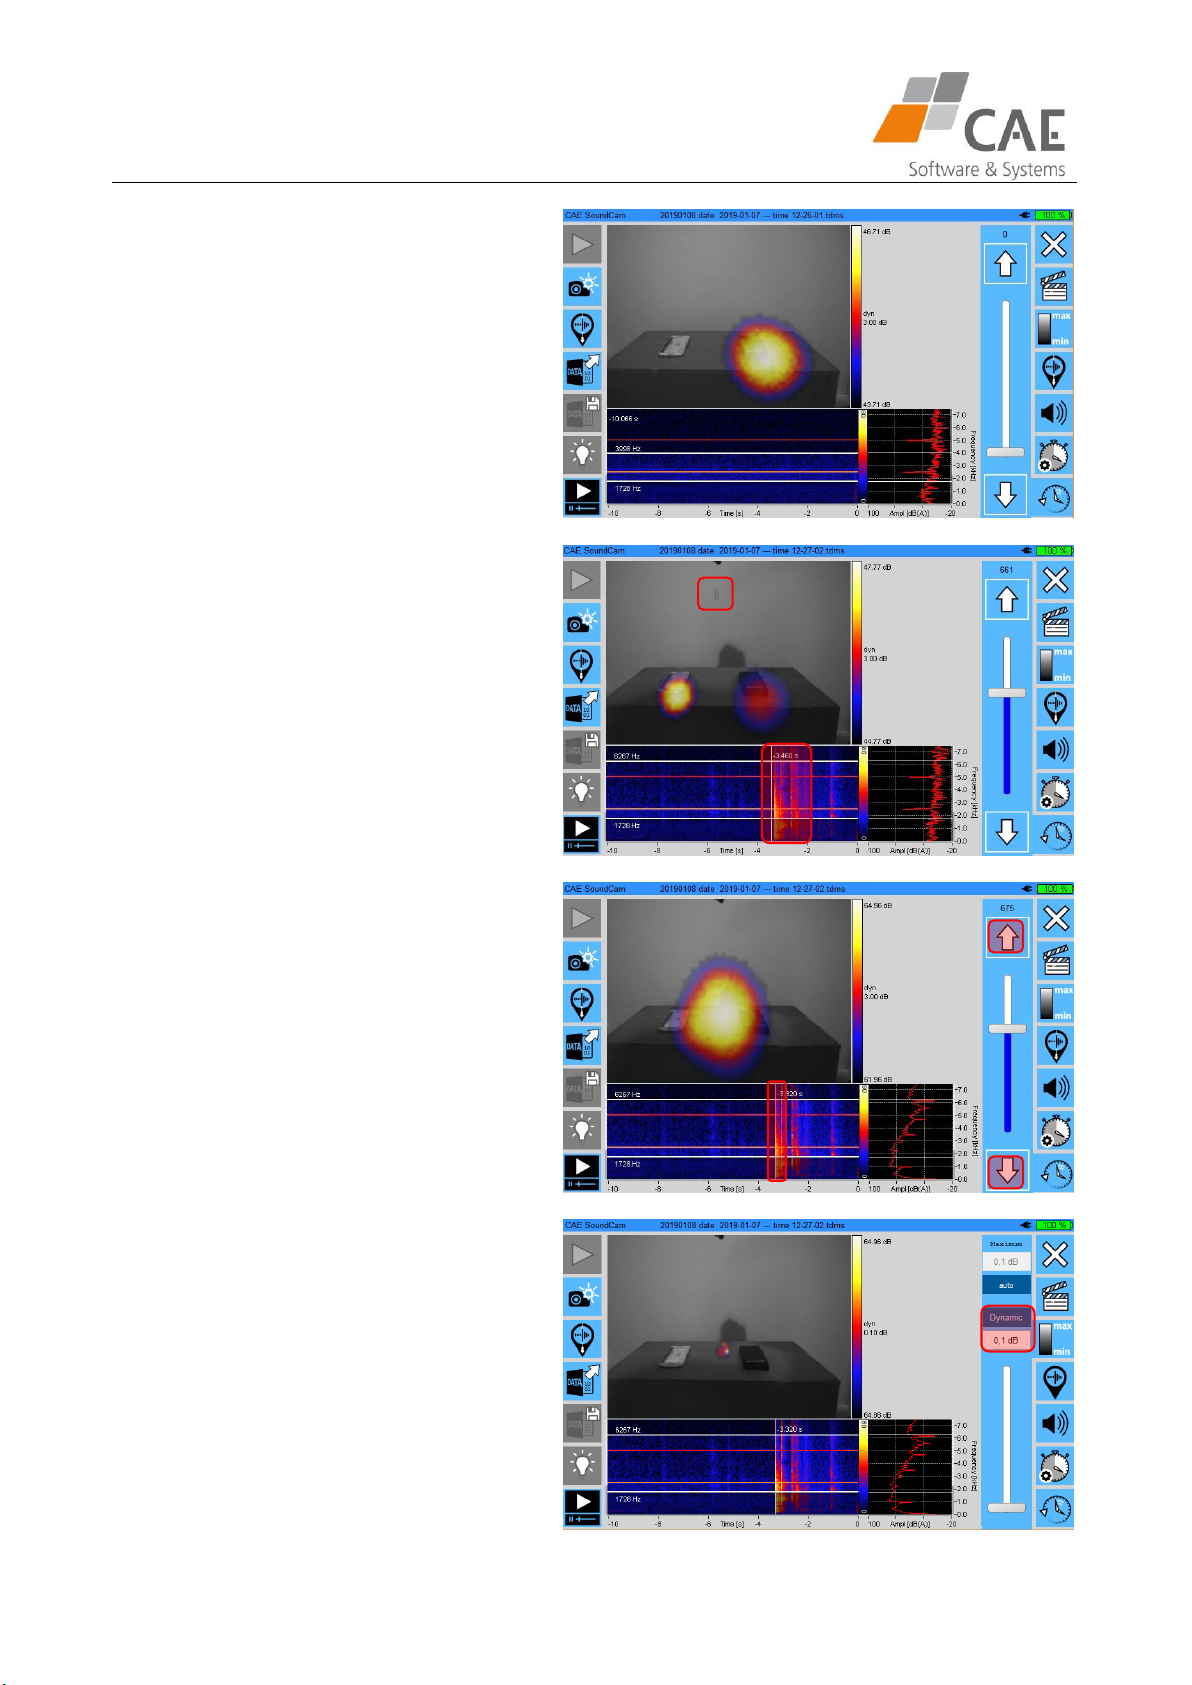
Distance settings
Set up the distance between the SoundCam
and your measurement object by using the
slider.
If the measurement object is further away than
350 cm set it to the max level 350cm.
You can also type in numbers by clicking into
the Distance box.
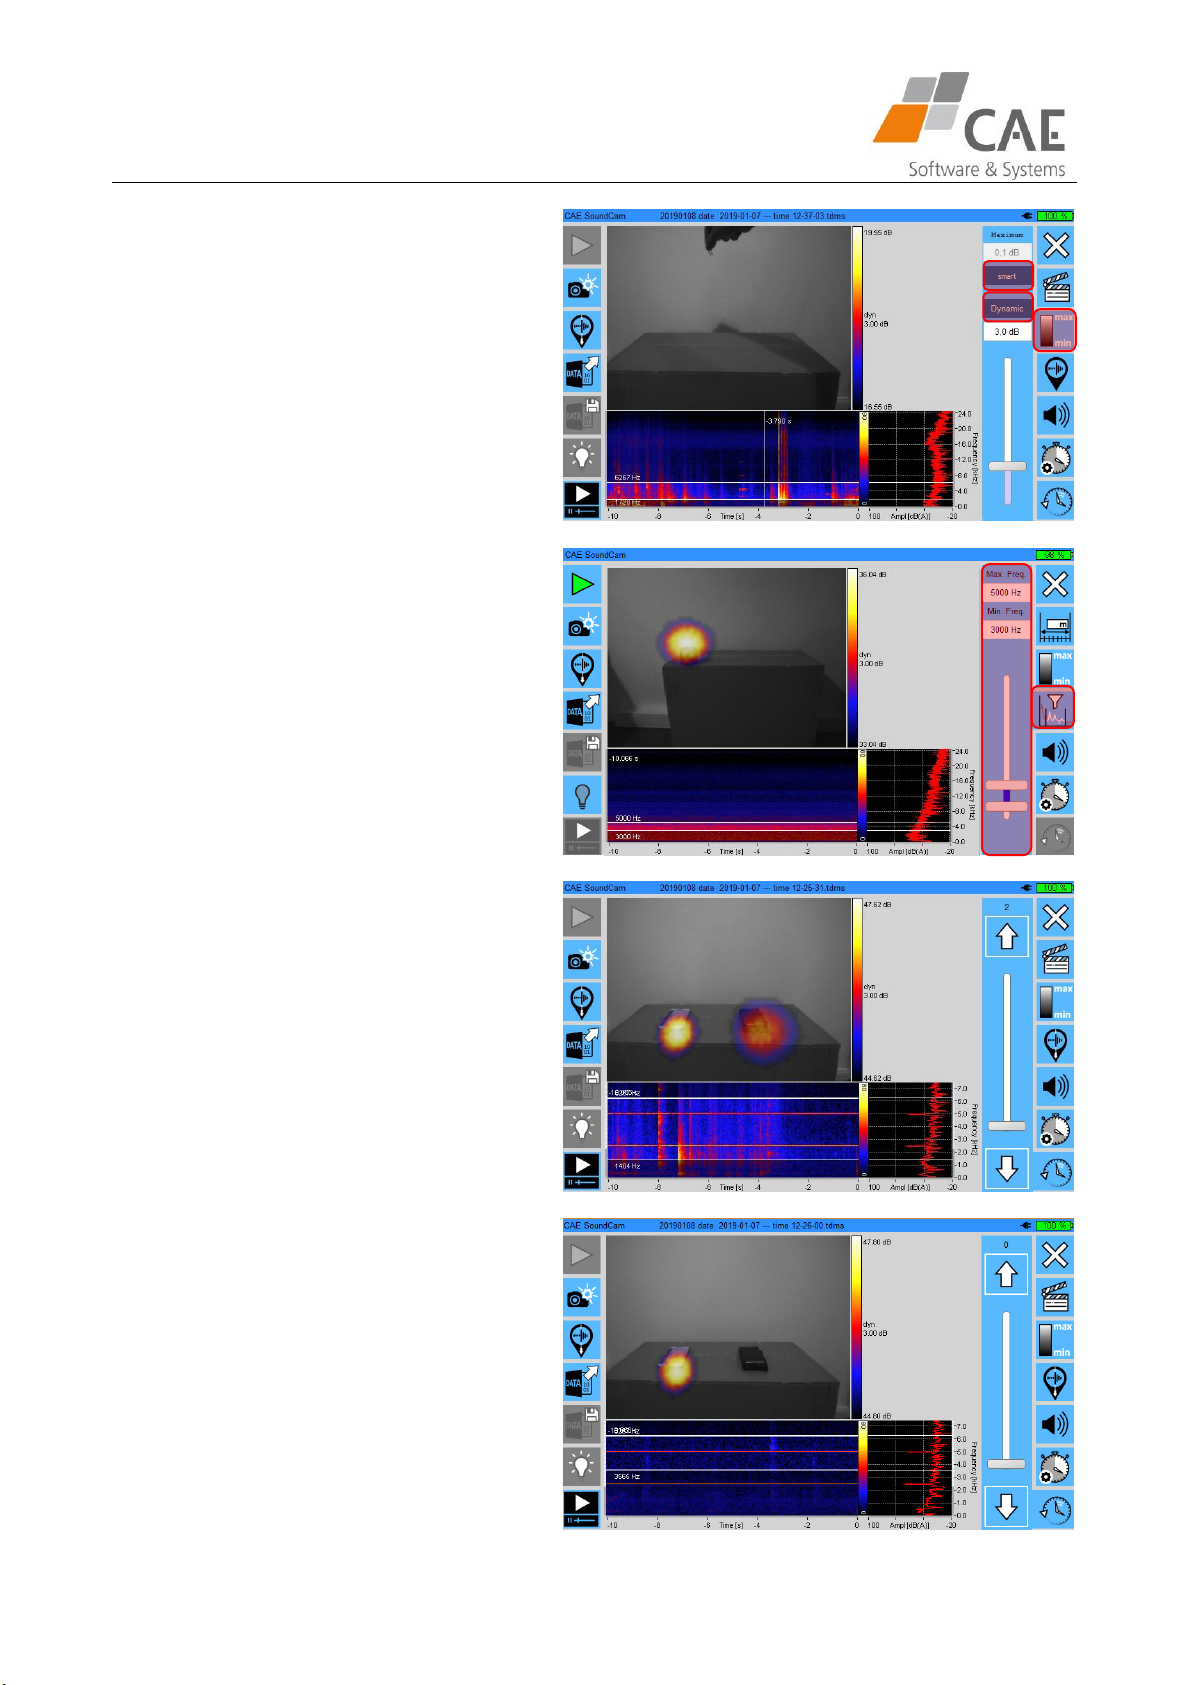
Scaling settings
Choose your scaling by clicking on the first
dark blue box: auto -> Max. found in the
pictures is used as maximum.
Smart -> Removes background noise. Average
level of the picture is calculated and crest
factor is added. Off -> Set up maximum level
by clicking into the box.
Set up the dynamic range using the slider for
auto and off scaling.
For smart scaling set up dynamic range and
crest factor. Click on the dark blue box above
the slider to change between dynamic range
and crest factor.