Inserire nel foro sulla parete il gruppo incasso (A) con le protezioni montate, collegare le mandate delle acque (acqua fredda a
destra, acqua calda a sinistra) ed eseguire l’impianto idraulico.
ATTENZIONE: collegare le utenze seguendo la numerazione dello schema (il tubo “1” deve essere la mandata dell’acqua
dell’utenza indicata dal punto “1” sulla piastra, così per gli altri numeri).
ATTENZIONE: è possibile utilizzare la piastra posteriore per fissaggio a muro o su cartongesso.
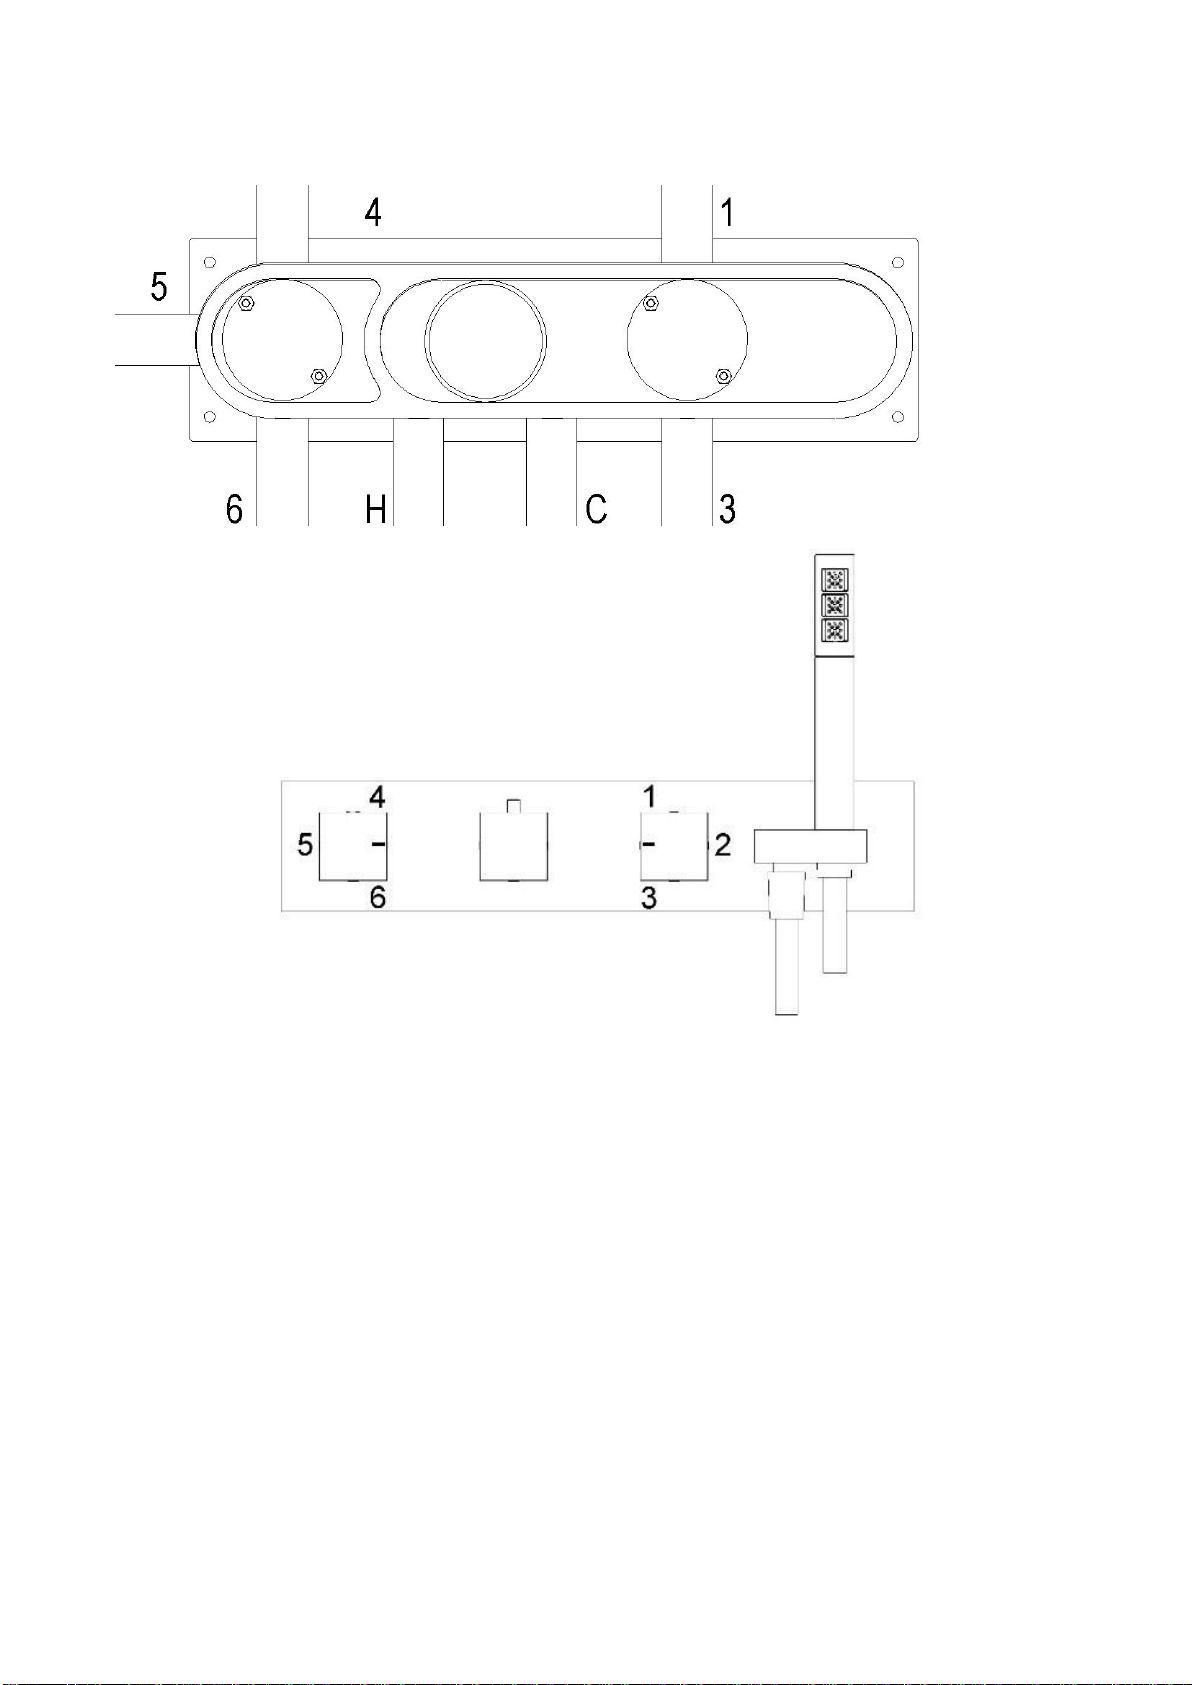
Insert the built-in group provided (A) with the protections into the hole in the wall, connect it to the water inlets (cold water on
the right, hot water on the left) and perform plumbing.
WARNING: connect the outlets following the sequential numbering of the above scheme (the tube “1” must be the water inlet of
the outlet indicated in point “1” on the plate and so forth).
WARNING: it is possible to use the rear plate to fix the mixer to the wall or to the plasterboard.
Introduire le group encastré (A) dans le trou de la paroi avec les protections montées, connecter les arrivées d’eau (froide à
droite, chaude à gauche) et faire l’implant hydraulique.
ATTENTION : connecter les tubes de sortie suivant la numérotation reportée en dessin (le tube « 1 » doit être l’arrivée d’eau
du tube de sortie indiquée du point « 1 » sur la plaque, et ainsi de suite).
ATTENTION : il est possible d'utiliser la plaque arrière pour fixer le mélangeur au mur ou au placoplâtre.
Legen der einbau-Gruppe (A) in das Loch an der Wand mit Schutzvorrichtungen an ihrem Platz ein, verbinden die Wasser
Sendungen (Kaltwasser auf der rechten Seite, Warmwasser auf der linken Seite) und führen die Wasserversorgungsanlage
aus.
ACHTUNG: die Nummerierung des Plans zu folgen, um die Sendungen zu schließen (die Röhre "1" muss das Wasser
Sendung von Benutzern Punkt "1" auf der Platte angegeben sein, so für die anderen Zahlen).
ACHTUNG: Zur Befestigung des Mischers an der Wand oder an der Gipskartonplatte kann die hintere Platte verwendet
werden.