3. Operation of Cassette player
1) Press STOP/EJECT to open cassette door and insert cassette.
Then close the cassette door.
2) Press PLAY to start playing cassette. Press PAUSE to pause playing.
3) Press REW to rewind cassette. Press FF To fast forward cassette.
4) Press PLAY and RECORD together to record.
4. Using Wired Microphone
1) Two wire MIC in jacks for two MICs working at the same time.
2) Insert wired MIC into MIC input jack separately.
3) Adjust echo control as desired.
4) Set the volume control of each mic to the proper position.
5. Using Wireless Microphone
1) Open transmitter battery compartment and insert a 9V battery. Then
close battery cover.
2) Turn on transmitter. RF indicator on the front panel of amplifier will
light.
3) Adjust W/MIC 1 volume button to set wireless microphone volume to
suitable level without any feedback.
4) Adjust ECHO, BASS and TREBLE controls to suitable level as you like.
5) Keep microphone pointed away from the speaker to avoid feedback.
6. Connect External Audio Device
Connect external audio device through AUDIO IN jack. Connect guitar
to Guitar in jack to play guitar. Volume can be adjusted by AUDIO
or GUITAR volume control.
---5---
INSTRUCTION
OPERATION
---2---
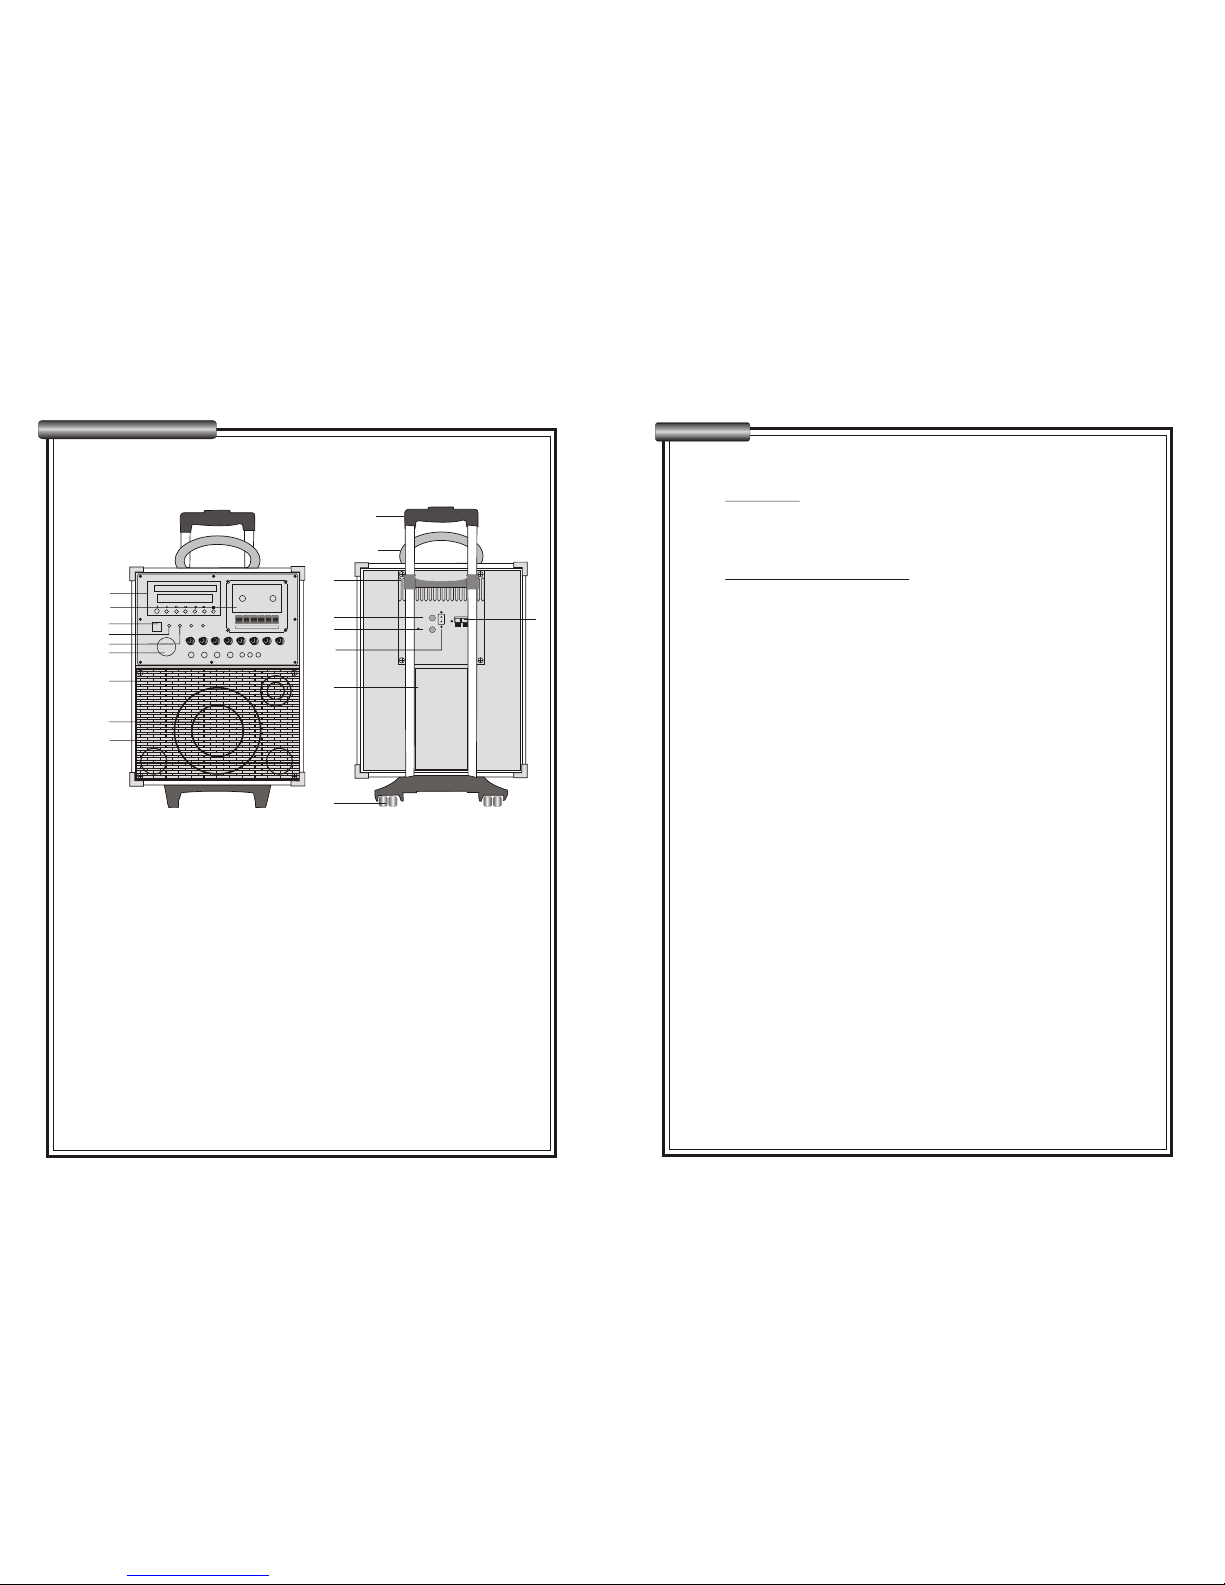
PARTS DESCRIPTION
FEATURES
1. This system is perfect for karaoke, conference, training, auditorium,
hotel, church & teaching etc.
2. Built-in DVD player supports DVD, SVCD, CD, Mp3, DVD-AUDIO,
HDCD, PICTURE-CD, CD-R/Rw. Built-in cassette player & recorder.
3. Built-in 12V7A rechargeable battery.
4. 3" tweeter & 8" woofer provides 160W peak power.
5. Built-in one channel VHF wireless microphone and two wired MIC input
jacks. It allows three persons to talk or sing simultaneously.
6. With bass, treble and echo controls.
7. With guitar input to connect Guitar.
8. With 6.35mm AUDIO input jack to connect external audio device.
9. With master volume control and separate volume controls for MIC,
guitar, audio input, DVD and cassette player.
10. With RCA audio/video output jack which can output audio and video
to your TV.
11. With trolley. Easy for transportation. Suitable for both indoor and
outdoor activities.
1
2
3
4
Handheld MIC
1. Mesh(capsule inside)
2. Power indicator
3. Power Switch
4. Battery compartment