A B
AN TENN A ANTENNB
SYNC
UP
DOWN
LEVEL B
MI N MAX MI N MAXUH F POWERI.R
MICMICLINE L INE
MI N MAX MIN MA X
ECHO MIC-EFF
LEVEL LEVEL LEVEL
I N
OUT
CH1 CH2 LINE
MIN MA X MI N MAX MIN MAX
MI C
PRIORITY
BASS H IG H
-1 2 +12 -1 2 +12
PEAK
MASTER
MI N MAX
TW SMO DE
USB
I.R
1
2
3
4
5
6789
10 11
12
13 14 15
16 19 22
17 20
23
26
28
27
30
29 31
34
3332
35
37
36
18 21
24
25
STOP
MODE EQ
0
123
456
789
38
FUNCTIONS:
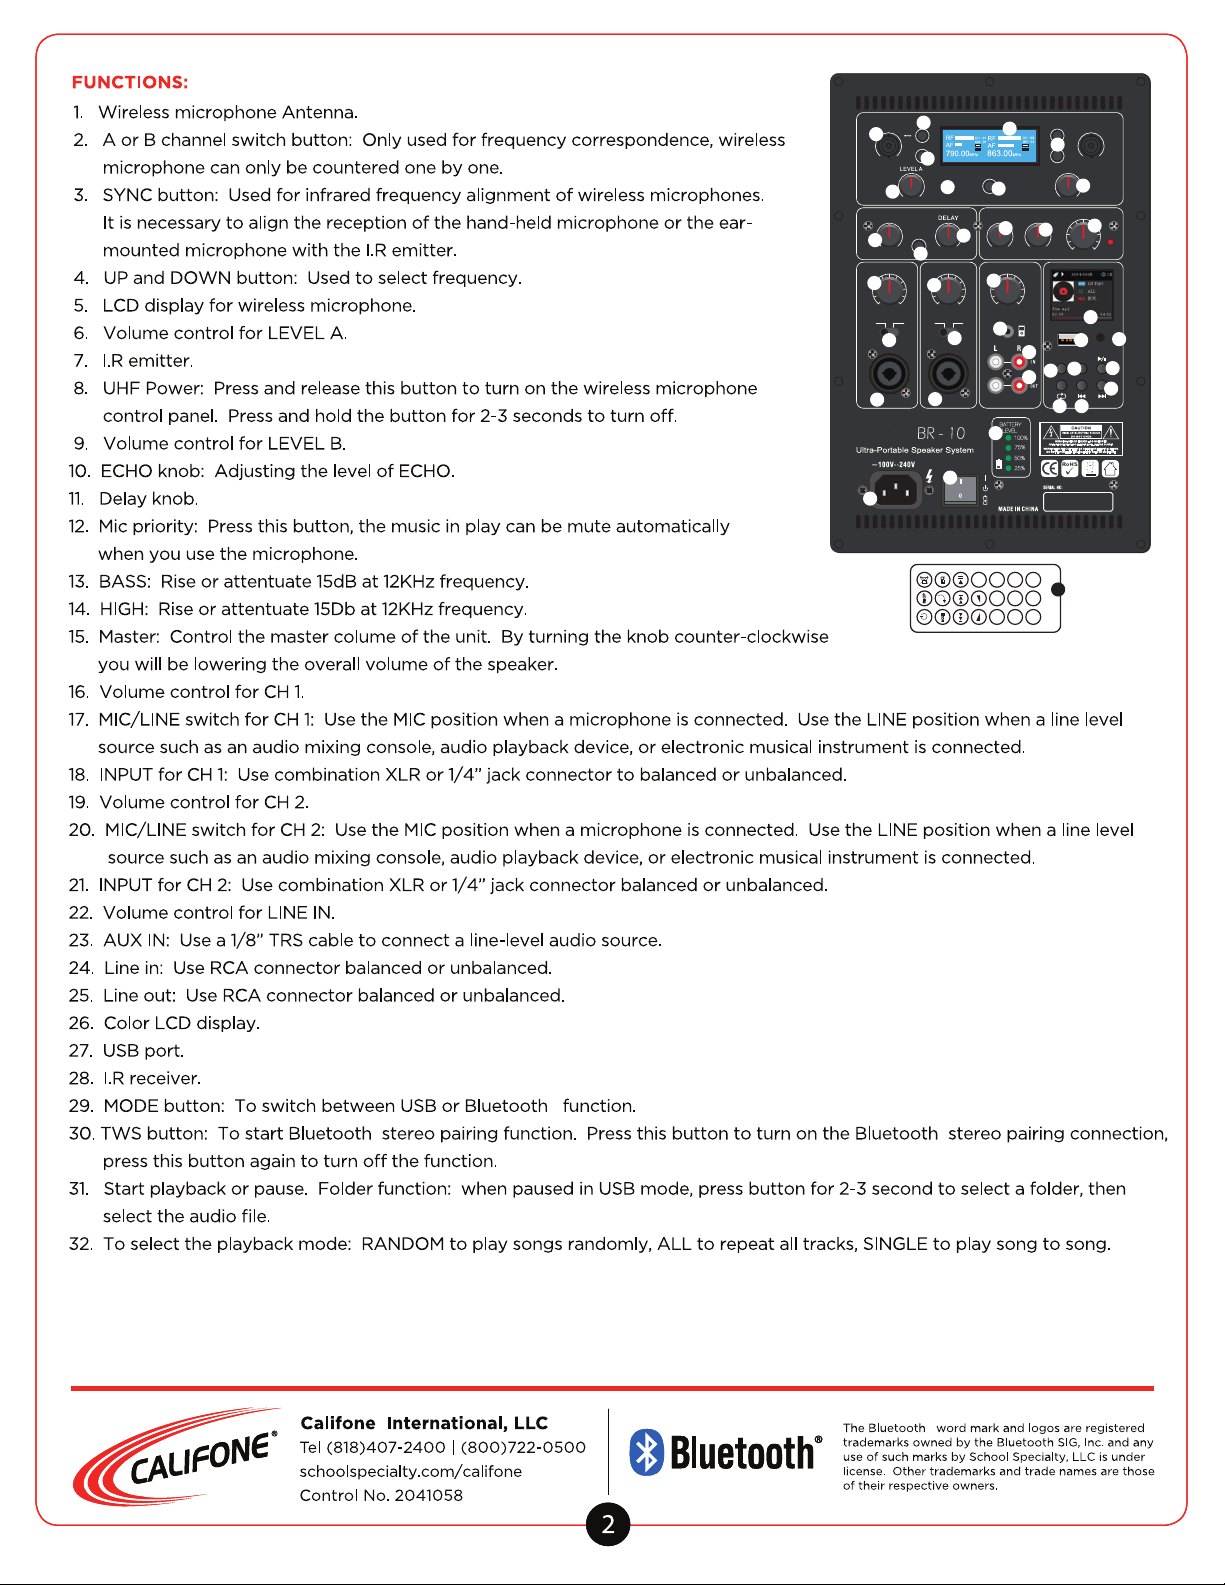
1. Wireless microphone Antenna.
2. A or B channel switch button: Only used for frequency correspondence, wireless
microphone can only be countered one by one.
3. SYNC button: Used for infrared frequency alignment of wireless microphones.
It is necessary to align the reception of the hand-held microphone or the ear-
mounted microphone with the I.R emitter.
4. UP and DOWN button: Used to select frequency.
5. LCD display for wireless microphone.
6. Volume control for LEVEL A.
7. I.R emitter.
8. UHF Power: Press and release this button to turn on the wireless microphone
control panel. Press and hold the button for 2-3 seconds to turn o.
9. Volume control for LEVEL B.
10. ECHO knob: Adjusting the level of ECHO.
11. Delay knob.
12. Mic priority: Press this button, the music in play can be mute automatically
when you use the microphone.
13. BASS: Rise or attentuate 15dB at 12KHz frequency.
14. HIGH: Rise or attentuate 15Db at 12KHz frequency.
15. Master: Control the master colume of the unit. By turning the knob counter-clockwise
you will be lowering the overall volume of the speaker.
16. Volume control for CH 1.
17. MIC/LINE switch for CH 1: Use the MIC position when a microphone is connected. Use the LINE position when a line level
source such as an audio mixing console, audio playback device, or electronic musical instrument is connected.
18. INPUT for CH 1: Use combination XLR or 1/4” jack connector to balanced or unbalanced.
19. Volume control for CH 2.
20. MIC/LINE switch for CH 2: Use the MIC position when a microphone is connected. Use the LINE position when a line level
source such as an audio mixing console, audio playback device, or electronic musical instrument is connected.
21. INPUT for CH 2: Use combination XLR or 1/4” jack connector balanced or unbalanced.
22. Volume control for LINE IN.
23. AUX IN: Use a 1/8” TRS cable to connect a line-level audio source.
24. Line in: Use RCA connector balanced or unbalanced.
25. Line out: Use RCA connector balanced or unbalanced.
26. Color LCD display.
27. USB port.
28. I.R receiver.
29. MODE button: To switch between USB or Bluetooth function.
30. TWS button: To start Bluetooth stereo pairing function. Press this button to turn on the Bluetooth stereo pairing connection,
press this button again to turn o the function.
31. Start playback or pause. Folder function: when paused in USB mode, press button for 2-3 second to select a folder, then
select the audio file.
32. To select the playback mode: RANDOM to play songs randomly, ALL to repeat all tracks, SINGLE to play song to song.
Califone®International, LLC
Tel (818)407-2400 | (800)722-0500
schoolspecialty.com/califone
Control No. 2041058
2
The Bluetooth word mark and logos are registered
trademarks owned by the Bluetooth SIG, Inc. and any
use of such marks by School Specialty, LLC is under
license. Other trademarks and trade names are those
of their respective owners.
®


