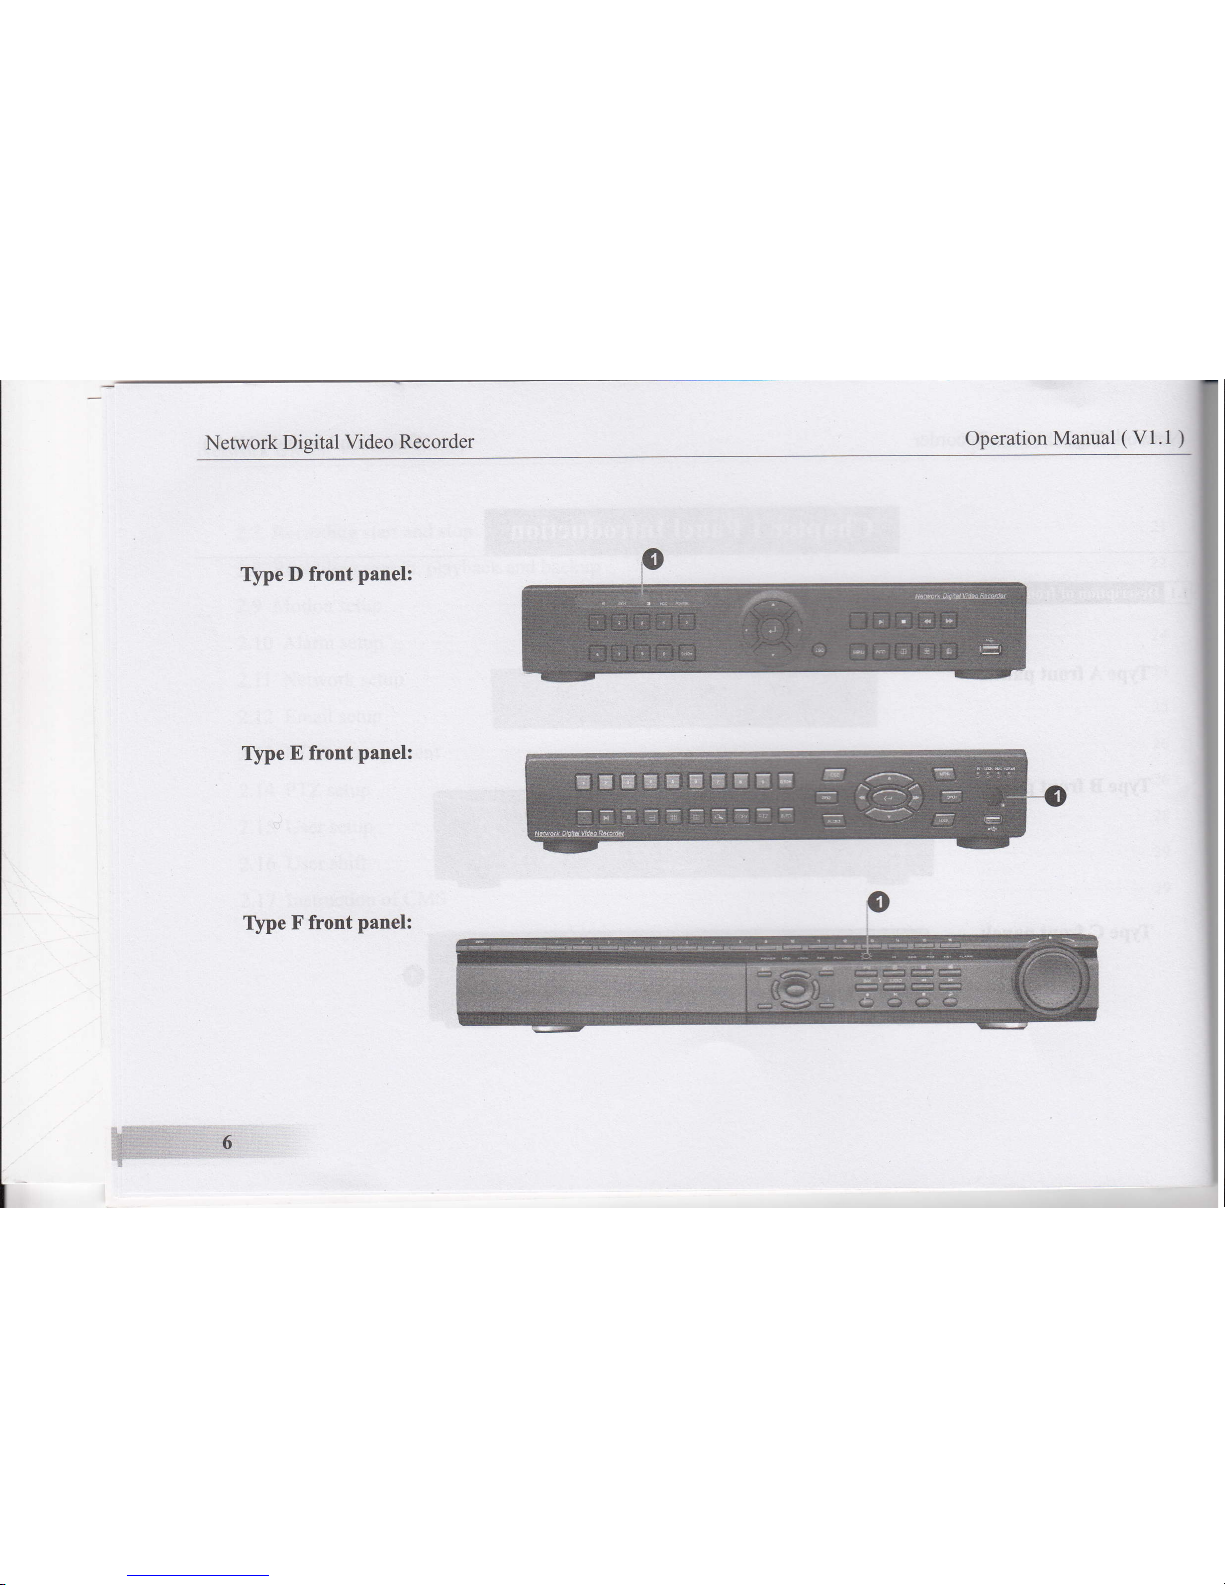
Network Digital Video Recorder Operation Manual ( Vl.l )
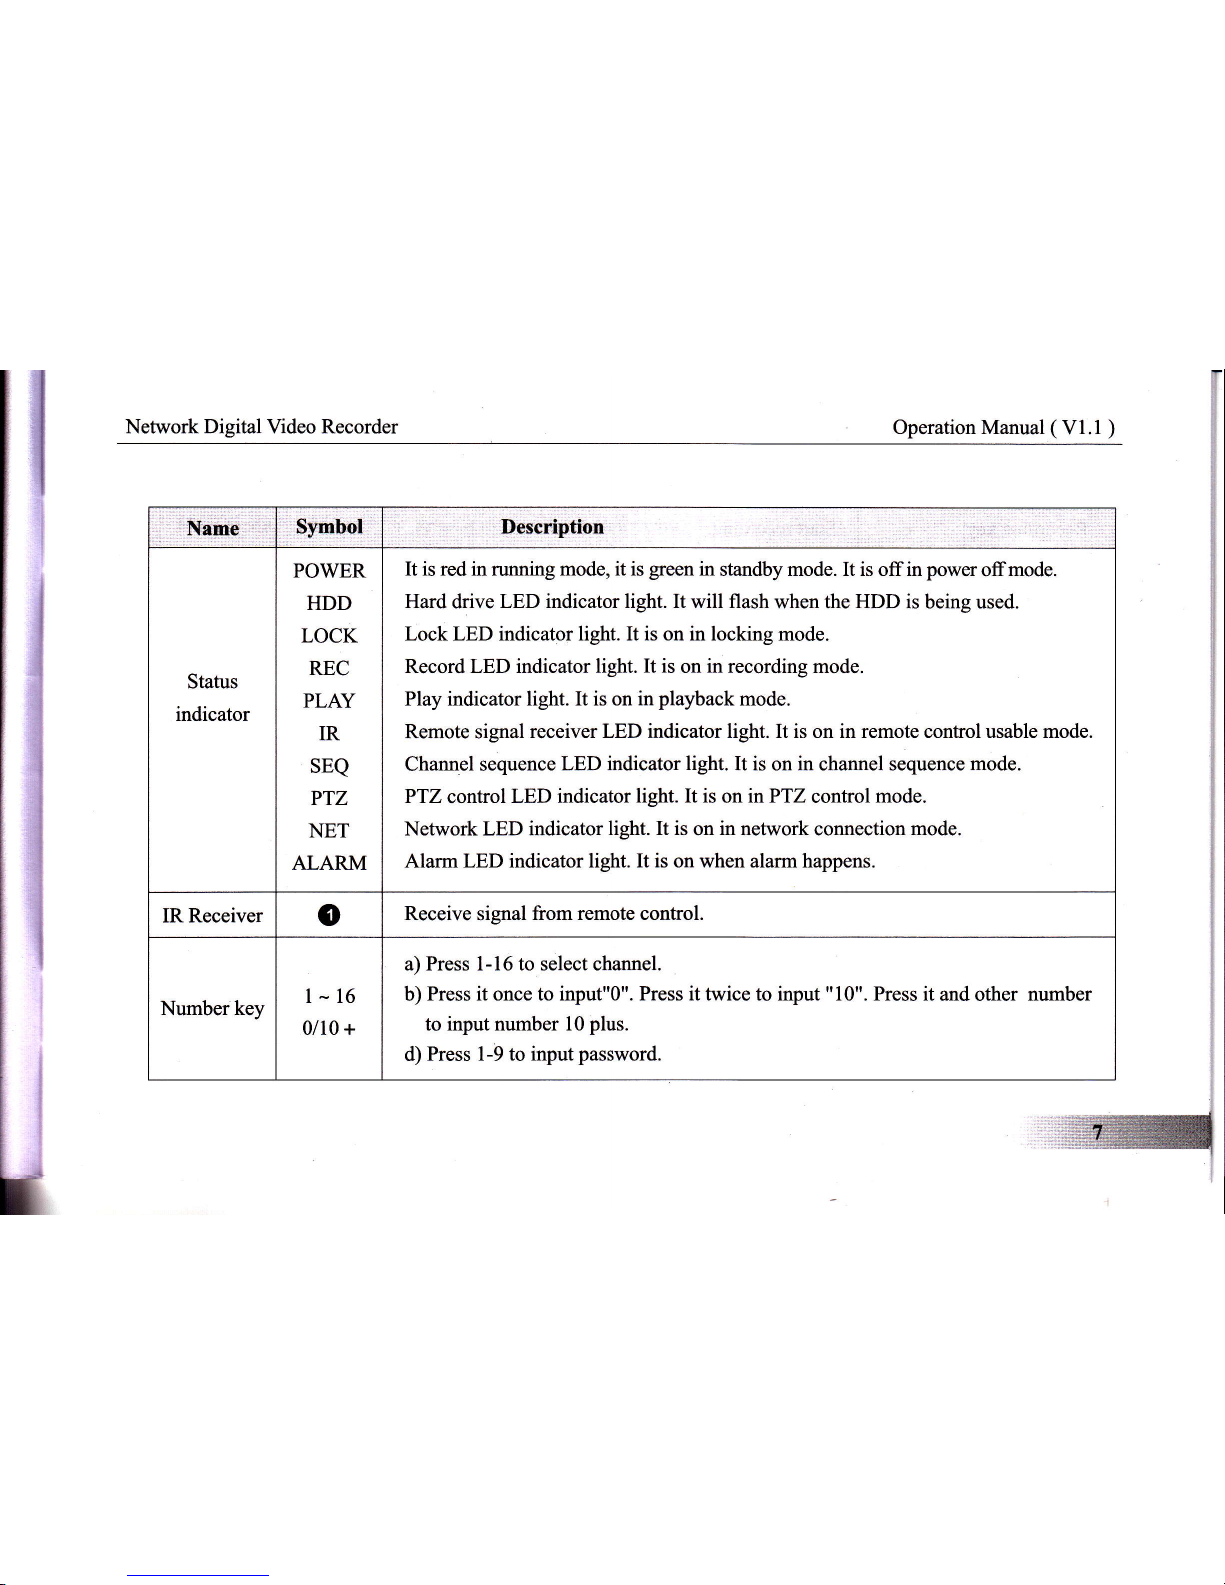
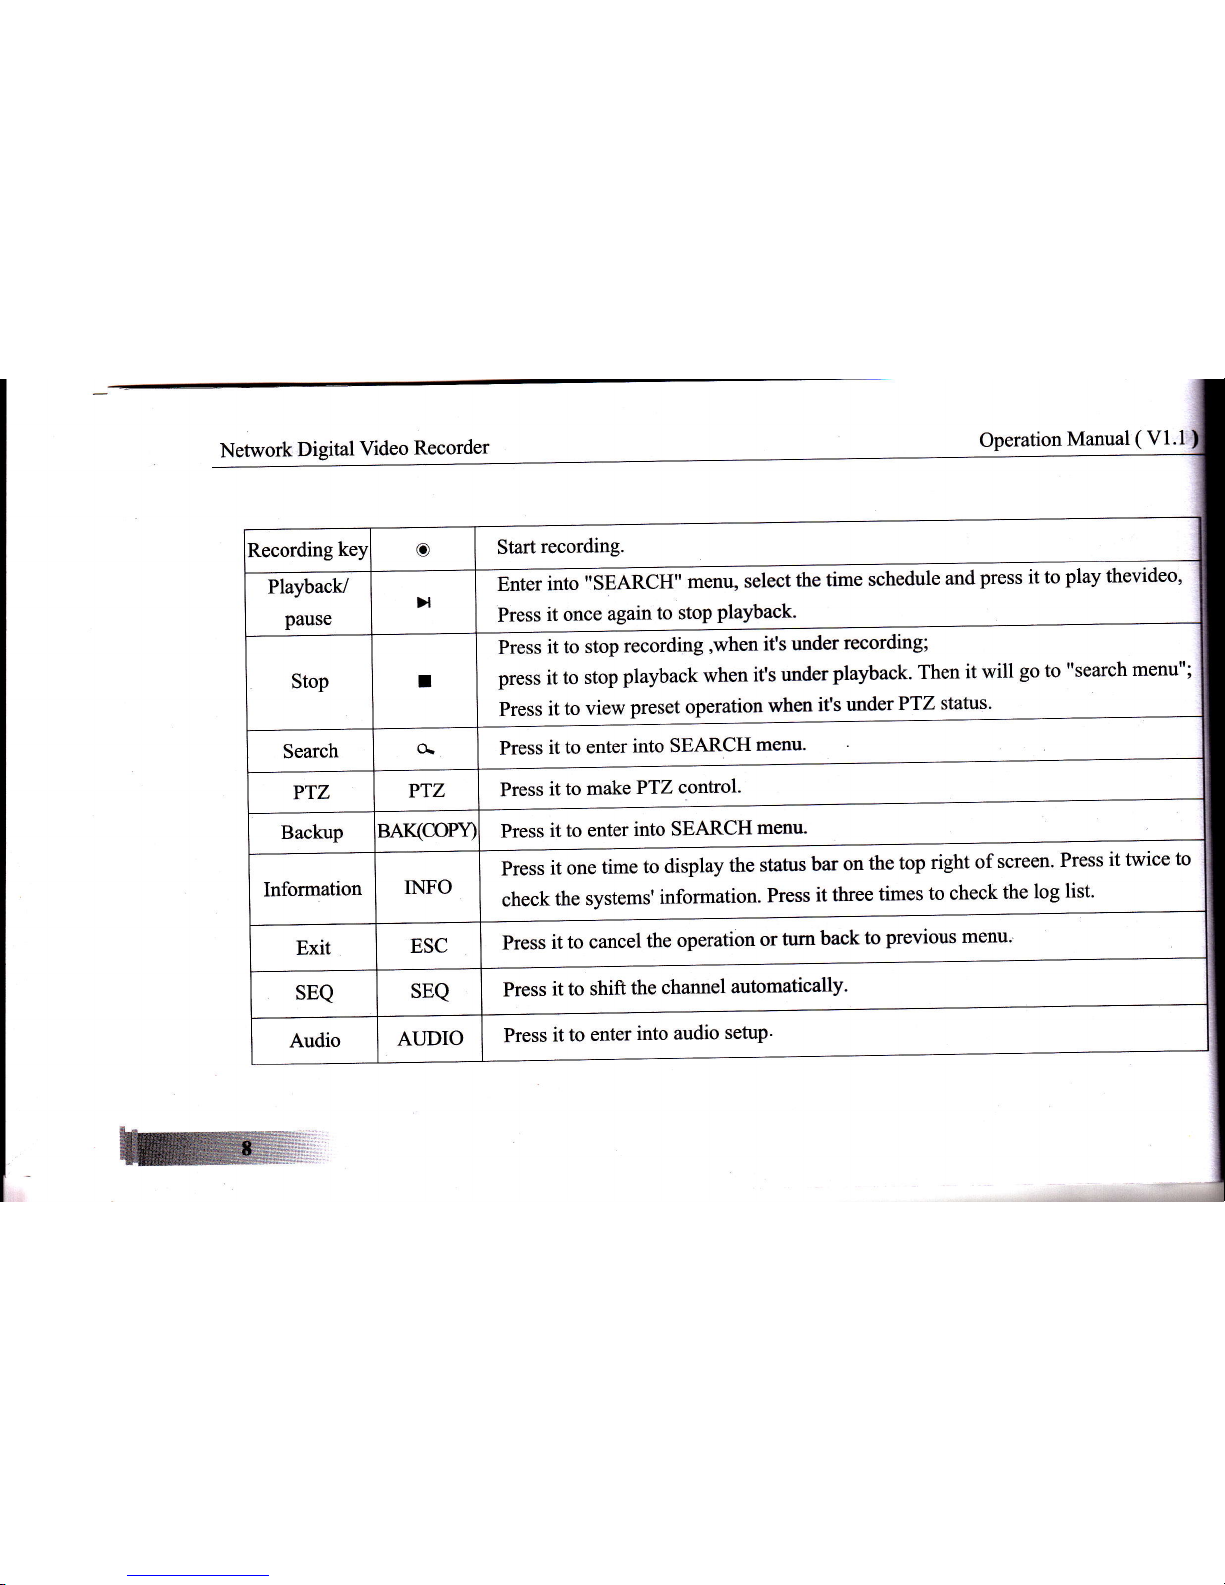
Main menu MENU Press it to enter into main menu.
Spot output SPOT Press it to enter into spot setup.
LOCK LOCK Press it to lock the system or shift user.
Direction /
split/
confirm key
llv<>
<_l
a) [^l (') [. ] [ >] are directionkeys. Inmenumode, selectthe listedoptions
upward/downward/leftward/rightward; in PT Z control mode, control the dome
to rotate upward/downward/leftward/rightward. [*]l confirm the selection and
operation. b) [ ^ ] [.:l ['l could be Quad, nine-split-screen andl6-split-screen
key in live mode. c) [. I [ > I rewind and forward in playback mode. Change
the parameters value in menu mode.
+/- +/- Increase or decrease the data value.
Split key E
ffi
ffi
Press it in live/record/playback mode to change the screen into four-split screen.
Press it in live/record/playback mode to change the screen into nine-split screen.
Press it in live/record/playback mode to change the screen into sixteen-split screen.
Shuttle @Tum the shuttle to select the menu or control the speed of playback. For example
2x,4x, 8x .
USB port EE. For USB mouse or connect to USB disk to upgrade or backup.
i
J
I