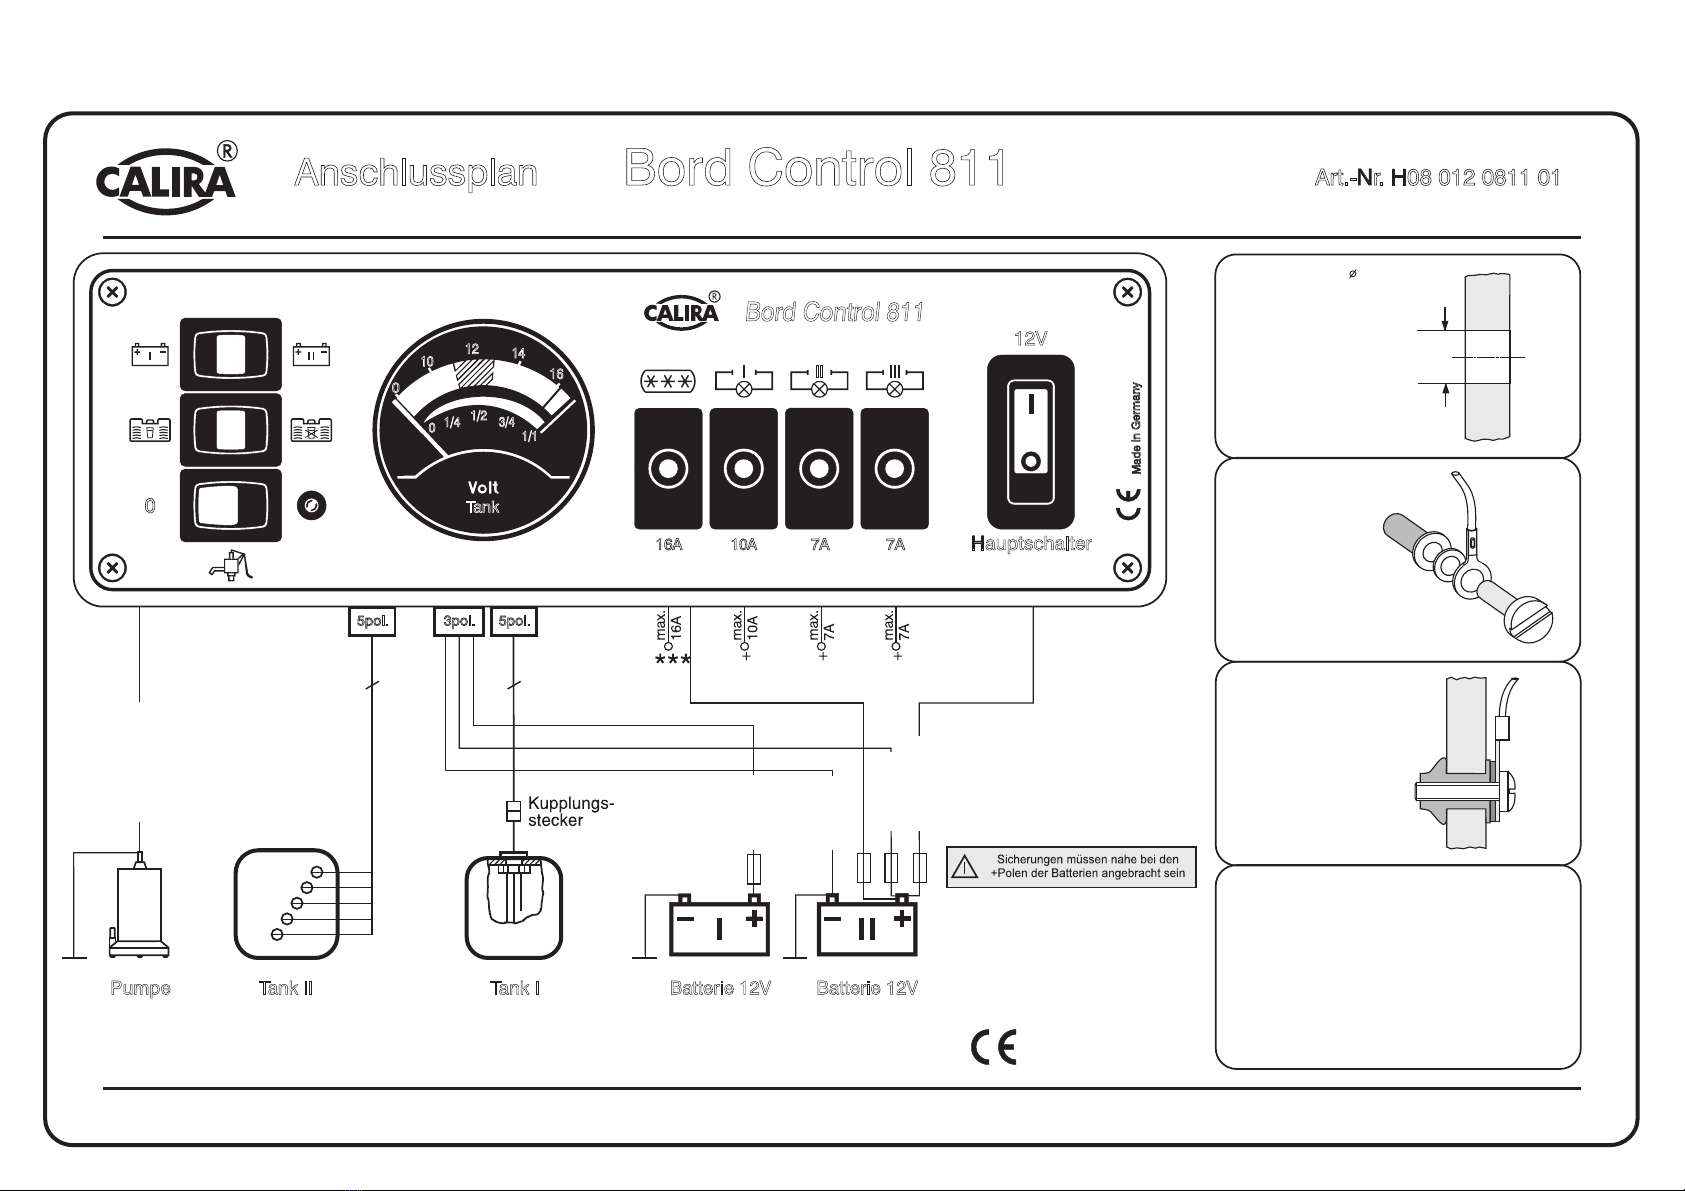
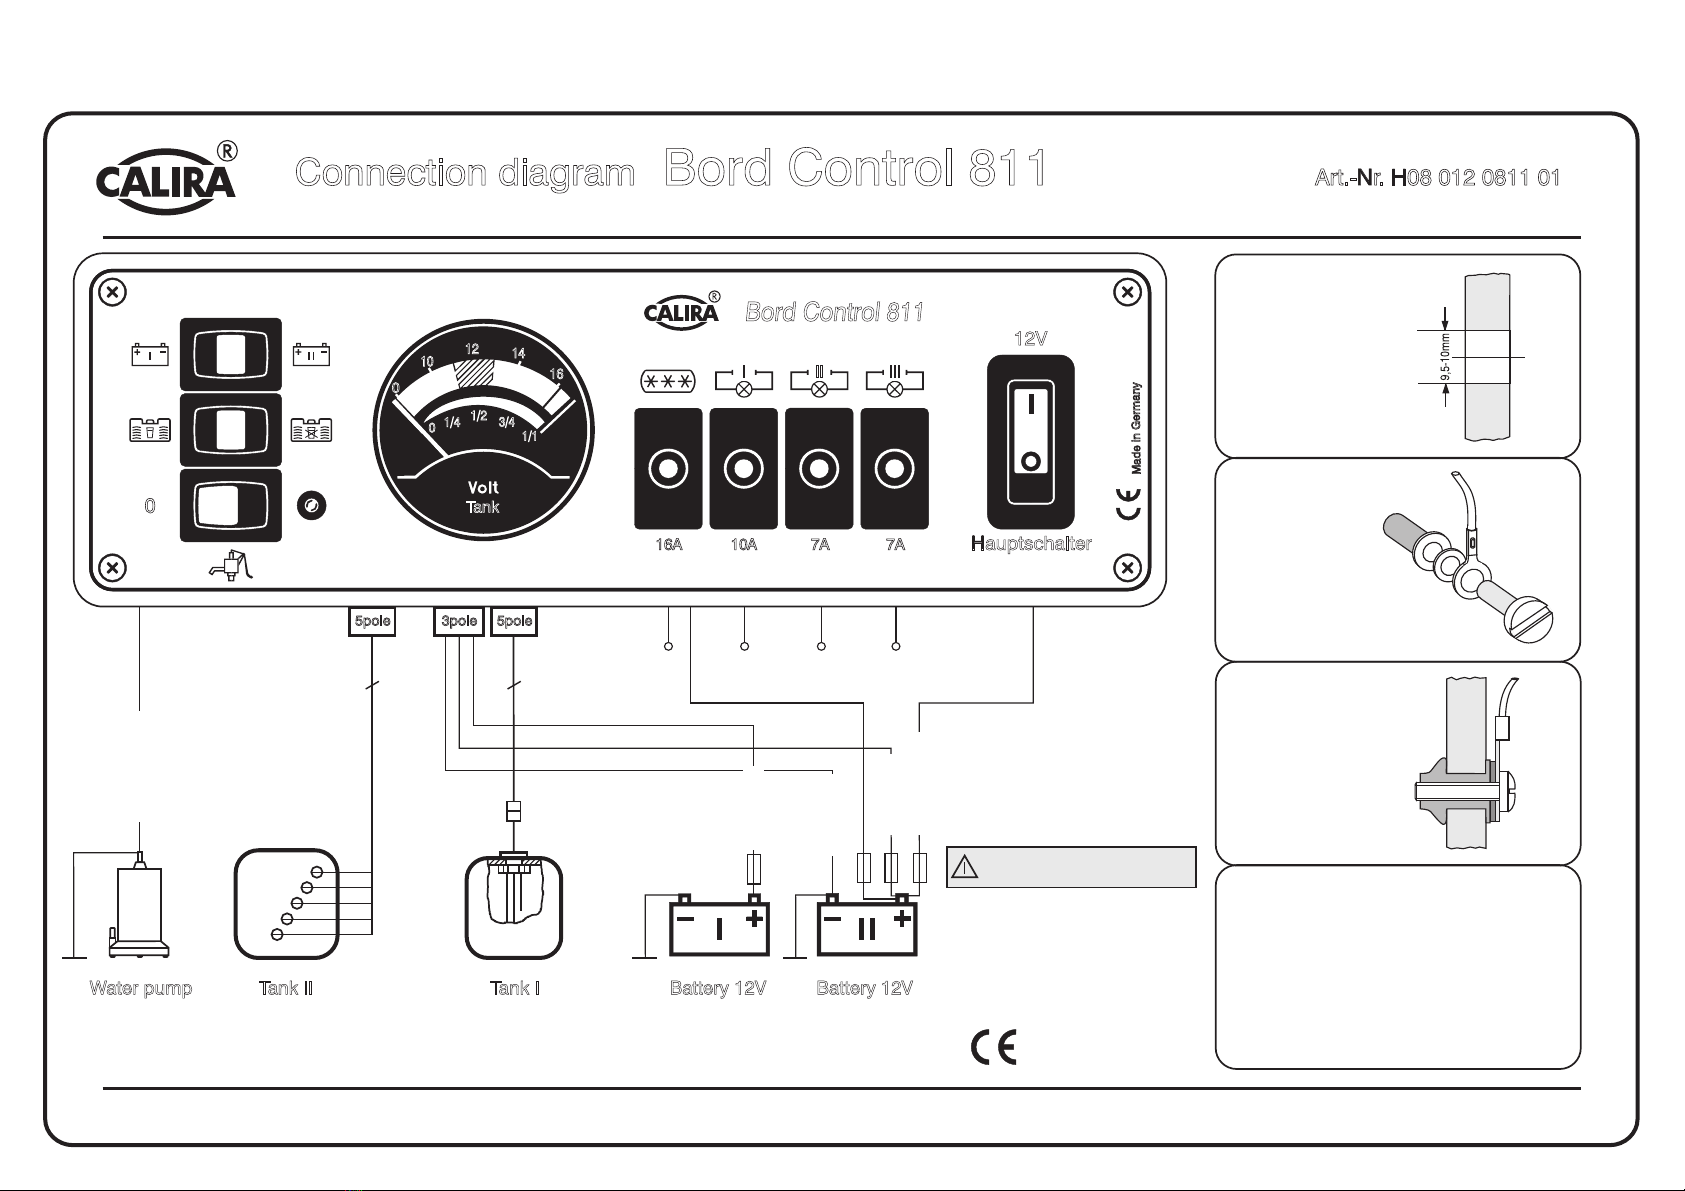
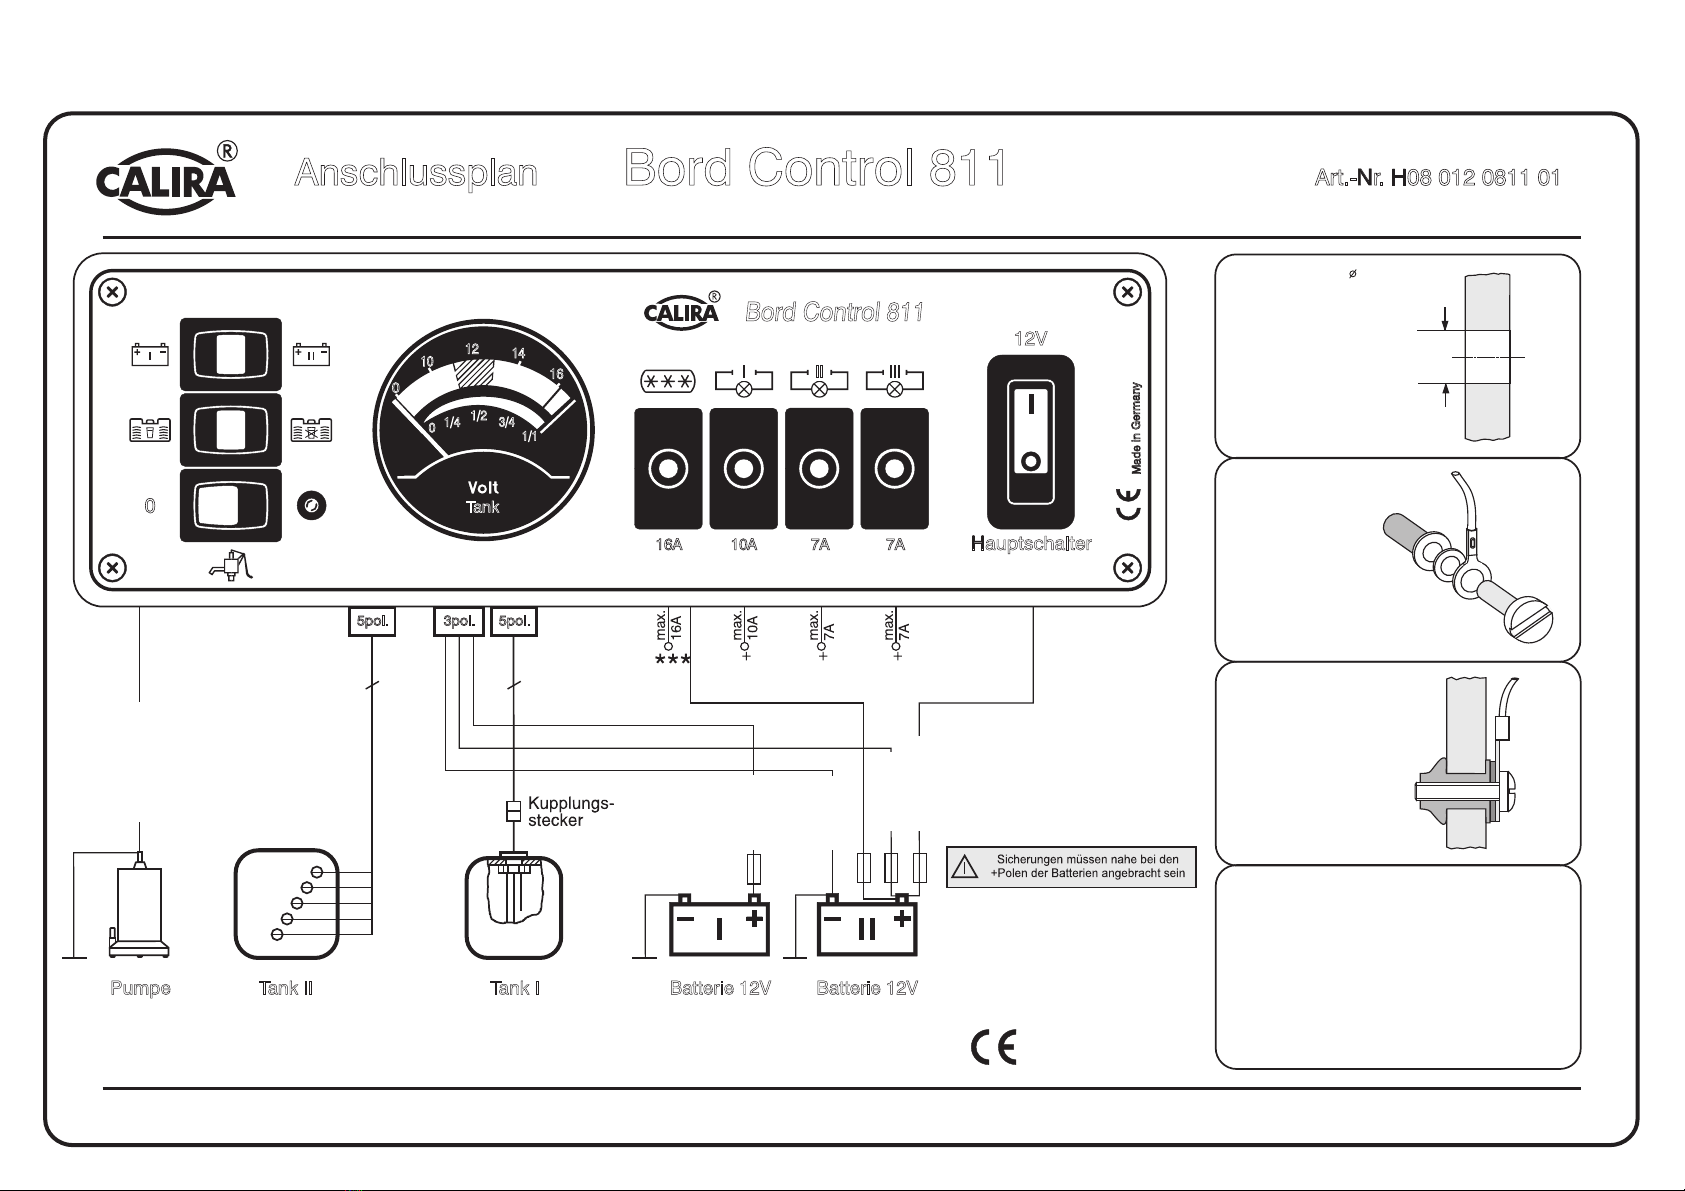
Anschlussplan Bord Control 811 Art.-Nr. H08 012 0811 01
CALIRA Electronic GmbH & Co. KG Lerchenfeldstraße 9 87600 Kaufbeuren-Neugablonz
Made in Germany
B51 080565 02
5pol. 5pol.3pol.
5 5
0
Pumpe
Pumpe +1,5mm²
Tank
0
12
10
16
14
1/4
0
1/2
3/4
1/1
gr 0
gn ½
ge ¼
ws 1
br ¾
Tank II
(Abwasser)
Tank I
(Frischwasser)
Bord Control 811
16A
10A
7A 7A
I II III
Hauptschalter
12V
Made in Germany
Batterie 12V Batterie 12V
(starten) (versorgen)
0,25mm² rt
0,25mm² bl
0,25mm² rs
2A
20A
2A
20A mind. 2,5mm²
Elektrische Leitungen sollten, um Spannungsverluste und Überlast-
ungen zu vermeiden, nie zu schwach dimensioniert verlegt werden.
Länge der Leitung und Strombelastung spielen eine wichtige Rolle
beim Festlegen des Querschnittes. Die Werte der nachfolgenden
Empfehlung sollten nicht unterschritten werden.
Empfehlung für Leitungsquerschnitte
Länge
bis 1,5m
bis 3,0m
bis 6,0m
über 6,0m
Strom
bis 15/30Amp.
bis 15/30Amp
bis 15/30Amp
bis 15/30Amp
Querschnitt
1,5/4,0mm²
2,5/4,0mm²
4,0/6,0mm²
6,0/10,0mm²
-Messfühler in die Tankbohrung
einsetzen -Kabelfarben beachten-
und mit Schraubendreher fest
anziehen.
Der Rand der Gummidichtung wird
dabei gegen die Außenwand des
Tanks gepresst. Innen bildet sich
eine Gummiwulst, welche die
Bohrung zuverlässig abdichtet
Messfühler zusammen-
setzen, Schrauben dabei mit
Dichtmasse oder elastisch-
em Kleber einsetzen,
Schrauben zunächst nur lose
von Hand anziehen
Löcher mit 9,5-10,0mm in den Ab-
wassertank (Tank II) bohren.
Bohrungen von außen, und möglichst
auch von innen, entgraten
9,5-10mm