CALMPER BM200S User manual

CALMPER
T H E D R E A M B U I L D E R
CALMPER
Model: BM200S
User Manual
Baby Monitor

SAFETY INSTRUCTIONS
1
COMPONENTS
3
WHAT'S IN THE BOX
2
QUICK SETUP
4
SETTINGS & OPERATIONS
5
TROUBLESHOOTING
12
SPECIFICATIONS
11
WARRANTY & CUSTOMER SERVICE
13
TABLE
OF CONTENTS

1
STRANGULATION HAZARD - Keep cord out of reach from
children while charging.
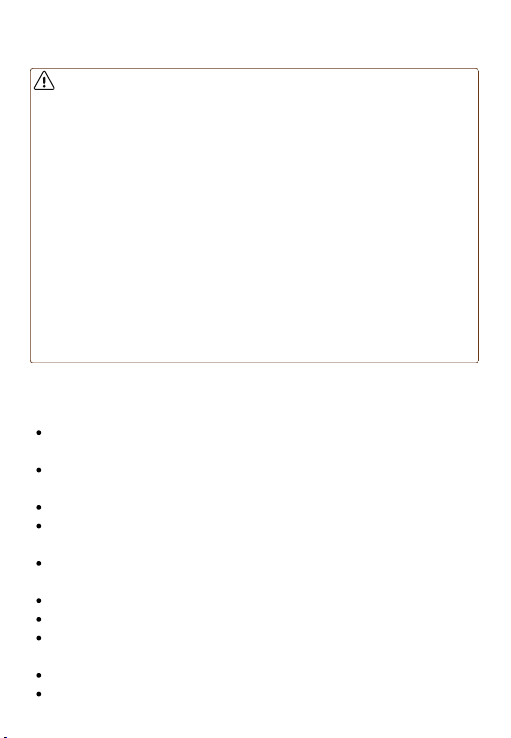
WARNING:
Caution:
Safety Instructions
This product is NOT a toy. Do not allow children under 3
years old to play with it.
This product is NOT waterproof, never use the product near
water.
Do NOT let children look into the light directly.
Do NOT place near any heat sources such as radiators,
heaters, stoves, or other devices that produce heat.
Disconnect the product from charger after fully charged
(charging indicator turns to green).
For indoor use only.
Unplug the product during lightning storms.
Please check the product condition and safety initially, and
on a regular basis.
Allow 10cm of air space around the product for ventilation.
Please only use the provided charging cable.
For your or your child's safety:
CHOCKING HAZARD - Contains small parts, keep away from
children under 3 years old.
Assemble by adults only. Keep small parts away from children
when assembling.
This product contains a lithium-ion battery. Handle with care and follow
proper usage guidelines to avoid potential fire hazard, injury or damage
to the device. Keep battery away from heat sources, do not expose to
high temperatures, and do not puncture or attempt to disassemble the
battery. Contact manufacturer or a professional for proper disposal and
recycling. Failure to comply with these warnings may result in serious
injury and/or damage.

Unplug the product during lightning storms.
Please check the product condition and safety at initial
installation, and on a regular basis.
Please check the reception regularly, especially after
relocation the camera.
Please only use dry microfiber cleaning cloth on the camera
lens.
Allow 10cm of air space around the product for ventilation.
Please keep the monitor 1 meter (3 feet) apart from the
camera to avoid feedback sound, you won't want to disturb a
sleeping baby.
User
Manual
Display Unit
1 Display Unit Charger
User Manual
Camera
1 Camera Unit Charger
2
What's In The Box
CALMPER

Components
Display Unit
3
Signal Antenna
Reset Key
Charging Indicator
Microphone
Home Touch Button
Directional Touch Buttons
Display Screen
Ok Touch Button
Talk Button
MicroUSB Charging Port
Speaker
Back Stand
Power Button

Locate a suitable power outlet: Choose a power outlet that is close to
where you plan to place the camera unit.
Connect the camera to the power outlet: Plug the charging cable into
the camera unit and the power adapter into the power outlet.
Turn on the power: Wait for about 2 seconds until the power indicator
light turns on. This means that the camera unit is working.
Place the camera unit: Choose a suitable location for the camera unit.
You may want to test a few different locations to find the best spot.
Power on the display unit: Long Press the Power Button to turn on the
display unit. Confirm the connection is established by checking the
signal bars, the picture will show on the display unit.
Please refer to the operation guide at page 10, if you need to pair the
camera with the display unit.
Use the monitor: Once the monitor is set up, you can start using it to
keep an eye on your baby. Remember to follow this user manual for
safe use of the device.
1.
2.
3.
4.
5.
6.
7.
Camera
Quick Setup
4
IR Light Sensor
Camera Lens
MicroSD Card Slot
Pairing Button
Microphone
Signal Antenna
MicroSD Charging Port
Power Indicator
Thermometer

Settings & Operations
Top Status Dock
5
Signal Levels (5 Levels)
No Signal
Camera 1
Camera 2
Camera Switch Mode
Zoom In (x1 or x10)
Lullaby
Volume Levels (6 Levels)
Night Vision Mode
VOX Mode (High, Medium and Low)
Camera Unit Room Temperature
System Time
Keyboard Click Sound Off
Battery Levels
Intercom Mode
Recording Mode
x1
xx10
x

Volume Settings
Feeding Reminder
Play Lullaby
System Time Setting
Temperature Unit Setting
Temperature Alarm On/Off
Camera Selection
VOX Mode On/Off
Sound Sensitivity Setting
Adjust Brightness
Camera Zoon In/Out
x10
Display Unit Menu Icons
6

Warranty
@ CALMPER All rights reserved.
www.calmper.net
Register: calmper
Contact Us
www.calmper
.net/register
E-mail: support@calmper
.net/contact-us
.net
CALMPER
T H E D R E A M B U I L D E R
Policy: calmper .net/warranty

To make a selection, use Buttons to navigate up / down / left
/right in the menu, and click on OK button to confirm.
Long press the Power Button at top, to turn on or turn off the
display unit.
Press the Home Touch Button to show the menu at the
bottom row on the display. Press it again to hide the menu.
Enable Auto Screen-On Sleep Mode
Turn On VOX Mode: Press the Home Touch button -> Select
from the menu -> select "HIGH" / "MED" / "LOW" ->Press OK Button to
confirm. When enabled, the icon appears in the Top Status
Dock. The video and audio will be turned off in 30 sec. Then, both
turns back on by a detected sound that's louder than the configured
threshold.
To adjust the camera's angle, press and hold the Directional Touch
Button for 2 seconds until an arrow icon displays on the screen,
which shows the camera's head starts to move to the indicated
direction. Release the button to stop the movement
Long press the Home Touch Button for 5 seconds, until the
icon is displayed in the Top Status Dock. Long press for another 5
seconds, to turn it off.
7
Operations
Turn Display Unit On and Off
Show / Hide Menu Settings
Pan and Tilt the Camera
Turn On Buttons Click Sound

Press and hold the Microphone button to talk to your baby,
release it to exit the intercom mode.
Please note: You will not hear any sound until you release of
Microphone button.
Press the Home Touch Button -> select -> press OK button
to zoom in. The icon will appear in the top status bar to
confirm the zoom in is active.
x10
Press the Home Touch Button -> select -> pick the desired
song -> press OK Button to play. The icon will appear in the
Top Status Dock to confirm playing.
8
Talk To Your Baby
Zoom In & Out
Play Lullaby
Volume: Press Home Button -> Select , use the Left and
Right Keys to turn the volume up or down.
Brightness: Press Home Button -> Select , use the Left and
Right Keys to adjust screen brightness.
Adjust Volume and Brightness
Keeps Audio and Video Always On
Turn Off VOX Mode: Press the Menu button -> select from
the menu -> select "OFF" ->Press OK to turn it off.
Press the Power Button to turn on the display, if it's off.
1.
2.
Turn Off VOX Mode: Press the Home Touch Button -> select
from the menu -> select "OFF" ->Press OK to turn it off.
Press the Power button to turn off the display.
Double check the sound by putting your ear close to the speaker
at the back of the display unit.
1.
2.
3.
Turn off Display & Allow Audio Only

The signal alert is enabled by default, and can not be turned off. It
goes off, when signal lost for 5 seconds, making beep sound for 5
times. Meanwhile, the signal lost icon will be displayed
on the screen and keeps flashing after the 5 beeping sound.
The Battery alert is also enabled by default, and can not be turned
off. In the Top Status Dock, the battery icon
indicates the current battery level.
The alert goes off , when the battery level is low and needs
recharge. The icon appears and prompt "LOW BATTERY"
message on the screen. Meanwhile, it makes 5 alerting beep
sounds.
Insert MicroSD Card: Put a compatible card into the card slot
on camera. The icon appears in the Top Status Dock, that
indicates the card is ready for recording.
Start Recording: On the display unit, long press OK Button for 2
seconds until the icon flashes on the screen.
Stop Recording: Long press OK Button for another 2 seconds, to
exit recording mode.
Play Recorded Videos: Take out the microSD card from the
camera and play on a computer with a card reader.
Signal Alert
9
Battery Alert
Note: To avoid interference from other electronic devices, place
your baby monitor at least 1 meter(3 feet) away from devices such
as wireless routers, microwaves, cell phones, computers or other
baby monitors.
Video Recording
Recording Now.
Please quit
Press the Home Touch Button -> select -> select "OFF" or
your desired timer durations -> press OK Button to confirm. When
the timer is on, the icon will appear in the Top Status Dock.
Feeding Reminder

Press the Home Touch Button -> select -> select ->
select available camera slot -> press OK Button to confirm ->
a message will display on the screen . The
display unit paring mode times out in 30 seconds.
Plug in the camera and keep it within 1 meter from the display
unit. Double click the pairing key to enter pairing mode, which
is indicated by a rapid flashing of the indicator light . Once it's
connected with the display unit, the indicator light will stay on.
The camera's pairing mode times out in 60 seconds.
1.
2.
Keep pressing the button of the
camera for three seconds to pair
2
Press the Home Touch Button -> select -> select ->
select the target camera slot -> press the OK Button -> select
to confirm deletion, or to cancel the action. The red square is
gone once confirmed deletion .
2
2
2
Note: The red square next to a camera slot, means that slot is
already token by a connected camera.
Add A Camera
*
*
Available slot
Unavailable slot
Delete A Camera
is to view camera 1,
is to view camera 2,
is to automatically switch between camera 1 and 2.
Press the Home Touch Button -> select -> select ->
select the desired option:
Switch Between 2 Cameras
2
10

Camera
Camera Pixel
1280 * 720p
Image Sensor
1/6 CMOS Sensor
Transmission Method
2.4GHz FHSS
Transmission Distance
300 Meters (Open Space)
View Angle
75° Degree
Pan-n-Tilt
355° Horizontal / 120° Vertical
Power Consumption
1.5W
Working Temperature
-20°C ~ 65°C / -4°F ~ 149°F
Size / Weight
86 * 86 * 107 mm / 227 grams
3.39 * 3.39 * 4.21 inches / 0.5 lbs
Specifications
11
Monitor
Monitor Screen
4.5-inch VGA Colour 15 FPS (480 * 800p)
Battery
2300 mAh
Power Consumption
1.6W
Working Temperature
-20°C ~ 65°C / -4°F ~ 149°F
Size / Weight
130.3 * 79.6 * 16.4 mm / 126 grams
5.13 * 3.13 * 0.65 inches / 0.28 lbs
Features
VOX, Infrared Night Vision, Lullaby Player, Feeding Reminder,
High/Low Temperature Alert, Poor Signal Alert, Low Battery Alert
and more.

The display unit
doesn't turn on
Refer to "Turn Display Unit On and Off" on page 7
The camera doesn't
pan n tilt
Long press the up/down/left/right touch buttons to
adjust the camera's view angle. Refer to page 7 for
detailed instructions.
Weak or no signal
Restart the display unit, and pull out the antenna.
Test the signal in another location.
Keep it away from other 2.4GHz products, like
WIFI Routers, Microwave ovens and other baby
monitors, which may interfere with the
connection.
Re-pairing, follow the Operations guide to Delete
the camera and add it back on page 10.
No sound?
Check the volume settings on the monitor, making
sure it is not on mute.
Image is in black and
white?
Night Vision makes picture appears as black and
white, when the light sensor detects enough light, it
will switch back to full colour.
Can't connect to the
WIFI?
This model doesn't connect to WIFI. The image only
runs on the display unit.
The product doesn't
charge or takes too
long?
Confirm the power point in working order.
Make sure to use the provided charger.
There's no video on
the display unit?
Confirm the camera has been connected to
power, and the power indicator is on.
Follow the troubleshooting guide to re-pair the
camera with the display unit.
Questions & Answers
12

Under the warranty policy, CALMPER warrants that the product
is free from defects in material and workmanship for a period of
12 months from the date of purchase. Within the warranty, it is
at the discretion of CALMPER to decide whether products under
warranty are repaired or replaced. The warranty does not cover
any damage caused by incorrect mounting, negligent
operation, dropping, impact, misuse, liquid ingress, extreme
temperatures or any other physical damage caused by anything
other than normal use etc., or normal wear and tear.
The protection under this Warranty is provided to the original
purchaser only and is not transferable to any subsequent owner
who acquires the product.
Background noise
from the speaker
A bit of noise that comes from the speaker,
is normal for all baby monitors.
Temperature is
inaccurate
After you relocated the camera, please give
it up to 30min, before read the
temperature.
Find more details about warranty, our products and contact us
at
https://www.calmper.net/warranty
https://www.calmper.net/contact-us
13
Please don't hesitate to contact us if you need more help.
Please register your product for warranty support:
https://calmper.net/register
https://calmper.com.au/register
Warranty & Customer Service

Purchase Date:
Order Number:
Table of contents
Other CALMPER Baby Monitor manuals