Canary Products MMRC190 User manual

Model # MMRC190
INFRARED REMOTE CONTROL MIST MAKER
INSTRUCTIONS MANUAL
Thank you for purchasing Canary Products. Please read the instructions manual
carefully before operating.
FEATURES & FUNCTIONS
MMRC192 has both inline control and remote control
You can use both the inline and remote control to select the color
of your choice.
Or you can simply turn off the color if you choose to do so.
You also have the option of controlling the amount of mist it
produces: low-medium-high
Please see the complete instruction for use of the remote and inline
control below.
TECHNICAL DATA
Working Voltage
(VAC)
Working Electric
Current (A)
Ultrasonic
Frequency(KHz)
Ceramic disc
spec. (mm)
24
0.60~ 0.70
1700±40
Φ20
Generate mist
(ml/h)
Water temp. Range
( ℃)
Lifespan of Ceramic
Disc ( hour)
≥250
15 ~ 50
>2000
OPERATING PROCESS
1. Place the MIST MAKER into a water container.
2. The water level sensor switch (please see drawing 1), must be completely
submerged under water (about 1/4 –1/2 inch is optimal). If submerged any further
than ½ inch than the mist will not work optimally.
3. Connect the mist maker with the inline control.
4. Connect the inline control with the adapter.
5. Plug in the adapter into your outlet.
6. If there is no mist or the LED lights are not operating, please note that you do not
have enough water, as it is not submerged completely.
NOTICE & CAUTION
1.Please DO NOT hold or pick up the fogger unit with its water level sensor. DO
NOT scratch or bump the water-level sensor as it could permanently damage the
unit.
2. Don't move the fogger unit or pull its cable while it's working.
3. Don't put your hand above the ceramic disc of the mist maker. The vibration can
shock you, but it is not an electronic shock.
MAINTENANCE & SERVICE
a. Be sure to pour clean and filtered water and replace water in the glass bowl timely.
b. Clean the ceramic disc and the surface of the mist maker with soft cloth or cotton
sticker in clean water once a month. DO NOT touch or scratch the ceramic disc or
the water lever sensor switch. DO NOT use washing powder to clean any part of
the mist maker.
c. If the unit cannot generate mist after running for some time, please check and
confirm there is enough water in the bowl. If the LED light is also off and not
creating mist, please make certain that it is receiving electricity and check the on
and off switch.
d. If the unit cannot generate mist, but only spraying water, the unit is good, the water
in the bowl may be dirty. Simply replace the water in the bowl, it should start
working normally. If it continues to spray, but not mist, please make sure the level
of the water is not higher than ½” above the water level sensor.
e. After running some time (approximately 1500 hours), the mist will start to reduce.

At this time, it is advisable to replace the ceramic disc with a new one. Please
purchase a new ceramic disc & tool from your local distributor, and refer to the
Fogger Unit Drawing to install the new ceramic disc. Please purchase Canary
Product item M-11 ceramic disc so that it will fit your fogger unit accordingly.
INSTRUCTIONS FOR REPLACING FOGGER UNIT DISC
a. Unplug the unit and remove from the glass bowl. Dry the fogger unit completely
with a soft cloth.
b. Insert the tool into the winding ring and unscrew counter clockwise.
c. Remove the winding ring and old ceramic disc.
IMPORTANT: note the front and back of the ceramic disc. Be sure to reinstall with
the correct side; white side up.
d. The inside area of the unit cavity must be completely dry before the parts are
installed.
Caution:
INSTRUCTIONS FOR USING INLINE CONTROLLERAND INFRARED
CONTROLLER
INLINE CONTROL:
1. ON the side of the side of the inline control, you can turn OFF or ON the fogger
unit.
2. The “SPEED” button controls the speed for the alternating lights. From “MODE”
1-9 the “SPEED” function is available. For “MODE” 10-16 the SPEED option is
not relevant- as the light stays constant and does not alternate. You will know if
the “SPEED” function is available, when you are from MODE “1-9” only if the
orange light is on, on the “SPEED” button.
3. The “SPEED” button completes a whole cycle of alternating colors listed below.
The speed options are: 1 second, 4 seconds, 7 seconds to complete a whole cycle.
Simply click on the “SPEED” button to control the speed at how fast you want
the colors to be changing.
4. On the inline control the “MODE” button allows for alternating colors. Please see
the list of option for changing the colors to the choice you prefer. (Please note
when you turn on the fogger, your fogger may start at MODE 10)
<Drawing No.1>
Water Lever
Sensor Switch
Rubber Tuck
LED Lamp
Front Of
Ceramic Disc Behind Of
Ceramic Disc
Tool
Winding Ring
Ceramic Disc
Sealing Washer
Mist Cavity
MODE
SPEED
ON OFF
Infrared Receiver
<Drawing No.3>

Mode 1: Colors alternate between Blue, Yellow and Red.
Mode 2: Blue stays lit, Red and Yellow fades in and out.
Mode 3: Red stays lit, Blue and Yellow fades in and out.
Mode 4: Yellow stays lit, Blue and Red fades in and out.
Mode 5: Any two alternating colors are on, while the alternating third fades in and out
Mode 6: Red+Yellow →Yellow+Blue →Blue+Red alternating
Mode 7: Red flashes three times →Yellow flashed three times →Blue flashes three
times ….alternates
Mode 8: Red+Yellow flashes 3 times →Yellow+Blue flashes 3 times →Blue+Red
flashes 3 times….alternates
Mode 9: Red →Yellow →Blue →Red+Yellow flashing three times→ Blue+Red flashing
three times →Red+Yellow flashing three times…alternating
Mode 10: Red stays lit
Mode 11: Yellow stays lit
Mode 12: Blue stays lit
Mode 13: Red + Yellow stays lit.
Mode 14: Yellow + Blue stays lit.
Mode 15: Red + Blue stays lit
Mode 16: Red + Yellow + Blue stays lit
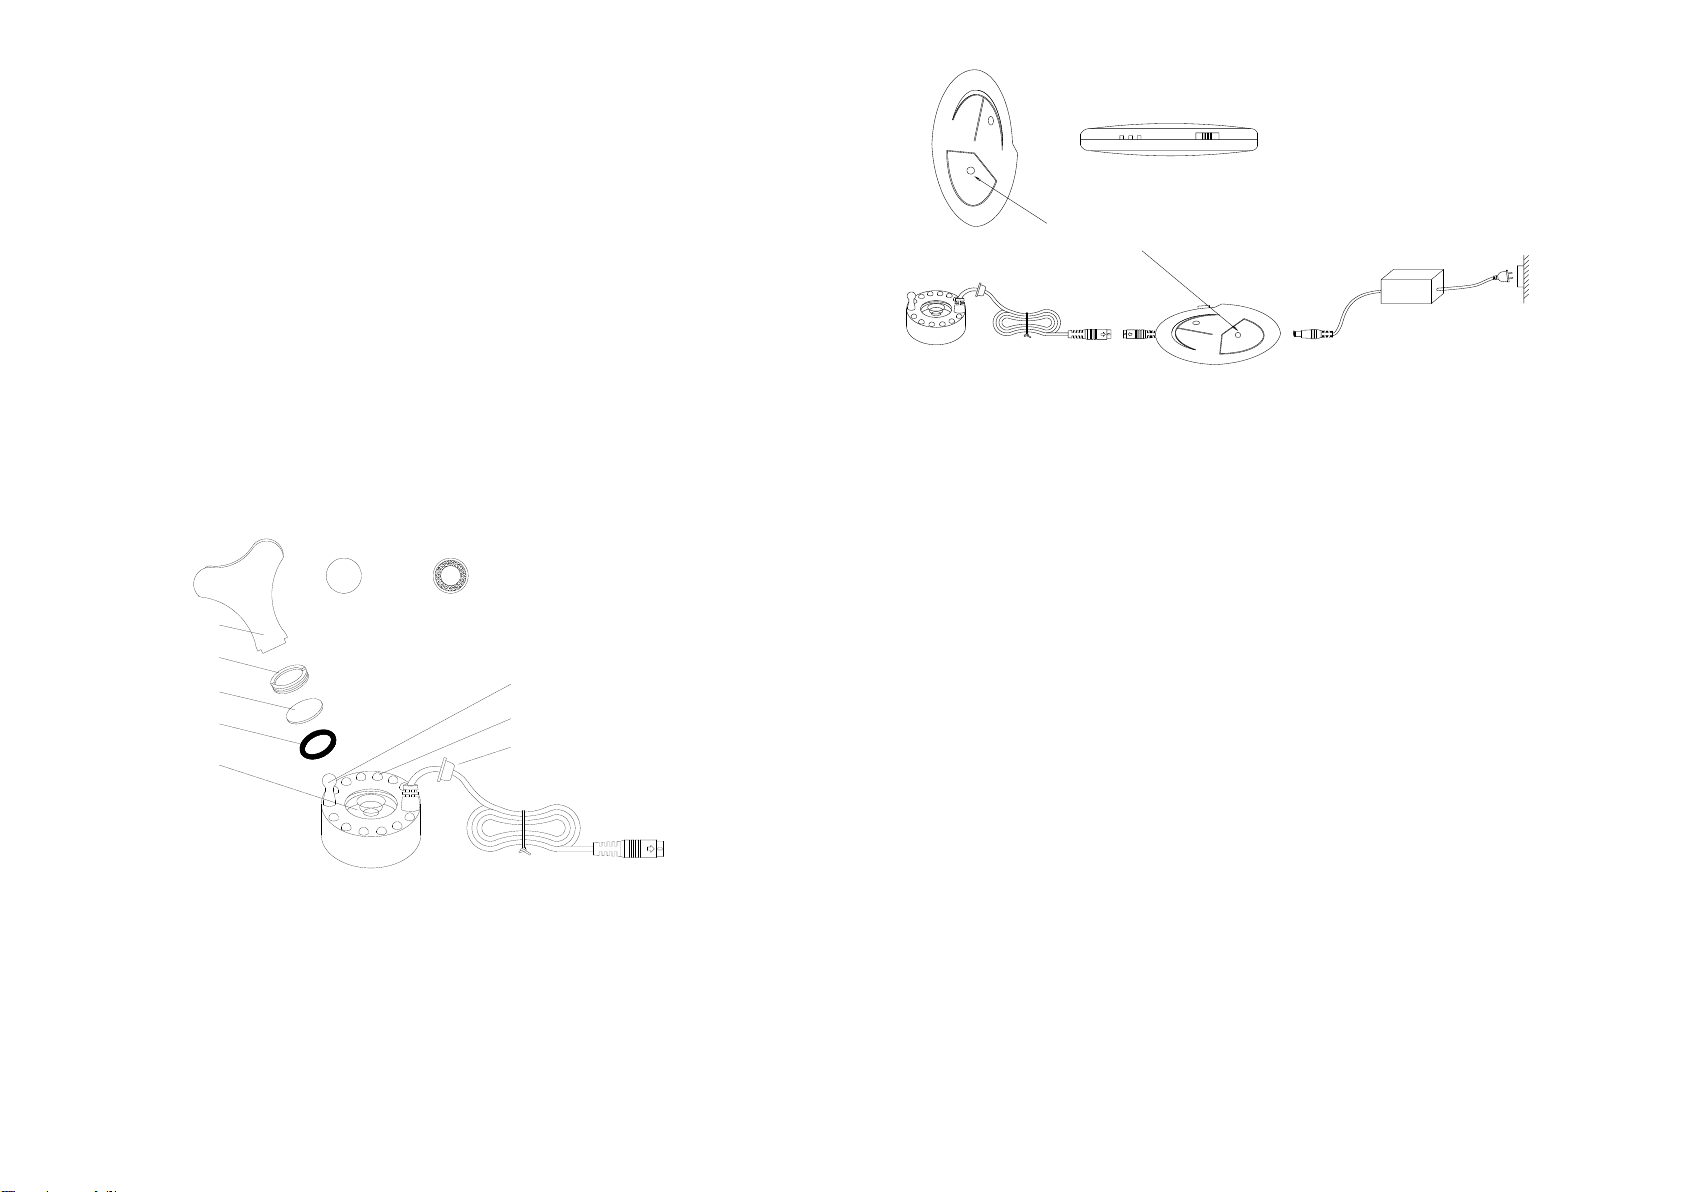
INFRARED REMOTE CONTROL (Drawing No. 4)
Please note this is an infrared remote control. YOU MUST POINT THE
INFRARED EMITTER DIRECTLY AT THE INLINE CONTROL FOR IT TO
FUNCTION. The infrared remote control uses 3V lithium battery inside. If it is
not as sensitive, please replace a battery and try again.
1. Please make sure the Inline Control is in the “ON” position.
2. POWER ON/OFF: This option will turn off the whole unit-lights and fogging unit.
3. LIGHTING & MODES ON/OFF: This option turns off all the lights and only creates
mist.
4. LIGHTING MODES:
a) To use this option, first turn ON the LIGHTING & MODES ON/OFF switch.
(1). SINGLE COLOR —3 Modes are available ①Red Lighting; ②Yellow
Lighting; ③Blue Lighting.
(2). MIXED COLOR —4 Modes are available ①Red+Yellow Lighting; ②
Yellow+Blue Lighting; ③Red+Blue Lighting; ④Red+Yellow+Blue Lighting.
(3). FADING COLOR —4 Modes are available ①Blue stays lit,
Red + Yellow fades in and out; ②Yellow stays lit, Red+Blue
fades in and out; ③Red stays lit, Yellow+Blue fades in and out;
④Any two lights at one time fades in and out.
(4) FLASHING COLOR —5 Modes are available ①Red,
Yellow, Blue alternating ②Red+Yellow →Yellow+Blue →
Blue+Red alternating ③Red flashes three times →Blue flashes
three times →Yellow flashes three times alternating ④
Red+Yellow flashes 3 times → Yellow+Blue flashes 3 times →
Blue+Red flashes 3 times ⑤Red+Yellow flashes 3 times →
Yellow+Blue flashes 3 times → Blue+Red flashes 3 times
followed by alternating colors blue + yellow + red
5. MIST VOLUME CONTROL
“__” button lowers the quantity of mist, “ + ” increase the quantity of mist.
_______________________________________________________________________
For any questions or issues, please email us at Canary Products. And we will respond within
24 hours.
Website: http://www.canaryproducts.com
Mailing Address: P.O. Box 1561 Cypress, CA 90630
Email: info@canaryproducts.com
LIGHTING
MODES
SPEED
FLASHING
COLOR
MIXED
COLOR
SINGLE
COLOR
FADING
COLOR
POWER
ON/OFF
LIGHTING&MODES
REMOTE CONTROL
ON/OFF
FSMLE.
Infrared Emitter
<Drawing No.4>
Special Attention:
Please let the Infrared emitter of the
Remote Control point to the infrared
receiver on the Hand-held control,
when you use it !!