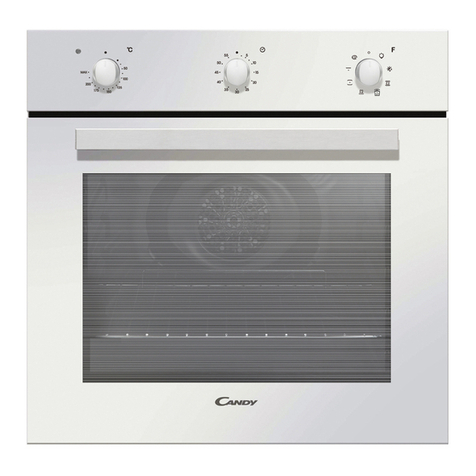
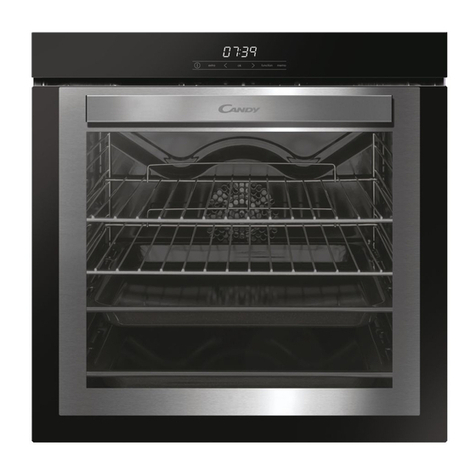
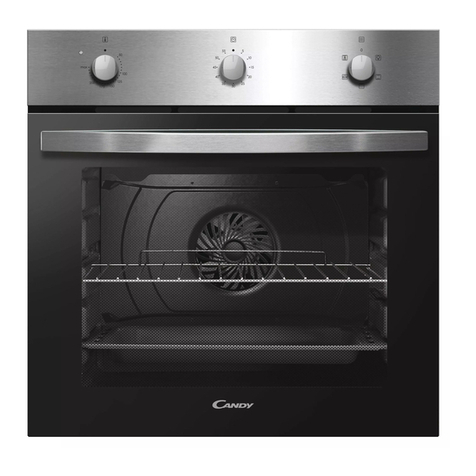
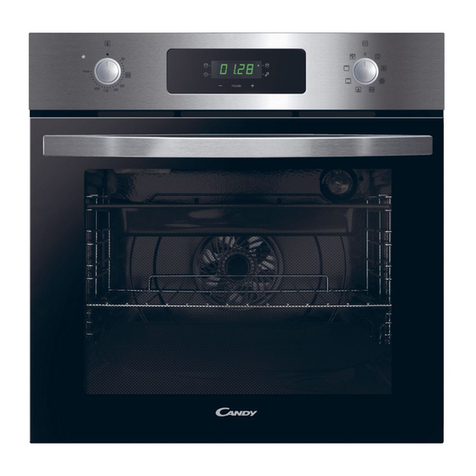
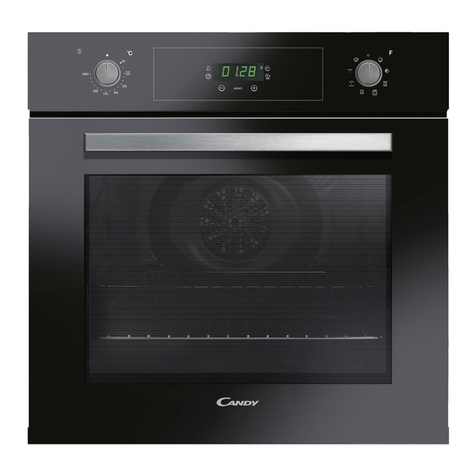
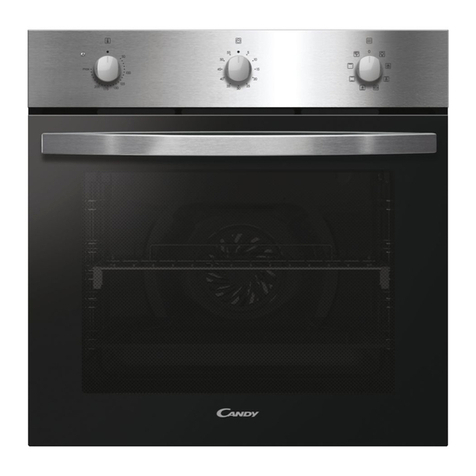
Candy FCT615X/1 User manual

USER INSTRUCTIONS
OVENS
NOTICE D'EMPLOI ET D'INSTALLATION
DES FOURS ENCASTRABLES
MANUALE D’ISTRUZIONI
FORNO
EN
FR
IT
02
12
22
CANDY HOOVER GROUP S.R.L. • Via Comolli 16 • 20861 Brugherio (MB) - Italy

General Warnings
• During cooking, moisture may condense inside
the oven cavity or on the glass of the door. This is a
normal condition. To reduce this effect, wait 10-
15 minutes after turning on the power before
putting food inside the oven. ln any case, the
condensation disappears when the oven reaches
the cooking temperature.
• Cook the vegetables in a container with a lid
instead of an open tray.
• Avoid leaving food inside the oven after cooking
for more than 15/20 minutes.
• WARNING: the appliance and accessible parts
become hot during use. Be careful not to touch
any hot parts.
• WARNING: the accessible parts can become hot
when the grill is in use. Children should be kept at
a safe distance.
• WARNING: ensure that the appliance is
switched off before replacing the bulb, to avoid
the possibility of electric shocks.
• WARNING: in order to avoid any danger caused
by the accidental resetting of the thermal
interruption device, the appliance should not be
powered by an external switching device, such as
a timer, or be connected to a circuit that is
regularly switched on and off.
• Children under 8 should be kept at a safe
distance from the appliance if not continuously
supervised.
• Children should not play with the appliance.
• The appliance can be used by those aged 8 or
over and by those with limited physical, sensorial
or mental capacities, without experience or
knowledge of the product, only if supervised or
provided with instruction as to the operation of
the appliance, in a safe way with awareness of the
possible risks.
• Cleaning and maintenance should not be carried
out by unsupervised children.
• Do not use rough or abrasive materials or sharp
metal scrapers to clean the oven door glasses, as
they can scratch the surface and cause the glass to
shatter.
• The oven must be switched off before removing
the removable parts. After cleaning, reassemble
them according the instructions.
• Only use the meat probe recommended for this
oven.
• Do not use a steam cleaner for cleaning
operations.
• Connect a plug to the supply cable that is able to
bear the voltage, current and load indicated on
the tag and having the earth contact. The socket
must be suitable for the load indicated on the tag
and must have ground contact connected and in
operation. The earth conductor is yellow-green in
colour. This operation should be carried out by a
suitably qualified professional. ln case of
incompatibility between the socket and the
appliance plug, ask a qualified electrician to
substitute the socket with another suitable type.
The plug and the socket must be conformed to the
current norms of the installation country.
Connection to the power source can also be made
by placing an omnipolar breaker between the
appliance and the power source that can bear the
maximum connected load and that is in line with
current legislation. The yellow-green earth cable
should not be interrupted by the breaker. The
socket or omnipolar breaker used for the
connection should be easily accessible when the
appliance is installed.
• The disconnection may be achieved by having
the plug accessible or by incorporating a switch in
the fixed wiring in accordance with the wiring
rules and with contact separation compliant to
the requirements for overvoltage category III.
• lf the power cable is damaged, it should be
substituted with a cable or special bundle
available from the manufacturer or by contacting
the customer service department. The type of
power cable must be H05V2V2-F. This operation
should be carried out by a suitably qualified
professional. The earth conductor (yellow-green)
must be approximately 10 mm longer than the
other conductors. For any repairs, refer only to
the Customer Care Department and request the
use of original spare parts.
• Failure to comply with the above can
compromise the safety of the appliance and
invalidate the guarantee.
• Any excess of spilled material should be
EN 02

removed before cleaning.
• A long power supply failure during an occurring
cooking phase may cause a malfunction of the
monitor. ln this case contact customer service.
• The appliance must not be installed behind a
decorative door in order to avoid overheating.
• When you place the shelf inside, make sure that
the stop is directed upwards and in the back of the
cavity. The shelf must be inserted completely into
the cavity.
• WARNING: Do not line the oven walls with
aluminium foil or single-use protection available
from stores. Aluminium foil or any other
protection, in direct contact with the hot enamel,
risk melting and deteriorating the enamel of the
insides.
• WARNING: Never remove the oven door seal.
• CAUTION: Do not refill the cavity bottom with
water during cooking or when the oven is hot.
• No additional operation/setting is required in
order to operate the appliance at the rated
frequencies.
EN 03

General Instructions
5
1.1 Safety indications
1.2 Electrical safety
1.3 Recommendations
1.4 Installation
1.5 Waste management
2.1 Overview
2.2 Accessories
2.3 First use
Product Description
6
3.1 Display description
3.2 Cooking modes
3.3 Using the steam function
Use of the Oven
7
4.1 General notes on cleaning
4.2 Aquactiva Function
4.3 Maintenance
• Instructıon for removal and cleanıng of the
sıde racks
• Removal of the oven window
• Removal and cleaning of the glass door
• Changing the bulb
Oven Cleaning and Maintenance
9
5.1 F.A.Q.
Troubleshooting
11
Summary
EN 04

1. General Instructions
We thank you for choosing one of our products. For the best results with your oven, you should read
this manual carefully and retain it for future reference. Before installing the oven, take note of the serial
number so that you can give it to customer service staff if any repairs are required. Having removed the
oven from its packaging, check that it has not been damaged during transportation. If you have doubts,
do not use the oven and refer to a qualified technician for advice. Keep all of the packaging material
(plastic bags, polystyrene, nails) out of the reach of children. When the oven is switched on for the first
time, strong smelling smoke can develop, which is caused by the glue on the insulation panels
surrounding the oven heating for the first time. This is absolutely normal and, if it occurs, you should
wait for the smoke to dissipate before putting food in the oven. The manufacturer accepts no
responsibility in cases where the instructions contained in this document are not observed.
NOTE: the oven functions, properties and accessories cited in this manual will vary, depending on the
model you have purchased.
1.1 Safety Indications
Only use the oven for its intended purpose, that is only for the cooking of
foods; any other use, for example as a heat source, is considered improper
and therefore dangerous. The manufacturer cannot be held responsible for
any damage resulting from improper, incorrect or unreasonable usage.
The use of any electrical appliance implies the observance of some
fundamental rules:
- do not pull on the power cable to disconnect the plug from the socket;
- do not touch the appliance with wet or damp hands or feet;
- in general the use of adaptors, multiple sockets and extension cables is not
recommended;
- in case of malfunction and/or poor operation, switch off the appliance and
do not tamper with it.
1.2 Electrical Safety
ENSURE THAT AN ELECTRICIAN OR QUALIFIED TECHNICIAN MAKES THE
ELECTRICAL CONNECTIONS. The power supply to which the oven is
connected must conform with the laws in force in the country of
installation. The manufacturer accepts no responsibility for any damage
caused by the failure to observe these instructions. The oven must be
connected to an electrical supply with an earthed wall outlet or a
disconnector with multiple poles, depending on the laws in force in the
country of installation. The electrical supply should be protected with
suitable fuses and the cables used must have a transverse section that can
ensure correct supply to the oven.
CONNECTION
The oven is supplied with a power cable that should only be connected to
an electrical supply with 220-240 Vac 50 Hz power between the phases or
between the phase and neutral. Before the oven is connected to the
electrical supply, it is important to check:
- power voltage indicated on the gauge;
- the setting of the disconnector.
The grounding wire connected to the oven's earth terminal must be
connected to the earth terminal of the power supply.
WARNING
Before connecting the oven to the power supply, ask a qualified electrician
to check the continuity of the power supply's earth terminal. The
manufacturer accepts no responsibility for any accidents or other
problems caused by failure to connect the oven to the earth terminal or by
an earth connection that has defective continuity.
NOTE: as the oven could require maintenance work, it is advisable to keep
another wall socket available so that the oven can be connected to this if it
is removed from the space in which it is installed. The power cable must
only be substituted by technical service staff or by technicians with
equivalent qualifications.
1.3 Recommendations
After each use of the oven, a minimum of cleaning will help keep the oven
perfectly clean.
Do not line the oven walls with aluminium foil or single-use protection
available from stores. Aluminium foil or any other protection, in direct contact
with the hot enamel, risks melting and deteriorating the enamel of the insides.
In order to prevent excessive dirtying of your oven and the resulting strong
smokey smells, we recommend not using the oven at very high temperature. It
is better to extend the cooking time and lower the temperature a little. In
addition to the accessories supplied with the oven, we advise you only use
dishes and baking moulds resistant to very high temperatures.
1.4 Installation
The manufacturers have no obligation to carry this out. If the assistance of the
manufacturer is required to rectify faults arising from incorrect installation,
this assistance is not covered by the guarantee. The installation instructions
for professionally qualified personnel must be followed. Incorrect installation
may cause harm or injury to people, animals or belongings. The manufacturer
cannot be held responsible for such harm or injury.
The oven can be located high in a column or under a worktop. Before fixing,
you must ensure good ventilation in the oven space to allow proper
circulation of the fresh air required for cooling and protecting the internal
parts. Make the openings specified on last page according to the type of
fitting.
1.5 Waste management and environmental protection
This appliance is labelled in accordance with European Directive
2012/19/EU regarding electric and electronic appliances (WEEE). The
WEEE contain both polluting substances (that can have a negative effect on
the environment) and base elements (that can be reused). It is
important that the WEEE undergo specific treatments to
correctly remove and dispose of the pollutants and recover all
the materials. Individuals can play an important role in
ensuring that the WEEE do not become an environmental
problem; it is essential to follow a few basic rules:
- the WEEE should not be treated as domestic waste;
- the WEEE should be taken to dedicated collection areas managed by the
town council or a registered company.
In many countries, domestic collections may be available for large WEEEs.
When you buy a new appliance, the old one can be returned to the vendor
who must accept it free of charge as a one-off, as long as the appliance is of
an equivalent type and has the same functions as the purchased appliance.
SAVING AND RESPECTING THE ENVIRONMENT
Where possible, avoid pre-heating the oven and always try to fill it. Open
the oven door as infrequently as possible, because heat from the cavity
disperses every time it is opened. For a significant energy saving, switch off
the oven between 5 and 10 minutes before the planned end of the cooking
time, and use the residual heat that the oven continues to generate. Keep
the seals clean and in order, to avoid any heat dispersal outside of the
cavity. If you have an electric contract with an hourly tariff, the "delayed
cooking" programme makes energy saving more simple, moving the
cooking process to start at the reduced tariff time slot.
EN 05
2. Product Description
2.1 Overview
1. Control panel
2. Shelf positions
(lateral wire grid if included)
3. Metal grill
4. Drip pan
5. Fan (behind the steel plate)
6. Oven door
2.2 Accessories (According to model)
Drip pan
1
Collects the residues that drip during the cooking of foods on the grills.
Lateral wire grids
3
It located at both sides of the oven cavity. It holds metal grills and drip pans.
2.3 First Use
PRELIMINARY CLEANING
Clean the oven before using for the first time. Wipe over external surfaces with a damp soft cloth. Wash all accessories and wipe inside the oven with a
solution of hot water and washing up liquid. Set the empty oven to the maximum temperature and leave on for about 1 hour, this will remove any lingering
smells of newness.
EN 06
Metal grill
2
Holds baking trays and plates.
2
3
5
4
6
1

87
3. Use of the Oven (According to model)
3.1 Display description
WARNING : the first operation to carry out after the oven has been installed or following the interruption
of power supply (this is recognizable the display pulsating and showing ) is setting the correct time. 12:00
The bottom right LED flashes at the same time ( ). This is achieved as follows.
•Set time with buttons."-" "+"
•Push the Menu button or wait 5 seconds than the clock is setted.
ATTENTION: The oven will only operate setting the clock
FUNCTION HOW TO DEACTIVATE WHAT IT DOES NOTE
HOW TO USE
KEY LOCK
•Child Lock function is activated by
touching Set (+) for a minimum of 5
seconds. From this moment on all
other function are locked and the
display will flash 3 sec intervals STOP
and preset time intermittently.
•Child Lock function is deactivated by
touching touchpad Set (+) again for a
minimum of seconds. From this 5
mom en t on all func ti ons are
selectable again.
•Push the central button 3 times
•Press the buttons "-" "+" to set
the required time
•Release all the buttons
•When the set time has elapsed, an
audible alarm is full stop after
activated this alarm will stop on its
own, however it can be stopped
immediately by pressing any button.
•Sounds an alarm at the end of the
set time.
•During the process, the display
shows the remaining time.
•Allows to use the oven as alarm clock
(could be activated either with operating
the oven or with out operating the oven)
•Select the cooking function with the
oven function knob, the temperature
you want to cook with the thermostat
knob.
• Push the central button 1 times
• Press the buttons "-" or "+"to set the
lenght of cooking required
• Release all buttons
NOTE: If the oven is switched off or
the lamp is functioning, the cooking
time schedule function will not work.
• It allows to preset the cooking time
required for the recipe chosen.
• To check how long is left to run press
the MENU button 1 time.
• To alter/change the preset time press
MENU and "-" "+" buttons.
•Push any button to stop the signal.
Push the central button to return to
the clock function.
•At the end of the program the program
gives 3 warning signals and “End” appears
on the display.
Set the function selector switch to "0" to
return to the clock function.
•At the time set, the oven will switch
off. To switch off manually, turn the
oven function selector to position O.
•Enables you to set the end of
cooking time
•To check the preset time push the
central button 2 times
•To modify the preset time press
buttons MENU + "-" "+"
•Select the cooking function with the
oven function knob, the temperature
you want to cook with the thermostat
knob.
•Push the central button times 2
•Press the buttons "-" "+" to set the
time at which you wish the oven to
switch off
•Release the buttons
NOTE: If the oven is switched off or
the lamp is functioning, the cooking
time schedule function will not work.
•This function is typically used with
“cooking time” function.
For example if the dish has to be cooked for
45 minutes and needs to be ready by
12 :30, simply select the required
function, set the cooking time to 45
minutes and the end of cooking time to
12:30.
•At the end of the cooking set time, the
oven will switch off automatically and an
audible alarm will ring.
•Cooking will start automatically at 11:45
(12:30 minus 45 mins) and will continue
until the pre-set end-of-cooking-time,
when the oven will switch itself off
automatically.
END OF
COOKING
COOKING
TIME
MINUTE
MINDER
EN 07
1. Minute minder
2. Clock setting
3. Cooking time
4. End of cooking
5. Temperature or clock display
6. LCD display adjustment controls
7. Thermostat selector knob
8. Function selector knob

3.2 Cooking Modes
*Tested in accordance with the EN 60350-1 for the purpose of energy consumption declaration and energy class.
EN 08
Function
Dial Function (Depends on the oven model)
LAMP: Turns on the oven light.
MULTI-LEVEL: We recommend you use this method for poultry, pastries, fish and vegetables. Heat penetrates into
the food better and both the cooking and preheating times are reduced. You can cook different foods at the same
time with or without the same preparation in one or more positions. This cooking method gives even heat
distribution and the smells are not mixed.
Allow about ten minutes extra when cooking foods at the same time.
CONVENTIONAL: Both top and bottom heating elements are used. Preheat the oven for about ten minutes. This
method is ideal for all traditional roasting and baking. For seizing red meats, roast beef, leg of lamb, game, bread,
foil wrapped food (papillotes), flaky pastry. Place the food and its dish on a shelf in mid position.
DEFROST: When the dial is set to this position. The fan circulates air at room temperature around the frozen food so
that it defrosts in a few minutes without the protein content of the food being changed or altered.
BOTTOM HEATING + FAN: The bottom heating element is used with the fan circulating the air inside the oven. This
method is ideal for juicy fruit flans, tarts, quiches and pâté.
It prevents food from drying and encourages rising in cakes, bread dough and other bottom-cooked food.
Place the shelf in the bottom position.
*
T °C
range
PIZZA - With this function hot air circulated in the oven to ensure perfect result for dishes such as pizza or cake.
COOK LIGHT + STEAM: Use the upper ventilation and heater at the same time to perfectly cook large portions of
food. This mode is especially suitable for roasting crispy dishes such as meat, poultry, or fish.
GRILL + STEAM: We recommend using the heat resulting from the upper heating system and hot steam to make
dishes that are gratinated on the surface and keep their elasticity and juices intact. You can also use it to
immediately brown the surface of undercooked food (rare meat) or fish served raw in the centre.
COOK LIGHT: This function allows to cook in a healthier way, by reducing the amount of fat or oil required. The
combination of heating elements with a pulsating cycle of air ensures a perfect baking result.
*
GRILL : use the grill with the door closed.
The top heating element is used alone and you can adjust the temperature. Five minutes preheating is required to
get the elements red-hot. Success is guaranteed for grills, kebabs and gratin dishes. White meats should be put at a
distance from the grill; the cooking time is longer, but the meat will be tastier. You can put red meats and fish fillets
on the shelf with the drip tray underneath. The oven has two grill positions:
Grill: 2140 W Barbecue: 3340 W
50 ÷ MAX
50 ÷ MAX
50 ÷ MAX
50 ÷ MAX
50 ÷ MAX
50 ÷ MAX
50 ÷ MAX
50 ÷ MAX
T °C
Suggested
180
190
190
210
220
230
230
220
3.3 Using The Steam Function
Steam function lets you have better hummidity during cooking cycle. We recommend alternating steam cooking with traditional cooking. We recommend
alternating steam cooking with traditional cooking.
WARNING: Risk of burn and damage to the appliance.
Released steam can cause burns:
lOpen the oven door carrefully to avoid injury after using a cooking function with steam.
1. Open the oven door
2. Fill the cavity bottom using max. 150 ml water. Fill the cavity bottom with water only when the oven is cold.
3. Put food in the appliance and close the oven door.
4. Set the function you prefer to cook with steam.
5. Turn the knob for the temperature to select a temperature.
6. Wait five minutes for preheating. Then press the steam oven button. The steam oven button works with the function.
CAUTION: Do not refill the cavity bottom with water during cooking or when the oven is hot.
7. To turn the appliance off switch the function and temperature knob to zero positions.
8. Remove water from the cavity bottom. Clean the drip tray after every cooking cycle. Clean the drip tray after every cooking cycle. Please see chapter 4.1 for
cleaning instrucitons.

4. Oven cleaning and maintenance
4.1 General notes on cleaning
The lifecycle of the appliance can be extended through regular cleaning.
Wait for the oven to cool before carrying out manual cleaning operations.
Never use abrasive detergents, steel wool or sharp objects for cleaning, so
as to not irreparably damage the enamelled parts. Use only water, soap or
bleach-based detergents (ammonia).
GLASS PARTS
It is advisable to clean the glass window with absorbent kitchen towel after
every use of the oven. To remove more obstinate stains, you can use a
detergent-soaked sponge, well wrung out, and then rinse with water.
OVEN WINDOW SEAL
If dirty, the seal can be cleaned with a slightly damp sponge.
ACCESSORIES
Clean accessories with a wet, soapy sponge before rinsing and drying them:
avoid using abrasive detergents.
DRIP PAN
After using the grill, remove the pan from the oven. Pour the hot fat into a
container and wash the pan in hot water, using a sponge and washing-up
liquid.
If greasy residues remain, immerse the pan in water and detergent.
Alternatively, you can wash the pan in the dishwasher or use a commercial
oven detergent. Never put a dirty pan back into the oven.
EN 09
4.2 Aquactiva Function
The Aquactiva procedure uses steam to help remove remaining fat and food particles from the oven.
1. Pour 300 ml of water into the Aquactiva container at the bottom of the oven.
2. Set the oven function to Static ( )or Bottom ( )heater
3. Set the temperature to the Aquactiva icon
4. Allow the program to operate for 30 minutes.
5. After 30 minutes switch off the program and allow the oven to cool down.
6. When the appliance is cool, clean the inner surfaces of the oven with a cloth.
Warning: Make sure that the appliance is cool before you touch it.
Care must be taken with all hot surfaces as there is a risk of burns.
Use distilled or drinkable water.
INSTRUCTION FOR REMOVAL AND CLEANING OF THE SIDE RACKS
1. Remove the wire racks by pulling them in the direction of the arrows (see below)
2. To clean the wire racks either put them in the dishwasher or use a wet sponge, ensuring that they are dried afterwards.
3. After the cleaning process install the wire racks in reverse order.
4.3 Maintenance
REMOVAL OF THE OVEN WINDOW
1. Open the front window.
2. Open the clamps of the hinge housing on the right and left side of the front window by pushing them downwards.
3. Replace the window by carrying out the procedure in reverse.
300 ml

LOW-E
1
2
3
1.
2.
3.
4.
5.
6.
7.
REMOVAL AND CLEANING OF THE GLASS DOOR
1. Open the oven door.
2.3.4. Lock the hinges, remove the screws and remove the upper metal cover by pulling it upwards.
5.6. Remove the glass, carefully extracting it from the oven door (NB: in pyrolytic ovens, also remove the second and third glass (if present)).
7. At the end of cleaning or substitution, reassemble the parts in reverse order.
On all glass, the indication "Low-E" must be legible and positioned on the left side of the door, close to the left-hand lateral hinge. In this way, the printed
label of the first glass will be inside the door.
EN 10

CHANGING THE BULB
1. Disconnect the oven from the mains supply.
2. Undo the glass cover, unscrew the bulb and replace it with a new bulb of the same type.
3. Once the defective bulb is replaced, replace the glass cover.
5. Troubleshooting
5.1 FAQ
PROBLEM POSSIBLE CAUSE SOLUTION
The oven does not heat up The clock is not set Set the clock
A cooking function and
temperature has not been set
Ensure that the necessary
settings are correct
The oven does not heat up
Steam and condensation on
the user interface panel
Clean with a microfiber cloth the user
interface panel to remove the
condensation layer
No reaction of the touch
user interface
EN 11

• Pendant la cuisson, de l’humidité peut se
condenser à l’intérieur de la cavité ou sur la vitre de
la porte. Il s’agit d’un phénomène normal. Pour
réduire cet effet, attendez 10-15 minutes après
avoir allumé l’appareil avant de mettre les aliments
au four. La condensation disparaîtra de toutes
façons dès que le four aura atteint la température
de cuisson.
• Cuisez les légumes dans un récipient avec
couvercle plutôt que dans un ustensile ouvert.
• Évitez de laisser des aliments à l’intérieur du four
plus de 15-20 minutes après cuisson.
• AVERTISSEMENT : L’appareil et ses parties
accessibles chauffent pendant l’utilisation.
Faites attention à ne pas toucher les parties
chaudes.
• AVERTISSEMENT : Les parties accessibles peuvent
devenir très chaudes quand le grill est en marche.
Les enfants doivent être tenus à une distance de
sécurité.
• AVERTISSEMENT : Vérifiez que l’appareil est éteint
avant de remplacer l’ampoule, pour éviter le risque
de chocs électriques.
• AVERTISSEMENT : Afin d’éviter tout risque lié à la
réinitialisation accidentelle de l’interrupteur
thermique, l’appareil ne doit pas être alimenté par
un dispositif de commutation externe, tel qu’une
minuterie, ou relié à un circuit régulièrement allumé
et éteint.
• Les enfants de moins de 8 ans doivent rester à une
distance de sécurité de l’appareil s’ils ne sont pas
surveillés en permanence.
• Les enfants ne doivent pas jouer avec l’appareil.
L’appareil peut être utilisé par des enfants de plus de
8 ans et par des personnes dont les capacités
physiques, sensorielles ou mentales sont limitées,
sans expérience ni connaissance du produit,
uniquement s’ils sont surveillés ou s’ils ont été
informés de la manière d’utiliser l’appareil, en toute
sécurité et qu’ils comprennent les risques possibles.
• Le nettoyage et l’entretien ne doivent pas être
effectués par des enfants sans surveillance.
• N’utilisez pas de matériaux rugueux ou abrasifs ou
de racloirs métalliques acérés pour nettoyer les
vitres des portes des fours, car cela pourrait rayer la
surface et provoquer la rupture de la vitre.
• Coupez le four avant de retirer les pièces
amovibles.
• Après le nettoyage, remontez-les selon les
instructions.
• Utilisez uniquement la sonde à viande
recommandée pour ce four.
• N’utilisez pas un nettoyeur à vapeur pour le
nettoyage.
• Branchez le câble d’alimentation sur une prise de
courant qui supporte le voltage (le courant et la
charge sont indiqués sur l’étiquette) et vérifiez la
présence d’une mise à la terre. La prise
d’alimentation doit supporter la charge indiquée sur
l’étiquette et être dotée d’une mise à la terre en état
de fonctionnement. Le conducteur de mise à la
terre est jaune et vert. Cette opération doit être
exécutée par le personnel qualifié. En cas
d’incompatibilité entre la prise d’alimentation et la
fiche du câble de l’appareil, demandez à un
électricien professionnel de remplacer la prise
d’alimentation par un dispositif compatible.
La fiche du câble d’alimentation et la prise
d’alimentation doivent être conformes aux normes
en vigueur dans le pays d’installation.
Il est possible de brancher l’appareil à la prise
d’alimentation en installant entre l’appareil et la
prise d’alimentation un disjoncteur multipolaire qui
supporte la charge électrique maximale,
conformément aux lois en vigueur.
Le conducteur jaune et vert de mise à la terre ne
doit pas être bloqué par le disjoncteur. La prise
d’alimentation ou le disjoncteur multipolaire utilisé
pour le branchement doit rester à tout moment
accessible après installation de l’appareil.
• La coupure peut être obtenue en rendant la fiche
accessible ou en incorporant un interrupteur dans le
câblage fixe, conformément aux règles de câblage et
avec une séparation des contacts conforme aux
exigences de la catégorie de surtension III.
• Si le câble d’alimentation est endommagé, il doit
être remplacé par un câble ou un faisceau de câbles
spécial disponible auprès du fabricant ou du service
après-vente.
• Le câble d’alimentation requis est le H05V2V2-F.
Conseils De Securite
FR 12

• Cette opération doit être exécutée par le
personnel qualifié. Le conducteur de mise à la terre
(jaune et vert) doit être environ 10 mm plus long
que les autres conducteurs. Pour toutes
réparations, contactez le service après-vente en
insistant sur l’utilisation de pièces de rechange
d’origine.
• Le non-respect des consignes ci-dessus peut
compromettre la sécurité de l’appareil et annuler la
garantie.
• Éliminez les éclaboussures importantes avant de
procéder au nettoyage.
• Une coupure de courant prolongée durant une
p h a s e d e c u i s s o n p e u t e n g e n d re r u n
dysfonctionnement de l’écran. Dans ce cas, veuillez
contacter le service après-vente.
• L’appareil ne doit pas être installé derrière une
porte décorative, pour éviter la surchauffe.
• Pour introduire la grille dans le four, vérifiez que le
butoir est dirigé vers le haut et au fond de la cavité.
La grille doit être complètement insérée dans la
cavité.
• AVERTISSEMENT : Ne recouvrez pas les parois du
four avec du papier aluminium ou une protection
jetable disponible dans les magasins. Le papier
d’aluminium ou toute autre protection, en contact
direct avec l’émail chaud, risque de fondre et de
détériorer l’émail de la cavité intérieure.
• AVERTISSEMENT : N’enlevez jamais le joint de la
porte du four.
• PRUDENCE : Ne remplissez pas le fond de la cavité
avec de l’eau pendant la cuisson ou lorsque le four
est chaud.
• Aucune autre opération ni aucun autre réglage ne
sont requis pour faire fonctionner l’appareil aux
fréquences nominales.
FR 13

SOMMAIRE
FR 14
1.1 Indications de sécurité
1.2 Sécurité électrique
1.3 Recommandations
1.4 Installation
1.5 La gestion des déchets et la protection de
l'environnement
2.1 Vue d'ensemble
2.2 Accessoires
2.3 Première utilisation
3.1 Description de l'affichage
3.2 Utilisation de la fonction vapeur
3.3 Mode de cuisson
4.1 Remarques générales concernant le nettoyage
4.2 Aquactiva Fonction
4.3 Entretien
• Retrait et nettoyage des grilles latérales
• Retrait de la porte du four
• Retrait et nettoyage des vitres
• Remplacement de l'ampoule
5.1 F.A.Q.
Instructions Générales
15
Description du produit
16
Utilisation du Four
17
Nettoyage du four et maintenance
19
Dépannage
21

,QVWUXFWLRQVJÃQÃUDOHV
EŽƵƐǀŽƵƐƌĞŵĞƌĐŝŽŶƐĚΖĂǀŽŝƌĐŚŽŝƐŝƵŶĚĞŶŽƐƉƌŽĚƵŝƚƐWŽƵƌŽďƚĞŶŝƌůĞƐŵĞŝůůĞƵƌƐƌĠƐƵůƚĂƚƐĂǀĞĐǀŽƚƌĞĨŽƵƌǀŽƵƐ
ĚĞǀĞnjůŝƌĞĂƚƚĞŶƚŝǀĞŵĞŶƚĐĞŵĂŶƵĞůĞƚůĞĐŽŶƐĞƌǀĞƌƉŽƵƌƚŽƵƚĞĐŽŶƐƵůƚĂƚŝŽŶƵůƚĠƌŝĞƵƌĞǀĂŶƚĚΖŝŶƐƚĂůůĞƌůĞĨŽƵƌ
ŶŽƚĞnjůĞŶƵŵĠƌŽĚĞƐĠƌŝĞŝůǀŽƵƐƐĞƌĂĚĞŵĂŶĚĠƉĂƌůĞƐƵƉƉŽƌƚƚĞĐŚŶŝƋƵĞƐŝĚĞƐƌĠƉĂƌĂƚŝŽŶƐƐŽŶƚŶĠĐĞƐƐĂŝƌĞƐ
ƉƌğƐĂǀŽŝƌĞŶůĞǀĠůĞĨŽƵƌĚĞƐŽŶĞŵďĂůůĂŐĞǀĠƌŝĨŝĞnjƋƵΖŝůŶΖĂƉĂƐĠƚĠĞŶĚŽŵŵĂŐĠƉĞŶĚĂŶƚůĞƚƌĂŶƐƉŽƌƚ^ŝǀŽƵƐ
ĂǀĞnjĚĞƐĚŽƵƚĞƐŶĞƉĂƐƵƚŝůŝƐĞƌůĞĨŽƵƌĞƚƐĞƌĠĨĠƌĞƌăƵŶƚĞĐŚŶŝĐŝĞŶƋƵĂůŝĨŝĠƉŽƵƌŽďƚĞŶŝƌĚĞƐĐŽŶƐĞŝůƐŽŶƐĞƌǀĞnj
ƚŽƵƐůĞƐŵĂƚĠƌŝĂƵdžĚΖĞŵďĂůůĂŐĞ;ƐĂĐƐĞŶƉůĂƐƚŝƋƵĞƉŽůLJƐƚLJƌğŶĞĐůŽƵƐͿŚŽƌƐĚĞůĂƉŽƌƚĠĞĚĞƐĞŶĨĂŶƚƐ>ŽƌƐĚĞůĂ
ƉƌĞŵŝğƌĞ ƵƚŝůŝƐĂƚŝŽŶ ĚƵ ĨŽƵƌ ŝů ƉĞƵƚ ƐĞ ƉƌŽĚƵŝƌĞ ƵŶ ĚĠŐĂŐĞŵĞŶƚ ĚĞ ĨƵŵĠĞ ąĐƌĞ ƉƌŽǀŽƋƵĠ ƉĂƌ ůĞ ƉƌĞŵŝĞƌ
ĠĐŚĂƵĨĨĞŵĞŶƚĚĞůĂĐŽůůĞĚĞƐƉĂŶŶĞĂƵdžĚŝƐŽůĂƚŝŽŶĞŶǀĞůŽƉƉĂŶƚůĞĨŽƵƌĞƉŚĠŶŽŵğŶĞĞƐƚŶŽƌŵĂůƚƚĞŶĚĞnjƋƵĞ
ůĂ ĨƵŵĠĞ ĐĞƐƐĞ ĂǀĂŶƚ ĚĞ ĐƵŝƌĞ ĚĞƐ ĂůŝŵĞŶƚƐ >Ğ ĨĂďƌŝĐĂŶƚ ĚĠĐůŝŶĞ ƚŽƵƚĞ ƌĞƐƉŽŶƐĂďŝůŝƚĠ ĚĂŶƐ ůĞƐ ĐĂƐ Žƶ ůĞƐ
ŝŶƐƚƌƵĐƚŝŽŶƐĐŽŶƚĞŶƵĞƐĚĂŶƐůĞƉƌĠƐĞŶƚĚŽĐƵŵĞŶƚŶĞƐŽŶƚƉĂƐƌĞƐƉĞĐƚĠĞƐ
ZDZYhůĞƐĨŽŶĐƚŝŽŶƐĚƵĨŽƵƌůĞƐƉƌŽƉƌŝĠƚĠƐĞƚůĞƐĂĐĐĞƐƐŽŝƌĞƐĐŝƚĠƐĚĂŶƐĐĞŵĂŶƵĞůƉĞƵǀĞŶƚǀĂƌŝĞƌƐĞůŽŶůĞƐ
ŵŽĚğůĞƐ
,QGLFDWLRQVGHVÃFXULWÃ
hƚŝůŝƐĞnjƵŶŝƋƵĞŵĞŶƚůĞĨŽƵƌăƐĂĚĞƐƚŝŶĂƚŝŽŶƋƵŝĞƐƚƐĞƵůĞŵĞŶƚƉŽƵƌůĂĐƵŝƐƐŽŶ
ĚĞƐ ĂůŝŵĞŶƚƐ ƚŽƵƚĞ ĂƵƚƌĞ ƵƚŝůŝƐĂƚŝŽŶ ƉĂƌ ĞdžĞŵƉůĞ ĐŽŵŵĞ ƵŶĞ ƐŽƵƌĐĞ ĚĞ
ĐŚĂůĞƵƌĞƐƚĐŽŶƐŝĚĠƌĠĞĐŽŵŵĞŝŵƉƌŽƉƌĞĞƚĚŽŶĐ >ĞĨĂďƌŝĐĂŶƚŶĞĚĂŶŐĞƌĞƵƐĞ
ƉĞƵƚġƚƌĞƚĞŶƵƌĞƐƉŽŶƐĂďůĞĚĞƚŽƵƚĚŽŵŵĂŐĞůŝĠăƵŶĞŵĂƵǀĂŝƐĞƵƚŝůŝƐĂƚŝŽŶŽƵĂ
ĚĞƐŵŽĚŝĨŝĐĂƚŝŽŶƐƚĞĐŚŶŝƋƵĞƐĚƵƉƌŽĚƵŝƚ
>ΖƵƚŝůŝƐĂƚŝŽŶĚĞƚŽƵƚĂƉƉĂƌĞŝůĠůĞĐƚƌŝƋƵĞŝŵƉůŝƋƵĞůĞƌĞƐƉĞĐƚĚĞĐĞƌƚĂŝŶĞƐƌğŐůĞƐ
ĨŽŶĚĂŵĞŶƚĂůĞƐ
ͲEĞƉĂƐƚŝƌĞƌƐƵƌůĞĨŝůĠůĞĐƚƌŝƋƵĞƉŽƵƌĚĠďƌĂŶĐŚĞƌůĂƉƌŝƐĞ
ͲEĞƉĂƐƚŽƵĐŚĞƌůΖĂƉƉĂƌĞŝůĂǀĞĐůĞƐŵĂŝŶƐŽƵůĞƐƉŝĞĚƐŵŽƵŝůůĠƐŽƵŚƵŵŝĚĞƐ
ͲŶŐĠŶĠƌĂůůΖƵƚŝůŝƐĂƚŝŽŶĚΖĂĚĂƉƚĂƚĞƵƌƐĚĞƉƌŝƐĞƐŵƵůƚŝƉůĞƐĞƚĚĞƌĂůůŽŶŐĞƐĞƐƚ
ĚĠĐŽŶƐĞŝůůĠ
ͲŶĐĂƐĚĞĚLJƐĨŽŶĐƚŝŽŶŶĞŵĞŶƚĞƚŽƵĚĞŵĂƵǀĂŝƐĨŽŶĐƚŝŽŶŶĞŵĞŶƚĠƚĞŝŶĚƌĞ
ůΖĂƉƉĂƌĞŝůĞƚŶĞƉĂƐLJƚŽƵĐŚĞƌ
6ÃFXULWÃÃOHFWULTXH
>ZE,DEd>dZ/YhK/ddZZ>/^WZhE/E^d>>dhZ
'ZKhhEd,E//E Yh>/&/d/KE^/D/>/Z
>ΖĂůŝŵĞŶƚĂƚŝŽŶĠůĞĐƚƌŝƋƵĞăůĂƋƵĞůůĞůĞĨŽƵƌĞƐƚĐŽŶŶĞĐƚĠĚŽŝƚġƚƌĞĐŽŶĨŽƌŵĞĂƵdž
ůŽŝƐ ĞŶ ǀŝŐƵĞƵƌ ĚĂŶƐ ůĞ ƉĂLJƐ ĚΖŝŶƐƚĂůůĂƚŝŽŶ >Ğ ĨĂďƌŝĐĂŶƚ ĚĠĐůŝŶĞ ƚŽƵƚĞ
ƌĞƐƉŽŶƐĂďŝůŝƚĠƉŽƵƌƚŽƵƚĚŽŵŵĂŐĞĐĂƵƐĠƉĂƌůĞŶŽŶƌĞƐƉĞĐƚĚĞĐĞƐŝŶƐƚƌƵĐƚŝŽŶƐ
>ĞĨŽƵƌĚŽŝƚġƚƌĞƌĂĐĐŽƌĚĠăůΖĂůŝŵĞŶƚĂƚŝŽŶĠůĞĐƚƌŝƋƵĞĂǀĞĐƵŶĞƉƌŝƐĞŵƵƌĂůĞ
ƌĞůŝĠĞăůĂƚĞƌƌĞŽƵƉĂƌůΖŝŶƚĞƌŵĠĚŝĂŝƌĞĚΖƵŶĚŝƐƉŽƐŝƚŝĨăĐŽƵƉƵƌĞŽŵŶŝƉŽůĂŝƌĞ
ƐĞůŽŶůĞƐůŽŝƐĞŶǀŝŐƵĞƵƌĚĂŶƐůĞƉĂLJƐĚΖŝŶƐƚĂůůĂƚŝŽŶ>ΖĂůŝŵĞŶƚĂƚŝŽŶĠůĞĐƚƌŝƋƵĞ
ĚŽŝƚġƚƌĞƉƌŽƚĠŐĠĞƉĂƌĚĞƐĨƵƐŝďůĞƐĂƉƉƌŽƉƌŝĠƐĞƚůĞƐĐąďůĞƐƵƚŝůŝƐĠƐĚŽŝǀĞŶƚĂǀŽŝƌ
ƵŶĞƐĞĐƚŝŽŶƚƌĂŶƐǀĞƌƐĂůĞƋƵŝƉĞƵƚĂƐƐƵƌĞƌƵŶĞĂůŝŵĞŶƚĂƚŝŽŶŶŽƌŵĂůĞĚƵĨŽƵƌ
KEEy/KE
>ĞĨŽƵƌĞƐƚůŝǀƌĠĂǀĞĐƵŶĐąďůĞĚĂůŝŵĞŶƚĂƚŝŽŶƉĞƌŵĞƚƚĂŶƚůĞƌĂĐĐŽƌĚĞŵĞŶƚƐŽƵƐ
ƵŶĞƚĞŶƐŝŽŶĠůĞĐƚƌŝƋƵĞĚĞϮϯϬsĞŶƚƌĞůĞƐƉŚĂƐĞƐŽƵĞŶƚƌĞƉŚĂƐĞĞƚŶĞƵƚƌĞ>Ğ
ƌĂĐĐŽƌĚĞŵĞŶƚĚĞǀƌĂġƚƌĞĞĨĨĞĐƚƵĠĂƉƌğƐĂǀŽŝƌǀĠƌŝĨŝĠ
Ͳ>ĂƚĞŶƐŝŽŶĚΖĂůŝŵĞŶƚĂƚŝŽŶŝŶĚŝƋƵĠĞƐƵƌůĞĐŽŵƉƚĞƵƌ
Ͳ>ĞƌĠŐůĂŐĞĚƵĚŝƐũŽŶĐƚĞƵƌ
>ĞĨŝůĚĞƉƌŽƚĞĐƚŝŽŶĚƵĐŽƌĚŽŶ;ǀĞƌƚũĂƵŶĞͿƌĞůŝĠăůĂŽƌŶĞdĞƌƌĞĚĞůĂƉƉĂƌĞŝů
ĚŽŝƚġƚƌĞƌĞůŝĠăůĂŽƌŶĞdĞƌƌĞĚĞůŝŶƐƚĂůůĂƚŝŽŶ
ddEd/KE
&ĂŝƌĞǀĠƌŝĨŝĞƌ ůĂĐŽŶƚŝŶƵŝƚĠĚĞůĂ ƚĞƌƌĞĚĞůŝŶƐƚĂůůĂƚŝŽŶĂǀĂŶƚ ĚĞƉƌŽĐĠĚĞƌĂƵ
ƌĂĐĐŽƌĚĞŵĞŶƚ>ĞĨĂďƌŝĐĂŶƚĚĠĐůŝŶĞƚŽƵƚĞƌĞƐƉŽŶƐĂďŝůŝƚĠĞŶĐĂƐĚΖĂĐĐŝĚĞŶƚƐŽƵ
ĚΖĂƵƚƌĞƐƉƌŽďůğŵĞƐƋƵŝƉŽƵƌƌĂŝĞŶƚƐƵƌǀĞŶŝƌăůΖƵƐĂŐĞĚΖƵŶĂƉƉĂƌĞŝůŶŽŶƌĞůŝĠăůĂ
ƚĞƌƌĞŽƵƌĞůŝĠăƵŶĞƚĞƌƌĞĚŽŶƚůĂĐŽŶƚŝŶƵŝƚĠƐĞƌĂŝƚĚĠĨĞĐƚƵĞƵƐĞ
ZDZYh>ĞĨŽƵƌƉĞƵƚŶĠĐĞƐƐŝƚĞƌƵŶĞŽƉĠƌĂƚŝŽŶĚĞ^sƵƐƐŝƉůĂĐĞnjůĂ
ƉƌŝƐĞĚĞĐŽƵƌĂŶƚĚĞĨĂĕŽŶăƉŽƵǀŽŝƌďƌĂŶĐŚĞƌůĞĨŽƵƌƵŶĞĨŽŝƐƐŽƌƚŝĚĞƐĂŶŝĐŚĞ
ąďůĞ ĚΖĂůŝŵĞŶƚĂƚŝŽŶ Ɛŝ ůĞ ĐŚĂŶŐĞŵĞŶƚ ĚƵ ĐąďůĞ ĚΖĂůŝŵĞŶƚĂƚŝŽŶ ƐΖĂǀğƌĞ
ŶĠĐĞƐƐĂŝƌĞ ŶŽƵƐ ǀŽƵƐ ĚĞŵĂŶĚŽŶƐ ĚĞ ĨĂŝƌĞ ƌĠĂůŝƐĞƌ ĐĞƚƚĞ ŽƉĠƌĂƚŝŽŶ ƉĂƌ ůĞ
ƐĞƌǀŝĐĞĂƉƌğƐͲǀĞŶƚĞŽƵƵŶĞƉĞƌƐŽŶŶĞĚĞƋƵĂůŝĨŝĐĂƚŝŽŶƐŝŵŝůĂŝƌĞ
5HFRPPDQGDWLRQV
ƉƌğƐĐŚĂƋƵĞƵƚŝůŝƐĂƚŝŽŶĚƵĨŽƵƌƌĠĂůŝƐĞƌƵŶƉĞƚŝƚĞŶƚƌĞƚŝĞŶƋƵŝĨĂǀŽƌŝƐĞƌĂůĞ
ŶĞƚƚŽLJĂŐĞƉĂƌĨĂŝƚĚƵĨŽƵƌEĞƉĂƐƚĂƉŝƐƐĞƌůĞƐƉĂƌŽŝƐĚƵĨŽƵƌĂǀĞĐĚĞƐĨĞƵŝůůĞƐĞŶ
ĂůƵŵŝŶŝƵŵŽƵĚĞƐƉƌŽƚĞĐƚŝŽŶƐũĞƚĂďůĞƐĚƵĐŽŵŵĞƌĐĞ>ĂĨĞƵŝůůĞĚΖĂůƵŵŝŶŝƵŵŽƵ
ƚŽƵƚĞĂƵƚƌĞƉƌŽƚĞĐƚŝŽŶĞŶĐŽŶƚĂĐƚĚŝƌĞĐƚĂǀĞĐůΖĠŵĂŝůĐŚĂƵĨĨĠƌŝƐƋƵĞĚĞĨŽŶĚƌĞ
ĞƚĚĞĚĠƚĠƌŝŽƌĞƌůΖĠŵĂŝůĚƵŵŽƵĨůĞǀĂŶƚŝŶƐƚĂůůĂƚŝŽŶĚĞůΖĂƉƉĂƌĞŝůŝůĨĂƵƚƌĞůĞǀĞƌ
ůĞ ŶƵŵĠƌŽ ĚĞ ƐĠƌŝĞ Ğƚ ůĞ ŶŽƚĞƌ ĐŝͲĚĞƐƐŽƵƐ ĞŶ ĐĂƐ ĚΖĠǀĞŶƚƵĞůůĞ ĚĞŵĂŶĚĞ
ĚΖŝŶƚĞƌǀĞŶƚŝŽŶ
ĨŝŶĚΖĠǀŝƚĞƌůĞƐƐĂůŝƐƐƵƌĞƐĞdžĐĞƐƐŝǀĞƐĚĞǀŽƚƌĞĨŽƵƌĂŝŶƐŝƋƵĞůĞƐĨŽƌƚĞƐŽĚĞƵƌƐĚĞ
ĨƵŵĠĞƉŽƵǀĂŶƚĞŶƌĠƐƵůƚĞƌŶŽƵƐƌĞĐŽŵŵĂŶĚŽŶƐĚĞŶĞƉĂƐƵƚŝůŝƐĞƌůĞĨŽƵƌăƚƌŽƉ
ĨŽƌƚĞƚĞŵƉĠƌĂƚƵƌĞ/ůĞƐƚƉƌĠĨĠƌĂďůĞĚĞ
ƌĂůůŽŶŐĞƌ ůĞ ƚĞŵƉƐ ĚĞ ĐƵŝƐƐŽŶ Ğƚ ĚĞ ďĂŝƐƐĞƌ ůĂ ƚĞŵƉĠƌĂƚƵƌĞ EŽƵƐ ǀŽƵƐ
ĐŽŶƐĞŝůůŽŶƐĚĞŶΖƵƚŝůŝƐĞƌƋƵĞĚĞƐƉůĂƚƐĚĞƐŵŽƵůĞƐăƉąƚŝƐƐĞƌŝĞƌĠƐŝƐƚĂŶƚƐăĚĞ
ƚƌğƐŚĂƵƚĞƐƚĞŵƉĠƌĂƚƵƌĞƐ
+PUVCNNCWLRQ
>ĂŵŝƐĞĞŶƐĞƌǀŝĐĞĚĞůĂƉƉĂƌĞŝůĞƐƚăůĂĐŚĂƌŐĞĚĞůĂĐŚĞƚĞƵƌůĞĐŽŶƐƚƌƵĐƚĞƵƌĞƐƚ
ĚĠŐĂŐĠĚĞĐĞƐĞƌǀŝĐĞ>ĞƐƉĂŶŶĞƐůŝĠĞƐăƵŶĞŵĂƵǀĂŝƐĞŝŶƐƚĂůůĂƚŝŽŶŶĞƐĞƌŽŶƚƉĂƐ
ĐŽƵǀĞƌƚĞƐ ƉĂƌ ůĂ ŐĂƌĂŶƚŝĞ hŶĞ ŵĂƵǀĂŝƐĞ ŝŶƐƚĂůůĂƚŝŽŶ ƉĞƵƚ ƉƌŽǀŽƋƵĞƌ ĚĞƐ
ĚŽŵŵĂŐĞƐ ĂƵdž ƉĞƌƐŽŶŶĞƐ ĂƵdž ĂŶŝŵĂƵdž ĚŽŵĞƐƚŝƋƵĞƐ ĚĂŶƐ ĐĞ ĐĂƐ ůĂ
ƌĞƐƉŽŶƐĂďŝůŝƚĠĚƵĐŽŶƐƚƌƵĐƚĞƵƌŶĞƉĞƵƚġƚƌĞĞŶŐĂŐĠĞ>ΖŝŶƐƚĂůůĂƚŝŽŶĚƵĨŽƵƌĚŽŝƚ
ġƚƌĞ ƌĠĂůŝƐĠĞ ƉĂƌ ƵŶ ŝŶƐƚĂůůĂƚĞƵƌ ĂŐƌĠĠ ŽƵ ƵŶ ƚĞĐŚŶŝĐŝĞŶ ĚĞ ƋƵĂůŝĨŝĐĂƚŝŽŶ
ƐŝŵŝůĂŝƌĞ>ĞĨŽƵƌƉĞƵƚġƚƌĞƉůĂĐĠĞŶŚĂƵƚĞƵƌĚĂŶƐƵŶĞĐŽůŽŶŶĞŽƵĞŶĐŚąƐƐĠƐŽƵƐ
ƵŶƉůĂŶĚĞƚƌĂǀĂŝůǀĂŶƚƐĂĨŝdžĂƚŝŽŶŝůĞƐƚŝŶĚŝƐƉĞŶƐĂďůĞĚΖĂƐƐƵƌĞƌƵŶĞďŽŶŶĞ
ĂĠƌĂƚŝŽŶĚĂŶƐůĂŶŝĐŚĞĚΖĞŶĐĂƐƚƌĞŵĞŶƚĂĨŝŶĚĞƉĞƌŵĞƚƚƌĞůĂďŽŶŶĞĐŝƌĐƵůĂƚŝŽŶĚĞ
ůΖĂŝƌĨƌĂŝƐŶĠĐĞƐƐĂŝƌĞĂƵƌĞĨƌŽŝĚŝƐƐĞŵĞŶƚĞƚăůĂƉƌŽƚĞĐƚŝŽŶĚĞƐŽƌŐĂŶĞƐŝŶƚĠƌŝĞƵƌƐ
WŽƵƌ ĐĞůĂ ƌĠĂůŝƐĞƌ ůĞƐ ŽƵǀĞƌƚƵƌĞƐ ƐƉĠĐŝĨŝĠĞƐ ƐĞůŽŶ ůĞ ƚLJƉĞ ĚΖĞŶĐĂƐƚƌĞŵĞŶƚ
;ĚĞƌŶŝğƌĞƉĂŐĞͿ
/DJHVWLRQGHVGÃFKHWVHWODSURWHFWLRQGHOHQYLURQQHPHQW
>Ğ ƉƌĠƐĞŶƚ ĂƉƉĂƌĞŝů ĞƐƚ ŵĂƌƋƵĠ ĐŽŶĨŽƌŵĠŵĞŶƚ ă ůĂ ĚŝƌĞĐƚŝǀĞ
ϮϬϭϮϭϵh ƌĞůĂƚŝǀĞ ĂƵdž ĚĠĐŚĞƚƐ ĚΖĠƋƵŝƉĞŵĞŶƚƐ ĠůĞĐƚƌŝƋƵĞƐ Ğƚ
ĠůĞĐƚƌŽŶŝƋƵĞƐ
;Ϳ>ĞƐĐŽŶƚŝĞŶŶĞŶƚăůĂĨŽŝƐĚĞƐƐƵďƐƚĂŶĐĞƐƉŽůůƵĂŶƚĞƐ
;ƋƵŝ ƉĞ ƵǀĞŶƚ ĂǀŽŝƌ ĚĞƐ ĐŽŶƐĠƋƵĞ ŶĐĞƐ ŶĠŐĂƚŝǀĞƐ ƐƵƌ
ůΖĞŶǀŝƌŽŶŶĞŵĞŶƚͿ Ğƚ ĚĞƐ ĠůĠŵĞŶƚƐ ĚĞ ďĂƐĞ ;ƌĠƵƚŝůŝƐĂďůĞƐͿ /ů ĞƐƚ
ŝŵƉŽƌƚĂŶƚĚĞƐŽƵŵĞƚƚƌĞůĞƐăĚĞƐƚƌĂŝƚĞŵĞŶƚƐƐƉĠĐŝĨŝƋƵĞƐĞŶ
ǀƵĞ ĚΖĞdžƚƌĂŝƌĞ Ğƚ ĚΖĠůŝŵŝŶĞƌ ĚĞ ĨĂĕŽŶ ĂƉƉƌŽƉƌŝĠĞ ƚŽƵƚĞƐ ůĞƐ ƐƵďƐƚĂŶĐĞƐ
ƉŽůůƵĂŶƚĞƐƉƵŝƐĚĞƌĠĐƵƉĠƌĞƌĞƚƌĞĐLJĐůĞƌƚŽƵƐůĞƐŵĂƚĠƌŝĂƵdž
ŚĂĐƵŶƉĞƵƚũŽƵĞƌƵŶƌƀůĞŝŵƉŽƌƚĂŶƚƋƵĂŶƚăůĂƉƌŽƚĞĐƚŝŽŶĚĞůΖĞŶǀŝƌŽŶŶĞŵĞŶƚ
ĐŽŶƚƌĞůĞƐWŽƵƌĂƚƚĞŝŶĚƌĞĐĞƚŽďũĞĐƚŝĨŝůĞƐƚŝŵƉĠƌĂƚŝĨĚĞƐƵŝǀƌĞƋƵĞůƋƵĞƐ
ƌğŐůĞƐĠůĠŵĞŶƚĂŝƌĞƐ
ͻ>ĞƐŶĞĚŽŝǀĞŶƚƉĂƐġƚƌĞƚƌĂŝƚĠƐĐŽŵŵĞĚĞƐĚĠĐŚĞƚƐŵĠŶĂŐĞƌƐ
ͻ /ůƐ ĚŽŝǀĞŶƚ ġƚƌĞ ƌĞŵŝƐ ĂƵdž ƉŽŝŶƚƐ ĚĞ ĐŽůůĞĐƚĞ ĂƉƉƌŽƉƌŝĠƐ ŐĠƌĠƐ ƉĂƌ ůĂ
ŵƵŶŝĐŝƉĂůŝƚĠ ŽƵ ƉĂƌ ĚĞƐ ƐŽĐŝĠƚĠƐ ŝŵŵĂƚƌŝĐƵůĠĞƐ ĂŶƐ ƉůƵƐŝĞƵƌƐ ƉĂLJƐ ŝů ĞƐƚ
ƉŽƐƐŝďůĞĚĞĐŽůůĞĐƚĞƌăĚŽŵŝĐŝůĞůĞƐǀŽůƵŵŝŶĞƵdž
ͻ>ŽƌƐƋƵĞǀŽƵƐĂĐŚĞƚĞnjƵŶŶŽƵǀĞůĂƉƉĂƌĞŝůǀŽƵƐĚĞǀĞnjƌĞƚŽƵƌŶĞƌůΖĂŶĐŝĞŶĂƵ
ǀĞŶĚĞƵƌ ƋƵŝ ůĞ ƌĠĐƵƉğƌĞ ŐƌĂƚƵŝƚĞŵĞŶƚ ĂƵ ĐĂƐ ƉĂƌ ĐĂƐ ă ĐŽŶĚŝƚŝŽŶ ƋƵĞ
ůΖĠƋƵŝƉĞŵĞŶƚƐŽŝƚĚĞƚLJƉĞĠƋƵŝǀĂůĞŶƚĞƚƉŽƐƐğĚĞůĞƐŵġŵĞƐĨŽŶĐƚŝŽŶƐƋƵĞĐĞůƵŝ
ĨŽƵƌŶŝ
KEKD/dZ^Wd>ΖEs/ZKEEDEd
>ŽƌƐƋƵĞĐĞůĂĞƐƚƉŽƐƐŝďůĞĠǀŝƚĞƌůĞƉƌĠĐŚĂƵĨĨĂŐĞĚƵĨŽƵƌĞƚĠǀŝƚĞƌĚĞůĞĨĂŝƌĞ
ƚŽƵƌŶĞƌăǀŝĚĞEΖŽƵǀƌĞnjůĂƉŽƌƚĞĚƵĨŽƵƌƋƵĞůŽƌƐƋƵĞĐĞůĂĞƐƚŶĠĐĞƐƐĂŝƌĞĐĂƌŝůLJ
ĂĚĞƐĚĠƉĞƌĚŝƚŝŽŶƐĚĞĐŚĂůĞƵƌăĐŚĂƋƵĞĨŽŝƐƋƵΖŝůĞƐƚŽƵǀĞƌƚWŽƵƌƵŶĞĠĐŽŶŽŵŝĞ
ĚΖĠŶĞƌŐŝĞƐŝŐŶŝĨŝĐĂƚŝǀĞĠƚĞŝŶĚƌĞůĞĨŽƵƌĞŶƚƌĞϱĞƚϭϬŵŝŶƵƚĞƐĂǀĂŶƚůĂĨŝŶĚĞ
ĐƵŝƐƐŽŶƉƌĠǀƵĞĞƚƵƚŝůŝƐĞƌůĂĐŚĂůĞƵƌƋƵĞůĞĨŽƵƌĐŽŶƚŝŶƵĞĚĞŐĠŶĠƌĞƌ'ĂƌĚĞnjůĞƐ
ũŽŝŶƚƐƉƌŽƉƌĞƐĞƚĞŶďŽŶĠƚĂƚƉŽƵƌĠǀŝƚĞƌƚŽƵƚĞĚĠƉĞƌĚŝƚŝŽŶĚΖĠŶĞƌŐŝĞ^ŝǀŽƵƐ
ĂǀĞnjƵŶĐŽŶƚƌĂƚĠůĞĐƚƌŝƋƵĞĂǀĞĐƵŶƚĂƌŝĨŚĞƵƌĞĐƌĞƵƐĞůĞƉƌŽŐƌĂŵŵĞΗĐƵŝƐƐŽŶ
ĚŝĨĨĠƌĠĞΗƉĞƵƚ ǀŽƵƐĨĂŝƌĞ ƌĠĂůŝƐĞƌĚĞƐĠĐŽŶŽŵŝĞƐ ĚΖĠŶĞƌŐŝĞ ĞŶĚĠƉůĂĕĂŶƚůĞ
ĚĠďƵƚĚƵƉƌŽŐƌĂŵŵĞăƵŶŝŶƚĞƌǀĂůůĞĚĞƚĞŵƉƐăƚĂƌŝĨƌĠĚƵŝƚ
)5

2. Description du produit
2.1. Vue d'ensemble
1. Panneau de contrôle
2. Positions d'étagère
(grille latérale si incluse)
3. grille métallique
4. égouttoir
5. Ventilateur
(derrière la plaque d'acier)
6. porte du four
2.2 Accessoires (Selon le modèle)
Léchefrite
1
Alimentaire recueille les gouttes pendant la cuisson sur le gril.
Grilles latérales
3
Situées des deux côtés de la cavité du four. Maintiennent les grilles
métalliques et les lèchefrites.
2.3 Première Utilisation
UN PREMIER NETTOYAGE doit être réalisé avant la première utilisation passer un chiffon doux et humide sur les surfaces extérieures de l'appareil.
Nettoyer avec une éponge additionnée de produit lessiviel, les accessoires et l'intérieur du four. Rincer et sécher. Faire chauffer le four à vide une bonne
heure à la température maximale pour faire disparaître l'odeur du neuf. Pendant cette opération, bien aérer la pièce.
Grille métalique
2
La grille métalique sert de support aux plats.
FR 16
2
3
5
4
6
1

3. Utilisation du Four (Selon le modèle)
3.1 Description de l'affichage
FR 17
87
FONCTION COMMENT L’ARRETER BUT REMARQUE
COMMENT L’UTILISER
SECURITE
ENFANT
• La fonction de verrouillage parental
est activée lorsque le four est éteint en
touchant Set (+) pendant au moins 5
secondes. A partir de ce moment,
toutes les autres fonctions sont
verrouillées et l'affichage clignotera à
intervalles de 3 secondes. STOP et le
temps préréglé par intermittence.
• La fonction de verrouillage enfant
est désactivée avec le four éteint en
touchant à nouveau le pavé tactile Set
(+) pendant au moins 5 secondes. A
partir de ce moment, toutes les
fonctions sont sélectionnables à
nouveau.
•Appuyer 1 foi sur la touche centrale.
•Appuyer sur les touches "-"ou "+"
pour régler la dureé
•Relâcher les touches.
•A la fin de la durée sélectionnée, le
minuteur se coupe et un signal sonore
retentit il s'arrête automatique-ment,
mais pour le stopper de suite,
appuyer sur la touche.
•Emission d'un signal sonore à la fin
d'un temps sélectionné
•Durant l'utilisation, l'écran affiche le
temps restant.
•II permet d'utiliser le program- mateur du
four comme un rêveilmémoire (il peut être
utilisé avec le four allumé ou éteint).
• Sélectionnez la fonction de cuisson
avec le bouton de fonction du four,
ainsi que la température de votre
choix avec le bouton du thermostat.
•Appuyer fois sur la touche1
centrale.
•Appuyer sur les touches "-" ou "+"
pour régler la durée.
•Relâcher les touches
•Choisir la fonction de cuisson avec le
bouton de sélection.
REMARQUE : Si le four est éteint ou si
la lampe fonctionne, la fonction de
programmation du temps de cuisson
ne fonctionne pas.
•S électionner la durée de la cuisson
des alimentes dans le four .
• Pour visualiser le temps restant
appuyer la touche . SELECT
• Pour modifier le temps restant
appuyer la touche + ou SELECT "-" “+"
•Pour arrêter le signal, appuyer sur
l' u ne d es to uc hes au cho i x.
Appuyer sur la touche centrale pour
retourner à la fonction horloge.
• À la fin du programme, le programme
émet 3 signaux d’avertissement et le
message End (Fin) apparaît sur l’afficheur.
Réglez le sélecteur de fonction sur "0" pour
revenir à la fonction horloge.
•A l'heure sélectionnée le four
s'éteint tout seul; pour l'arrêter en
avant il est nécessaire de porter le
bouton de sélection en position O.
•Mémoriser l'heure de fin de cuisson
•Pour visualiser l'heure 3 fois
•P o u r m o d i f i e r l ' h e u r e
sélectionnée appuyer sur les touche
SELECT +"-" ou "+"
• Sélectionnez la fonction de cuisson
avec le bouton de fonction du four,
ainsi que la température de votre
choix avec le bouton du thermostat.
•2 fois
•Appuyer sur les touches "-"ou "+"
pour régler duréela
•Relâcher les touches
• e cuisson avec le Choisir la fonction d
bouton de sélection
REMARQUE : Si le four est éteint ou si
la lampe fonctionne, la fonction de
programmation du temps de cuisson
ne fonctionne pas.
•Cette fonction est utilisée pour des
cuissons que l'on peut programmer à
l'avance. Par exemple, votre plat doit cuire
45 mn et être prêt à 12:30; réglez alors
simplement la durée sur 45 mn et l'heure
de fin de cuisson sur 12:30.
•Quand le temps de cuisson est écoulé, la
cuisson s'arrête automati quemen et
l'alarme sonne quelques secondes. La
cuisson commencera auto- matiquement
à 11:45 (12:30 moins 45 mn) et continuera
jusqu'à ce que l'heure de fin de cuisson soit
atteinte. A ce moment, le tour s'arrêtera
automatiq uement.
HEURE DE
FIN DE
CUISSON
TEMPS
DE
CUISSON
MINUTEUR
ATTENTION: la première opération à exécuter après l'installation ou après une coupure de
courant (de telles situations se reconnaissent parce que le atticheur est sur 12:00 et clignote)est
réglage de l'heure, comme décrit ci-dessus. Le voyant LED en bas à droite clignote en même
temps ( ).
•Régler l'heure à l'aide des boutons ."-" "+"
• Appuyez sur la touche Menu ou attendez 5" que l’horloge soit configurée.
ATTENTION: Le four fonctionne uniquement si l'horloge est réglée.
1- Minuteur
2- Reglage de l'heure
3- Durèe de cuisson
4- Fin de cuisson
5- Display température ou horloge
6- Boutons de réglage
7- Manette de température
8- Manette des fonctions

T °C
Gamme
50 ÷ MAX
50 ÷ MAX
50 ÷ MAX
50 ÷ MAX
50 ÷ MAX
50 ÷ MAX
50 ÷ MAX
50 ÷ MAX
3.2 Mode de cuisson
* Programme testé selon le CENELEC, norme européenne EN 60350-1 qui définit la classe énergétique.
FR 18
Bouton de
sélection Fonction (Selon Modèle)
L'AMPOULE: Allumage de l’éclairage du four
*
*
T °C
Suggéré
180
190
190
210
220
230
230
220
GRIL: l'utilisation du grilloir se fait porte fermée. Un préchauffage de 5 mins est nécessaire pour le rougissement
de la résistance. Succès assuré pour les grillades, les brochettes et les gratins. Les viandes blanches doivent être
écartées du grilloir ; le temps de cuisson sera alors plus long, mais la viande sera plus savoureuse. Les viandes
rouges et filets de poissons peuvent être placés sur la grille avec le plat récolte sauce glissé dessous.
Le four a deux positions de gril : Gril: 2140 W Barbecue: 3340 W
COOK LIGHT: cette fonction permet une cuisson plus saine en réduisant la quantité de graisses ou d'huile
nécessaire. La combinaison d'éléments chauffants et d'un cycle à pulsation d'air garantit des résultats de cuisson
parfaits.
CHALEUR PULSÉE: fonction recommandée pour les volailles, les pâtisseries, les poissons, les légumes... La
chaleur pénètre mieux à l'intérieur du mets à cuire et réduit le temps de cuisson, ainsi que le temps de
préchauffage. Vous pouvez réaliser des cuissons combinées avec préparations identiques ou non sur un ou deux
gradins. Ce mode de cuisson assure en effet une répartition homogène de la chaleur et ne mélange pas les
odeurs. Prévoir une dizaine de minutes de plus, pour la cuisson combinée.
CONVECTION NATURELLE: utilisation simultanée de la résistance de sole et de voûte.
Préchauffer le four une dizaine de minutes. Idéale pour toutes les cuissons à l'ancienne, pour saisir les viandes
rouges, les rosbifs, gigots, gibiers, le pain, les papillotes, les feuilletages. Placer le mets à cuire à un niveau de
gradin moyen.
DÉCONGÉLATION: fonctionnement de la turbine de cuisson qui brasse l'air dans l'enceinte du four. Idéale pour
réaliser une décongélation avant une cuisson.
RÉSISTANCE INFÉRIEURE + VENTILATEUR: idéale pour les tartes à fruits juteux, les tourtes, les quiches, les pâtés.
Elle évite le dessèchement des aliments et favorise la levée pour les cuissons de cakes, pâte à pain et autres
cuissons par le dessous. Placer la grille sur le gradin inférieur. Avec ce mode de cuisson, un préchauffage est
nécessaire en Chaleur Brassée pendant une dizaine de minutes.
SOLE: Utilisation de la résistance de sole. Idéale pour la cuisson de tartes, de crème caramel, flans, terrine, toutes
préparations qui nécessitent une cuisson par le dessous (cocottes : poulet, boeuf)
COOK LIGHT + VAPEUR : En utilisant la ventilation et la résistance du haut simultanément, on cuit parfaitement
de grands morceaux de nourriture. Ce mode de cuisson est surtout adapté pour faire griller des plats
croustillants comme la viande, la volaille ou le poisson.
GRIL + VAPEUR : La chaleur générée par le système de chauffage supérieur et par la vapeur chaude est suggérée
pour finir les plats ayant seulement besoin d’être gratinés en surface mais qui ne doivent pas perdre leur
élasticité et leurs jus. On peut également l’utiliser quand il est nécessaire de dorer immédiatement une surface
de l’aliment qui doit rester saignant (viandes) ou des poissons servis crus au centre.
3.3 Utilisation de la fonction vapeur
La fonction vapeur vous permet d'avoir une meilleure humidité pendant le cycle de cuisson. Il est conseillé d'alterner les cuissons à la vapeur aux cuissons
traditionnelles.
AVERTISSEMENT : Risque de brûlure et d'endommagement de l'appareil.
La vapeur émise peut causer des brûlures :
Ouvrez soigneusement la porte du four pour éviter les blessures après utilisation d'une fonction de cuisson à la vapeur.
1. Ouvrez la porte du four
2. Remplissez le fond de la cavité avec max. 150 ml d'eau. Ne remplissez le fond de la cavité avec de l'eau que lorsque le four est froid.
3. Mettez les aliments dans l'appareil et fermez la porte du four.
4. Réglez la fonction avec laquelle vous aimez cuire à la vapeur.
5. Tournez le bouton de température pour sélectionner une température.
6. Attendez cinq minutes pour le préchauffage. Ensuite, appuyez sur le bouton du four à vapeur. Ce bouton fonctionne avec la fonction.
MISE EN GARDE : Ne remplissez pas le fond de la cavité avec de l'eau pendant la cuisson ou lorsque le four est chaud.
7. Pour mettre l'appareil hors tension, mettez le bouton de fonction et le bouton de température en position zéro.
8. Retirez l'eau du fond de la cavité. Nettoyer l'égouttoir après chaque cycle de cuisson. Voir chapitre 4.1 pour les instructions de nettoyage.

4. Nettoyage du four et maintenance
4.1 Remarques générales sur le nettoyage
Le cycle de vie de l'appareil peut être étendu grâce à un nettoyage régulier.
Attendez le refroidissement du four avant de procéder à des opérations de
nettoyage manuel. Ne jamais utiliser de détergents abrasifs, de laine
d'acier ou d'objets pointus pour le nettoyage, l'émail serait
irrémédiablement abîmé. Utilisez uniquement de l'eau, du savon ou des
détergents à base d'eau de Javel (ammoniac).
PARTIE VITREE
Il est conseillé de nettoyer la vitre avec du papier absorbant après chaque
utilisation du four. Pour enlever les taches plus tenaces, vous pouvez
utiliser une éponge imbibée de détergent, puis rincer à l'eau.
JOINT DE LA PORTE
Si elle est sale, le joint peut être nettoyé avec une éponge légèrement
humide.
ACCESSOIRES
Nettoyer les accessoires avec une éponge et de l'eau savonneuse puis
rincer. Eviter d'utiliser des détergents abrasifs.
LECHEFRITE
Après l'utilisation de la grille, retirez le du four. Prendre soin de lêchefrite
reverser les graisses (tièdes) dans l’évier. Laver et rincer le plat récolte-
sauce dans de l’eau chaude, avec une éponge imbibée de produit lessiviel.
Si les résidus restent collés, le faire tremper dans de l’eau et un produit
détergent. Il peut aussi être nettoyé dans un lave-vaisselle ou avec un
produit du commerce.
Ne jamais replacer le plat récolte-sauce encrassé dans un four.
4.2 Aquactiva Fonction
Le système Aquactiva utilise la vapeur pour éliminer les graisses et les restes de nourritures incrustées sur les parois du four.
1. Verser 300 ml d’eau dans la zone prévue à cet effet (au centre de la cavité – voir schéma)
2. Mettre le programme convection naturelle ( ) ou sole seule ( ).
3. Mettre la température sur Aquactiva .
4. Laisser agir 30 minutes.
5. Une fois les 30 minutes écoulées, éteindre le programme et attendre que le four refroidisse.
6. Une fois que le four est refroidi passer un linge propre pour éliminer les résidus.
Attention:
Ne pas toucher les parois tant qu’elles n’ont pas refroidies (risque de brûlures). N’utiliser que de l’eau potable ou distillée.
RETRAIT ET NETTOYAGE DES GRILLES LATÉRALES
1- Retirez les grilles en les tirant dans le sens des flèches (voir ci-dessous).
2- Pour nettoyer les grilles, passez-les en lave-vaisselle ou utilisez une éponge humide en veillant à bien les sécher ensuite.
3- Quand les grilles sont nettoyées, remettez-les en place en suivant les instructions dans l’ordre inverse.
4.3 Entretien
RETRAIT DE LA PORTE DU FOUR
1. Ouvrez la porte.
2. Ouvrez les pinces du boîtier de charnière sur le côté droit et gauche de la fenêtre avant en les poussant vers le bas.
3. Replacez la porte en procédant en sens inverse.
FR 19
300 ml

LOW-E
1
2
3
1.
2.
3.
4.
5.
6.
7.
RETRAIT ET NETTOYAGE DES VITRES
1. Ouvrez la porte du four.
2.3.4. Bloquer les charnières, enlever les vis et retirez le couvercle métallique supérieur en le tirant vers le haut.
5.6. Retirez le verre, soigneusement de la porte du four (NB: dans les fours de pyrolyse, retirez également les deuxième et troisième verre (le cas l'extraire
échéant)).
7. A la fin du nettoyage Remonter les pièces dans l'ordre inverse.
Sur toutes les vitres, l'indication "Pyro" doit être lisible et positionné sur le côté gauche de la porte, à proximité de la charnière latérale gauche. De cette
manière, l'étiquette imprimée du premier verre sera à l'intérieur de la porte.
FR 20
Table of contents
Languages:
Other Candy Oven manuals

Candy
Candy FCP602X User manual

Candy
Candy FCXP605X User manual

Candy
Candy Idea FIDC N615/1 User manual

Candy
Candy FCS 100 X/E User manual

Candy
Candy FCP815X E0/E User manual

Candy
Candy FCT686N User manual

Candy
Candy FCT615WXL User manual

Candy
Candy FCT602N/E User manual

Candy
Candy HOFZ7170IN User manual

Candy
Candy FIDC N602 User manual

Candy
Candy FCP455X User manual

Candy
Candy F 279 P Technical manual

Candy
Candy FP 855/1 User manual

Candy
Candy FCXNE828X WIFI User manual

Candy
Candy FCPK606X/E User manual

Candy
Candy FCT602X User manual

Candy
Candy FCC604NAV User manual

Candy
Candy FCT825NXL User manual

Candy
Candy FCS600XE User manual

Candy
Candy FCNE825XRWF User manual