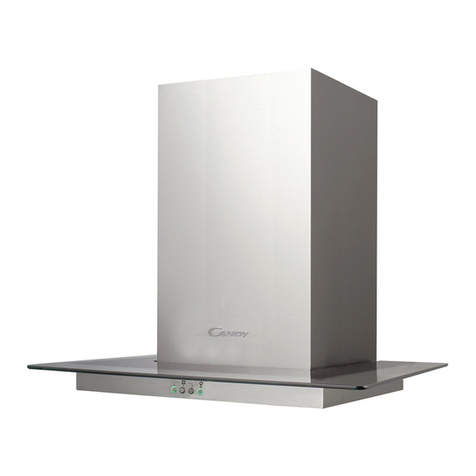
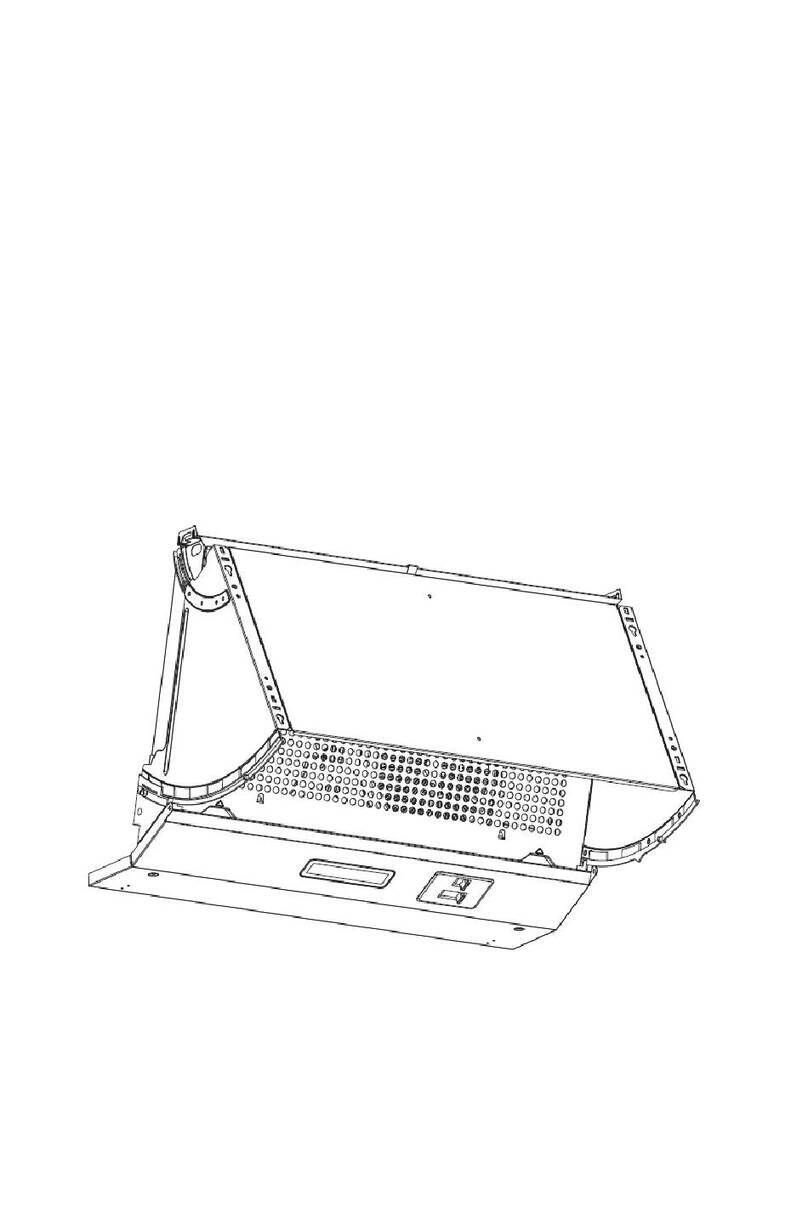
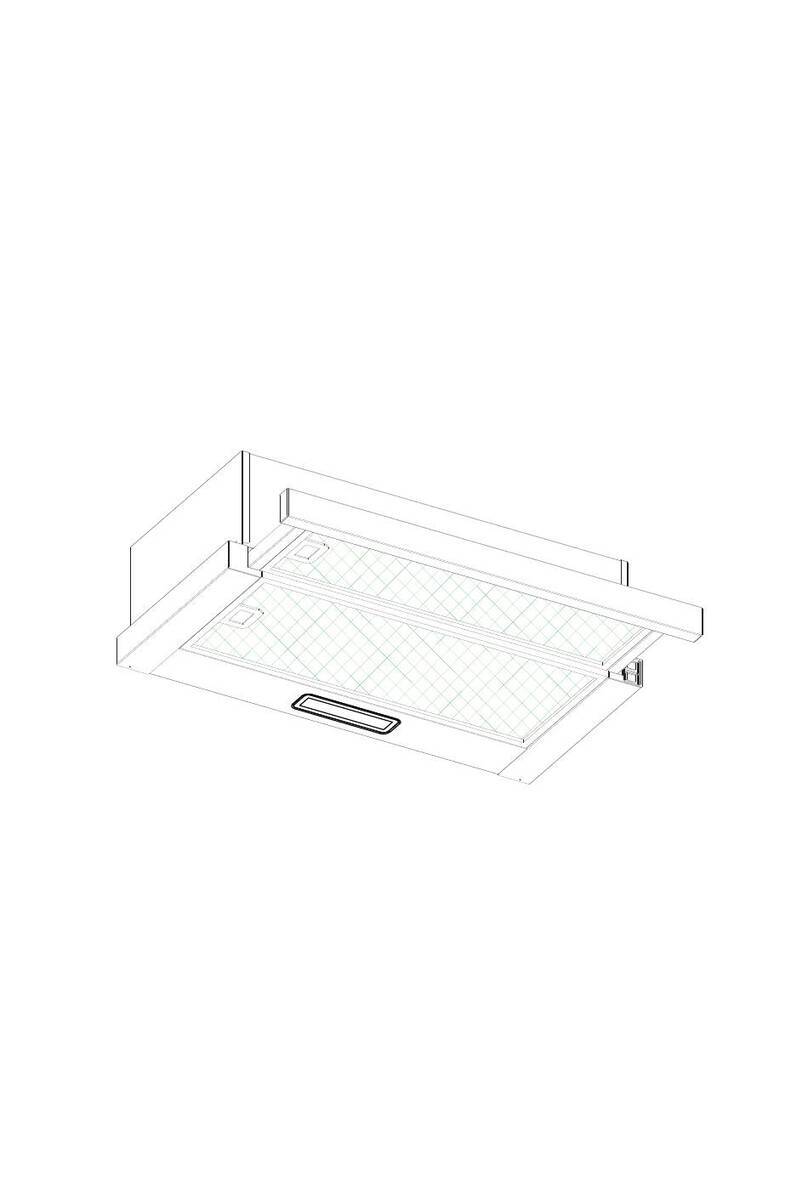
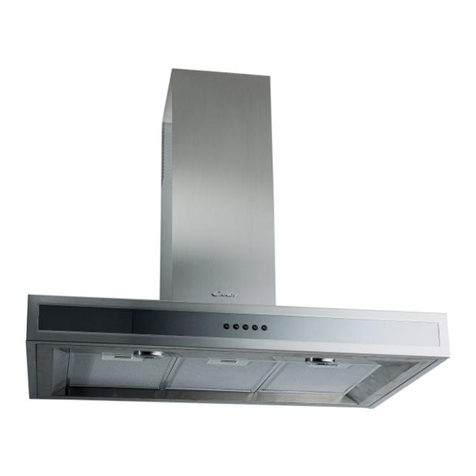
Candy CCR 617 X User manual

CCR 617 X
User manual
ENGLISH(EN)--------------------------------------------------------------------------------page 001
FRENCH(FR) --------------------------------------------------------------------------------page 011
ITALIANO (IT) -----------------------------------------------------------------------------pagina 017

1
CCR 617 X
User manual
CONTENT
1Introduction................................................................................ 2
2Safety precaution........................................................................ 2
3Installation.................................................................................. 6
4Notice of installation .................................................................. 7
5Safety Warning........................................................................... 8
6Operation.................................................................................... 9
7Maintenance ............................................................................... 9
8Environmental protection......................................................... 10

1. Introduction
Carefully read the following important information regarding installation, safety
and maintenance. Keep this information booklet accessible for further
consultations.
The appliance has been designed as a exhausting version (external exhaust ) or
as a filter version (internal air recycle) cooker hood.
2. SAFETY PRECAUTION
Important! Always switch off the electricity
supply at the mains during installation and
maintenance such as light bulb replacement.
The cooker hood must be installed in
accordance with the installation instructions
and all measurements followed.
All installation work must be carried out by a
competent person or qualified electrician.
Please dispose of the packing material
carefully. Children are vulnerable to it.
Pay attention to the sharp edges inside the
cooker hood especially during installation
and cleaning.
When the range hood is located above a
gas appliance,the minimum distance
between the supporting surface for the
cooking vessels on the hob and the lowest
part of the range hood that distance must
be:
Gas cookers: 75 cm
Electric cookers: 65 cm
2

Coal or oil cookers: 75 cm
Make sure the ducting has no bends
sharper than 90 degrees as this will reduce
the efficiency of the cooker hood.
Cooker hood is for domestic use only.
Always put lids on pots and pans when
cooking on a gas cooker.
Do not try to use the cooker hood without
the grease filters or if the filters are
excessively greasy!
When in extraction mode, air in the room is
being removed by the cooker hood. Please
make sure that proper ventilation measures
are being observed. The cooker hood
removes odours from room but not steam.
There shall be adequate ventilation of the
room when the range hood is used at the
same time as appliances burning gas or
other fuels
Do not install above a cooker with a high
level grill.
Do not leave frying pans unattended during
use because overheated fats or oils might
catch fire.
Never leave naked flames under the cooker
hood.
3

If the cooker hood is damaged, do not
attempt to use.
If the supply cord is damaged, it must be
replaced by the manufacturer, its service
agent or similarly qualified persons in order
to avoid a hazard.
This appliance can be used by children
aged from 8 years and above and persons
with reduced physical, sensory or mental
capabilities or lack of experience and
knowledge if they have been given
supervision or instruction concerning use of
the appliance in a safe way and understand
the hazards involved. Children shall not
play with the appliance. Cleaning and user
maintenance shall not be made by children
without supervision.
Caution: The appliance and its accessible
parts can become hot during operation. Be
careful to avoid touching the heating
elements. Children younger than 8 years
old should stay away unless they are under
permanent supervision.
– There shall be adequate ventilation of the
room when the range hood is used at the
same time as appliances burning gas or
other fuels
4

– There is a fire risk if cleaning is not
carried out in accordance with the
instructions
– Do not flambé under the cooker hood.
– CAUTION: Accessible parts may become
hot when used with cooking appliances.
–The air must not be discharged into a flue
that is used for exhausting fumes from
appliances burning gas or other fuels.
–The minimum distance between the
supporting surface for the cooking vessels
on the hob and the lowest part of the range
hood. (When the range hood is located
above a gas appliance, this distance shall
be at least 65 cm
–Regulations concerning the discharge of
air have to be fulfilled.
Clean your appliance periodically by
following the method given in the chapter
MAINTENANCE.
For safety reason, please use only the
same size of fixing or mounting screw which
are recommended in this instruction manual.
Warning: Failure to install the screws or
fixing device in accordance with these
instructions may result in electrical hazards
Regarding the instructions method of fixing
5

for the fixed appliance and how the
appliance is to be fixed to its support,
thanks to refer to the section
“INSTALLATION AND FIXING”.
Regarding the instructions for the bulb
changing, thanks to refer to the section
“bulb changing”.
ILCOS D code for lamp is:DBS-2.5/65-H-120/33
3. INSTALLATION
If the model without Glass:
3.1 The cooker hood should be placed at a distance of 65-75cm (26-30inch)
from the cooking surface for the best effect. See Pic 1.
3.2 Install the hook on a suitable place once the installation height is fixed, and
keep it in line. The fixed position of the inside chimney bracket is the place of
chimney.
3.3 Fix the outside chimney bracket on the outside chimney, and be sure that the
inside chimney can be adjusted the height in it freely as well as fixing the
extensible tube. Afterwards, install the extensible tube and chimney on the
cooker hood. See Pic 3.
3.4Put the cooker hood on the hook. See Pic 4.
3.5 Adjust the height of the inside chimney
to the position of the inside chimney bracket
and fix on it by screw, after adjusting the
position, fix the body with safety screw. See
Pic 5.
6

Note: The two safety vents are positioned on the back casing, with diameter of
6mm.
4. NOTICE OF INSTALLATION
For safety reason, please use only the
same size of fixing or mounting screw which
are recommended in this instruction manual.
Warning: Failure to install the screws or
fixing device in accordance with these
instructions may result in electrical hazards
1. Before installation, please ensure the area is clean to avoid suction of
the remaining bits of broken wood and dust.
2. It cannot share the same air ventilation tube with other appliance
such as gas tube, warmer tube, and hot wind tube.
3. The bending of ventilation tube should be120°, parallel or above
the start point and should be connected to the external wall.
4. After installation, make sure that the extractor is level to avoid
grease collection at one end.
7

5.
SAFETY WARNING
Keep your children from using the cooker hood.
Your cooker hood is for domestic use only, not suitable for barbecue, roast shop and
other commercial use.
Any installation work must be carried out by a qualified electrician or competent person.
The cooker hood and its filter mesh should be cleaned regularly in order to keep in good
working order.
Before cleaning, always ensure that you have switched your cooker hood off.
Clean the cooker hood according to the instruction manual and keep the cooker hood
from the danger of burning.
No fire for drying your cooker hood.
If there is any fault with your cooker hood, please call the service department appointed
by agent for servicing.
Please keep the room draughty when your cooker hood and gas hob are working.
Do not exhaust the gas from cooker hood through the same heated flue which is for the
gas from gas hob and other kitchen appliances.
Before installation and usage, read all the instructions and make sure that the voltage (V)
and the frequency (Hz) indicated on your cooker hood are exactly the same as the voltage
(V) and the frequency (Hz) in your home.
In order to get the most out of your cooker hood, please read the instruction manual
before installing & using, and keep it in a safe place.
Ensure that you could get our guarantee for your cooker hood, please provide the
warranty card and purchase receipt, or the guarantee will not be offered.
8

5. OPERATION
Push botton
Switch off button for motor
Press this button to stop the motor operation.
Low Speed button
Press this button to operate at low speed.
Medium Speed button
Press this button to operate at medium speed.
High Speed button
Press this button to operate at high speed.
Light button
Press once, two lighting lamps will illuminate. Press
again will turn all light off.
ILCOS D code for lamp is:DBS-2.5/65-H-120/33
7. MAINTENANCE
7.1 The cleaning of the carbon grease filter mesh
Your cooker hood includes a grease filter which helps to absorb grease
particles to protect your kitchen and furniture from greasy residues.
This aluminium filter may become flammable if it becomes saturated with
this greasy residue.
To prevent this fire hazard, the filter should be cleaned regularly.
Depending on use, this should be done every 10 -15 days or at least once a
month, using hot water and normal washing-up detergent.
DO NOT WASH THE GREASE FILTER IN A DISHWASHER.
Soak the grease filter in hot water and washing up liquid for at least 5
minutes (or longer if the grease build up is severe)
Rinse it off thoroughly with h ot water. Repeat the process if required.
Refit the grease filter once it has COMPLETELY dried.
9

7.2 Notice of cleaning cooker hood
A. To protect the main body from corrosion over a long period of time,
the cooker hood should be cleaned with hot water plus non
corrosive detergent every two months.
B. Please do not use abrasive detergent for it will damage the body.
C. Keep the motor and other spare parts free from water, as this will
cause damage to the appliance.
D. Before cleaning the appliance please remember to cut off power
E. The carbon filter shouldn’t be exposed to heat.
F. Please don’t tear open the fixed bar around the carbon filter
G. If the plug or cord is damaged, please replace it with special soft
cord.
8.ENVIRONMENTAL PROTECTION:
This product is marked with the symbol on the selective sorting of waste
electronic equipment. This means that this product must not be disposed
of with household waste but must be supported by a system of selective
collection in accordance with Directive 2002/96/EC. It will then be
recycled or dismantled to minimize impacts on the environment, electrical and
electronic products are potentially dangerous for the environment and human
health due to the presence of hazardous substances.
For more information, please contact your local or regional authorities.
Note:
a. In order to reduce the environmental impact (e.g. energy use) of the cooking
process, please be sure that your product is installed according to the user
manual, keep the operation place ventilated, keep the extraction duct be direct
and short as possible as it can be.
b. For the product with manual operation mode, we suggest switch the motor off
within 10 minutes after finishing the cooking process.
c. Please be sure to dismantle related components according to the user manual
when maintaining for non-destructive, protect the parts to make the re-installed
work can be favoring and avoid damage.
10

11
CCR 617 X
Manuel de l'utilisateur
SOMMAIRE
1Introduction.............................................................................. 12
2Avertissement de sécurité......................................................... 12
3Installation................................................................................ 12
4Notice of installation ................................................................ 13
5Alerte de sécurité...................................................................... 14
6 Description du bandeau de commande..................................... 15
7Maintenance ............................................................................. 15
8Environmental protection......................................................... 16

1. Introduction
Merci d‘avoir choisi cette hotte.
Ce manuel d'instructions est conçu pour vous fournir toutes les instructions requises relatives à
l'installation, l'utilisation et l'entretien de l'appareil. Afin de faire fonctionner l'appareil correctement et
en toute sécurité, merci de lire attentivement ce manuel avant l'installation et l'utilisation. La hotte
utilise des matériaux de haute qualité avec un design épuré. Equipé d’un moteur électrique de grande
puissance et d’un ventilateur centrifuge, il fournit également une puissance d'aspiration forte, un
fonctionnement avec un bruit modéré, un filtre à graisse et un montage facile..
2. Avertissement de sécurité
Ne pas laisser d’enfants utiliser l’appareil
Cette hotte est dédiée à un usage domestique uniquement. Elle ne doit pas être utilisée
pour les barbecues, les rôtisseries ou toutes autres activités
La hotte et ses filtres doivent être nettoyés régulièrement pour en garantir un bon état
de fonctionnement
Respecter les consignes de ce manuel pour le nettoyage de la hotte afin d’empêcher
tout risque d’incendie
Merci de garder une ventilation dans la cuisine
Avant de connecter cet appareil, contrôlez que le cordon d'alimentation n'est pas
endommagé. Un cordon d'alimentation endommagé doit être remplacé par une
personne qualifiée.
Il doit y avoir une ventilation adéquate de la pièce quand la hotte est utilisée en même
temps que des appareils utilisant du gaz ou d'autres combustibles
l'air ne doit pas être évacué par un conduit qui est utilisé pour évacuer les fumées des
appareils utilisant le gaz ou d'autres combustibles
La réglementation concernant le rejet de l’air doit être satisfaite
Cet appareil n’est pas destiné à être utilisé par des personnes (notamment les enfants)
incapables, irresponsables ou sans connaissance sur l’utilisation du produit, à moins
qu’elle ne soit surveillées ou instruites sur l’utilisation de l’appareil par une personne
responsable de leur sécurité
Les enfants doivent être surveillés pour s'assurer qu'ils ne jouent pas avec l'appareil.
Ne pas faire flamber sous la hotte
La hotte n'est pas destinée à être installé au-dessus d’une plaque de cuisson ayant plus
de quatre foyers de cuisson
Risque de choc électrique
Cette hotte ne peut être branchée seulement sur une prise reliée à la terre. En cas
de doute, demandez conseil à un ingénieur qualifié
Le non-respect de ces instructions peut entraîner la mort, un incendie ou un choc
électrique
3. INSTALLATION
12

3.1 Pour une prestation la meilleure la hotte doit être placée à une distance de 65-
75cm (26-30 pouces) de la plaque. Voir la photo 1.
3.2 Installez le crochet sur un endroit approprié une fois que la hauteur d'installation
est fixée et maintenez-la en ligne. La position fixée du support de cheminée intérieur
est le lieu de la cheminée.
3.3 Fixez le support de cheminée extérieur sur la cheminée extérieure et assurez-
vous que la cheminée intérieure peut être réglée en hauteur librement ainsi que la
fixation du tube extensible. Ensuite, installez le tube extensible et la cheminée sur la
hotte aspirante. Voir la photo 3
3.4 Mettre la hotte sur le crochet. Voir la photo 4.
3.5 Réglez la hauteur de la cheminée intérieure
vers la position du support de cheminée intérieur
et fixez-la par vis, après avoir réglé la position,
fixez le corps avec une vis de sécurité. Voir la
photo 5.
Remarque: les deux évents de sécurité sont
positionnés sur le boîtier arrière, avec un diamètre de 6 mm
4. NOTICE OF INSTALLATION
Pour des raisons de sécurité, utilisez uniquement la même taille de fixation ou de
13

vis de montage recommandée dans ce mode d'emploi.
Attention: le défaut d'installer les vis ou le dispositif de fixation conformément à
ces instructions peut entraîner des risques électriques
1. Avant l'installation, assurez-vous que la zone est propre pour éviter l'aspiration
des morceaux restants de bois cassé et de poussière.
2. Il ne peut pas partager le même tube de ventilation avec un autre appareil tel
qu'un tube à gaz, un tube chauffant et un tube de vent chaud
3.La flexion du tube de ventilation doit être de 120 °, parallèle ou au-dessus du point
de départ et doit être reliée à la paroi extérieure.
4.Après l'installation, assurez-vous que l'extracteur est à niveau pour éviter la
collecte de graisse à une extrémité.
5. ALERTE DE SÉCURITÉ
Gardez vos enfants à l'aide de la hotte
Votre hotte est uniquement pour usage domestique, ne convient pas pour le
barbecue, boutique et autre usage commercial.
Tout travail d'installation doit être effectué par un électricien qualifié ou une
personne compétente.
La hotte aspirante et son filtre doivent être nettoyés régulièrement afin de
maintenir un bon état de fonctionnement
Avant de nettoyer, assurez-vous toujours que vous avez éteint votre hotte.
Nettoyez la hotte selon le mode d'emploi et gardez-le de danger
d’inflammation.
Pas de feu pour sécher votre hotte
En cas de panne avec votre hotte, veuillez appeler le service après-vente
agréé par l'agent.
Gardez la pièce en plein air lorsque votre hotte et votre plaque à gaz
fonctionnent
Ne pas épuiser le gaz du hotte à travers la même cheminée chauffée qui est
pour le plaque au gaz et d'autres appareils de cuisine.
Avant l'installation et l'utilisation, lisez toutes les instructions et assurez-vous
que la tension (V) et la fréquence (Hz) indiquée sur votre hotte sont
14

exactement les mêmes que la tension (V) et la fréquence (Hz) dans votre
maison.
Pour tirer le meilleur parti de votre hotte, lisez le mode d'emploi avant
d'installer et d'utiliser, et conservez-le dans un endroit sûr.
Assurez-vous que vous pouvez obtenir notre garantie pour votre hotte,
veuillez fournir la carte de garantie et le bon de réception, ou la garantie ne
sera pas offerte.
6.Description du bandeau de commande
Utilisation
Bouton vitesse minimale
Utilisée pour la ventilation de la cuisine. Elle est adaptée si vous faîtes mijoter votre
préparation ou si vous cuisinez sans qu’il y ait beaucoup de vapeur
Bouton vitesse intermédiaire
Cette vitesse est idéale pour une cuisson standard
Bouton vitesse maximale
En cas de grosse fumée ou vapeur, appuyez sur le bouton de puissance maximale pour une
évacuation parfaite de l’air ambiant
Bouton d’éclairage
Note : Si les trois puissances (minimale, intermédiaire et maximale) sont enclenchées en
même temps, l’appareil fonctionnera à pleine puissance.
7. MAINTENANCE
7.1 The cleaning of the carbon grease filter mesh
Votre hotte comprend un filtre à graisse qui permet d'absorber les particules de
graisse pour protéger votre cuisine et vos meubles contre les résidus graisseux.
Ce filtre en aluminium peut devenir inflammable s'il est saturé avec de résidu
gras.
. Pour éviter le risque d'incendie, le filtre doit être nettoyé régulièrement
Selon l'utilisation, cela devrait être effectué tous les 10-15 jours ou au moins une
fois par mois, en utilisant de l'eau chaude et un détergent à vaisselle normal
NE LAVEZ PAS LE FILTRE DE GRASSE DANS UNE LAVE-VAISSELLE
Faire tremper le filtre à graisse dans de l'eau chaude et vider le liquide pendant
au moins 5 minutes (ou plus si l'accumulation de graisse est grave)
Rincer abondamment à l'eau chaude. Répétez le processus si nécessaire.
. Remettre le filtre à graisse quand il sera complètement séché.
15

.
7.2 Notice of cleaning cooker hood
A.Pour protéger le corps principal de la corrosion sur une longue période
de temps, la hotte doit être nettoyé avec de l'eau chaude plus un
détergent non corrosif tous les deux mois.
B.. N'utilisez pas de détergent abrasif car cela endommagera le corps
C.Gardez le moteur et les autres pièces détachées exemptes d'eau, car
cela pourrait endommager l'appareil.
D.Avant de nettoyer l'appareil, n'oubliez pas de le éteindre.
E.Le filtre à charbon ne doit pas être exposé au feu
F.Ne déchirez pas la barre fixée autour du filtre à charbon
G.Si la fiche ou le cordon est endommagé, remplacez-le par un cordon
doux spécial.
8.ENVIRONMENTAL PROTECTION:
Cet appareil est produit conformément à la directive européenne 2002/69/CE concernant la
mise au rebut des déchets d’équipements électriques et électroniques.
Le fait que cet article ait été réalisé en conformité avec les normes en vigueur, contribue
à prévenir toute conséquence nuisible pour l’environnement et la santé, la simple mise
au rebut de cet appareil provoquerait en revanche de graves dommages.
Ce symbole indique que ce produit ne peut en aucun cas être traité comme un déchet ménager,
il doit être remis à un centre de collecte chargé du recyclage des équipements électriques et
électroniques. Pour obtenir de plus amples détails au sujet au sujet du traitement, de
l’élimination, et du recyclage de cet appareil, contacter le service local de collecte des déchets
ou bien s’adresser au magasin dans lequel l’article a été acheté.
16

17
CCR 617 X
Manuale d’uso
INDICE
1Generalità ................................................................................ 18
2Precauzioni di sicurezza .......................................................... 18
3Installazione ............................................................................ 22
4Consigli di installazione .......................................................... 23
5Avvertenze per la sicurezza ..................................................... 24
6Funzionamento ........................................................................ 25
7Manutenzione .......................................................................... 25
8Protezione ambientale ............................................................. 26

18
1. Generalità
Leggere attentamente le seguenti informazioni importanti in materia di
installazione, sicurezza e manutenzione. Tenere questo manuale di istruzioni a
disposizione per futuro riferimento.
L'elettrodomestico è stato progettato come cappa in versione con scarico (scarico
all'esterno) o con filtro (ricircolo aria interno).
2. PRECAUZIONI DI SICUREZZA
Importante! Staccare sempre l'alimentazione
elettrica dalla rete durante le attività di
installazione e manutenzione, quale ad esempio
la sostituzione delle lampadine.
La cappa deve essere montata in accordo
con le istruzioni di installazione e rispettando
tutte le misure indicate.
Tutti i lavori di installazione devono essere
effettuati da operatori competenti o da
elettricisti qualificati.
Si prega di smaltire in modo appropriato il
materiale di imballaggio. È pericoloso per i
bambini.
Prestare attenzione agli spigoli vivi all'interno
della cappa, in particolare durante
l'installazione e la pulizia.
Quando la cappa aspirante si trova al di sopra
di un elettrodomestico a gas, la distanza
minima tra la superficie di supporto dei
recipienti di cottura sul piano di cottura e la
parte inferiore della cappa aspirante deve
essere la seguente:
Fornelli a gas: 75 cm
Fornelli elettrici: 65 cm
Fornelli a carbone o gasolio: 75 cm

19
Accertarsi che le tubazioni non abbiano curve
più strette di 90 gradi in quanto ciò riduce la
resa della cappa.
La cappa è progettata solo per uso interno.
Mettere sempre i coperchi su pentole e
tegami quando si cuociono gli alimenti su una
cucina a gas.
Non cercare di utilizzare la cappa senza i filtri
per grasso oppure se i filtri sono
eccessivamente sporchi di grasso!
In modalità di estrazione, l'aria all'interno
dell'ambiente viene aspirata dalla cappa.
Accertarsi che siano adottate misure
adeguate per la ventilazione. La cappa toglie
gli odori dall'ambiente ma non il vapore.
Deve esserci un'adeguata ventilazione
dell'ambiente quando si utilizza la cappa
aspirante insieme ad elettrodomestici con
combustione a gas o altri combustibili
Non montare la cappa sopra ad un fornello
con grill molto alto.
Non lasciare pentole con olio bollente
incustodite durante l'utilizzo in quanto i grassi
o gli oli surriscaldati possono incendiarsi.
Non lasciare mai fiamme libere sotto la cappa.
Se la cappa è danneggiata, non cercare di
utilizzarla.
Table of contents
Languages:
Other Candy Ventilation Hood manuals

Candy
Candy CBT6240 User manual

Candy
Candy CBP612/3 Technical manual

Candy
Candy CBT625/2B User manual

Candy
Candy CCE 16/1 X User manual

Candy
Candy CE 61 X User manual

Candy
Candy CVM670LX User manual

Candy
Candy CMBI970LX User manual

Candy
Candy CFT63/1W/1 User manual

Candy
Candy CBT6240W User manual

Candy
Candy CT6360IN User manual

Candy
Candy CFT610/5X/P User manual

Candy
Candy CCR616/1X User manual

Candy
Candy CFT610/5X/1 User manual

Candy
Candy CBT6130/3X User manual

Candy
Candy CBP612/4GR User manual

Candy
Candy COOKER HOOD User manual

Candy
Candy CFT63 Series User manual

Candy
Candy CFT 610 3W Technical manual

Candy
Candy CCR 616 User manual

Candy
Candy CVMI900X User manual