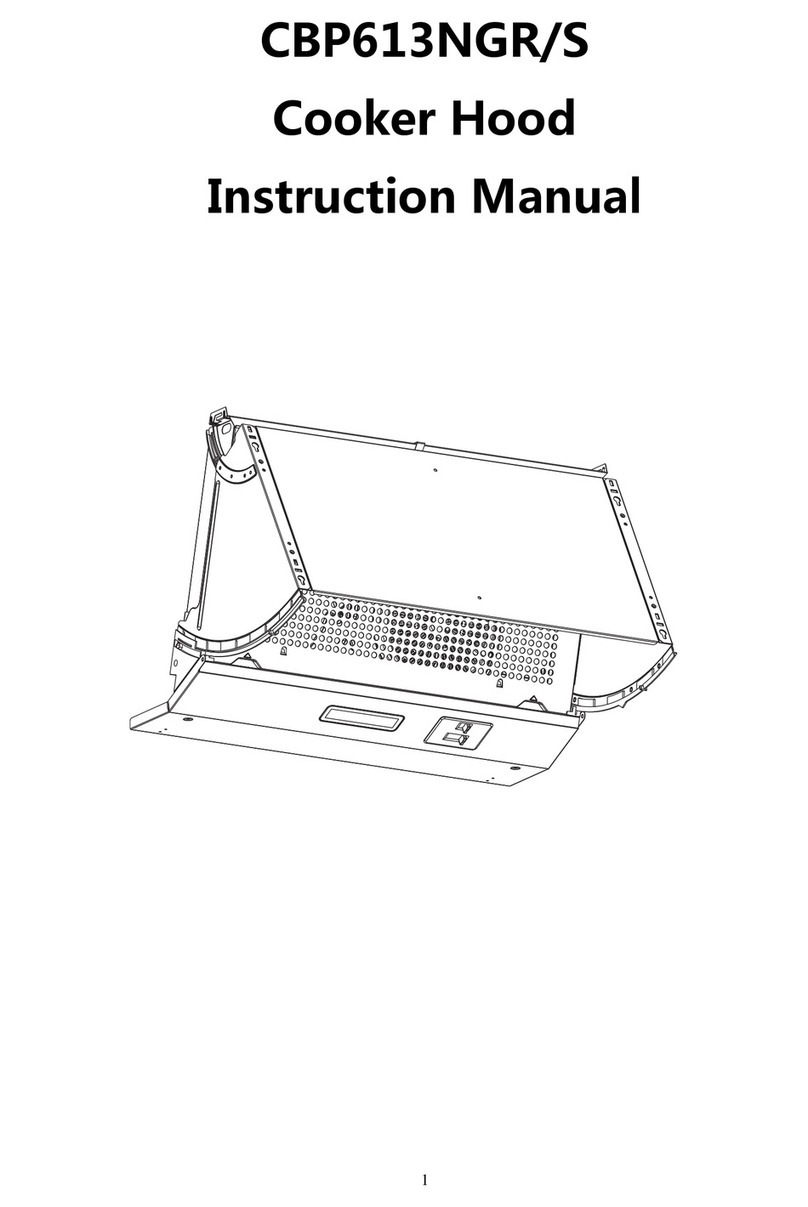
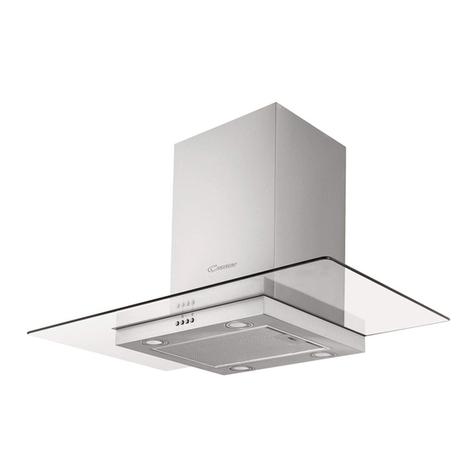
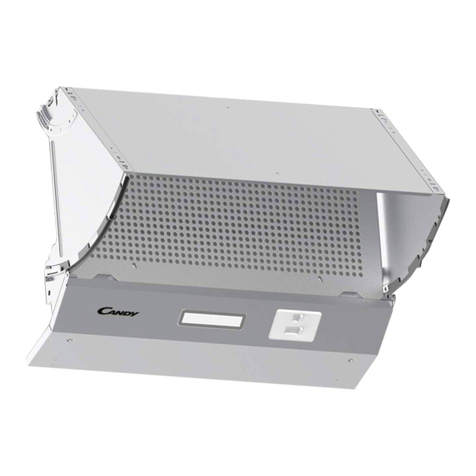
Candy CT6360IN User manual

1
CT6360IN
CookerHood
InstructionManual

2
Content
1…………………………………..………………………………Safetyinstructions
2…………………………………..………………………………Installation
3…………………………………..………………………………Startusingyourcookerhood
4…………………………………..………………………………Troubleshooting
5…………………………………..………………………………Maintenanceandcleaning
6…………………………………..………………………………Environmentprotection

3
SAFETYINSTRUCTIONS
Thismanualexplainstheproperinstallationanduseofyourcookerhood,
pleasereaditcarefullybeforeusingevenifyouarefamiliarwiththeproduct.
Themanualshouldbekeptinasafeplaceforfuturereference.
Nevertodo:
●Do not try to use the cooker hood
without the grease filters or if the filters
are excessively greasy!
●Do not install above a cooker with a
high level grill.
●Do not leave frying pans unattended
during use because overheated fats or
oils might catch fire.
●Never leave naked flames under the
cooker hood.
●If the cooker hood is damaged, do not
attempt to use.
●Do not flambé under the cooker hood.
●CAUTION: Accessible parts may
become hot when used with cooking
appliances.
●The minimum distance between the
supporting surface for the cooking
vessels on the hob and the lowest part
of the cooker hood. (When the cooker
hood is located above a gas appliance,
this distance shall be at least 65 cm)
●The air must not be discharged into a
flue that is used for exhausting fumes
from appliances burning gas or other
fuels.
Alwaystodo:
●Important! Always switch off the
electricity supply at the mains during
installation and maintenance such as
light bulb replacement.
●The cooker hood must be installed in
accordance with the installation
instructions and all measurements
followed.
●All installation work must be carried
out by a competent person or qualified
electrician.
●Please dispose of the packing material
carefully. Children are vulnerable to it.
●Pay attention to the sharp edges
inside the cooker hood especially
during installation and cleaning.
●Make sure the ducting has no bends
sharper than 90 degrees as this will
reduce the efficiency of the cooker
hood.
●Warning: Failure to install the screws
or fixing device in accordance with
these instructions may result in
electrical hazards
●Warning: Before obtaining access to
terminals, all supply circuits must be
disconnected.

4
Alwaystodo:
●Always put lids on pots and pans
when cooking on a gas cooker.
●When in extraction mode, air in the
room is being removed by the cooker
hood. Please make sure that proper
ventilation measures are being
observed. The cooker hood removes
odours from room but not steam.
●Cooker hood is for domestic use only.
●If the supply cord is damaged, it must
be replaced by the manufacturer, its
service agent or similarly qualified
persons in order to avoid a hazard.
●This appliance can be used by
children aged from 8 years and above
and persons with reduced physical,
sensory or mental capabilities or lack
of experience and knowledge if they
have been given supervision or
instruction concerning use of the
appliance in a safe way and
understand the hazards involved.
Children shall not play with the
appliance. Cleaning and user
maintenance shall not be made by
children without supervision.
●Warning: Before obtaining access to
terminals, all supply circuits must be
disconnected.
Alwaystodo:
●Caution: The appliance and its
accessible parts can become hot
during operation. Be careful to avoid
touching the heating elements.
Children younger than 8 years old
should stay away unless they are
under permanent supervision.
●There shall be adequate ventilation of
the room when the cooker hood is
used at the same time as appliances
burning gas or other fuels.
●There is a fire risk if cleaning is not
carried out in accordance with the
instructions
●Regulations concerning the discharge
of air have to be fulfilled.
●Clean your appliance periodically by
following the method given in the
chapter MAINTENANCE.
●For safety reason, please use only the
same size of fixing or mounting screw
which are recommended in this
instruction manual.
●Regarding the details about the
method and frequency of cleaning,
please refer to maintenance and
cleaning section in the instruction
manual.
●Cleaning and user maintenance shall
not be made by children without
supervision.
●When the cooker hood and
appliances supplied with energy other
than electricity are simultaneously in
operation, the negative pressure in the
room must not exceed 4 Pa (4 x 10⁻⁵
bar).
●WARNING: Danger of fire: do not
store items on the cooking surfaces.
●Asteam cleaner is not to be used.
●NEVER try to extinguish a fire with
water, but switch off the appliance and
then cover flame e.g. with a lid or a
fire blanket.

5
INSTALLATION(VENTOUTSIDE)
Therearetwowaysofinstallationofcookerhood:onthewallandundera
wallunit.
Wayone:Mountingonthewall:
1. Thecookerhoodsshouldbeplacedatadistanceof65-75cmfromthe
cookingsurfaceforbesteffect.
65cm
75cm
2. Toinstallontothewalldrill4holesofØ8mmonasuitableplaceaccording
withthecentredistanceofholeinthebackofthecookerhood.
3. Insertthenutintotheholes.
4. Insertthescrewsintothenutsandtight.
5. Putupthecookerhoodontothefixedscrews.
Waytwo:Mountingunderawallunit
1. Drill4holesof4mmdiameteratthebottomofthehangingcupboard.

6
2. Install the cooker hood on the bottom of the cupboard, tighten the hood
withtheM4screws.
3. Usetwo3*12screwstofixtheadjustedboardonthebottomofthehoodin
ordertokeepoutthegapbetweenhoodbackandcupboard.
Electrical Installation
All installation must be carried out by a competent person or qualified electrician.
Before connecting the mains supply ensure that the mains voltage corresponds to the
voltage on the rating plate.
Direct Connection
The appliance must be connected directly to the mains using an omnipolar circuit
breaker with a

7
minimum opening of 3mm between the contacts.
The installer must ensure that the correct electrical connection has been made and
that it complies with the wiring diagram.
The cable must not be bent or compressed.
Regularly check the power plug and power cord for damage. If the supply cord is
damaged, it must be replaced by a special cord or assembly available
from the manufacturer or its service agent.
WARNING: This is a Class I appliance and MUST be earthed
This appliance is supplied with a 3 core mains cable coloured as
follows:
Brown = L or Live
Blue = N or Neutral
Green and Yellow = E or Earth
WARNING:
For safety reason, please use only the same
size of fixing or mounting screw which are
recommended in this instruction manual.
Failure to install the screws or fixing device in
accordance with these instructions may result in
electrical hazards.
StartUsingYourCookerHood
Five-key electronic button
There are five touch buttons: (Low), (Mid), (High), (Light),
(Power).See Pic above.
1. After connecting to power, indicator light will lit on, all the output close and the hood
will enter standby mode. The indicator light will be off automatically after reminding
if no operation.
2. Power on: Press power button one time, its indicator light will lit on, the hood
works at low speed. Indicator light of low speed will be bright. Press power
button again to close it, and its indicator light will be off. All the function operation of

8
the hood will be closed, the hood enters into standby mode, and recycle by circle.
The speed buttons and lamp button can work separately and not controlled by the
power button. Press one function button, the hood will work at that function status.
Press power button at any status will close all function operation.
3. Press lamp button once; lights will be turn on. Indicator light of lamp button
and power button will lit on. Press lamp button again to turn off the lights.
Indicator light of lamp button and power buttonwill be off. And recycle like
this.
4. Press the (High) button one time, motor runs on high speed, the indicator light
of high button and power button will beam. Press high button again and
the motor will stop. Indicator light of high button and power button will be off,and
recycle by circle.
5. Press the (Mid) button one time, motor runs on middle speed, the indicator light
of middle button and power button will beam. Press middle button again
and the motor will stop. Indicator light of middle button and power button will be
off,and recycle by circle.
6. Press the (low) button one time, motor runs on low speed, the indicator light of
low button and power button will beam. Press low button again and the
motor will stop. Indicator light of low button and power button will be off,and recycle
by circle.
Low speed, mid speed and high speed cannot work at the same time. When hood is
on high speed, press low speed, it will turn to low speed at once; when it is in low
speed, press middle speed, it will turn to middle speed immediately, and so on.
TROUBLESHOOTING
Fault PossibleCause Solution
Light on, but motor
does not work
Fan switch turned off Select a fan switch position.
Fan switch failed Contact service center.
Motor failed Contact service center.
Light does not
work, motor does
not work
House fuses blown Reset/Replace fuses.
Power cord loose or
disconnected Refit cord to power outlet.
Switch power outlet on.
Oil leakage
One way valve and the outlet
are not tightly sealed Take down the one way valve
and seal with sealant.
Leakage from the connection of
chimney and cover Take chimney down and seal.

9
Lights not working Broken/Faulty globes Replace globes as per this
instruction.
Insufficient suction The distance between the
cooker hood and the gas top is
too far
Refit the cooker hood to the
correct distance.
The Cooker hood
inclines The fixing screw not tight
enough Tighten the hanging screw and
make it horizontal.
NOTE:
Any electrical repairs to this appliance must conform to your local, state and
federal laws.Please contact the service centre if in any doubt before
undertaking any of the above.Always disconnect the unit from the power source when
opening the unit.
MAINTENANCEANDCLEANING
Caution:
• Before maintenance or cleaning is carried out, the cooker hood should be
disconnected from the main power supply. Ensure that the cooker hood is switched
off at the wall socket .
• External surfaces are susceptible to scratches and abrasions, so please follow the
cleaning instructions to ensure the best possible result is achieved without damage.
GENERAL
Cleaning and maintenance should be carried out with the appliance cold especially
when cleaning.Avoid leaving alkaline or acid substances (lemon juice, vinegar etc.) on
the surfaces.
STAINLESS STEEL
The stainless steel must be cleaned regularly (e.g.weekly) to ensure long life
expectancy.Dry with a clean soft cloth. A specialized stainless steel cleaning fluid may
be used.
NOTE:
Ensure that wiping is done along with the grain of the stainless steel to prevent any
unsightly crisscross scratching patterns from appearing.
CONTROL PANEL SURFACE
The inlay control panel can be cleaned using warm soapy water. Ensure the cloth is
clean and well wrung before cleaning. Use a dry soft cloth to remove any excess
moisture left after cleaning.
Important
Using neutral detergents and avoid using harsh cleaning chemicals, strong household
detergents or products containing abrasives,as this will affect the appliance
appearance and potentially remove any printing of artwork on the control panel and

10
will void manufactures warrantee.
GREASE MESH FILTERS
The mesh filters can be cleaned by
hand. Soak them for about 3 minute in
water with a grease-loosening
detergent then brush it gently with a
soft brush. Please do not apply too
much pressure, avoid to damage it .
(Leave to dry naturally out of direct
sun light)
Filters should be washed separately to crockery and kitchen utensils. it is advisable
not to use rinse aid.
INSTALLING GREASE MESH FILTERS
• To install filters for the following four steps .
- Angle the filter into slots at the back of the hood.
- Push the button on handle of the filter.
- Release the handle once the filter fits into a resting position.
- Repeat to install all filters.
CARBON FILTER-not supplied
Activated carbon filter can be used to trap odors. Normally the activated carbon filter
should be changed at three or six months according to your cooking habit. The
installation procedure of activated carbon filter is as below.
Please pull out the hood and take off the tow filters.
Fix the charcoal filter into motor side to make sure its tighten.See Pic.below.
Put back the two filters into hood.
NOTE:
Make sure the filter is securely locked. Otherwise, it would loosen and cause
dangerous.
When activated carbon filter attached, the suction power will be lowered.

11
BULB REPLACEMENT
Important :
The bulb must be replaced by the manufacturer, its
service agent or similarly qualified persons.
Always switch off the electricity supply before
carrying out any operations on the appliance. When
handling bulb, make sure it is completely cool down
before any direct contact to hands.
When handling globes hold with a cloth or gloves to
ensure perspiration does not come in contact with
the globe as this can reduce the life of the globe.
Note:
Before Replacement light that the cooker hood can be isolated from the supply
mains by means of a plug or an all-pole switch.
Protect against danger when changing lights, such as wearing gloves.
Changing the lights:
Remove the grease filter.
Use a tool or the hand to press the spring splinter of both sides of LED light to the
inside, until the light is pressed out, see pic 1.Then slightly pull the light connecting
wire out, and dismantle the terminal of the light connecting wire. . See pic 2.
Apply the reverse procedure to install the light back.
• ILCOS D code for this lamp is: DSR-1.5/65-H-64
– LED modules –round lamp
– Max wattage: 2 X 1.5 W
– Voltage range: DC 12V
– Dimensions:

12
ENVIRONMENTALPROTECTION:
This appliance is labelled in accordance with European Directive
2012/19/EU on Waste Electrical and Electronic Equipment Regulations
2013 regarding electric and electronic appliances (WEEE). The WEEE
contain both polluting substances (that can have a negative effect on the
environment) and base elements (that can be reused). It is important that
the WEEE undergo specific treatments to correctly remove and dispose of
the pollutants and recover all the materials. Individuals can play an
important role in ensuring that the WEEE do not become an environmental problem;
it is essential to follow a few basic rules:
- the WEEE should not be treated as domestic waste;
- the WEEE should be taken to dedicated collection areas managed by the town
council or a registered company.
ln many countries, domestic collections may be available for large WEEEs. When
you buy a new appliance, the old one can be returned to the vendor who must accept it
free of charge as a one-off, as long as the appliance is of an equivalent type and has
the same functions as the purchased appliance.
NOTE:
The following shows how to reduce total environmental impact (e.g. energy use) of the
cooking process).
(1) Install the cooker hood in a proper place where there is efficient ventilation.
(2) Clean the cooker hood regularly so as not to block the airway.
(3) Remember to switch off the cooker hood light after cooking.
(4) Remember to switch off the cooker hood after cooking.
INFORMATION FOR DISMANTLING
Do not dismantle the appliance in a way which is not shown in the user manual. The
appliance could not be dismantled by user. At the end of life, the appliance should
not be disposed of with household waste. Check with you Local Authority or retainer
for recycling advice.

CT6360IN
Απορροφητήρας
(ηλεκτρικής) κουζίνας
Εγχειρίδιο οδηγιών
13

14
Περιεχόμενα
1 ................................................................Οδηγίες ασφαλείας
2 ................................................................Εγκατάσταση
3 ................................................................Ξεκινήστε τη χρήση του απορροφητήρα σας
4 ................................................................Αντιμετώπιση προβλημάτων
5 ................................................................Συντήρηση και καθαρισμός
6 ................................................................Προστασία περιβάλλοντος

15
ΟΔΗΓΙΕΣ ΑΣΦΑΛΕΙΑΣ
Το εγχειρίδιο αυτό εξηγεί τη σωστή εγκατάσταση και χρήση του απορροφητήρα, γι' αυτό
παρακαλούμε να το διαβάσετε προσεκτικά πριν από τη χρήση, ακόμη και αν είστε εξοικειωμένοι
με το προϊόν. Το εγχειρίδιο πρέπει να φυλάσσεται σε ασφαλές μέρος για μελλοντική αναφορά.
Να μην κάνετε ποτέ:
Πρέπει πάντοτε να κάνετε:
⚫Μην προσπαθήσετε να χρησιμοποιήσετε
τον απορροφητήρα χωρίς τα φίλτρα
λίπους ή εάν τα φίλτρα είναι υπερβολικά
γεμάτα με λίπη!
⚫Μην τον εγκαταστήσετε πάνω από μια
κουζίνα με σχάρα υψηλού επιπέδου.
⚫Μην αφήνετε τα τηγάνια αφύλακτα κατά
τη χρήση, επειδή τα λίπη ή τα έλαια που
έχουν υπερθερμανθεί ενδέχεται να
προκαλέσουν φωτιά.
⚫Ποτέ να μην αφήνετε να υπάρχουν γυμνές
φλόγες κάτω από τον απορροφητήρα.
⚫Σημαντικό! Απενεργοποιείτε πάντα την
παροχή ηλεκτρικού ρεύματος στο ρεύμα
κατά την εγκατάσταση και τη συντήρηση,
όπως η αντικατάσταση του λαμπτήρα.
⚫Ο απορροφητήρας πρέπει να
εγκατασταθεί σύμφωνα με τις οδηγίες
εγκατάστασης και όλες τις μετρήσεις που
ακολουθούνται.
⚫Όλες οι εργασίες εγκατάστασης πρέπει
να εκτελούνται από αρμόδιο άτομο ή
εξειδικευμένο ηλεκτρολόγο.
⚫Παρακαλούμε ανοίξτε και ξεδιπλώστε
προσεκτικά το υλικό συσκευασίας. Το υλικό
αυτό είναι Επικίνδυνο για τα παιδιά.
⚫Προσοχή στις αιχμηρές άκρες στο
εσωτερικό του απορροφητήρα, ιδιαίτερα
κατά την εγκατάσταση και τον καθαρισμό.
⚫Βεβαιωθείτε ότι ο αγωγός εξαερισμού
δεν έχει καμπύλες μεγαλύτερες από
90 μοίρες, καθώς αυτό θα μειώσει την
απόδοση του απορροφητήρα.
⚫Προειδοποίηση: Εάν δεν εγκαταστήσετε
τις βίδες ασφάλισης ή δεν στερεώσετε τη
συσκευή σύμφωνα με αυτές τις οδηγίες,
μπορεί να προκληθούν ηλεκτρικοί
κίνδυνοι
⚫Προειδοποίηση: Πριν από την πρόσβαση
στα τερματικά, όλα τα κυκλώματα
τροφοδοσίας πρέπει να αποσυνδεθούν.
⚫Εάν ο απορροφητήρας είναι
κατεστραμμένος, μην επιχειρήσετε να τον
χρησιμοποιήσετε.
⚫Μην ανάβετε φωτιά με φλόγες κάτω από
τον απορροφητήρα.
⚫ΠΡΟΣΟΧΗ: Τα προσβάσιμα εξαρτήματα
ενδέχεται να ζεσταθούν όταν χρησιμοποιούνται
μαζί με συσκευές μαγειρέματος.
⚫Αυτή είναι η ελάχιστη απόσταση μεταξύ
της επιφάνειας στήριξης για τις συσκευές
μαγειρέματος στις εστίες της κουζίνας και
το χαμηλότερο μέρος του
απορροφητήρα. (Όταν ο απορροφητήρας
βρίσκεται πάνω από μια συσκευή αερίου,
η απόσταση αυτή πρέπει να είναι
τουλάχιστον 65 cm)
⚫Ο αέρας δεν πρέπει να εκκενωθεί σε
καπναγωγό που χρησιμοποιείται για την
εξάτμιση καπνών από συσκευές καύσης
φυσικού αερίου ή άλλων καυσίμων.

16
Πρέπει πάντοτε να κάνετε:
⚫Να τοοποθετείτε πάντα τα καπάκια στις
κατσαρόλες και τα τηγάνια / ταψιά κατά
το μαγείρεμα σε μια εστία αερίου.
⚫Όταν είναι σε λειτουργία εξαγωγής
αερίων, ο αέρας του δωματίου
απορροφάται από τον απορροφητήρα.
Βεβαιωθείτε ότι τηρούνται τα κατάλληλα
μέτρα εξαερισμού. Ο απορροφητήρας
απορροφά τις οσμές από το δωμάτιο
αλλά όχι τον ατμό.
⚫Ο απορροφητήρας είναι μόνο για
οικιακή χρήση.
⚫Προσοχή: Η συσκευή και τα προσιτά μέρη
αυτής μπορεί να ζεσταθούν κατά τη
λειτουργία. Προσέξτε να μην αγγίξετε τα
στοιχεία θέρμανσης. Τα παιδιά ηλικίας κάτω
των 8 ετών πρέπει να παραμένουν μακριά
εκτός εάν βρίσκονται υπό μόνιμη επίβλεψη
ή εποπτεία.
⚫Θα πρέπει να υπάρχει επαρκής εξαερισμός
του χώρου όταν χρησιμοποιείται ο
απορροφητήρας ταυτόχρονα με τις
συσκευές που καίνε αέριο ή άλλα καύσιμα.
⚫Υπάρχει κίνδυνος πυρκαγιάς εάν ο
καθαρισμός δεν πραγματοποιείται
σύμφωνα με τις οδηγίες
⚫Οι κανόνες που αφορούν την εκκένωση του
αέρα πρέπει να πληρούνται.
⚫Να καθαρίζετε τη συσκευή σας σε τακτά
διαστήματα ακολουθώντας τη μέθοδο που
παρέχεται στο κεφάλαιο ΣΥΝΤΗΡΗΣΗ.
⚫Για λόγους ασφαλείας, χρησιμοποιήστε
μόνο το ίδιο μέγεθος βιδών ασφάλισης ή
βιδών στερέωσης με αυτό που συνιστάται
σε αυτό το εγχειρίδιο οδηγιών.
⚫Σχετικά με τις λεπτομέρειες όσον αφορά τη
μέθοδο και τη συχνότητα καθαρισμού,
ανατρέξτε στην ενότητα "Συντήρηση και
καθαρισμός" στο εγχειρίδιο οδηγιών.
⚫Ο καθαρισμός και η οι εργασίες
συντήρησης από τον χρήση απαγορεύεται
να γίνονται από παιδιά χωρίς επιτήρηση.
⚫Όταν η εστία μαγειρέματος και οι συσκευές
που τροφοδοτούνται με ενέργεια
διαφορετική από την ηλεκτρική ενέργεια
βρίσκονται ταυτόχρονα σε λειτουργία, η
αρνητική πίεση στο δωμάτιο δεν πρέπει να
υπερβαίνει τα 4 Pa (4 x 10- 5 bar).
⚫ΠΡΟΕΙΔΟΠΟΙΗΣΗ: Κίνδυνος πυρκαγιάς:
Μην αποθηκεύετε αντικείμενα στις
επιφάνειες μαγειρέματος.
⚫Δεν πρέπει να χρησιμοποιείτε καθαριστικά
ατμού.
⚫ΠΟΤΕ μην προσπαθήσετε να σβήσετε μια
φωτιά με νερό, αλλά απενεργοποιήστε τη
συσκευή και, στη συνέχεια, καλύψτε τη
φλόγα π.χ. με ένα καπάκι ή με μια
πυρίμαχη κουβέρτα πυρκαγιάς.
⚫Αν το καλώδιο παροχής ρεύματος έχει
φθαρεί πρέπει να αντικατασταθεί από
τον κατασκευαστή ή τον αντιπρόσωπο
του σέρβις ή παρόμοια
εξουσιοδοτημένα πρόσωπα, προς
αποφυγή του κινδύνου.
⚫Η συσκευή αυτή μπορεί να
χρησιμοποιηθεί από παιδιά ηλικίας από
8ετών και άνω και από άτομα με
μειωμένες σωματικές, αισθητηριακές ή
διανοητικές ικανότητες ή έλλειψη
εμπειρίας και γνώσης, εφόσον βρίσκονται
υπό εποπτεία ή εάν τους έχουν δοθεί
σαφείς οδηγίες σχετικά με τη χρήση της
συσκευής με ασφαλή τρόπο και έχουν
κατανοήσει επακριβώς τους σχετικούς
κινδύνους. Τα παιδιά δεν επιτρέπεται να
παίζουν με τη συσκευή. Ο καθαρισμός
και η οι εργασίες συντήρησης από τον
χρήση απαγορεύεται να γίνονται από
παιδιά χωρίς επιτήρηση.
⚫Προειδοποίηση: Πριν από την πρόσβαση
στα τερματικά, όλα τα κυκλώματα
τροφοδοσίας πρέπει να αποσυνδεθούν.

17
ΕΓΚΑΤΑΣΤΑΣΗ (ΕΞΩΤΕΡΙΚΟΣ ΑΝΕΜΙΣΤΗΡΑΣ)
Υπάρχουν δύο τρόποι τοποθέτησης του απορροφητήρα: στον τοίχο
και κάτω από μια μονάδα τοίχου.
Πρώτος τρόπος: Τοποθέτηση στον τοίχο:
1. Οι απορροφητήρες πρέπει να τοποθετούνται σε απόσταση 65-75cm πάνω από την
επιφάνεια μαγειρέματος για καλύτερο αποτέλεσμα.
2. Για να τον τοποθετήσετε στον τοίχο, ανοίξτε 4 οπές Ø8mm σε κατάλληλο σημείο ανάλογα με
την κεντρική απόσταση της οπής στο πίσω μέρος του απορροφητήρα.
3. Τοποθετήστε το παξιμάδι στις οπές.
4. Τοποθετήστε τις βίδες στα παξιμάδια και σφίξτε.
5. Τοποθετήστε τον απορροφητήρα στις σταθερές βίδες.
Εύτερος τρόπος: Τοποθέτηση κάτω από μια μονάδα τοίχου
1. Ανοίξτε 4 τρύπες διαμέτρου 4 mm στο κάτω μέρος του κρεμαστού ντουλαπιού.
65cm
75cm
100
60 cm

18
2. Τοποθετήστε τον απορροφητήρα στο κάτω μέρος του ντουλαπιού, σφίξτε τον απορροφητήρα
με τις βίδες M4.
3. Χρησιμοποιήστε δύο βίδες 3*12 για να στερεώσετε την προσαρμοσμένη σανίδα στο κάτω
μέρος τον απορροφητήρα, ώστε να μην υπάρχει το κενό μεταξύ της πλάτης τον απορροφητήρα
και του ντουλαπιού.
Ηλεκτρική εγκατάσταση
Όλες οι εργασίες εγκατάστασης πρέπει να εκτελούνται από αρμόδιο άτομο ή εξειδικευμένο
ηλεκτρολόγο. Πριν συνδέσετε την παροχή ρεύματος, βεβαιωθείτε ότι η τάση δικτύου αντιστοιχεί
στην τάση στην πινακίδα τεχνικών χαρακτηριστικών.
Απευθείας σύνδεση
Η συσκευή πρέπει να συνδέεται απευθείας με την παροχή ρεύματος, στην οποία πρέπει να
εγκατασταθεί ένας παντοπολικός διακόπτης με ελάχιστο διάκενο 3mm μεταξύ των επαφών.
60 cm
254
516
60 cm

19
Ο εγκαταστάτης πρέπει να διασφαλίσει ότι έχει γίνει η σωστή ηλεκτρική σύνδεση και ότι
συμμορφώνεται με το διάγραμμα τοποθέτησης των καλωδίων και συνδέσεων.
Το καλώδιο δεν πρέπει να λυγίσει ή να συμπιεστεί.
Να ελέγχετε τακτικά το βύσμα τροφοδοσίας και το καλώδιο τροφοδοσίας για ζημιές. Εάν το
καλώδιο τροφοδοσίας είναι κατεστραμμένο, πρέπει να αντικατασταθεί από ένα ειδικό καλώδιο
ή συγκρότημα που διατίθεται από τον κατασκευαστή ή τον αντιπρόσωπο σέρβις του.
ΠΡΟΕΙΔΟΠΟΙΗΣΗ: Αυτή είναι μια συσκευή Κατηγορίας I και ΠΡΕΠΕΙ να
είναι γειωμένη
Αυτή η συσκευή παρέχεται με καλώδιο τροφοδοσίας 3 πυρήνων με το εξής
χρώμα:
Καφέ = L ή Φάση με ρεύμα
Μπλε = Β ή Ουδέτερο
Πράσινο και Κίτρινο = Ε ή Γείωση
ΠΡΟΕΙΔΟΠΟΙΗΣΗ:
➢Για λόγους ασφαλείας, χρησιμοποιήστε μόνο το ίδιο
μέγεθος βιδών ασφάλισης ή βιδών στερέωσης με αυτό
που συνιστάται σε αυτό το εγχειρίδιο οδηγιών.
➢Εάν δεν εγκαταστήσετε τις βίδες ασφάλισης ή δεν
στερεώσετε τη συσκευή σύμφωνα με αυτές τις οδηγίες,
μπορεί να προκληθούν ηλεκτρικοί κίνδυνοι.
Ξεκινήστε τη χρήση του απορροφητήρα σας
Ηλεκτρονικό κουμπί με πέντε πλήκτρα
Υπάρχουν πέντε κουμπιά αφής: (Χαμηλό), (Μεσαίο), (Υψηλό), (Φως),
(Ισχύς). Δείτε την παραπάνω εικόνα.
1. Μετά τη σύνδεση στο ρεύμα, η ενδεικτική λυχνία θα ανάψει, όλη η έξοδος κλείνει και ο
απορροφητήρας θα μπει σε κατάσταση αναμονής. Η ενδεικτική λυχνία θα σβήσει αυτόματα
μετά την υπενθύμιση εάν δεν γίνει καμία λειτουργία.
2. Παροχή ρεύματος σε λειτουργία: Πατήστε το κουμπί λειτουργίας μια φορά, η ενδεικτική
λυχνία του θα ανάψει, ο απορροφητήρας λειτουργεί σε χαμηλή ταχύτητα. Η ενδεικτική λυχνία
χαμηλής ταχύτητας θα είναι φωτεινή. Πατήστε ξανά το κουμπί λειτουργίας για να το
κλείσετε και η ενδεικτική λυχνία του θα σβήσει. Όλη η λειτουργία του απορροφητήρα θα
κλείσει, ο απορροφητήρας θα μπει σε κατάσταση αναμονής και θα ανακυκλωθεί ανά κύκλο.

20
Τα κουμπιά ταχύτητας και το κουμπί της λάμπας μπορεί να λειτουργήσει χωριστά και δεν
ελέγχεται από το κουμπί λειτουργίας. Πατήστε ένα κουμπί λειτουργίας, ο απορροφητήρας θα
λειτουργήσει σε αυτήν την κατάσταση λειτουργίας. Πατώντας το κουμπί λειτουργίας σε
οποιαδήποτε κατάσταση θα κλείσουν όλες οι καταστάσεις και δυνατότητες λειτουργίας.
3. Πατήστε το κουμπί της λυχνίας μια φορά, τα φώτα θα ανάψουν. Η ενδεικτική λυχνία του
κουμπιού λυχνίας και το κουμπί λειτουργίας θα ανάψουν. Πατήστε το κουμπί της
λυχνίας πάλι για να σβήσουν τα φώτα. Η ενδεικτική λυχνία του κουμπιού λυχνίας και
το κουμπί λειτουργίας θα είναι εκτός λειτουργίας. Και ανακυκλώστε με αυτό τον τρόπο.
4. Πατήστε το κουμπί (υψηλό) μία φορά, ο κινητήρας λειτουργεί με υψηλή ταχύτητα, η
ενδεικτική λυχνία του κουμπιού υψηλής ταχύτητας και κουμπί λειτουργίας θα
ακτινοβολήσει. Πατήστε το (υψηλό) κουμπί ξανά και ο κινητήρας θα σταματήσει. Η
ενδεικτική λυχνία του κουμπιού υψηλής ταχύτητας και του κουμπιού λειτουργίας θα είναι
σβηστή και θα ανακυκλώνεται ανά κύκλο.
5. Πάτα το κουμπί (Μεσαίο) μία φορά, ο κινητήρας λειτουργεί με μεσαία ταχύτητα, η
ενδεικτική λυχνία του μεσαίου κουμπιού και κουμπί λειτουργίας θα ακτινοβολήσει.
Πατήστε το (μεσαίο) κουμπί ξανά και ο κινητήρας θα σταματήσει. Η ενδεικτική λυχνία του
μεσαίου κουμπιού και του κουμπιού λειτουργίας θα είναι σβηστή και θα ανακυκλώνεται ανά
κύκλο.
6. Πάτα το κουμπί (χαμηλό) μία φορά, ο κινητήρας λειτουργεί με χαμηλή ταχύτητα, η ενδεικτική
λυχνία του κουμπιού χαμηλής ταχύτητας και κουμπί λειτουργίας θα ακτίνα. Πατήστε το
(χαμηλό) κουμπί ξανά και ο κινητήρας θα σταματήσει. Η ενδεικτική λυχνία του χαμηλού
κουμπιού και του κουμπιού λειτουργίας θα είναι σβηστή και θα ανακυκλώνεται ανά κύκλο.
Η χαμηλή ταχύτητα, η μεσαία και η υψηλή ταχύτητα δεν μπορούν να λειτουργήσουν
ταυτόχρονα. Όταν ο απορροφητήρας είναι σε υψηλή ταχύτητα, πατήστε τη χαμηλή ταχύτητα,
θα μετατραπεί σε χαμηλή ταχύτητα αμέσως, και όταν είναι σε χαμηλή ταχύτητα, πατήστε τη
μεσαία ταχύτητα, θα γυρίσει αμέσως στη μεσαία ταχύτητα και ούτω καθεξής.
ΑΝΤΙΜΕΤΩΠΙΣΗ ΠΡΟΒΛΗΜΑΤΩΝ
Σφάλμα
Πιθανή αιτία
Λύση
Ανάβει, αλλά
οκινητήρας δεν
λειτουργεί
Ο διακόπτης ανεμιστήρα απενεργοποιήθηκε
Επιλέξτε τη θέση του διακόπτη
ανεμιστήρα.
Ο διακόπτης ανεμιστήρα απέτυχε
Επικοινωνήστε με το κέντρο
εξυπηρέτησης πελατών.
Ο κινητήρας απέτυχε να λειτουργήσει
Επικοινωνήστε με το κέντρο
εξυπηρέτησης πελατών.
Το φως δεν
λειτουργεί,
οκινητήρας δεν
λειτουργεί
Οι οικιακές ασφάλειες εκτοξεύονται
Επαναφορά / αντικατάσταση
ασφαλειών.
Το καλώδιο τροφοδοσίας είναι χαλαρό ή
αποσυνδεδεμένο
Επανατοποθετήστε το καλώδιο στην
πρίζα. Ενεργοποιήστε την πρίζα.
Διαρροή λαδιού
Η βαλβίδα μονής κατεύθυνσης και η
έξοδος δεν είναι στεγανά σφραγισμένα
Βγάλτε τη βαλβίδα μονής κατεύθυνσης
και σφραγίστε την με σφραγιστικό.
Διαρροή από τη σύνδεση της καπνοδόχου
με τον απορροφητήρα
Αφαιρέστε την καμινάδα και
σφραγίστε.
Table of contents
Languages:
Other Candy Ventilation Hood manuals

Candy
Candy CFT63/1W/1 User manual

Candy
Candy CVMI900X User manual

Candy
Candy CCG6MX/A User manual

Candy
Candy CBP612/3 Technical manual

Candy
Candy CDG6CEBWIFI User manual

Candy
Candy CCE60NX/1 User manual

Candy
Candy CCT61 Technical manual

Candy
Candy CCR 617 X User manual

Candy
Candy CCL60N User manual

Candy
Candy CISD 94 User manual

Candy
Candy CIARRA User manual

Candy
Candy CBT625/2X User manual

Candy
Candy CBP612/4N User manual

Candy
Candy CCE 116X User manual

Candy
Candy CMB97SLX WIFI User manual

Candy
Candy CBP612/4GR User manual

Candy
Candy CCC 60BA/1 User manual

Candy
Candy CBT6130/3X User manual

Candy
Candy CCE119X User manual

Candy
Candy CBT9240/2X User manual