Canon Perfect Binder-F1 User manual

Please read this guide before operating this product.
Perfect Binder-F1
User's Guide
ENG
Perfect Binder_USA
Black
PANTONE
3288
4Y1-8644-010
USRMZ-0081
CANON INC.
30-2, Shimomaruko 3-chome, Ohta-ku, Tokyo 146-8501, Japan
CANON U.S.A., INC.
One Canon Park, Melville, NY 11747, U.S.A.
CANON CANADA INC.
8000 Mississauga Road Brampton ON L6Y 5Z7, Canada
CANON EUROPA N.V.
Bovenkerkerweg 59, 1185 XB Amstelveen, The Netherlands
(See http://www.canon-europe.com/ for details on your regional dealer)
CANON AUSTRALIA PTY. LTD
Building A, The Park Estate, 5 Talavera Road, Macquarie Park, NSW 2113, Australia
CANON SINGAPORE PTE. LTD.
1 Fusionopolis Place, #15-10 Galaxis, Singapore 138522
C CANON INC. 2022

How This Manual Is Organized
Before You Start Using This Machine
Basic Operations
Troubleshooting
Appendix
Chapter 1
Please read this.
Chapter 2
Chapter 3
Chapter 4
Considerable effort has been made to ensure that this manual is free of inaccuracies and omissions. However, as we are constantly improving our
products, if you need an exact specification, please contact Canon.

ii
Contents
Preface . . . . . . . . . . . . . . . . . . . . . . . . . . . . . . . . . . . . . . . . . . . . . . . . . . . . . . . . . iv
How to Use This Manual . . . . . . . . . . . . . . . . . . . . . . . . . . . . . . . . . . . . . . . . . . . iv
Symbols Used in This Manual . . . . . . . . . . . . . . . . . . . . . . . . . . . . . . . . . . . . . . iv
Trademarks . . . . . . . . . . . . . . . . . . . . . . . . . . . . . . . . . . . . . . . . . . . . . . . . . . . . iv
Legal Notices . . . . . . . . . . . . . . . . . . . . . . . . . . . . . . . . . . . . . . . . . . . . . . . . . . . . . v
Product Name . . . . . . . . . . . . . . . . . . . . . . . . . . . . . . . . . . . . . . . . . . . . . . . . . . v
Important Safety Instructions. . . . . . . . . . . . . . . . . . . . . . . . . . . . . . . . . . . . . . . .vi
Installation Precautions . . . . . . . . . . . . . . . . . . . . . . . . . . . . . . . . . . . . . . . . . . . vi
Power Supply. . . . . . . . . . . . . . . . . . . . . . . . . . . . . . . . . . . . . . . . . . . . . . . . . . vii
Shutting Down the Machine in an Emergency . . . . . . . . . . . . . . . . . . . . . . . . . viii
Handling. . . . . . . . . . . . . . . . . . . . . . . . . . . . . . . . . . . . . . . . . . . . . . . . . . . . . . . ix
Maintenance/Inspections . . . . . . . . . . . . . . . . . . . . . . . . . . . . . . . . . . . . . . . . . . x
Consumables . . . . . . . . . . . . . . . . . . . . . . . . . . . . . . . . . . . . . . . . . . . . . . . . . . . x
Other Warnings . . . . . . . . . . . . . . . . . . . . . . . . . . . . . . . . . . . . . . . . . . . . . . . . . x
Test of the Breaker . . . . . . . . . . . . . . . . . . . . . . . . . . . . . . . . . . . . . . . . . . . . . . . .xi
How to Check the Breaker . . . . . . . . . . . . . . . . . . . . . . . . . . . . . . . . . . . . . . . . . xi
Chapter 1 Before You Start Using This Machine
Parts and Their Functions. . . . . . . . . . . . . . . . . . . . . . . . . . . . . . . . . . . . . . . . . .1-2
Exterior View . . . . . . . . . . . . . . . . . . . . . . . . . . . . . . . . . . . . . . . . . . . . . . . . . .1-2
Outline of the Binder’s Mechanisms. . . . . . . . . . . . . . . . . . . . . . . . . . . . . . . . .1-3
Outline of Bookbinding Procedure . . . . . . . . . . . . . . . . . . . . . . . . . . . . . . . . . .1-4
About Optional Equipment . . . . . . . . . . . . . . . . . . . . . . . . . . . . . . . . . . . . . . . . .1-5
Main Power. . . . . . . . . . . . . . . . . . . . . . . . . . . . . . . . . . . . . . . . . . . . . . . . . . . . . .1-6
Energy Saver and Energy Save Mode. . . . . . . . . . . . . . . . . . . . . . . . . . . . . . .1-6
Chapter 2 Basic Operations
Paper and Finished Sizes . . . . . . . . . . . . . . . . . . . . . . . . . . . . . . . . . . . . . . . . . .2-2
Types of Paper that Can be Used . . . . . . . . . . . . . . . . . . . . . . . . . . . . . . . . . .2-2
Types of paper . . . . . . . . . . . . . . . . . . . . . . . . . . . . . . . . . . . . . . . . . . . . . .2-2
Paper size. . . . . . . . . . . . . . . . . . . . . . . . . . . . . . . . . . . . . . . . . . . . . . . . . .2-4
Finished Sizes of Booklets . . . . . . . . . . . . . . . . . . . . . . . . . . . . . . . . . . . . . . . .2-5
Cutting method and paper size . . . . . . . . . . . . . . . . . . . . . . . . . . . . . . . . .2-5
Examples of finished size of booklets (3-direction cutting) . . . . . . . . . . .2-10
Removing Finished Booklets . . . . . . . . . . . . . . . . . . . . . . . . . . . . . . . . . . . . . .2-11
Discharging Cuttings. . . . . . . . . . . . . . . . . . . . . . . . . . . . . . . . . . . . . . . . . . . . .2-14

iii
Discarding Cuttings . . . . . . . . . . . . . . . . . . . . . . . . . . . . . . . . . . . . . . . . . . . .2-14
Displaying the Cuttings Discharge Enabled State
(Perfect Binder Continuous Kit) . . . . . . . . . . . . . . . . . . . . . . . . . . . . . . . . . . .2-16
Replenishing Glue. . . . . . . . . . . . . . . . . . . . . . . . . . . . . . . . . . . . . . . . . . . . . . .2-17
Cleaning the Binder. . . . . . . . . . . . . . . . . . . . . . . . . . . . . . . . . . . . . . . . . . . . . .2-20
Chapter 3 Troubleshooting
Clearing Paper Jams. . . . . . . . . . . . . . . . . . . . . . . . . . . . . . . . . . . . . . . . . . . . . .3-2
Clearing a Paper Jam Inside the Top Cover . . . . . . . . . . . . . . . . . . . . . . . . . .3-2
Clearing a Paper Jam Inside the Front Cover . . . . . . . . . . . . . . . . . . . . . . . . .3-6
Clearing a Paper Jam in the Stacker (or Booklet Delivery Part) . . . . . . . . . .3-12
Unfinished Paper Auto Output . . . . . . . . . . . . . . . . . . . . . . . . . . . . . . . . . . . .3-14
Adjustments from the Printer Display. . . . . . . . . . . . . . . . . . . . . . . . . . . . . . .3-15
Alarm List. . . . . . . . . . . . . . . . . . . . . . . . . . . . . . . . . . . . . . . . . . . . . . . . . . . . . .3-20
Reducing Frequent Paper Jams or Errors . . . . . . . . . . . . . . . . . . . . . . . . . . .3-22
When Tidy Binding Is not Possible . . . . . . . . . . . . . . . . . . . . . . . . . . . . . . . . .3-24
Power does not Turn On (Breaker Test) . . . . . . . . . . . . . . . . . . . . . . . . . . . . .3-25
When the Main Power Is Turned Off During Operations
(Checking the Stacker) . . . . . . . . . . . . . . . . . . . . . . . . . . . . . . . . . . . . . . . . . . .3-26
Chapter 4 Appendix
Specifications . . . . . . . . . . . . . . . . . . . . . . . . . . . . . . . . . . . . . . . . . . . . . . . . . . .4-2
Perfect Binder-F1. . . . . . . . . . . . . . . . . . . . . . . . . . . . . . . . . . . . . . . . . . . . . . .4-2
Glossary . . . . . . . . . . . . . . . . . . . . . . . . . . . . . . . . . . . . . . . . . . . . . . . . . . . . . . . .4-4

iv
Preface
Thank you for purchasing the Canon Perfect Binder-F1.
Please read this manual thoroughly before operating the machine in order to familiarize
yourself with its capabilities, and to make the most of its many functions. After reading this
manual, store it in a safe place for future reference.
This manual describes the basic operations of this binder. For information regarding printer
settings refer to the manual for the printer.
Also, you may not be able to set or use some of the types and the functions of booklets and
paper described in this manual if the printer does not support them.
How to Use This Manual
Symbols Used in This Manual
The following symbols are used in this manual to explain procedures, restrictions,
handling precautions, and instructions that should be observed for safety.
WARNING
Indicates a warning concerning operations that may lead to death or
injury to persons if not performed correctly. In order to use the machine
safely, always pay attention to these warnings.
CAUTION
Indicates a caution concerning operations that may lead to injury to
persons, or damage to property if not performed correctly. In order to use
the machine safely, always pay attention to these cautions.
IMPORTANT
Indicates operational requirements and restrictions. Be sure to read
these items carefully in order to operate the machine correctly, and to
avoid damage to the machine.
NOTE
Indicates a clarification of an operation, or contains additional
explanations for a procedure. Reading these notes is highly
recommended.
Trademarks
Canon, and the Canon logo are trademarks of Canon Inc.
Other product and company names herein may be the trademarks of their
respective owners.

v
Legal Notices
Product Name
Safety regulations require the product’s name to be registered.
In some regions where this product is sold, the following name(s) in ( ) may be
registered instead.
Perfect Binder-F1 (F281004)

vi
Important Safety Instructions
Please read these “Important Safety Instructions” thoroughly before operating the
machine. As these instructions are intended to prevent injury to the user or other
persons or destruction of property, always pay attention to these instructions. Also,
since it may result in unexpected accidents or injuries, do not perform any operation
unless otherwise specified in the manual. Improper operation or use of this
machine could result in personal injury and/or damage requiring extensive repair
that may not be covered under your Limited Warranty.
Installation Precautions
WARNING
Do not install the machine near alcohol, paint thinner, or other flammable
substances. If flammable substances come into contact with electrical parts inside
the machine, it may result in a fire or electrical shock.
Do not place the following items on the machine. If these items come into contact
with high-voltage areas inside the machine, it may result in a fire or electrical shock.
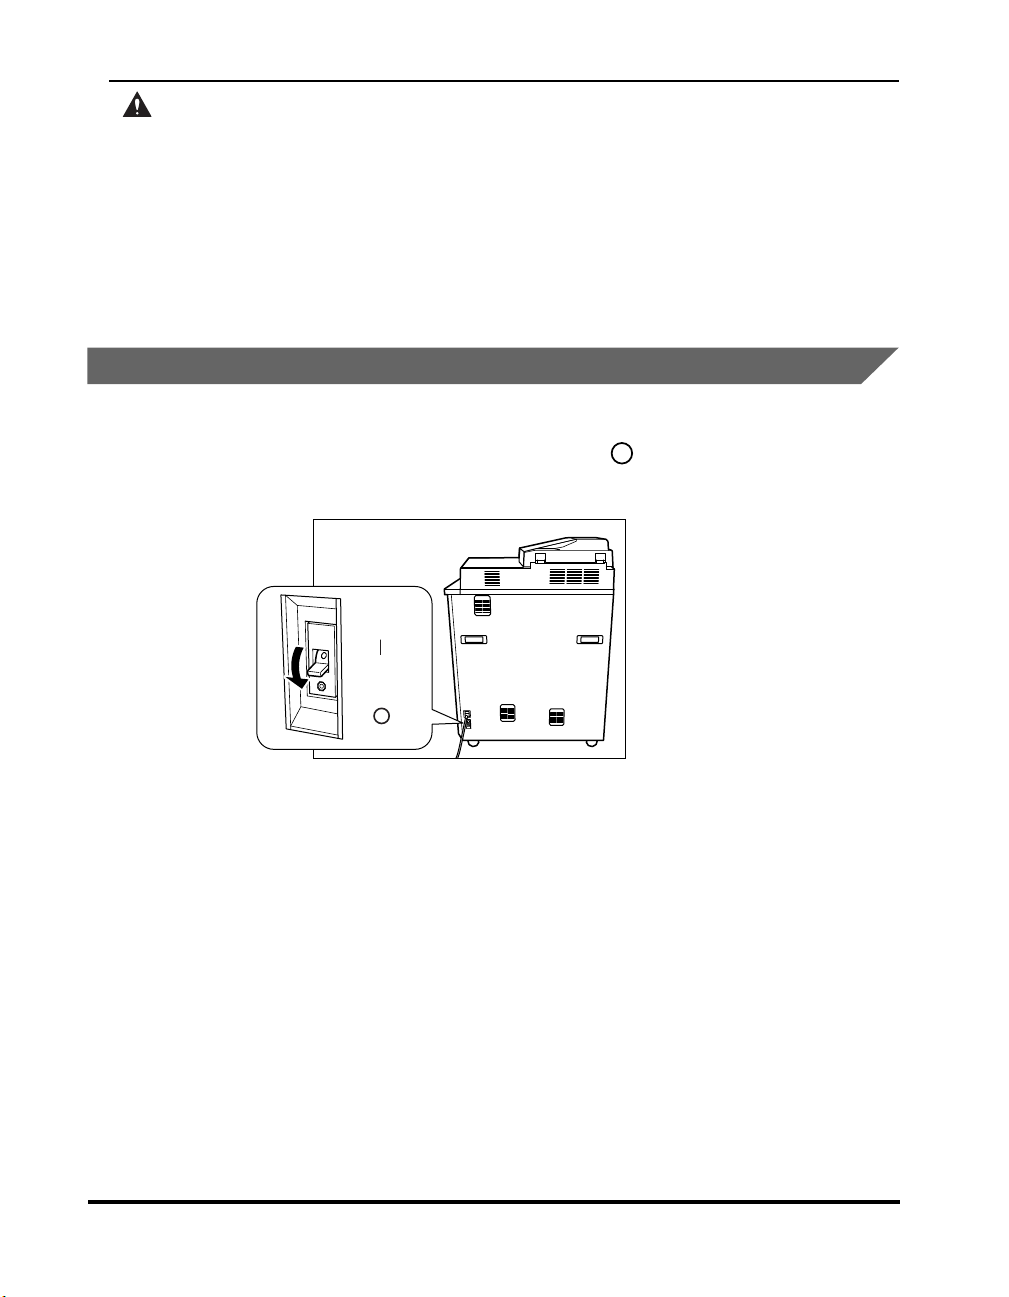
If these items are dropped or spilled into the machine, turn OFF the power switch of
the printer, and disconnect the power cord from the power outlet. Then, contact your
local retailer where you purchased the machine or an authorized Canon dealer.
- Necklaces and other metal objects
- Cups, vases, flowerpots, and other containers filled with water or liquids
CAUTION
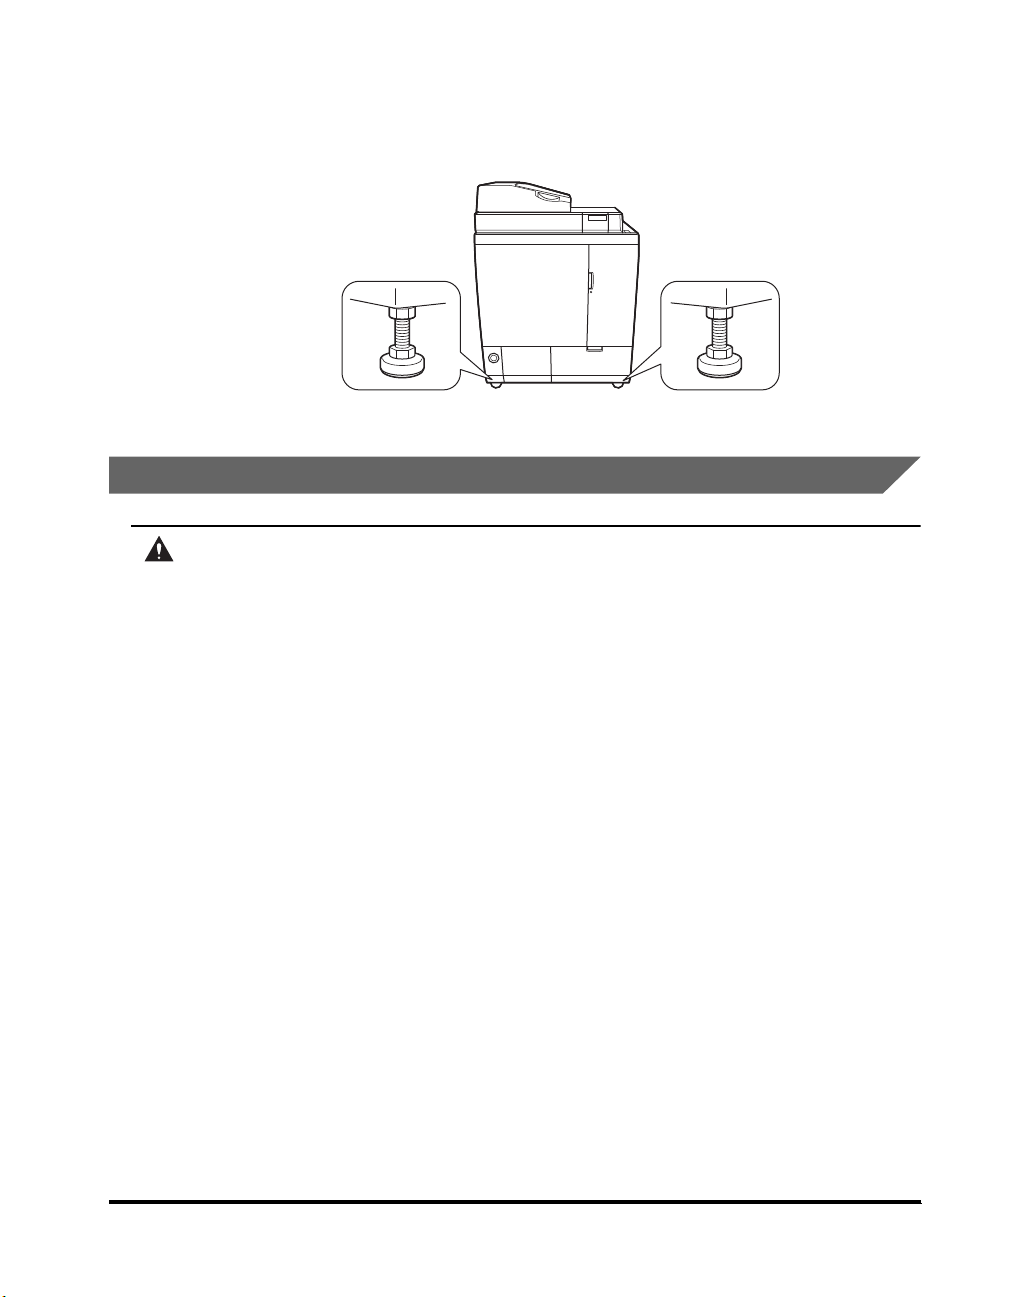
Do not install the machine in unstable locations, such as unsteady platforms or
inclined floors, or in locations subject to excessive vibrations, as this may cause the
machine to fall or tip over, resulting in personal injury.
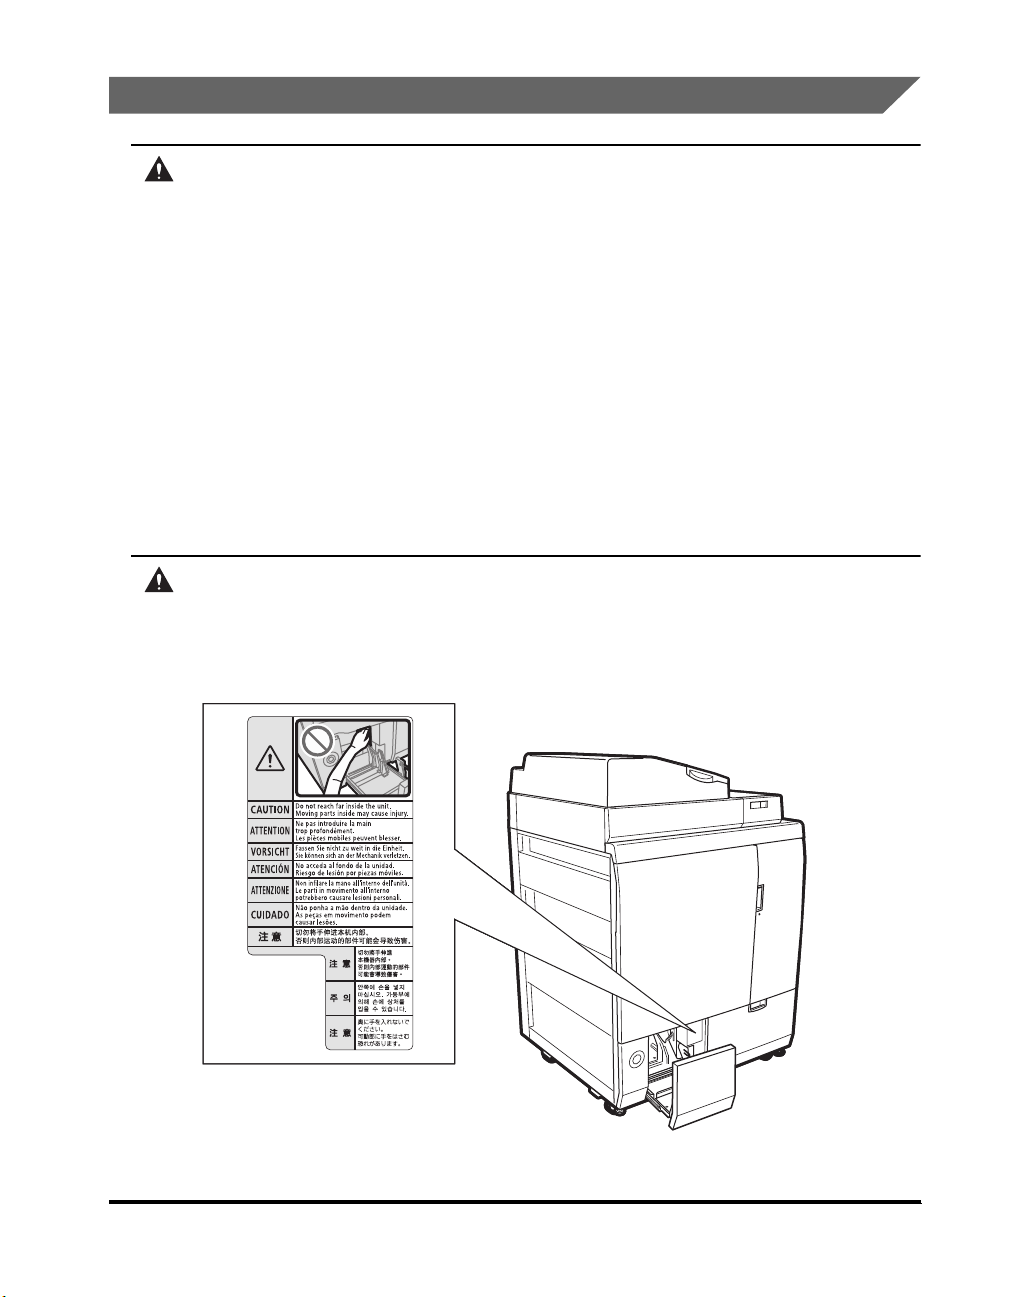
Never block the ventilation slots and louvers on the machine. These openings are
provided for proper ventilation of working parts inside the machine. Blocking these
openings can cause the machine to overheat. Never place the machine on a soft
surface, such as a sofa or rug.
The machine may emit gas when the glue is melting that could irritate the eyes, nose
and throat, however this gas is not harmful to humans. Keep the room ventilated to
maintain a comfortable work environment.
Do not install the machine in the following locations:
- A damp or dusty location
- A location near water faucets or water
- A location exposed to direct sunlight

vii
- A location subject to high temperatures
- A location near open flames
Do not remove the machine’s leveling feet after the machine has been installed, as
this may cause the machine to fall or tip over, resulting in personal injury.
Contact your local authorized Canon dealer to move the machine.
Power Supply
WARNING
Do not walk on the power cord and do not place heavy objects on it. Doing so could
damage the card after which continued use could result in a fire or electrical shock or
some other malfunction.
Do not damage or modify the power cord. Also, do not place heavy objects on the
power cord, or pull on or excessively bend it, as this could cause electrical damage
and result in a fire or electrical shock.
Do not connect or disconnect the power cord with wet hands, as this may result in
electrical shock.
Do not bundle up or tie the power cord in a knot, as this may result in a fire or
electrical shock.
Do not connect the power cord to a multiplug power strip or overload a single power
outlet with too many power cords, as this may cause a fire or electrical shock.
Keep the power cord away from a heat source; failure to do this may cause the power
cord coating to melt, resulting in a fire or electrical shock.
Always grasp the power plug when disconnecting the power cord. Pulling on the
power cord may expose or snap the core wire, or otherwise damage the power cord. If
the power cord is damaged, this could cause current to leak, resulting in a fire or
electrical shock.
The machine must be connected to a socket-outlet with grounding connection by the
provided power cord.
Do not use power cords other than the one provided, as this may result in a fire or
electrical shock.
The provided power cord is intended for use with this machine. Do not connect the
power cord to other devices.

viii
CAUTION
Use a power supply with specifications compatible with 208-240 V AC.
Make sure that the power supply and the voltage are stable.
Do not plug other equipment into the same outlet as the machine.
Leave sufficient space around the power plug so that it can be unplugged easily. If
objects are placed around the power plug, you will be unable to unplug it in an
emergency.
Disconnect the power cord for safety when the machine will not be used for an
extended period of time.
Shutting Down the Machine in an Emergency
This machine has a breaker that detects excess current or leakage current.
Make sure to turn the breaker switch to the OFF (" " side) position, and then turn
OFF the main power in an emergency.
ON
( )
OFF
( )

ix
Handling
WARNING
Do not attempt to disassemble or modify the machine.
There are high-temperature components inside the machine which may result in a
fire. Be very careful when inspecting the interior of the machine. Also, do not do any
operations not described in this manual.
If the machine makes strange noises, or gives off smoke, heat or strange smells, turn
OFF the power switch of the printer and disconnect the power cord from the power
outlet. Contact your local retailer where you purchased the machine or an authorized
Canon dealer. Using the machine under these conditions may result in a fire or
electrical shock.
Do not use highly flammable sprays near the machine. If gas from these sprays
comes into contact with the electrical components inside the machine, it may result
in fire or electrical shock.
Do not drop paper clips, staples, or other metal objects inside the machine. Also, do
not spill water or liquids inside the machine. If these items come into contact with a
high-voltage area inside the machine, it may result in a fire or electrical shock.
CAUTION
When closing the top cover, be careful not to get your fingers caught, as this may
result in personal injury.
The following caution label is attached to the machine. To use the machine safely, pay
attention indicated on the caution labels.

x
Maintenance/Inspections
WARNING
When cleaning the machine, first turn OFF the power switch of the printer and
disconnect the power cord from the power outlet. Failure to observe these steps may
result in a fire or electrical shock.
Disconnect the power cord from the power outlet regularly, and clean the area around
the base of the power plug’s metal pins and the power outlet with a dry clot to ensure
that all dust and grime is removed. If the power cord is connected for a long period of
time in a damp, dusty or smoky location, dust can build up around the power plug
and become damp. This may cause a short circuit and result in a fire.
Clean the machine using a slightly dampened cloth with a mild detergent mixed with
water. Do not use alcohol, benzene, paint thinner, or other flammable substances.
The volatile or flammable materials could come in contact with the machine’s
electronic components and cause a fire or a short circuit.
Consumables
WARNING
Do not expose the glue to fire. The glue is flammable and may cause burns or a fire.
Do not store the glue near an open flame. The glue and paper are flammable and may
cause burns or a fire.
CAUTION
Store the glue someplace that is out of the reach of children. Contact a doctor
immediately if anyone drinks the glue.
Glue that has been spilled may have some dirt in it and should not be used in the
machine.
Do not store the glue in a location that is subject to high temperatures or humidity,
doing so could cause the glue to melt.
Contact your local retailer if you need the material safety data sheet (MSDS) for the
glue. Be sure to get the latest version of the MSDS as some of the information may
have changed.
Other Warnings
If you intend to dispose of the machine, contact your local authorized Canon dealer
beforehand.

xi
Test of the Breaker
A breaker that detects over current and short circuits is equipped in order to prevent
electric shock on the product.
Perform the following procedure once a month to test the breaker.
IMPORTANT
If a breaker test reveals that it is not operating normally, contact your local
authorized Canon dealer.
How to Check the Breaker
1
Use a ballpoint pen or some other thin, pointed object to
press the breaker test button on the back of the unit.
IMPORTANT
Do not keep the test button depressed. Press and immediately release it.
NOTE
The breaker is located on the back of the unit.

xii
2
Confirm that the breaker switch toggles to the OFF ( ) side
and power turns off.
IMPORTANT
The test button is not intended to be used to turn power on and off.
If the breaker switch does not toggle to the OFF ( ) side, perform step 1 again.
If the breaker switch does not toggle to the OFF ( ) side even though you perform
step 1 two or three times, contact your local authorized Canon dealer.
3
Return the breaker switch to the ON ( ) side.
ON
( )
OFF
( )
ON
( )
OFF
( )

CHAPTER
1-1
1
Before You Start Using
This Machine
This chapter describes what you should know before using the machine, such as parts and
their functions, and how to turn on the main power.
Parts and Their Functions. . . . . . . . . . . . . . . . . . . . . . . . . . . . . . . . . . . . . . . . . . . . . . . . . 1-2
Exterior View. . . . . . . . . . . . . . . . . . . . . . . . . . . . . . . . . . . . . . . . . . . . . . . . . . . . . . . . . . . . . . . . .1-2
Outline of the Binder’s Mechanisms. . . . . . . . . . . . . . . . . . . . . . . . . . . . . . . . . . . . . . . . . . . . . . .1-3
Outline of Bookbinding Procedure. . . . . . . . . . . . . . . . . . . . . . . . . . . . . . . . . . . . . . . . . . . . . . . .1-4
About Optional Equipment . . . . . . . . . . . . . . . . . . . . . . . . . . . . . . . . . . . . . . . . . . . . . . . . 1-5
Main Power. . . . . . . . . . . . . . . . . . . . . . . . . . . . . . . . . . . . . . . . . . . . . . . . . . . . . . . . . . . .1-6
Energy Saver and Energy Save Mode. . . . . . . . . . . . . . . . . . . . . . . . . . . . . . . . . . . . . . . . . . . . .1-6

Parts and Their Functions
1-2
Before You Start Using This Machine
1
Parts and Their Functions
This section explains the names and functions of interior and exterior parts, and
operation buttons.
Exterior View
[1] Top cover
Open this cover when clearing a paper jam from
the gathering tray. (P. 3-2)
[2] Energy saver/LED
Enters and exits the energy save mode. Also, it
lights green in energy save mode and flashes
when adjustment of the glue temperature starts.
(P. 1-6)
[3] Glue unit
Open when replenishing glue. (P. 2-17)
[4] Front cover (left/right)
Open these covers when clearing a paper jam.
(P. 3-6)
[5] Front cover LED
Lights orange during a binding operation to
indicate that the front cover is locked. Goes out
to indicate that the cover is unlocked when
clearing a paper jam is required or the binder is
not doing a binding operation. (P. 3-6)
[6] Breaker
Use to do tests of the breaker. This breaker is to
completely prevent short circuits. (P. xi)
[7] Test button
Press when performing testing breaker
inspection. (P. xi)
[8] Trimmer waste unit
Open to discard cuttings. (P. 2-14)
[9] Stacker
Holds completed booklets. (P. 2-11)
[10]Stacker open button/LED
Press when removing booklets from the finished
booklet receptacle. Also, it lights green when the
stacker is open or the stacker is full, and it
flashes while preparing to open/close.
(P. 2-11)
[11]Stack LED
Lights green when the finished booklet is
stacked in the stacker and flashes while a
binding operation is in progress. (P. 2-11)
[1]
[2]
[10]
[11]
[3]
[4]
[8][9]
[5]
[7]
[6]

Parts and Their Functions 1-3
Before You Start Using This Machine
1
Outline of the Binder’s Mechanisms
[1] Gathering tray
Gathers and collates finished booklet paper.
[2] Gathering tray transfer section
Transfers paper to the gathering tray.
[3] Binder/pass-through transfer section
Transfers covers up to the binding position.
When the booklet finishing function is not being
used, passes paper over to the next device.
[4] Gluing section
Applies glue to a stack of collated paper.
[5] Binding position
Binds stack of paper with cover.
[6] Cutter section
Cuts stacks of paper and transports finished
booklets to the booklet receptacle.
[7] Stacker
Holds booklets.
[8] Trimmer waste tray
Holds paper cuttings.
[1]
[2]
[3]
[5]
[4]
[8]
[6]
[7]

Parts and Their Functions
1-4
Before You Start Using This Machine
1
Outline of Bookbinding Procedure
[1] Paper (body pages/slip sheets) is transferred to the gathering tray.
[2] Paper stack is collated by the gathering tray.
[3] Collated paper stack is transported to the gluing section.
[4] Transfers paper (covers).
[5] Glue is applied to the spine of the paper stack.
[6] Paper stack with glue applied is bound with a cover.
[7] Paper stack bound with cover is transported to the cutter section.
[8] Paper stack bound with cover is rotated and cut.
[9] Finished item is transported to the stacker.
[10]Cuttings are discharged to the trimmer waste tray.
[1]
[2]
[3]
[4][5]
[6]
[7]
[8]
[9]
[10]

About Optional Equipment 1-5
Before You Start Using This Machine
1
About Optional Equipment
This section explains the optional equipment that can be installed on the machine.
IMPORTANT
If other equipment is installed in front of the machine (figure A), then install it
approximately 2.36" (60 mm) away from the cover of the machine. Otherwise, you may
not be able to open the booklet delivery part if a paper jam occurs.
If the Perfect Binder Continuous Kit is installed, so that cuttings can be discharged
without stopping binding, then the front cover LED can indicate conditions in which
cuttings can be discharged. For details, refer to “Displaying the Cuttings Discharge
Enabled State (Perfect Binder Continuous Kit)” (
P. 2-16).
[1] Perfect Binder Continuous Kit-B1
Outputs bound booklets from the booklet
delivery part to outside the machine as needed.
[1]
Approx.
2.36" (60 mm) A

Main Power
1-6
Before You Start Using This Machine
1
Main Power
This product has the Energy saver for controlling power. A breaker is also equipped
to detect over current and short circuits.
IMPORTANT
If the product does not operate, check if the breaker is OFF. See “Power does not Turn
On (Breaker Test)” (
P. 3-25).
To completely cut off the power to the binder, disconnect the power plug.
Energy Saver and Energy Save Mode
Turning on the Energy Saver (LED lights) enters the energy save mode and cuts
electric power in order to melt glue and adjust temperature. Use the energy saver
when you want to keep only the functions that transport paper (pass-through
transfer) to the next device operational, without performing binding.
The energy save mode also is entered automatically for the amount of time set on
the printer, when a prescribed amount of time has passed following completion of a
booklet, etc. To recover from the energy save mode, press the energy saver.
■The time for entering the energy save mode following completion of a
booklet can be set from the printer.
Adjust the time for entering the energy save mode from the printer display. Consult the
manual that comes with the printer for the procedure.
■The energy saver LED indicates the following.
Lit: Glue temperature adjustment is not being done, the binder is in energy save mode.
Flashing: Glue temperature is being adjusted to the correct binding temperature.
Off: Binding is possible, the glue is at the correct temperature for binding.

Main Power 1-7
Before You Start Using This Machine
1
1
Press the energy saver to enter the energy save mode.
The energy save LED will light and glue temperature adjustment will stop.
2
To recover from the energy save mode, press the energy saver
again.
The energy save LED will flash and then go out, indicating binding can now be
done.
NOTE
When you do binding settings on the printer, the Perfect Binder-F1 automatically
recovers from the energy save mode.
Table of contents
Other Canon Binding Machine manuals
Popular Binding Machine manuals by other brands

Rollabind
Rollabind PBS 2000 operating instructions

GMP
GMP Model J2 Instructions for use

Fellowes
Fellowes Star Plus 150 instructions

Horizon International
Horizon International BQ-P6 Service manual

Esselte
Esselte LEITZ impressBIND 280 operating instructions

General Binding
General Binding 410KM operating instructions

Fellowes
Fellowes Quasar E 500 instruction manual

Fastbind
Fastbind Elite user manual

Fellowes
Fellowes Quasar E 500 instructions

Kyocera
Kyocera TJEP ULTRA GRIP 25 manual

Konica Minolta
Konica Minolta GBC PUNCH G2 Operation & instruction manual

ProfiOffice
ProfiOffice Bindstream Thermo T220 instruction manual