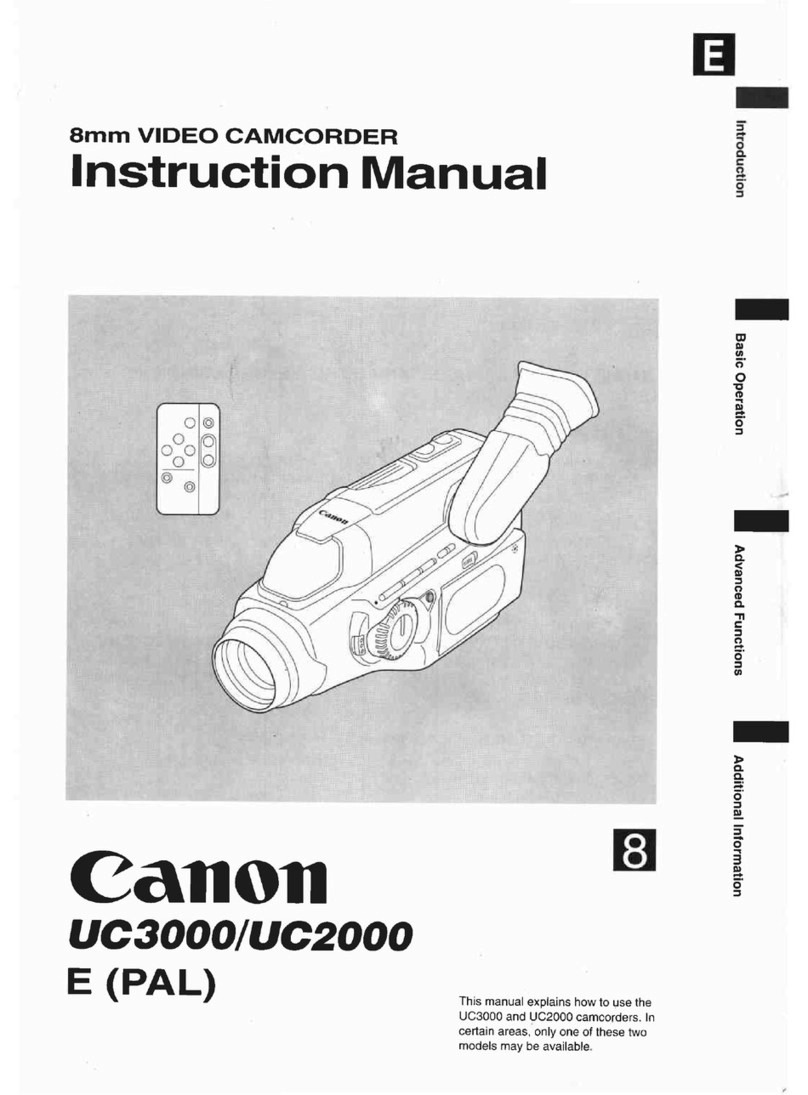
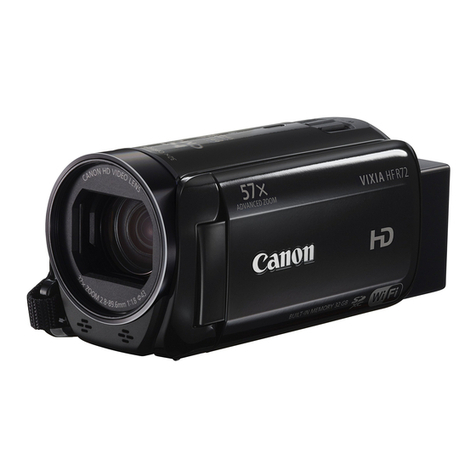
Canon UC-V30 Hi8 User manual

8mm
VIDEO
CAMCORDER
Instruction
Manual
Canon
UC-V30
\\m!UC-V20
mm
UC-V300
i
d
IUC-V200
w
DA
I
This
manua
^
explains
how
to
use
the
UC~V30Hi,
UC-V20Hi,
•
ML
UC-V300
and
UC-V200
camcorders.
In
certain
areas,
some
of
these
four
models
may
not
be
available.
H
Mastering
III
Using
the
Full
1111
Additional
the
Basics
|||
Range
of
Features
1111
Editing
Information

Introduction
Important
Usage
Instructions

f
Introduction
y
---
J
~
When
Making
Manual
Adjustments
...~
Important
Usage
Instructions
.2
Focusing.45
Thank
You
for
Choosing
a
Canon.4
Exposure
.47
Introducing
the
Camcorder.5
|
Mastering
the
Basics
|
Powering
Your
Camcorder
.6
-
Connecting
the
camera
to
a
mains
outlet.6
-
Attaching
and
charging
a
battery
pack.7
Loading
a
Cassette.9
Basic
Recording
.11
Zooming
.13
Using
the
LCD
Screen.15
Playing
Back
a
Cassette
.18
Connections
for
Playback
on
a
TV
Screen
.22
Tips
for
Making
Better
Videos
.27
Using
the
Full
Range
of
Features
-
General
—
~
Turning
the
Image
Stabilizer
On/Off
(UC-V30Hi/UC-V20Hi/UC-V300)
..29
Using
the
Wireless
Controller.30
~
For
Recording
...~
Setting
the
Date
and
Time.31
Titles
.33
Searching
and
Reviewing
While
Recording.36
Using
the
Various
Recording
Programs.38
Using
the
Digital
Effects.40
Using
the
Digital
Faders.42
Audio
Recording.44
~
For
Playback
...~
Searching
the
Tape
(Date
Search).49
Using
the
PAL
60
System.50
The
Auto
Editing
Function.51
Preparing
for
Editing
.52
Using
the
Editing
Function
for
the
First
Time.53
Choosing
a
Scene.55
Preview
and
Recording
.56
Cut-In
and
Cut-Out
Adjustments.57
Deleting
Scenes
and
Clearing
the
Program.59
Reordering
Scenes
.60
Editing
Scenes
.61
Simple
Editing
to
a
VCR.62
Additional
Information
Preparing
the
Camera
.63
Notes
on
Using
the
Batteries.65
Maintenance.69
Troubleshooting.73
The
Video
System
Diagram.77
Optional
Accessories.78
Finding
Your
Way
Around
the
Camcorder.81
Screen
Displays.84
Specifications.87
Index
.88
3
Introduction

Introduction
Thank
You
for
Choosing
a
Canon
First,
we’d
like
to
thank
you
for
purchasing
this
Canon
camcorder.
Its
advanced
technology
makes
it
very
easy
to
use
—
you
will
soon
be
making
high-quality
videos
which
will
give
you
pleasure
for
years
to
come.
To
get
the
most
out
of
your
new
camcorder,
we
recommend
that
you
read
this
manual
thoroughly
—
there
are
many
sophisticated
features
which
will
add
to
your
recording
enjoyment.
[
Getting
started
To
get
started
we
suggest
that
you
master
the
basic
operations
of
the
camcorder
first,
before
moving
on
to
use
its
full
range
of
features.
For
quick
reference
(in
addition
to
the
contents
and
index)
please
refer
to:
•
Finding
Your
Way
Around
the
Camcorder
(p.
81)
•
Screen
displays
(p.
84)
•
Troubleshooting
—
in
case
you
run
into
any
problems
(p.
73)
Note
that
capital
letters
are
used
to
refer
to
settings
that
appear
in
the
display
and
buttons
labelled
on
the
camcorder
itself
e.g.
Press
the
EJECT
A
button.
Your
camcorder
is
supplied
with
the
following
accessories:
4

Introducing
the
Camcorder
LCD
Screen
An
LCD
screen
makes
it
easy
for
you
to
shoot
colourful,
well
composed
video.
You
can
even
put
yourself
in
the
frame
and
check
the
picture
as
you
shoot.
It
is
also
great
for
playback.
Auto
Editing
Function
A
complete
set
of
editing
functions
is
built-in
—
turn
your
recordings
into
finished
productions,
with
no
extra
equipment
required.
Flexi
Zone
Control
Easier
than
manual
operation
and
more
flexible
than
automatic
functions,
Canon’s
FlexiZone
Control
is
a
completely
new
way
to
use
a
video
camera.
Image
Stabilizer
(UC-V30Hi/llC-V20Hi/UC-V300)
Images
are
stabilized
even
in
long
telephoto
shots.
22x
lens
and
100x/290x
digital
zoom
From
wide-angle
to
22x
telephoto
—
with
unparalleled
optical
quality.
The
digital
zoom
magnifies
this
up
to
lOOx
for
even
more
dramatic
results.
Also,
the
picture
magnifies
up
to
290x
with
Digital
Effects.
Close-Up
The
subject
can
be
further
digitally
enlarged
by
1.5x,
for
a
maximum
of
440x
magnification.
Hi8
(UC-V30Hi/UC-V20Hi)
Hi8
is
the
format
that
“Xzjgv
V-
most
video
professionals
rely
on
for
high
quality
1
•
and
long
recording
times.
Digital
Effects
and
Faders
#
3
®
Advanced
digital
technology
allows
you
to
add
special
effects
and
scene
transitions
to
your
recordings.
Titles
You
don’t
need
any
extra
equipment
to
add
titles
to
your
home
videos
—
the
camera
r
rOYME
^
does
it
all.
Hi-fi
stereo
sound
(UC-V30Hi/UC-V20Hi)
The
compact
integral
i
microphone
offers
the
depth
and
realism
of
AFM
in
full
dynamic
stereo.
Long
Time
Recording
You
can
record
up
to
11
hours
(12
hours
for
UC-V200)
continuously
with
two
BP-941
Battery
Packs
(optional)
on
the
CH-900
Dual
Battery
Charger/Holder
(optional)
.
5
Introduction

Mastering
the
Basics
Powering
Your
Camcorder
Before
operating
your
camera,
you
will
need
to
use
the
power
adapter
to:
provide
power
from
a
mains
outlet
or
charge
a
battery
pack
Notes:
•
The
power
adapter
converts
current
from
a
household
power
outlet
(110-240
V
AC,
50/60
Hz)
to
the
DC
current
used
by
your
camera.
•
If
the
adapter
is
used
next
to
a
TV,
it
may
cause
the
TV
to
emit
noise
—
move
the
adapter
away
from
the
TV
or
the
aerial
cable.
Use
the
power
adapter
to
provide
your
camera
with
instant
power
from
a
mains
outlet.
1.
Connect
the
power
adapter
to
the
camera.
2.
Plug
the
adapter
into
a
mains
outlet.
3.
Remove
the
power
adapter
after
use.
•
Always
turn
the
camera
off
before
removing
the
power
source.
CA-550
Compact
Power
Adapter
Specifications
Power
supply
110-240
VAC,
50/60
Hz
Power
consumption
20
W
Rated
output
8.4
V.
1.5
A
DC
Operating
temperature
range
0°
-
40°C
(32
-
104°F)
Dimensions
64
x
130
x
43.5
mm
(2
'/2
x
5
]
/8
x
1
3
/4
in)
Weight
305
g
(10
3
/4
oz)
UK
model:
370
g
(13
oz)
Australia
model:
310
g
(10
7
/s
oz)
Weight
and
dimensions
are
approximate.
Errors
and
omissions
excepted.
Subject
to
change
without
notice.
CA-550
identification
plate
is
located
on
the
bottom.
6

Your
battery
pack
was
partially
charged
before
it
left
the
factory.
It
should
have
enough
power
for
you
to
check
that
your
camera
is
working
properly.
However,
you
must
charge
the
battery
pack
fully
if
you
want
it
to
power
the
camera
for
more
than
a
few
minutes.
It
is
recommended
to
set
the
POWER
switch
to
OFF
when
charging
a
battery
pack.
However,
if
the
POWER
switch
is
set
to
CAMERA
and
the
camcorder
stays
in
record
pause
mode
for
over
five
minutes,
it
will
automatically
turn
itself
off
and
start
charging
the
battery
pack.
If
a
fully
charged
battery
pack
is
removed
and
then
re-attached,
it
will
need
another
few
minutes
of
charging
to
reach
fully
charged
status
again.
Use
only
the
CA-550
Compact
Power
Adapter
to
charge
battery
packs.
1.
Attach
the
battery
pack
to
the
camera.
•
Align
the
triangle
on
the
battery
pack
with
the
guide
line
on
the
camera.
•
Slide
it
in
the
direction
of
the
arrow
until
it
clicks
into
place.
•
Be
sure
to
test
the
battery
pack
to
check
that
it
is
properly
attached.
2.
Connect
the
power
adapter
to
the
camera.
3.
Plug
the
power
adapter
into
a
mains
outlet.
•
The
CHARGE
indicator
flashes
to
show
that
charging
is
in
progress.
Single
flashes
mean
that
the
battery
pack
is
less
than
50%
charged.
Double
flashes
mean
that
it
is
between
50%
and
75%
charged.
Triple
flashes
mean
that
it
is
more
than
75%
charged.
•
The
indicator
glows
steadily
when
the
battery
pack
is
fully
charged.
Battery
pack
usage
time
will
be
further
extended
if
you
continue
charging
for
an
hour
after
the
indicator
starts
glowing
steadily.
•
If
the
indicator
flashes
once
every
two
seconds,
the
battery
pack
could
be
defective.
•
The
indicator
will
not
light
at
all
when
the
power
adapter
is
defective.
Mastering
the
Basics

Mastering
the
Basics
4.
Remove
the
battery
pack
after
use.
•
Press
and
hold
the
BATTERY
RELEASE
button.
•
Always
tum
the
camera
off
before
removing
the
power
source.
Notes:
•
Charge
the
battery
pack
in
an
ambient
temperature
of
10°C
to
30°C.
If
the
battery
pack
is
charged
at
low
or
high
temperatures,
charging
takes
longer.
If
the
ambient
temperature
is
0°C
or
lower
or
40°C
or
higher,
the
battery
pack
sometimes
cannot
be
charged.
Also,
the
time
that
it
can
be
used
is
drastically
shortened.
•
The
battery
pack
warms
up
after
it
has
been
used
or
charged.
The
battery
pack
sometimes
cannot
be
charged
if
it
is
warm.
•
You
can
find
detailed
notes
for
using
the
batteries
in
the
“Notes
on
Using
the
Batteries”
on
p.
65.
These
notes
include
charging
and
recording
times
and
how
to
install
the
backup
battery.
8

Loading
a
Cassette
Only
use
videocassettes
marked
with
an
0
(or
Hi0
for
UC-V30Hi/
UC-V20Hi).
3.
Load
or
unload
the
cassette.
•
Insert
the
cassette
gently
with
the
window
facing
out
and
the
erasure
prevention
tab
to
the
top
left.
•
Remove
the
cassette
by
pulling
it
straight
out.
4.
Press
the
[push)
mark
on
the
compartment
until
it
clicks,
and
wait
for
it
to
close.
•
Press
the
IpushI
mark
horizontally.
Loading
and
unloading
_
1.
Make
sure
that
you
have
attached
or
connected
a
power
source.
2.
Press
the
EJECT
±
button
and
wait
for
the
cassette
compartment
to
open.
Notes:
•
See
p.
10
for
information
on
protecting
your
recordings
from
accidental
erasure.
•
If
you
turn
the
camera
on
with
no
cassette
loaded,
flashes
in
the
display.
•
After
loading
a
cassette,
use
record
search
(p.
36)
to
find
the
point
where
you
want
to
start
recording.
•
Do
not
interfere
with
the
cassette
compartment
while
it
is
opening
or
closing
automatically.
•
Do
not
leave
the
cassette
in
the
camera
after
use
—
return
it
to
its
case
and
store
it
in
a
cool,
clean,
dry
place.
9
Mastering
the
Basics

Mastering
the
Basics
Protecting
tapes
from
accidental
erasure
To
protect
your
recordings
from
accidental
erasure,
slide
the
red
switch
on
the
cassette
so
that
it
covers
the
hole.
(This
switch
position
is
usually
labelled
SAVE
or
ERASE
OFF.)
If
you
load
this
cassette
and
power
on
the
camera,
“I^1”
flashes
in
the
display.
If
you
want
to
record
on
the
cassette
again,
slide
the
red
switch
back
so
the
hole
is
open.
(This
position
is
usually
labeled
REC
or
ERASE
ON.)
Handling
cassettes
•
To
protect
the
tape
heads,
transfer
cassettes
directly
from
the
tape
case
to
the
camcorder
-
do
not
open
the
tape
protect
cover
or
touch
the
tape
itself.
•
Do
not
use
cassettes
where
the
tape
has
been
damaged
or
rejoined
-
they
may
damage
the
camcorder.
•
Do
not
insert
anything
into
the
small
holes
on
the
cassette
or
cover
them
with
cellophane
tape.
•
Handle
cassettes
with
care
-
dropping
them
or
exposing
them
to
external
shocks
may
cause
internal
damage.
•
Store
cassettes
in
the
provided
case,
rewinding
them
to
the
start
of
the
tape
first,
and
then
storing
them
upright.
\
About
Hi8
(for
UC-V30Hi/UC-V20Hi)
To
record
or
play
back
in
the
Hi8
format,
you
need
both
a
Hi8
camcorder
and
a
Hi8
cassette
(you
can
use
either
Metal-P
or
Metal-E
Hi8
cassettes).
A
Hi8
camcorder
can
record
or
play
back
in
either
the
Hi8
format
or
standard
8mm
format,
depending
on
the
tape
used.
The
superior
quality
of
Hi8
can
best
be
appreciated
on
a
TV
which
has
an
S-video
input
terminal.
10

Before
you
start
recording
ZD
Have
you
completed
the
following
steps?
•
Attached
a
power
source
(p.
6).
•
Loaded
a
cassette
(p.
9).
•
Adjusted
the
LCD
screen
(p.
15)
or
viewfinder,
fastened
the
grip
belt
and
taken
off
the
lens
cap
(p.
63).
You
may
also
want
to
install
the
backup
battery
(p.
67)
in
order
to
set
the
date
and
time
display
(p.
31).
To
record
1.
Press
down
and
turn
the
POWER
switch
to
CAMERA.
•
PAUSE
appears
in
the
display
—
the
camera
is
now
in
“record
pause
mode.”
2.
Press
the
red
start/stop
button
to
begin
recording.
•
The
tally
lamp
flashes
and
REC
appears
in
the
display.
3.
Press
the
start/stop
button
again
to
pause
recording.
•
The
camera
returns
to
record
pause
mode
and
PAUSE
reappears
in
the
display.
•
You
can
stop
and
restart
recording
as
often
as
you
like
by
pressing
the
start/stop
button.
•
The
camera
will
turn
itself
off
if
you
leave
it
in
record
pause
mode
for
more
than
about
five
minutes.
To
return
to
record
pause
mode,
repush
the
start/stop
button,
or
set
the
power
switch
to
OFF
and
then
back
to
CAMERA.
11
Mastering
the
Basics

Mastering
the
Basics
When
you
have
finished
recording
•
Replace
the
lens
cap.
•
Return
the
viewfinder
to
its
retracted
and
lowered
position.
•
Close
the
LCD
panel.
•
Unload
the
cassette.
•
Set
the
POWER
switch
to
OFF.
•
Disconnect
the
power
source.
Notes:
•
To
check
that
the
camera
is
recording
correctly,
make
a
test
recording
first.
•
Before
making
important
recordings,
clean
the
video
heads
using
a
Canon
CC-8
Video
Head
Cleaning
Cassette
or
a
commercially
available
8mm
video
head
cleaning
cassette.
•
You
cannot
monitor
the
sound
from
the
speaker
when
recording.
•
For
tips
on
how
to
make
better
videos,
see
page
27.
I
Recording
with
the
LCD
screen
In
place
of
using
the
viewfinder,
you
can
also
monitor
recording
using
the
LCD
screen.
When
you
open
the
LCD
panel,
the
viewfinder
turns
off
automatically.
For
more
details
please
refer
to
“Using
the
LCD
Screen”
(p.
15).
Notes:
•
You
cannot
monitor
the
sound
from
the
speaker
during
recording.
•
The
LCD
screen
uses
a
lot
of
power,
so
possible
recording
time
will
be
less
than
if
you
were
to
use
the
viewfinder.
•
Be
sure
to
close
the
LCD
panel
flush
to
the
camera
body
when
you
have
finished
recording
with
the
LCD
screen.
12

Zooming
The
camera’s
22x
zoom
lens
allows
you
to
choose
the
best
picture
angle
for
each
scene:
•
Turn
the
zoom
control
towards
W
to
zoom
out
to
wide-angle.
•
Turn
it
towards
T
to
zoom
in
to
telephoto.
22x
optical
zoom
You
can
also
control
the
speed
of
zooming:
•
Move
the
control
slightly
to
zoom
slowly.
•
Turn
it
farther
to
zoom
more
quickly.
(The
farther
you
turn
the
zoom
control,
the
faster
the
zoom
speed.)
The
T
and
W
buttons
on
the
wireless
controller
adjust
the
picture
angle,
but
not
the
zoom
speed.
When
you
operate
the
zoom
control,
the
zoom
bar
indicating
the
zooming
position
appears
in
the
display,
and
after
about
five
seconds,
the
display
disappears.
lOOx
digital
zoom
Turn
the
zoom
control
towards
T
until
D.ZOOM
appears
in
the
display,
to
magnify
the
camera’s
zoom
range
by
4.5x.
The
zoom
control
continues
to
work
as
usual.
You
can
freely
zoom
in
and
out
between
lx
and
lOOx
magnification
—
the
camera
automatically
switches
between
optical
zooming
(up
to
22x)
and
digital
zooming
(22x
to
lOOx).
D.ZOOM
disappears
from
the
display
when
you
return
to
optical
zooming.
13
Mastering
the
Basics

Mastering
the
Basics
Close-up
cio*e-u»»
If
you
press
the
CLOSE-UP
button,
CLOSE-UP
appears
in
the
display
and
the
subject
is
enlarged
by
1.5x.
It
digitally
enlarges
the
central
portion
of
the
image.
Pressing
the
CLOSE-UP
button
again
returns
the
subject
to
its
original
size.
CLOSE-UP
can
be
combined
with
the
Extra
Long
Digital
Zoom
(p.
40)
to
produce
a
magnification
of
440x.
Notes:
•
When
you
want
to
get
as
close
as
possible
to
your
subject,
keep
the
zoom
at
the
wide-angle
position.
You
can
focus
on
a
subject
as
close
as
1
cm
(3/8
in).
•
Image
resolution
is
lower
when
the
magnification
is
greater
than
22x.
•
Optical
Zooming
and
Digital
Zooming
can
also
be
operated
from
the
wireless
controller.
However,
CLOSE-UP
and
Extra
Long
Digital
Zoom
(p.
40)
must
first
be
selected
from
the
camcorder
body.
14

Using
the
LCD
Screen
Open
the
LCD
screen
Push
the
OPEN
button
and
open
the
panel
by
pulling
it
away
from
the
camera.
This
automatically
switches
the
LCD
screen
on
and
the
viewfinder
off.
When
you
close
the
LCD
panel,
the
LCD
screen
automatically
switches
off
and
the
viewfinder
switches
back
on.
Changing
the
angle
of
the
LCD
screen
First
open
out
the
LCD
panel
at
a
right
angle
(90°)
to
the
camera.
You
can
now
choose
the
angle
of
the
panel
that
suits
you
best
by
rotating
it
about
this
axis.
If
you
rotate
the
panel
around
to
180°
so
that
it
faces
the
direction
of
the
lens
you
can
include
yourself
in
the
picture,
while
monitoring
the
shot
on
the
LCD
screen
(p.
17).
The
viewfinder
is
also
activated
when
the
panel
is
in
this
position.
From
this
position
you
may
also
push
the
panel
flat
against
the
camera
until
it
is
flush
with
the
side,
with
the
screen
facing
outwards.
15
Mastering
the
Basics

Mastering
the
Basics
Notes:
•
Avoid
touching
the
LCD
screen
when
moving
the
LCD
panel.
•
Do
not
hold
the
camera
by
the
LCD
panel
or
the
viewfinder.
•
Make
sure
you
open
the
LCD
panel
at
90°,
before
attempting
to
rotate
it
backwards
or
forwards.
•
Always
rotate
the
LCD
panel
vertically
into
place,
before
closing
it
or
pushing
it
flat
against
the
side
of
the
camera.
•
Be
careful
not
to
leave
the
LCD,
viewfinder
or
lens
exposed
to
direct
sunlight
outdoors
or
in
a
window.
Doing
so
could
cause
damage.
•
Bright
light
falling
on
the
LCD
screen
may
cause
glare
that
makes
it
difficult
to
view
the
image.
In
this
case,
switch
to
using
the
viewfinder.
You
are
also
able
to
adjust
the
brightness
of
the
screen
(see
“Adjusting
the
LCD
screen”
below).
The
camera
automatically
brightens
the
backlight
of
the
screen
when
recording
outdoors.
j
Adjusting
the
LCD
screen
You
can
adjust
the
brightness
of
the
LCD
screen.
Adjust
the
level
using
the
BRIGHT
buttons
on
the
end
of
the
LCD
panel.
A
bar
showing
the
level
appears
in
the
display.
•
Press
the
+
button
to
make
the
display
brighter.
•
Press
the
-
button
to
make
the
display
darker.
Notes:
•
The
bar
showing
the
brightness
disappears
from
the
display
in
a
few
seconds.
•
The
brightness
of
the
LCD
screen
does
not
affect
that
of
the
recorded
images
or
the
viewfinder.
About
the
LCD
Screen
The
LCD
screen
built
into
this
camcorder
is
a
high
precision
product.
However,
small
black
dots
or
bright
points
of
light
(red,
blue
or
green)
may
appear
constantly
on
the
LCD
screen.
This
is
not
a
malfunction
of
the
LCD
screen
and
they
are
not
recorded
on
the
tape.
(Effective
dots:
more
than
99.99%)
16

[
Allowing
the
subject
to
monitor
recording
When
you
turn
the
LCD
panel
so
that
it
faces
the
opposite
direction
(see
diagram
below),
you
can
watch
yourself
during
recording
or
let
your
subject
monitor
recording.
1.
Open
the
LCD
panel
(p.
15).
2.
Rotate
the
LCD
panel
180°
until
the
screen
faces
the
same
direction
as
the
lens.
•
Adjust
the
angle
so
that
you
can
view
it
easily.
*
The
viewfinder
is
also
activated
when
the
LCD
is
in
this
position.
3.
Use
the
wireless
controller
to
start
and
stop
recording
(p.
30).
Notes:
•
When
you
flip
over
the
LCD
panel,
the
display
automatically
changes
to
a
mirror-image.
•
Screen
displays
are
reversed,
but
titles/dates
are
correctly
recorded
without
affecting
the
recording.
•
It
is
also
possible
to
monitor
the
shot
through
the
viewfinder
while
the
subject
monitors
the
shot
in
the
LCD
screen.
17
Mastering
the
Basics

Mastering
the
Basics
Playing
Back
a
Cassette
plays
back
the
soundtrack
via
the
built-in
speaker
(p.
20).
To
play
back
your
recordings
on
a
TV,
see
p.
22.
To
use
the
wireless
controller,
see
p.
30.
Note:
•
To
avoid
accidental
recording,
make
sure
that
you
slide
the
tab
on
the
cassette
so
that
it
exposes
the
hole
(the
switch
position
is
usually
labelled
SAVE
or
ERASE
OFF).
1.
Attach
a
power
source,
press
down
and
turn
the
POWER
switch
to
PLAY.
2.
Load
the
cassette.
3.
Press
the
►
(play)
button
to
start
playback.
•
To
end
playback,
press
down
the
■
(stop)
button.
•
To
wind
the
tape
forwards,
stop
playback
and
press
down
the
►►
(fast
forward)
button.
•
To
wind
the
tape
backwards,
stop
playback
and
press
down
the
◄◄
(rewind)
button.
•
If
the
playback
picture
is
rough,
clean
the
video
heads
using
a
Canon
CC-8
Video
Head
Cleaning
Cassette
or
a
commercially
available
8mm
video
head
cleaning
cassette.
18

[
Special
playback
Still
playback
To
view
the
video
as
a
still
picture,
press
the
start/stop
button
on
the
body
of
the
camera
during
normal
playback
(or
press
the
II
(pause)
button
on
the
wireless
controller).
Press
the
same
button
again
to
resume
normal
playback.
The
camera
automatically
goes
into
stop
mode
after
about
five
minutes’
still
playback.
Fast
forward
playback
To
play
back
the
recording
at
9
times
the
normal
speed
(6
times
normal
speed
when
the
LCD
panel
is
opened),
press
and
hold
the
►►
(fast
forward)
button
during
normal
playback.
Rewind
playback
To
play
back
in
reverse
at
7
times
the
normal
speed
(4
times
normal
speed
when
the
LCD
panel
is
opened),
press
and
hold
the
(rewind)
button
during
normal
playback.
High-speed
search
To
play
back
the
recording
at
about
9
times
normal
speed,
press
and
hold
the
►►
(fast
forward)
button
during
normal
fast
forward.
For
reverse
playback
at
about
7
times
normal
speed,
press
and
hold
the
(rewind)
button
during
normal
rewind.
Notes:
•
The
LCD
screen
is
free
from
noise
bars
during
still
playback,
fast
forward
playback
and
rewind
playback
(Clear
Search).
Some
flicker
or
distortion
may
appear
on
the
screen
of
the
viewfinder
or
a
connected
television.
With
the
LCD
closed
during
special
playback,
some
flicker
or
distortion
may
appear
on
the
screen
if
the
LCD
is
then
opened.
The
soundtrack
cannot
be
heard
during
special
playback.
•
During
still
playback,
fast
action
scenes
may
appear
blurred.
•
You
can
use
the
wireless
controller’s
ON
SCREEN
button
to
turn
the
on-screen
displays
on/off
(p.
84).
19
Mastering
the
Basics

Mastering
the
Basics
Built-in
speaker
The
camera
has
a
built-in
speaker
so
you
can
review
the
soundtrack
alongside
the
picture
during
playback.
Adjust
the
speaker
volume
by
pressing
the
FlexiZone
controller.
•
A
bar
appears
in
the
display
temporarily
to
indicate
the
current
volume.
•
Press
upwards
to
increase
the
volume.
Press
downwards
to
V0L
decrease
the
volume.
•
You
can
also
use
the
A/T
keys
on
the
wireless
controller
to
adjust
speaker
volume.
Note:
•
When
the
LCD
panel
is
closed,
the
speaker
does
not
work.
20
This manual suits for next models
3
Table of contents
Other Canon Camcorder manuals

Canon
Canon VIXIA HF M300 User manual

Canon
Canon DC100 - WL Remote Control User manual

Canon
Canon ZR70MC User manual

Canon
Canon DC310 User manual

Canon
Canon LEGRIA HFM40 User manual

Canon
Canon LEGRIA HF G26 User manual

Canon
Canon LEGRIA HV40 User manual

Canon
Canon 3249B001 User manual

Canon
Canon FS10 User manual

Canon
Canon ELURA 50 User manual

Canon
Canon GL-2 User manual

Canon
Canon Pixma G1000 series User manual

Canon
Canon EOS C100 User manual

Canon
Canon LEGRIA GX10 User manual

Canon
Canon MD120 User manual

Canon
Canon ZR500 User manual

Canon
Canon Optura Pi User manual

Canon
Canon HG-10 User manual

Canon
Canon ZR70 MC A User manual

Canon
Canon VIXIA HF G21 User manual