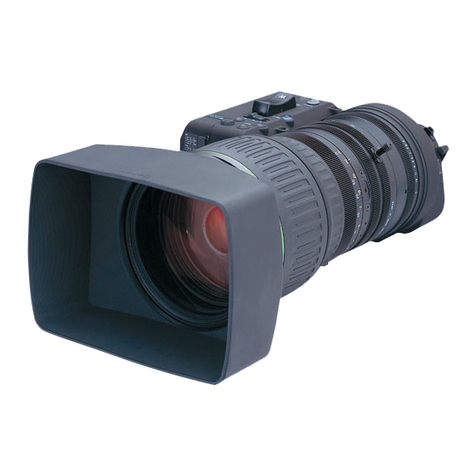
このたびはキヤノン 3x ワイドズームレンズをお買い求めいただきまして、誠にありがとうございます。
この製品は、XL マウントシステムに対応したビデオカメラに取り付けてご使用いただける高性能ワイドズームレ
ンズで、35mm フイルム換算で 24mm という超広角で、しかも高解像度、高画質を実現しています。
本製品をご使用になる際は、お手持ちのビデオカメラが XL マウントシステムに対応していることをご確認のうえ、
ご使用ください(XL マウントシステム対応の機器には、 マークが表示されています)。
安全上のご注意
●ご使用の前にこの「安全上のご注意」をよくお読みのうえ、正しくお使いください。
●絵表示について
この使用説明書および製品への表示では、製品を正しくお使いいただき、あなたや他の人々への危害や財産へ
の損害を未然に防止するために、いろいろな絵表示をしています。その内容と意味は次のようになっています。
内容をよく理解してから本文をお読みください。
この表示を無視して、誤った取り扱いをすると、人が重傷を負う可能性が想定される内容
および物的損害のみの発生が想定される内容です。必ずお守りください。
●ズームレンズを確実にビデオカメラに取り付けてください。
緩んで脱落して割れると、ガラスの破片でけがの原因となることがあります。
各部の名称
1レンズフード
2フード固定ネジ
3ズームリング
4ND フィルター挿脱切り換えスイッチ
5XL マウント
6電子接点
7赤指標
8フォーカスモード切り換えスイッチ
9プッシュ AF ボタン
!0 マニュアルフォーカスリング
使用方法
1.レンズの着脱方法
[取り付けかた]
1)レンズの底ぶたを、反時計方向に回してはずします(図 A)。
2)ビデオカメラ側の指標とレンズの赤指標を合わせて、カチッと音がするまでレンズ全体を時計方向に回します
(図 B)。
3)レンズキャップをはずします(図 C)。
[取りはずしかた]
レンズを取りはずすときは、ビデオカメラのレンズ取りはずしスイッチを押しながら、レンズを反時計方向に
回してください(図 D)。
・本レンズの取りはずしかたについて、詳しくは、お手持ちのビデオカメラの使用説明書でご確認ください。
2.レンズフードの取り付けかた
1)レンズ先端部にフードをはめ込み、フード上にある Canon の文字が真上にくるまで時計方向に回します(図 E)。
2)フード固定ネジを締めて、フードを固定します(図 F)。
・レンズの保護および有害光線をカットするために、撮影時には必ずレンズフードを取り付けてください。
3.マニュアルフォーカスリングについて
被写体に向かって、右に回転させると、最短撮影距離方向/左に回転させると、無限遠方向にピントが合います。
・マニュアルフォーカスリングは、速く回転させると、高速でピントの調節ができます。逆に、よりゆっくり
回転させると、微妙な調節をすることができます。
・オートフォーカスのままマニュアルフォーカスリングを操作すると、操作している間、リングでピントの調
節ができます。
4.ズームリングについて
被写体に向かって、右に回転させると、広角側(ズームアウト)/左に回転させると、望遠側(ズームイン)
へのズームになります。
・ズームリングは、速く回すと高速ズームになります。逆に、よりゆっくり回転させると、微妙な調節をする
ことができます。
5.その他の機能について
フォーカスモード切り換えスイッチ
スイッチを前にスライドさせて「AF」にすると、オートフォーカスになり、後ろにスライドさせて「M」にす
ると、マニュアルフォーカスになります。
プッシュ AF ボタン
フォーカスモード切り換えスイッチがマニュアルのときに、プッシュ AF ボタンを押している間は、オートフォー
カスになります。
ND フィルター挿脱切り換えスイッチ
ND フィルターを挿入するには、ND フィルター切り換えスイッチを後ろ(ON)にスライドさせます。
ND フィルターをはずすには、ND フィルター切り換えスイッチを前(OFF)にスライドさせます。
・ ND フィルターを挿入/はずす際は、カチッと音がするまでスイッチを確実にスライドさせてください。
レンズの汚れやゴミに注意してください
本機は、超広角 3×ズーム(35mm フイルム換算で 24 〜 72mm)を実現しています。そのため、被写界深度が従来
のビデオレンズよりもはるかに深く、レンズの表面に汚れやゴミが付いたままで撮影すると(とくに小絞り時)、
汚れ、ゴミなどが映りこむことがあります。
このようなことを避けるためには、a)ビデオカメラの指示に従って、明るい場面では内蔵 ND フィルターを使用
する、b)さらに明るい場面では ND8 以上の ND フィルターをレンズ前部に装着する、などにより絞りが小絞りに
ならないように撮影することをおすすめします。
ND フィルターなどでもこのようなことが避けられない場合、ブロアーなどでレンズのゴミを取り除いてから、付
属のレンズクロスでレンズ表面を傷つけないように、ていねいに拭き取ってください。
また、レンズ面の汚れやゴミはオートフォーカスの正常な動作を妨げることもあります。
レンズ表面はつねにきれいに保つようにしてください。
ご注意
●レンズを保管する場合は
・必ず底ぶたとレンズキャップを付けてください。
・直射日光があたる場所、熱器具の近く、夏期の密閉した車内のような高温下に放置しないでください。変形、
変色の原因となります。
●レンズの電子接点に汚れ、傷、指紋などが付くと接触不良や腐食の原因となりますのでご注意ください。
●強い振動や衝撃を与えないでください。
●本製品は絶対に分解や改造をしないでください。
●レンズ前部に装着するフィルターは1枚にしてください。フィルターを 2 枚以上重ねて使用すると、ケラレの
原因となります。
●レンズフード内側植毛部は構造上傷つきやすくなっています。強く押したり、こすったり、汚したりしないよ
うに、ご注意ください。
●エクステンダー XL1.6×について
本機は超広角レンズです。超広角レンズとしての光学性能を発揮させるために、エクステンダー XL1.6×の装
着はおすすめできません。
保証書
本製品には保証書が添付されています。必要事項が記入されていることをお確かめのうえ、大切に保存してく
ださい。
注意
Nous vous remercions d’avoir acheté l’objectif grand-angle 3×de Canon. Cet objectif est un objectif
zoom grand-angle pour camescopes équipés d’un système de monture XL. En terme de films 35
mm, il équivaut à un objectif extra grand-angle de 24 mm qui produit des images de haute qualité et
haute résolution. Avant d’installer cet objectif sur le camescope, vérifier que celle-ci est compatible
avec le système de Monture XL (le label est indiqué sur le camescope).
Nomenclature
1Pare-soleil
2Vis de fixation du pare-soleil
3Bague de zoom
4Commande de filtre ND
5Monture XL
6Contacts électroniques
7Point rouge (point de positionnement au montage)
8Sélecteur de mise au point auto/manuelle
9Bouton-poussoir de mise au point AF
!0 Bague de mise au point manuelle
Mode d’emploi
1. Installation et retrait de l’objectif
Installation de l’objectif:
1) Dévisser le capuchon arrière de l’objectif en tournant dans le sens contraire au sens des aiguilles
d’une montre jusqu’à butée et l’enlever de l’objectif (A).
2) Aligner la marque repère du corps de la caméra et le point rouge de l’objectif et faire tourner
l’objectif dans le sens des aiguilles d’une montre jusqu’à enclenchement en position (B).
3) Enlever le capuchon de l’objectif (C).
Retrait de l’objectif:
Faire glisser le commutateur de déverrouillage de l’objectif sur la caméra et le maintenir dans cette
position, puis faire tourner l’objectif dans le sens contraire au sens des aiguilles d’une montre
jusqu’à arrêt. Enlever l’objectif (D).
¡Pour plus de détails, voir le mode d’emploi de le camescope.
2. Montage du pare-soleil
1) Aligner le pare-soleil avec l’objectif dans le sens de la longueur, avec le label Canon du côté
gauche (E).
2) Le faire pivoter 90° de façon à ce que le label Canon arrive en haut. Terminer en vissant la vis de
fixation (F).
¡Pour démonter, effectuer le même processus dans le sens inverse.
¡Puisque le pare-soleil sert à protéger l’objectif de la lumière parasite cause de taches lumineuses
et d’images dédoublées, toujours l’utiliser lors de la prise de vue.
3. Utilisation de la bague de mise au point manuelle
Faire tourner la bague d’un mouvement ample pour des mises au point approximatives.
¡Faire tourner la bague plus lentement pour des mises au point précises.
¡Il est possible de régler la mise au point manuellement sans annuler le mode de mise au point
automatique. Le mode est réactivé dès que vous levez votre main de la bague de mise au point.
4. Utilisation de la bague de zoom
Faire tourner la bague vers la droite pour aller vers des plans généraux jusqu’au grand-angle, et
vers la gauche pour des plans rapprochés jusqu’au gros plan.
¡Faire tourner la bague d’un mouvement ample pour faire fonctionner le zoom rapidement.
Pivoter la bague plus lentement pour des réglages plus précis du zoom.
5. Utilisation des autres fonctions de l’objectif
Sélecteur de mise au point auto/manuelle
Pour utiliser la mise au point manuelle, faire glisser le sélecteur sur la position M. Pour régler la
mise au point sur automatique, faire glisser le sélecteur sur la position AF.
Bouton-poussoir de mise au point AF
Appuyer sur le bouton-poussoir AF pendant la mise au point manuelle (avec le sélecteur de mise
au point positionné sur M) pour mettre au point rapidement et automatiquement. Le camescope
continuera à mettre au point automatiquement tant que le bouton-poussoir sera maintenu enfoncé.
Relâcher le bouton-poussoir pour retourner à la mise au point manuelle.
Filtre ND
Faire glisser la commande de filtre ND sur ON pour utiliser le filtre.
¡Il est possible que votre camescope affiche des informations dans le viseur concernant le filtre
ND − se reporter à son mode d’emploi individuel pour plus de détails.
¡Lors de la sélection ou du désengagement du filtre ND, vérifier que le sélecteur de filtre ND est
bien coulissé complètement jusqu’à audition d’un déclic.
Attention aux saletés et aux poussières sur l’objectif.
Cette unité est un objectif zoom extra grand-angle 3×équivalent de 24 à 72 mm en termes de films
35 mm.
Par conséquent, la profondeur de champ est supérieure à celle des objectifs vidéo précédents et les
saletés ou les poussières déposées sur la surface de l’objectif ressortiront, notamment quand
l’ouverture est petite.
Pour éviter cet inconvénient, nous vous recommandons a) en fonction des instructions du
camescope, d’utiliser un filtre gris neutre interne pour les scènes lumineuses et b) pour les scènes
encore plus lumineuses un filtre gris neutre 8 ou supérieur à monter sur l’objectif afin de pouvoir
filmer sans que l’ouverture devienne trop petite.
Si vous ne pouvez pas remédier à ce problème avec les filtres gris neutre, etc., retirez la poussière
sur l’objectif avec un pinceau soufflant puis essuyez soigneusement sa surface avec la chiffonnette
nettoyante, fournie en accessoire, de manière à ne pas rayer l’objectif.
Les saletés et poussières déposées sur l’objectif peuvent également empêcher le fonctionnement
correct de la mise au point automatique.
Notes
¡Pour le rangement de l’objectif:
−Assurez-vous de bien réinstaller les capuchons avant et arrière sur l’objectif.
−Ne pas ranger objectif zoom dans un endroit expose à la chaleur, au soleil, à proximité d’un
appareil de chauffage ou d’un radiateur ou dans une voiture sous peine de déformation ou de
décoloration.
¡Pour assurer un bon raccordement électrique toujours tenir les contacts électroniques de l’objectif
en parfait état de propreté.
¡Protéger l’objectif des chocs et des vibrations.
¡Ne pas tenter de démonter ou de modifier cet objectif zoom.
¡Un problème quelconque rencontré lors de prise de vues peut aussi bien être imputable au
camescope qu’à l’objectif. Dans un tel cas, contacter le revendeur ainsi qu’un service après-vente
qualifié Canon.
¡Ne montez pas plus d’un filtre à l’avant de l’objectif. Le fait de monter plusieurs filtres en même
temps provoque un vignettage.
¡Les parties en feutre à l’intérieur du parasoleil d’objectif s’abîment facilement. Prenez garde à ne
pas salir, exercer de friction ou à appuyer trop fermement sur le feutre.
¡A propos du multiplicateur de focale XL 1,6×
C’est un objectif ultra grand-angle. Pour obtenir la performance optique maximale de votre objectif
lors des photos ultra panoramiques, l’utilisation du multiplicateur de focale XL 1,6×n’est pas
recommandée.
Le présent appareil numérique n’émet pas de bruits radioélectriques dépassant les limites
applicables aux appareils numériques (de la classe B) prescrites dans le Règlement sur le
brouillage radioélectrique édicté par le ministère des Communications du Canada.
MODE D’EMPLOI
Objectif Zoom 3×
Thank you for purchasing the Canon 3×Wide Lens. This lens is a wide zoom lens for camcorders
fitted with the XL mount system. In 35 mm film terms, it is equivalent to a 24 mm extra wide-angle
lens that produces high resolution, high quality imagery. Before mounting this lens, make sure that
your camcorder is also compatible with the XL Mount System (the mark appears on the
camcorder).
Nomenclature
1Lens Hood 6Electronic Contacts
2Lens Hood Fixing Screw 7Red Dot (Mount Positioning Point)
3Zooming Ring 8Auto/Manual Focus Switch
4ND Filter On/Off Switch 9Push AF Button
5XL Mount !0 Manual Focusing Ring
Instructions for Use
1. Mounting and Removing the Lens
Mounting the Lens:
1) Turn the rear dust cap anticlockwise until it stops, and remove it from the lens (A).
2) Align the mark on the camcorder body and the red dot on the lens, then rotate the lens clockwise
until it clicks into position (B).
3) Remove the front lens cap (C).
Removing the Lens:
Slide and hold the lens release switch on the camcorder, and rotate the lens anticlockwise until it
stops. Then remove the lens (D).
¡For more details, refer to the instruction manual of the camcorder.
2. Attaching the Lens Hood
1) Align the hood with the lens lengthways, and the Canon logo facing to the left (E).
2) Twist it clockwise, 90° into position, so that the Canon logo is to the top. Finally, tighten the locking
screw (F).
¡To remove, reverse the above procedure.
¡Since the lens hood cuts stray light that may cause flare and ghost images, and also protects the
lens, be sure to attach the hood when you are recording.
3. Using the Manual Focusing Ring
Turn the ring in one large movement to make large adjustments to the focus.
¡Turn the ring more slowly to make fine adjustments to the focus.
¡You can adjust the focus, without turning off the autofocus, by turning the lens’ focusing ring.
Autofocus resumes as soon as you take your hand away from the ring.
4. Using the Zooming Ring
Turn the ring to the right to zoom out to the wide-angle end, and to the left to zoom in to the
telephoto end.
¡Turn the ring in one large movement to operate the high speed zoom. Turn the ring more slowly
to make fine adjustments to the zoom.
5. Using the Other Lens Functions
Auto/Manual Focus Switch
To set the focus to manual, slide the focus switch to the M position. To set the focus to Auto, slide
the focus switch to the AF position.
Push AF Button
Press the PUSH AF button during manual focusing (with the focus switch set to M) to quickly adjust
the focus automatically. The camcorder will continue to focus automatically as long as you hold
down the button. Release the button to return to manual focus.
ND Filter
Slide the ND FILTER switch to ON to use the filter.
¡Your camcorder may show displays relating to the ND Filter−refer to its instruction manual for
more details.
¡When you turn the ND filter on/off, make sure that you slide the ND FILTER switch across until
you hear it click into position.
Beware of dirt and dust on the lens.
This unit is an extra wide-angle 3×zoom lens, equivalent to 24 to 72 mm in 35 mm film terms.
Therefore, the depth of field is greater than that of previous video lenses and any dirt or dust on the
surface of the lens will be projected, especially when the aperture is small.
To prevent this, it is recommended that a), in accordance with camcorder instructions, an internal ND
filter be used for a bright scene and b), for an even brighter scene, a ND8 or higher ND filter be fitted
over the whole lens to enable shooting without the aperture becoming too small.
If this problem can not be avoided with ND filters, etc., remove the dust from the lens with a blower
then wipe the lens surface carefully with the accessory lens cloth so as not to produce scratches.
Dirt and dust on the lens surface may also prevent the correct operation of the auto focus.
The lens surface should always be kept clean.
Notes
¡When storing the lens:
−Be sure to replace the front lens cap and rear dust cap.
−Do not store the zoom lens in hot places such as in direct sunlight, near a heater or radiator, in a
hot car, etc. This may cause the zoom lens to become deformed or discolored.
¡Be sure to keep the electronic contacts clean, to ensure proper connection.
¡Protect the lens from strong vibrations or shocks.
¡Do not try to disassemble or modify this zoom lens.
¡Problems with the operation of this lens may be due to faults in not only the lens, but in the
camcorder itself. In the event of problems, contact a dealer or service center familiar with your
camcorder, as well as a Canon authorized service center.
¡Do not fit more than one filter to the front end of the lens. Fitting 2 or more filters at the same time
will cause vignetting.
¡The felt portions on the inside of the lens hood are easily damaged. Take care not to soil, chafe, or
press too firmly on the felt.
¡Concerning Extender XL 1.6×
This is an ultra wide-angle lens. To ensure that you gain maximum optical performance from your
lens in ultra wide-angle photography, use of the XL 1.6×Extender is not recommended.
Note: This equipment has been tested and found to comply with the limits for a Class B digital
device, pursuant to Part 15 of the FCC Rules. These limits are designed to provide reasonable
protection against harmful interference in a residential installation. This equipment generates,
uses and can radiate radio frequency energy and, if not installed and used in accordance with
the instructions, may cause harmful interference to radio communications.
However, there is no guarantee that interference will not occur in a particular installation. If this
equipment does cause harmful interference to radio or television reception, which can be
determined by turning the equipment off and on, the user is encouraged to try to correct the
interference by one or more of the following measures:
−Reorient or relocate the receiving antenna.
−Increase the separation between the equipment and receiver.
−Connect the equipment into an outlet on a circuit different from that to which the receiver is
connected.
−Consult the dealer or an experienced radio/TV technician for help.
Do not make any changes or modifications to the equipment unless otherwise specified in the
manual. If such changes or modifications should be made, you could be required to stop operation
of the equipment.
This device complies with Part 15 of the FCC Rules. Operation is subject to the following two
conditions: (1) This device may not cause harmful interference, and (2) this device must accept
any interference received, including interference that may cause undesired operation.
This digital apparatus does not exceed the Class B limits for radio noise emissions from digital
apparatus set out in the Radio interference Regulations of the Canadian Department of
Communications.
3× Zoom Lens
INSTRUCTIONS
XL 3.4-10.2mm f/1.8-2.2
質量
Weight
Poids
Gewicht
XL 3.4-10.2mm F1.8-2.2
3× ズームレンズ
使用説明書
XL3.4-10.2mmF1.8-2.2
注意
仕様一覧 / Specifications / Fiche technique / Technische Daten
3.4-10.2mm 3×4.8×3.6mm 70°26′×55°48′26°29′×20°1′20mm 0.5m 71.8×53.8mm 249×187mm φ 72mm 約φ 91.5×116mm
(φ 3 5/8×4 5/8in)
約670g
(1 lb 7 1/2oz)
焦点距離
Focal Length
Distance focale
Brennweite
ズーム比
Maximum
Magnification
Agrandissement
maximum
Maximale
Vergrößerung
有効画面サイズ
Effective Image Size
Taille effective de
l’image
Effektive Bildgröße
1/3"イメージサイズ
Image size
Taille de l’image
Bildgröße
画角
Angle of View
Angle de prise de vue
Bildwinkel
至近距離
Closest Focusing Distance (Normal)
Distance minimum de mise au point
(normale)
Kürzeste Einstellentfernung (Normal)
至近距離画界
Field Size at Closest Focusing Distance
(Normal)
Format du champ àla distance minimum de
mise au point (normale)
Objektfeld bei kürzester Einstellentfernung
(Normal)
フィルターネジ径
Filter Diameter
Diamètre des filtres
Filterdurch-messer
寸法
Dimensions
(φ×L)
Dimensions
(φ×L)
Abmessungen
(φ ×L)
広角端
Wide-angle
Grand-angle
Weitwinkel
望遠端
Telephoto
Téléobjectif
Telefoto
広角端
Wide-angle end
Extrémitégrand-angle
Weitwinkelbereich
ズーム全域
Telephoto end
Extrémitétéléobjectif
Telebereich
広角端
Wide-angle
Grand-angle
Weitwinkel
(20mm)
望遠端
Telephoto
Téléobjectif
Telefoto
(0.5m)
¡寸法、質量表示はレンズ本体のみで、フード、キャップ等は含みません。
製品の仕様および外観は、改良等の理由で予告なく変更することがあります。
¡Weight and dimensions are for lens only, and do not include lens cap and lens hood.
Weight and dimensions are approximate.
Subject to change without notice.
Errors and omissions excepted.
¡Le poids et les dimensions s’entendent pour l’objectif uniquement sans le capuchon ni le pare-soleil.
Le poids et les dimensions sont approximatifs.
Les caractéristiques sont sujettes àmodification sans préavis et sont fournies sauf erreur ou omission.
J E F
ビデオカメラが近づける距離の変化(光学ズームのとき)
Changes in video camcorder approach distance (using optical zoom)
Variations de la distance d’approche du camescope (avec un zoom optique)
Änderungen in der Camcorder-Annäerungsentfernung (mit optischem Zoom)
ピントの合う範囲
Focusing Range
Plage de mise au point
Einstellbereich
距離
Distance
Distance
Entfernung
2cm
0.5m
ズームの W 端
Zoom set to W (Wide-angle)
Zoom réglé sur W (grand-angle)
Zoom steht auf W (Weitwinkel)
ズーム位置
Zoom Setting
Réglage zoom
Zoomeinstellung
ズームの T 端
Zoom set to T (Telephoto)
Zoom réglé sur T (téléobjectif)
Zoom steht auf T (Tele)
ズームの位置によって、被写体にどこまで近づけるかが変わります。
The minimum distance to the subject varies depending on the zoom setting.
La distance minimum entre le camescope et le sujet dépend du réglage du zoom.
Die kürzeste Einstellentfernung hängt von der jeweiligen Zoomeinstellung ab.
XL 3,4-10,2mm f/1,8-2,2
Vielen Dank für den Kauf des Canon 3×-Weitwinkelobjektivs. Dieses Vario-Objektiv verfügt über
einen XL-Anschluss und kann daher für alle Camcorder mit XL-Anschlusssystem verwendet werden.
Umgerechnet auf das 35-mm-Kleinbildformat entspricht es einem 24-mm-Extraweitwinkelobjektiv und
ermöglicht hochwertige Aufnahmen mit hoher Bildauflösung. Vergewissern Sie sich vor dem
Ansetzen dieses Objektivs, dass lhr Camcorder mit dem XL-Anschlusssystem kompatibel ist
(erkennbar an dem -Zeichen auf dem Camcordergehäuse).
Bezeichnung der Teile
1Gegenlichtblende
2Befestigungsschraube für Gegenlichtblende
3Brennweitenring
4ND-Filter-Knopf
5XL-Anschluss
6Elektronische Kontakte
7Roter Punkt (Anschluss-Positionierungspunkt)
8Fokus-Wahlschalter (automatisch/manuell)
9AF-Knopf
!0 Entfernungsring
Hinweise zum Gebrauch
1. Ansetzen und Abnehmen des Objektivs
Ansetzen des Objektivs:
1) Den hinteren Objektivdeckel im Gegenuhrzeigersinn bis zum Anschlag drehen und abnehmen
(A).
2) Die rote Tastkuppe des Objektivs auf die Markierung auf dem Camcordergehäuse ausrichten,
dann das Objektiv im Uhrzeigersinn drehen, bis es einrastet (B).
3) Den vorderen Objektivdeckel abnehmen (C).
Abnehmen des Objektivs:
Den Objektiv-Freigabeschalter auf dem Camcorder schieben und halten, das Objektiv im
Gegenuhrzeigersinn bis zum Anschlag drehen und abnehmen (D).
¡Schlagen Sie diesbezüglich bitte in der Bedienungsanleitung lhres Camcorders nach.
2. Anbringen der Gegenlichtblende
1) Die Gegenlichtblende so auf das Objektiv ausrichten, dass das Canon-Logo nach links zeigt (E).
2) Um 90°drehen, so dass sich das Canon-Logo oben befindet. Dann die Befestigungsschraube
festziehen (F).
¡Zum Entfernen der Gegenlichtblende in umgekehrter Reihenfolge vorgehen.
¡Bringen Sie beim Aufnehmen immer die Gegenlichtblende an. Sie verhindert nicht nur den Einfall
von Streulicht, das Blendenflecken verursachen kann, sondern schützt auch das Objektiv.
3. Verwendung des Entfernungsrings
Für Grobeinstellungen der Bildschärfe diesen Ring in einer weiten Bewegung drehen.
¡Für Feineinstellungen den Ring langsamer drehen.
¡Sie können manuell scharfstellen, ohne die Autofokus-Funktion auszuschalten, indem Sie den
Entfernungsring des Objektivs drehen. Sobald Sie den Entfernungsring loslassen, wird die
Autofokus-Funktion wieder aktiviert.
4. Verwendung des Brennweitenrings
Zum Heranholen des Objekts den Ring nach rechts in Richtung Weitwinkel drehen, zum
Zurückfahren des Objekts den Ring nach links in Richtung Tele drehen.
¡Für schnelle Brennweitenveränderungen den Ring in einer weiten Bewegung drehen. Für
Feineinstellungen den Ring langsamer drehen.
5. Verwendung der anderen Objektivfunktionen
Fokus-Wahlschalter (automatisch/manuell)
Für manuelle Scharfeinstellung den Fokus-Wahlschalter auf M stellen. Für automatische
Scharfeinstellung den Fokus-Wahlschalter auf AF schieben.
AF-Knopf
Bei manueller Scharfeinstellung (Fokus-Wahlschalter in M-Position) den AF-Knopf drücken, um
schnell automatisch scharfzustellen. Solange der AF-Knopf gedrückt bleibt, stellt der Camcorder
automatisch scharf. Wenn der Knopf losgelassen wird, kann wieder manuell scharfgestellt werden.
ND-Filter
Zum Aktivieren des ND-Filters den ND FILTER-Schalter auf ON stellen.
¡Ihr Camcorder zeigt möglicherweise Anzeigen zum ND-Filter an − nähere Einzelheiten
entnehmen Sie bitte der Bedienungsanleitung.
¡Beim Ein/Ausschalten des ND-Filters mußder ND FILTER-Schalter verschoben werden, bis er
einrastet.
Schützen Sie das Objektiv vor Schmutz und Staub.
Dieses Extraweitwinkel-3×-Vario-Objektiv liefert, umgerechnet auf das 35-mm-Kleinbildformat, einen
Brennweitenbereich von 24 bis 72 mm. Die Tiefenschärfe ist daher größer als die bisheriger
Camcorderobjektive, weshalb auch kleinere Schmutz- und Staubpartikel auf der Linsenoberfläche im
Bild deutlich abgebildet werden, besonders bei Aufnahmen mit kleiner Blende.
Um dies zu vermeiden, empfehlen wir bei hellen Szenen den Gebrauch eines internen ND-Filters
(Grau- bzw. Neutralfilter) gemäß Camcorder-Anleitung und bei noch helleren Szenen das Vorsetzen
eines ND8-Filters (oder höher), um eine zu kleine Blendenöffnung zu vermeiden.
Sollte ein ND-Filter keine zufriedenstellende Abhilfe für dieses Problem sein, entfernen Sie alle
Staubpartikel mit einer Gebläsebürste von der Linsenoberfläche, um diese dann vorsichtig mit dem
beigelegten Linsenreinigungstuch abzuwischen, so dass keine Kratzer entstehen können.
Schmutz und Staub auf der Linse können darüber hinaus auch die Funktion der Scharfstellautomatik
(Autofokus) stören.
Die Linsenoberfläche sollte stets in einwandfrei sauberem Zustand sein.
Hinweise
¡Aufbewahrung des Objektivs:
−Vergewissern Sie sich, den vorderen und hinteren Deckel aufzusetzen.
−Starke Wärme kann das Vario-Objektiv beschädigen. Setzen Sie es daher nicht direkter Sonnen
be strahlung aus und lassen Sie es nicht in der Nähe eines Heizkörpers oder in einem heißen
Auto liegen.
¡Die elektronischen Kontakte des Objektivs sauberhalten, damit ein einwandfreier Anschluss
gewährleistet ist.
¡Das Objektiv vor Vibrationen und Stößen schützen.
¡Nicht versuchen, das Vario-Objektiv auseinanderzunehmen oder zu modifizieren.
¡Funktionsbeeinträchtigungen des Objektivs können ihre Ursache auch im Camcorder selbst haben.
Sollten Probleme auftreten, wenden Sie sich bitte an ein Geschäft oder eine Kundendienststelle,
wo man mit lhrem Camcorder vertraut ist, oder an eine autorisierte Canon-Kundendienstzentrale.
¡Bringen Sie nicht mehr als ein Filter an der Vorderseite des Objektivs an. Wenn 2 oder mehr Filter
vorgesetzt werden, kann Abschattung in den Bildern auftreten.
¡Die Filzflächen in der Gegenlichtblende werden leicht beschädigt. Achten Sie darauf, dass der Filz
nicht schmutzig wird, durchscheuert oder zu starken Druck ausgesetzt wird.
¡Anmerkung bezüglich des Tele-Converters XL 1,6×
Dies ist ein Extra-Weitwinkelobjektiv. Um sicherzustellen, dass Sie im extremen Weitwinkelbereich
optimale Ergebnisse erzielen, sollten Sie vom Gebrauch des Tele-Converters XL 1,6×absehen.
3×−Vario-Objektiv
BEDIENUNGSANLEITUNG
D
XL 1:1,8-2,2 / 3,4-10,2mm
¡Gewicht und Abmessungen gelten nur für das Objektiv.
Objektivdeckel und Gegenlichtblende sind nicht mit eingeschlossen.
Gewicht und Abmessungen sind nur Annäherungswerte.
Technische Änderungen vorbehalten.
Fehler und Auslassungen Vorbehalten.
