Thankyou for purchasing
this Canonproduct.
Before
taking
pictures,
please
read
theseinstructions
carefully
fora thorough
understanding
ofhow
the
camera
operates.
Table
of Contents
These
instructions
aredividedinto
four
sections:
lntroduction,
Basic
Operations,Advanced
Operations, _
::**:'n:ll',rxlt"ry[:[:n*ixit"
-
" 3
I
Introduction.
E taking Pictures..... ............-....'.22
Green/Orange
Indicators .."".'--.'23
Taking
Pictures
through
aWindow
'.".'.'..-.-.."-23
Close-up
Photography .'...'.'-.-""..24
E Removing
the FilmCartridge
......'..'.'-.-.'-"25
FilmCartridge
Processtng '---.'.""'26
Handling
FilmCartridges
After
Exposure
'.".""26
AdvancedOperations
6 Cnanging
the
Flash
Mode .-.'..27
f t9 4u1s
FlashWithout
Red-eye
Reduction..2B
E @tfr Auto
Flash
With
Red-eye
Reduction
'.29
Red-eye
Reduction
Function
...........'..........30
E t rtasnON
Mode.... .....'......'.31
E
tr E O I Slow-synchro
Mode
with
Red-eye
Reduction .......
'.'..33
Using
Focus
Lock.......... ..............34
'J
Using
theSelf-timer
..................................35
'rr Shooting
with
theOptional
Remote
Control..'.36
Replacing
the
Remote
Control
Battery
"-'.'..."'37
lmprinting
the
Dateand
Time "....38
Selecting
the
Date
Format...............
"............'39
Setting
the
Dateand
Time ..'.......40
F/ lmprinting
Titles...... ................42
Selecting
the
Title
Language
......'.........'
:
..
-'-'.'42
Selecting
the
Title....... ..'.....'.'."...43
a€ Mid-roll
Film
Change
...............
...............44
ToRemove
anUnfinished
FilmCartridge..'-'-'.'.44
Loading
aPartially
Used
FilmCartridge
'..'.'...'45
H Setting
the
Print
Quantity '.'...46
Setting
the
Custom
Functions
.................'...'48
Additional lnformation
Troubleshooting
......... ..............'..50
Questions
and
Answers
..........................'.....51
tr
iConvention
Thefollowing
convention
is
usedintheseinstructions:
i ([) gil:ff. vou
should
observewhen
usins
the
' l:l
i lfl Additional
information
onusingthecamera.
I Introduction
I $1'
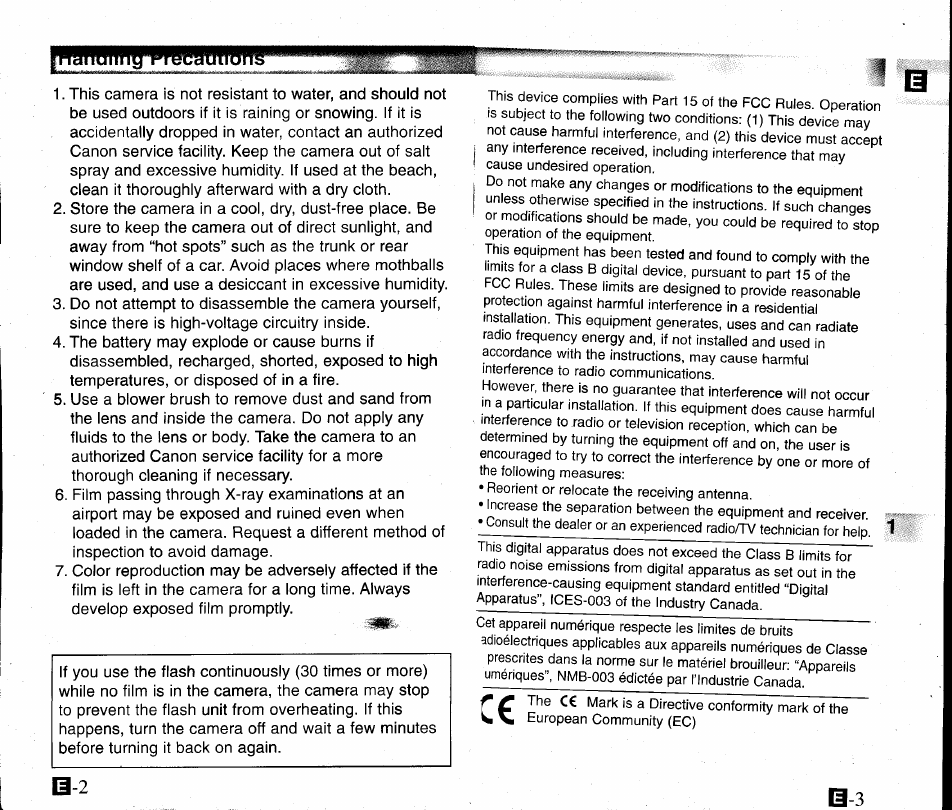
Handling
Precautions ....................2
Table
of
Contents ........4
ADVANCED
PHOTO
SYSTEMFeatures........6
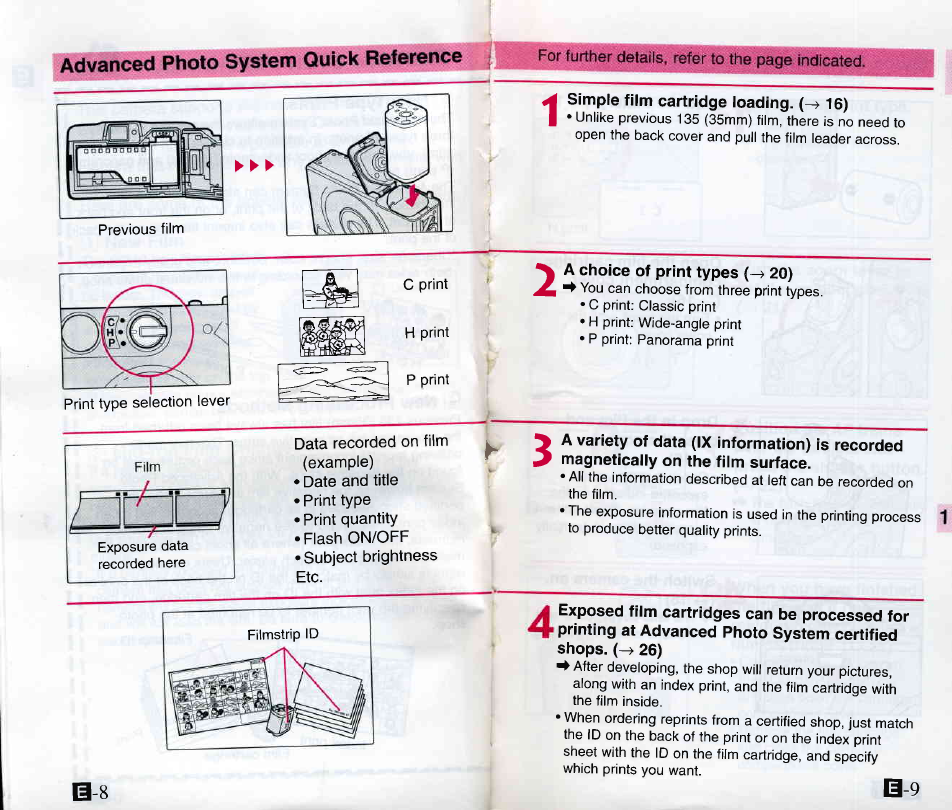
Advanced
Photo
System
Quick
Reference
....8
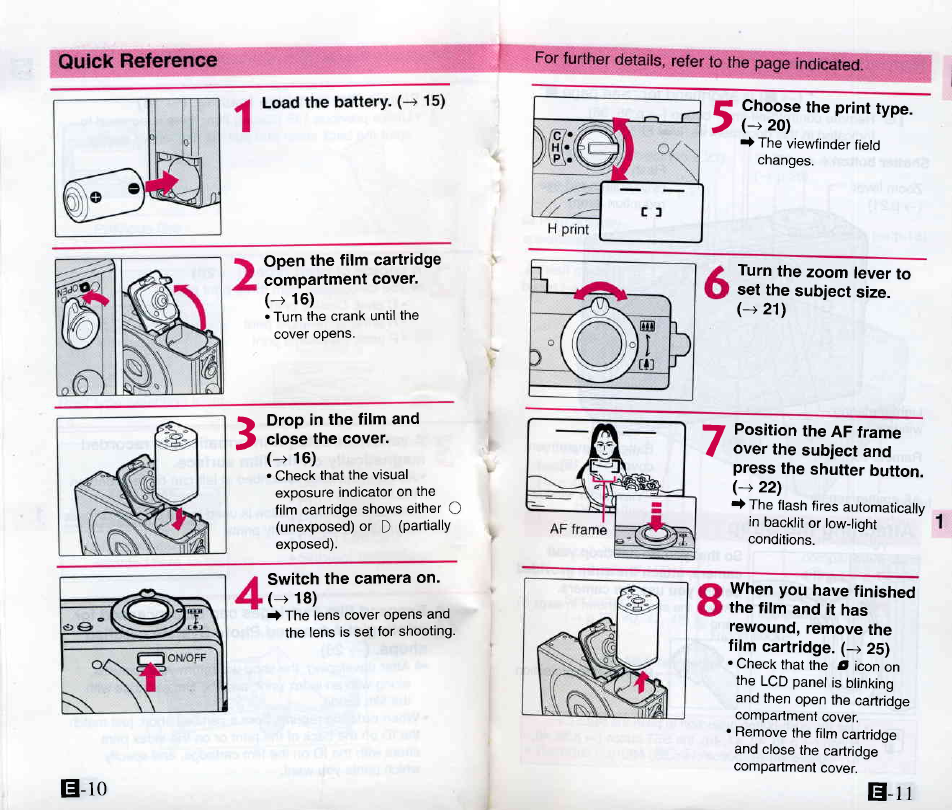
Quick
Reference. .......10
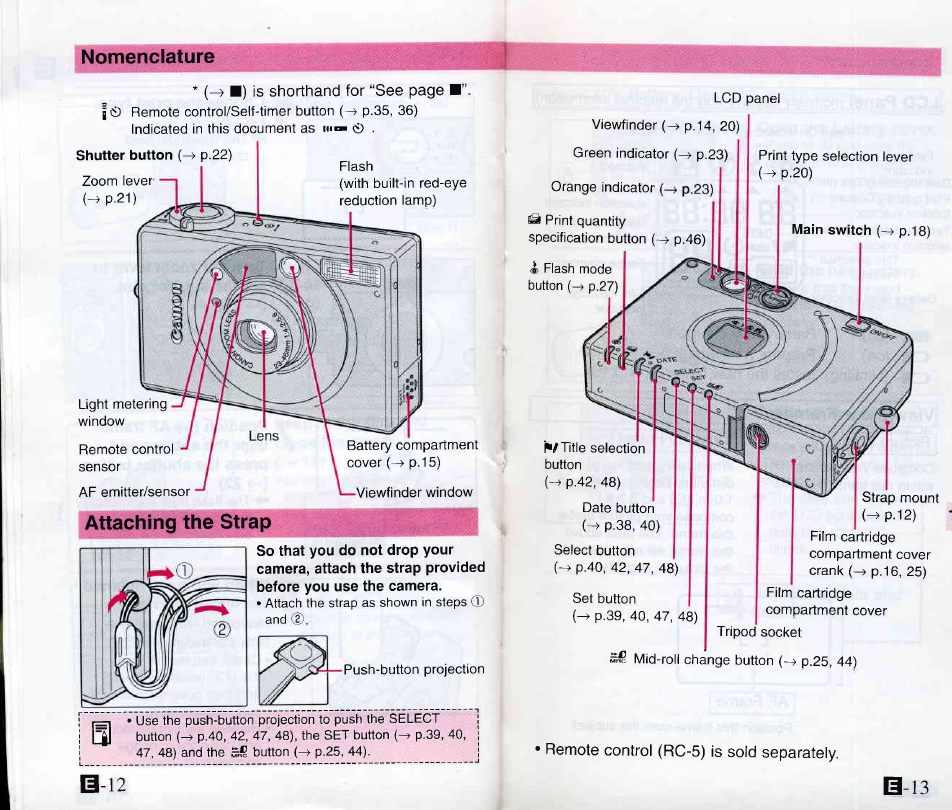
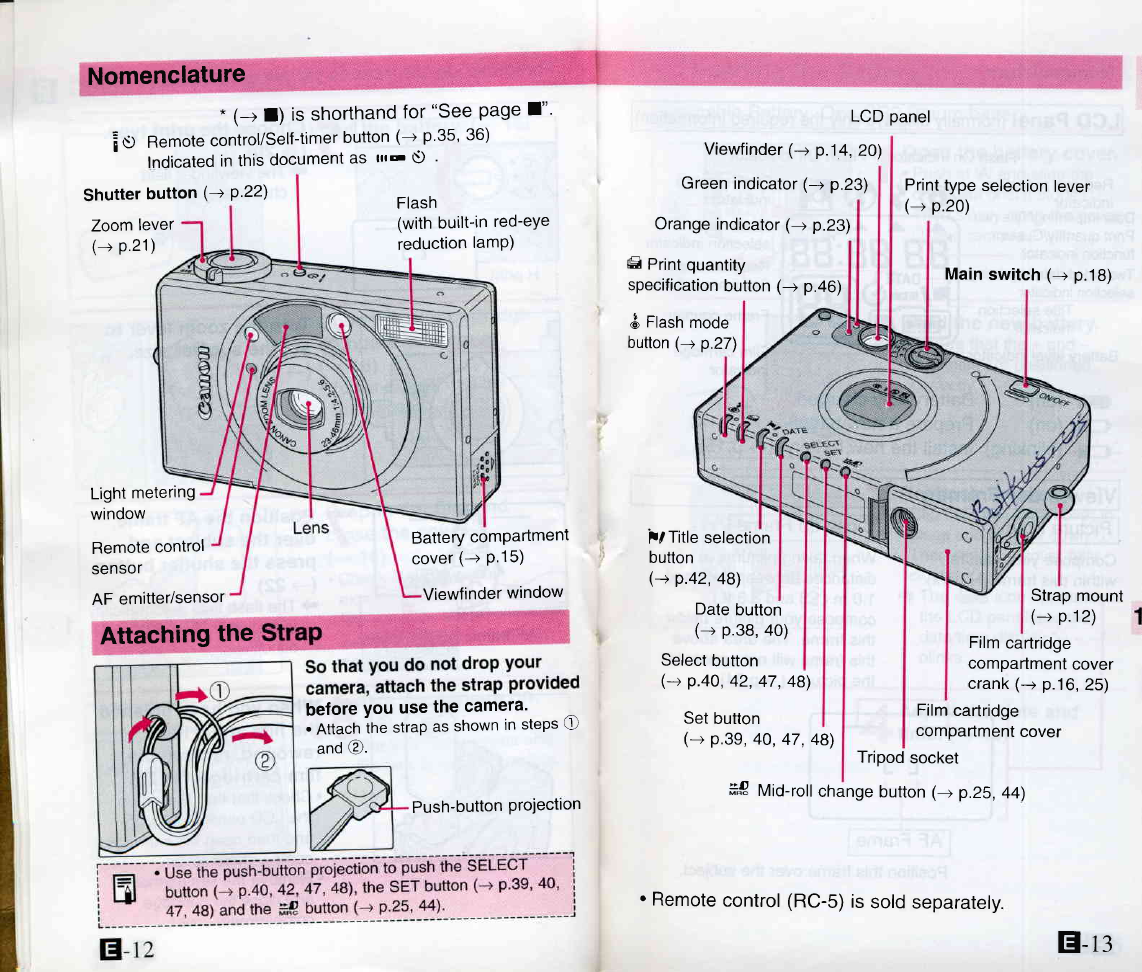
Nomenclature
.............. ................12
Attaching
the
Strap... ...................12
t ilt Basic Operations
- LJJ
Loading
theBattery ................15
E Loading
theFilm
Cartridge......................16
CheckingthePhotography
Data........................17
E Turning
thePower
On..............................18
CheckingtheBattery
Power ........18
E HotOing
the
Camera ................19
E Choosing
thePrintType
..........................20
E UsingtheZoom ......................21
E-u
,{*,,'rry
W,WW
I4l
tr-s


 User manual")