manuals.online logo
Brands
  1. Home
  2. •
  3. Brands
  4. •
  5. Canon
  6. •
  7. Digital Camera
  8. •
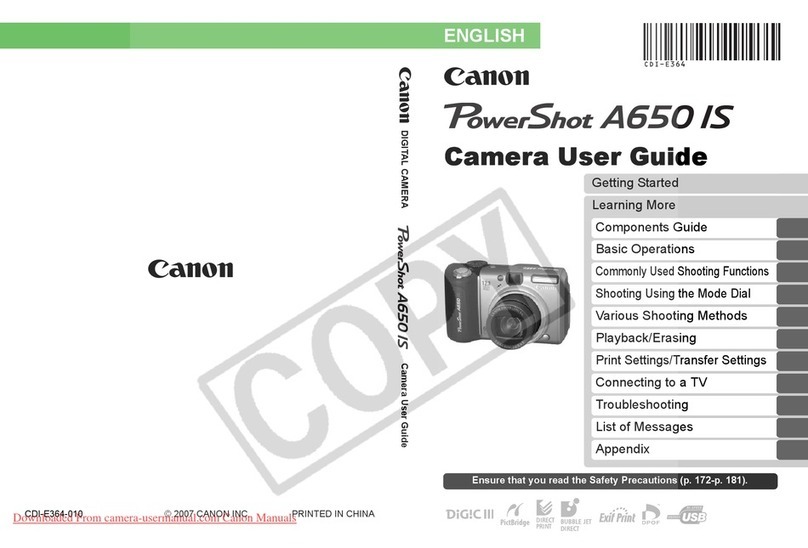
  9. Canon Powershot A650 IS User manual

Canon Powershot A650 IS User manual

CDZ-E364
7_o.,e,-ShotAGSO 15
Camera User Guide
Componen!s Gu!de
Basic Operations
CommonlyuseciSi_ooiingFunciions
Shooiing Using ..............
variousShootirigaethoas
Playback/Erasing
Print Settings/Transfer Settings
Connecting to aTV
Troubleshooting ......................................................
Lis{ofMessages ...................................................
Appendix
Workfiow and Reference Guides
The following guides are available. Refer to them as necessary according to the
flowchart below.
: Contents of This Guide
rGetting Started (p. 7)
fLearning More (p. 37)
Names camera components and provides more detailed instructions for
_er_.Sh°°ting and playback. Lists information for more advanced use of _your
Connect the camera
to other devices
• Connecting to aprinter
•Connecting to aTV set
•Connecting to acomputer
Camera User Guide
Direct Print User
Guide
Software Smiter
Guide
ZoomBrowser EX/
ImageBrowser
Software User Guide
• PDF manuals
available on the
Canon website.
http://web.canonjp/
Imaging/information-
e.html
CheckingthePackageContentsI 1
Checking the Package Contents
The following items are included in the package. If something is missing,
_leasecontact the retail outlet at which you purchased the product.
OCamera OAA Alkaline OMemory
Batteries (x4) Card
(32MB)
Interface Cable
IFC=400PCU
Wrist Strap WS-DC4
AVCableAVC-DC300
Canon Digital Camera OWarranty
Solution Disk Card
You may not be able to achieve the full performance of this camera
wth the nc uded memory card.
You can use SD* memory cards, SDHC (SD High Capacity)
,_'_" memory cards, MultiMediaCards, MMCplus cards and HC
MMCplus cards in this camera. These memory cards are
collectively referredto as memory cards inthis guide.
*SDstandsforSecureDigital,acopyrightprotectionsystem.
4ITable of Contents
Print Settings/Transfer Settings 150
Setting the DPOF Print Settings .................. 150
Setting the DPOF Transfer Settings ............... 155
Connecting to a TV 157
Shooting/Playback Using a TV ................... 157
Troubleshooting 158
List of Messages 168
Appendix 172
Safety Precautions ............................. 172
Warnings .................................... 173
Cautions ..................................... 176
Table of Contents I5
Preventing Malfunctions ........................ 177
Battery Handling .............................. 178
Handling the Memory Card ...................... 180
Using the Power Kits (Sold Separately) ............. 182
Using the Lenses (Sold Separately) ............... 185
Using an Externally Mounted Flash (Sold Separately) . 189
Camera Care and Maintenance ................... 191
Specifications ................................. 192
Index 202
Functions Available in Each Shooting Mode 214
• Symbol Conventions in this Guide
yOL__ ._ot _ w_ ttteQparna_s_r_m f_rpos_a_ by
_,rpt_x_at_y_:2)_h_n in_heLeO _i_o_
Mode switch position
Available shooting modes
operation.
This mark denotes additional
topics that complement the
_basic operating procedures.
Explanations in this guide are based on the camera's default settings
at time of purchase.
1521 PrintSettingsfTransferSettings
Single Images
elect the images•
Selection methods differ for the Print Type settings (p. 150).
• Standard (l) /Both (l [])
1. Use the ÷ or +button to NumberofPdntCopies
se ect the mages
2. Press the _ button.
3. Use the ÷ or 41.button to
select the number of print
copies (up to 99).
4. Press the O button.
• If the camera is connected to a ....
printer, the _,,_ button will light in blue while images are
being selected. At this time, press thegn button, confirm
that [Print] isselected, and when the _ button is pressed,
printing will begin.
Print Settings/Transfer Settings 1153
• Index (_)
1. Use the ÷ or +button to select the images.
2. Select and deselect with _ Index Print Selection
3. Press the O button.
You can also select images in
• the index playback mode.
If the camera is connected to a
printer, the _,v button will light
in blue while images are being ....
selected. At this time, press the
_,,_ button, confirm that [Print]
is selected, and when the FMNC./SET button is pressed,
printing will begin.
All the Images on a Memory Card
1. Set the mode switch to r;I.
2. Press the O button.
3. Use the 4- or .I, button to select the
[] menu. _1_ _ _g_
4. Use the "IFor 4" button to select
[Select All Images].
5. Press the _ button.
One copy of every image will be set to print.
Selecting [Clear All Selections] cancels all print settings.
When the camera is connected to a printer, the _ button will
light blue. At this time, press the _ button, confirm that
[Print] is selected, and when the FMNC./SET button is pressed,
printing will begin.
154Print Settings/Transfer Settings
1. Use the 4" or 4. button to select
[OK].
2. Press the @ button.
O • ]-he output of some printers or photo developing services
may not reflect the specified print settings.
•Print settings cannot be set for movies.
_] •Images are printed in order according to the file number.
• A maximum of 998 images can be selected.
• When [Print Type] is set to [Both], the number of copies can
be set. When it is set to [Index], the number of copies cannot
be set (only one copy will be printed).
Print SettingsFFransfer Settings 1155
tSetting the DPOF Transfer Settings []
You can use the camera to specify settings for images before
downloading to a computer. Refer to the Software Starter Guide for
instructions on how to transfer images to your computer.
The settings used on the camera comply with the DPOF standards.
The Aicon may display for a memory card with transfer
settings set by a different DPOF-compliant camera. These
settings will be overwritten by those set by your camera.
Single Images
156J PrintSettingsfTransferSettings
All the Images on a Memory Card
_] • Images are transferred in order according to the file number.
• A maximum of 998 images can be selected.
Connecting to a TV 1157
lShooting/Playback Using a TV [][]
You can use the supplied AV cable to shoot or playback images using a TV.
• The video output signal can be switched (NTSC or PAL) to
accommodate different regional standards (p. 47). The
default setting varies between regions.
- NTSC: Japan, U.S.A., Canada, Taiwan and others
- PAL: Europe, Asia (excluding Taiwan), Oceania and others
• If the video system is set incorrectly, the camera output may
not display properly.
1581 Troubleshooting
•Camera (p. 158).
• When the power is turned on (p. 159).
• LCD monitor (p. 159).
• Shooting (p. 161).
• Shooting movies (p. 164).
• Playback(p. 165).
• Battery (p. 166).
• TV monitor output (p. 166).
• Printing with a direct print compatible printer (p. 167).
Power is not turned on. Press the power button (p. 13).
Memo_ card sio_battery i Confirm ihat ihe memo_ card siot
cover is open. battery cover is securely closed (p. 9).
Batteries are Ioaded in the • Retoad the batteries in the correct
wrong direction, direction (p. 8).
Batteries are not the right • Use only unused AA-size alkaline
type. batteries or Canon AA-size NiMH
Battery charge is low and • Replace the camera batteries with 4
the camera will not operate, unused or fully charged batteries
("Change the batteries" (p. 8).
message displays). • Use the AC Adapter Kit ACK600 (sold
separately) (p. 162).
Poor contact between • Wipe the battery terminals with a
camera and battery clean dry cloth.
terminals. • Reload the batteries several times.
Troubleshooting 1159
The camera's horizontal/ • The camera's orientation mechanism
vertical orientation was is operating. There is no malfunction.
changed.
kYt,'leJTI[_1,'1_Ji )zz_,,,L=]dit.-i [_ I[,] k]
The SD memory card's or
SDHC memory card's write
protect tab is set to "Write
protect".
OWhen recording to, erasing from or
formatting the memory card, slide the
write protect tab upward (p. 180).
The lithium date battery • Replace the lithium date battery
charge is depleted. (p. 14).
I![.]_] 13Tt_ITT[trf_
LCD monitor is turned off. • Press DISP. button and turn on the
LCD monitor (p. 49).
The image in the LCD oThis is a normal occurrence in
monitor will darken in strong devices containing CCDs and does
sunlight or bright light, not constitute a malfunction. This
image will not be recorded when
shooting still photos, but it will be
recorded when shooting movies.
Display flickers when shot • This is not a camera malfunction
under fluorescent lighting. (flickering recorded in movies, but not
in still images).
1601 Troubleshooting
Sometimes appears when
shooting a bright subject,
such as the sun or other
light source.
• This is a normal occurrence in
devices containing CCDs and does
not constitute a malfunction. This bar
of light will not be recorded when
shooting still photos, but it will be
recorded when shooting movies.
A slow shutter speed has
likely been selected
because of insufficient
lighting.
This displays when using a
memory card that has print
settings or transfer settings
set by other DPOF-
compliant cameras.
• Set the IS Mode to any setting other
than [Off] (p. 70).
• Raise the ISO speed (p. 104).
• Set the Auto SO Sh ft to any setting
other than [Off].
• Select a setting other than [] (flash
off) (p. 62).
• Set the self-timer and attach the
camera to a tripod or other device
(p. 64).
• These settings will be overwritten by
those set by your camera
(pp. 150, 155).
Camera automatically • There is no effect on the recorded
lightened the image image.
displayed on the LCD
monitor to make it easier to
see when shooting in a dark
area (p. 49).
Troubleshooting 1161
Mode switch is set to [] • Set the mode switch to a (shooting)
(playback). (p. 15).
Flash is charging. • When the flash is charged, the
indicator will light orange. Shooting is
now possible (p. 41).
Memory card is full. • Insert a new memory card (p. 10).
• tf required, download the images to a
computer and erase them from the
memory card to make space.
Memory card is not • Format the memory card (p. 56).
formatted correctly. • tf reformatting does not work, the
memory card logic circuits may be
damaged. Consult the nearest Canon
Customer Support Help Desk.
SD memory card or SDHC • Slide the write protect tab upward
memory card is write (p. 180).
protected.
LCD monitor is closed. • When the shooting mode is _ or
DN open the LCD monitor and shoot
subject.
Usually the recorded image • Confirm the actual image size with
contains more of the scene the LCD monitor. Use the LCD
than is seen in the monitor when taking close-up shots
viewfinder. (p. 49).
The camera moves when • Confirm the steps in "_J appears"
the shutter button is (p. 160).
pressed.
I
1621 Troubleshooting
AF-assist Beam is set to • In dark places where it is difficult for
[Off]. the camera to focus, the AF-assist
Beam will emit to assist focusing. As
the AF-assist Beam will not function
when turned off, set it [On] to activate
it (p. 45). Take care not to obstruct
the AF-assist Beam with your hand
when used.
Subject is out of focal range. • Shoot with the subject at the correct
focusing distance (p. 192).
• The camera may be set to an
unintended function (such as []
(macro) or [] (manual focus)).
Cancel the setting.
The subject is hard to focus • Use the focus lock, AF lock or manual
on. focus to shoot (p. 97).
Insufficient light for shooting• Set the flash to [] (Flash on) (p. 62).
The subject is • Set the exposure compensat on to a
underexposed because the positive (+) setting (p. 108).
surroundings are too bright. • Use the AE Lock or spot metering
functions (pp. 101,109).
Subject is too far away for • Shoat within correct flash range of the
flash to reach, subject when using the built-in flash
(p. 193).
• Raise the ISO speed and then shoot
(p. 104).
Subject is too close, making • Shoot within correct flash range of the
the flash too strong, subject when using the built-in flash
(p. 193).
• Turn [On] the Safety FE (p. 120).
The subject is overexposed • Set the exposure compensation to a
because the surroundings negative (-) setting (p. 108).
are too dark. • Use the AE Lock or spot metering
functions (pp. 101,109).
I
Troubleshooting I163
Too much light is shining • Change the shooting angle.
directly into the camera, or
is being reflected off the
subject.
Flash is set to on. • Set the flash to [] (Flash off) (p. 62).
ISO speed is too high. • Higher ISO speeds and [] (High ISO
Auto) setting may increase image
noise. For higher image quality, use
as low an ISO speed as possible
(p. 104L
• In I_1, [] and I_, ['_--'l,I_, []
modes in the SeN mode, the ISO
speed increases and noise can
appear.
Light from the flash has • This is a phenomenon that occurs
reflected offdust particles or with digital cameras and does not
insects in the air. This is constitute a malfunction.
particularly noticeable when
shooting using the wide
angle or when you increase
the aperture value in the
aperture-priority Av mode.
Light is reflected back from •Turn [On] the Red-Eye setting in the
the eyes when the flash is Rec. menu (p. 89). For this mode to
used in dark areas, be effective, the subject must be
looking right at the red-eye reduction
lamp. Try asking them to look directly
at the lamp.
Even better results can be obtained
by increasing the lighting in indoor
settings or approaching closer to the
subject.
• You can correct red eyes in images
using the Red-Eye Correction
function (p. 140).
1641Troubleshooting
Thememorycard's •To enhance the continuous shooting
performance has dropped, performance, you are recommended
to format the memory card in the
camera after you save all its images
to your computer (p. 56).
Memory card was formatted • Use a memory card formatted in your
in another device, camera (p. 56).
Memory card slot]battery • After closing the memory card slot]
cover was opened with battery cover, turn the power on then
power on. back off (p. 9).
The following types of •Although the recording time may not
memory cards are used. display properly during shooting, the
- Stow recording memory movie will be recorded correctly on
cards, the memory card. Recording time will
- Memory cards formatted display properly if you format the
on a different camera or a memory card in this camera
computer. (excluding slow recording memory
- Memory cards which have cards) (p. 56).
had images recorded and
erased repeatedly.
Troubleshooting 1165
There is insufficient free
space in the camera's built-
in memory.
•Try the following steps.
- Format the memory card with a low
level format before shooting (p. 56)
- Lower the recording pixels (p. 79)
- Use a high-speed memory card
(SDC-512MSH, etc.)
Zoom lever was pressed • Operate the zoom before shooting in
while shooting in movie movie mode (p. 57). Note the digital
mode. zoom is available while shooting, but
only in Standard movie mode.
You attempted to play back • Computer images that cannot be
images shot with another played back may play back if they are
camera or images edited added to the camera using the
with acomputer, supplied software program
ZoomBrowser EX or ImageBrowser.
See ZoomBrowser EX/
ImageBrowser Software User Guide
(PDF).
Fiienamewaschanged_iihJ Setihefiienameoriocationonihe
a computer or file location file format/structure of the camera.
was changed. (Refer to the Software Starter Guide
for details).
Movies recorded with high recording pixels may momentarily stop
playing if played on slow reading memory cards.
You may experience frame dropping and audio breakup when
playing back a movie on a computer with insufficient system
resources.
1661Troubleshooting
I:]£'?[;F2f_
Battery is not being used to • See Battery Handling Precautions
its full capacity. (p. 178)
Batteries are not the right • Use only unused AA-size alkaline
type. batteries or Canon AA-size NiMH
batteries (p. 178).
Bakery capaciiy drops due • if shool]ng in a coid iocaiionl warm
to low ambient the batteries such as by placing them
temperatures, in your pocket before using them.
Battery terminals are dirty. •Wipe the terminals well with a dry
cloth before use.
• Reload the batteries several times.
If using Canon AA-size NiMH batteries
As the batteries have not J Their charging performance should
been used for over a year, return to normal after fully recharging
their recharging capacity and depleting them over several
has decreased, times.
Battery life has been • Replace both batteries with new
exceeded, ones.
Incorrect video system • Set the video system to the
setting, appropriate setting, NTSC or PAL, for
....... your TV !p. 47). .....
Shooting in Stitch Assist • The output will not appear on a TV in
mode. Stitch Assist mode. Shoot in a
different shooting mode (p. 80).

Other manuals for Powershot A650 IS

6

Other Canon Digital Camera manuals

Canon PowerShot SX600 HS User manual

Canon

Canon PowerShot SX600 HS User manual

Canon PowerShot G12 User manual

Canon

Canon PowerShot G12 User manual

Canon EOS 500N QD User manual

Canon

Canon EOS 500N QD User manual

Canon PowerShot ELPH 115 IS User manual

Canon

Canon PowerShot ELPH 115 IS User manual

Canon PowerShot G1 Use and care manual

Canon

Canon PowerShot G1 Use and care manual

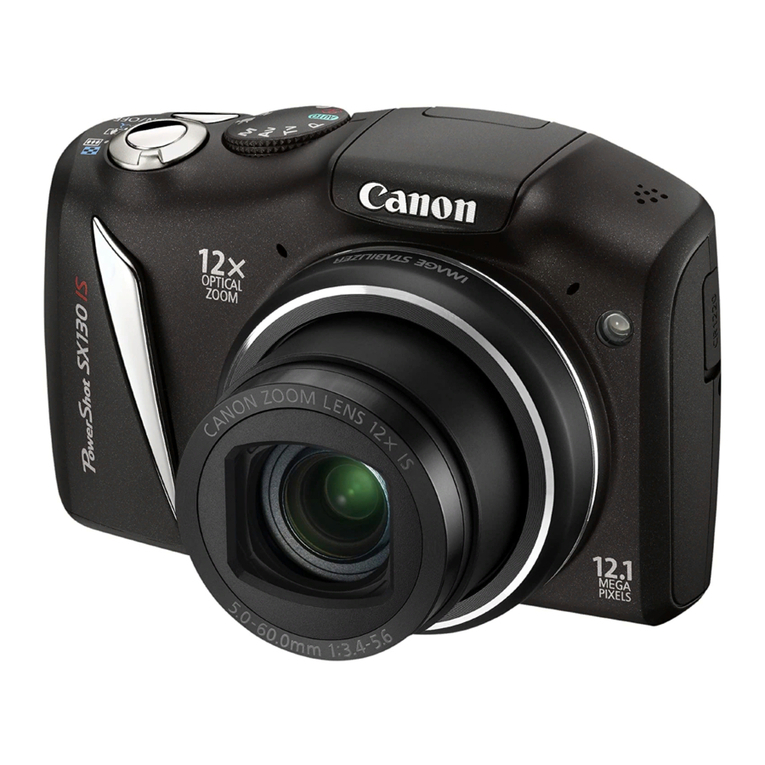
Canon PowerShot SX130 IS User manual

Canon

Canon PowerShot SX130 IS User manual

Canon 4342B001 User manual

Canon

Canon 4342B001 User manual

Canon POWERSHOT S10 Mounting instructions

Canon

Canon POWERSHOT S10 Mounting instructions

Canon IXUS 30 Instruction Manual

Canon

Canon IXUS 30 Instruction Manual

Canon PowerShot A510 User guide

Canon

Canon PowerShot A510 User guide

Canon EOS-1 Assembly instructions

Canon

Canon EOS-1 Assembly instructions

Canon Sure shot 85 zoom User manual

Canon

Canon Sure shot 85 zoom User manual

Canon EOS 5D Mark II User manual

Canon

Canon EOS 5D Mark II User manual

Canon PowerShot SXE60 HS User manual

Canon

Canon PowerShot SXE60 HS User manual

Canon PowerShot SX170 IS User manual

Canon

Canon PowerShot SX170 IS User manual

Canon PowerShot A560 User manual

Canon

Canon PowerShot A560 User manual

Canon SD450 - PowerShot Digital ELPH Camera User manual

Canon

Canon SD450 - PowerShot Digital ELPH Camera User manual

Canon AE-1 User manual

Canon

Canon AE-1 User manual

Canon EOS REBEL K2 3000V DATE User manual

Canon

Canon EOS REBEL K2 3000V DATE User manual

Canon EOS REBEL K2 3000V DATE User manual

Canon

Canon EOS REBEL K2 3000V DATE User manual

Canon PowerShot G15 User manual

Canon

Canon PowerShot G15 User manual
Canon EOS Rebel T5i 18-55mm IS STM Kit User manual

Canon

Canon EOS Rebel T5i 18-55mm IS STM Kit User manual

Canon PowerShot G6 User manual

Canon

Canon PowerShot G6 User manual

Canon PowerShot G9 User manual

Canon

Canon PowerShot G9 User manual

Popular Digital Camera manuals by other brands

iClick Fremont 300 user manual

iClick

iClick Fremont 300 user manual

Sony Cyber-Shot DSC-RX10M2 instruction manual

Sony

Sony Cyber-Shot DSC-RX10M2 instruction manual

Polaroid PDC3080 user guide

Polaroid

Polaroid PDC3080 user guide

Kaiser Baas X360 user guide

Kaiser Baas

Kaiser Baas X360 user guide

Samsung Vluu PL200 user manual

Samsung

Samsung Vluu PL200 user manual

UNIVIEW IPC540 Series quick guide

UNIVIEW

UNIVIEW IPC540 Series quick guide

Brookstone VR Camera manual

Brookstone

Brookstone VR Camera manual

First Alert DW702M user manual

First Alert

First Alert DW702M user manual

Genie WAHD2EBVAF user manual

Genie

Genie WAHD2EBVAF user manual

Casio PV-R4 user guide

Casio

Casio PV-R4 user guide

IMOU Cue 2 quick start guide

IMOU

IMOU Cue 2 quick start guide

Olympus C-2000 - Zoom 2.1MP Digital Camera Instruction

Olympus

Olympus C-2000 - Zoom 2.1MP Digital Camera Instruction

Hasselblad H3D-39 Brochure & specs

Hasselblad

Hasselblad H3D-39 Brochure & specs

Olympus Camedia D-575ZOOM Manual básico

Olympus

Olympus Camedia D-575ZOOM Manual básico

Olympus 262857 instruction manual

Olympus

Olympus 262857 instruction manual

Pentax IQZOOM170SL specification

Pentax

Pentax IQZOOM170SL specification

Sony BLOGGIE MHS-FS3/FS3K Handbook

Sony

Sony BLOGGIE MHS-FS3/FS3K Handbook

Philips SIC 3608S/G7 user manual

Philips

Philips SIC 3608S/G7 user manual

manuals.online logo
manuals.online logoBrands
  • About & Mission
  • Contact us
  • Privacy Policy
  • Terms and Conditions

Copyright 2025 Manuals.Online. All Rights Reserved.