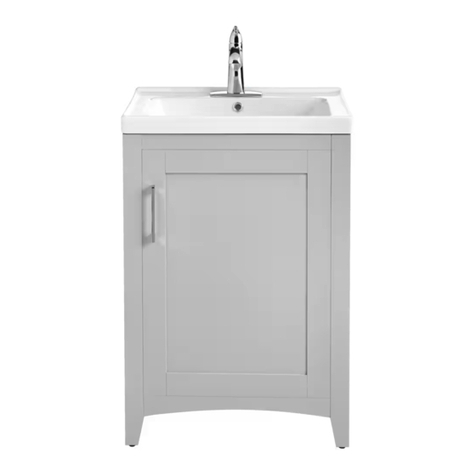
Canvas GIBSONS 063-6343-8 User manual

ASSEMBLY INSTRUCTIONS
HAVING TROUBLE?
TOLL-FREE:
1-888-670-6684
IMPORTANT: Please read this manual carefully
before beginning assembly of this product.
Keep this manual for future reference.
GIBSONS
30” (76.2 CM) BATHROOM
VANITY
PRODUCT NO. 063-6343-8—WHITE
063-6349-6—GREY

We believe in the power of décor and its
ability to make up the fabric of your home.
That’s why CANVAS® collections draw
inspiration from Canadians and the way
they live.
From on-trend furniture pieces to holiday
décor and all your outdoor living essentials,
CANVAS® makes it easy to refresh your space
to reect your unique style and the way you
live every day.
We would love to hear from you and welcome
your thoughtful feedback. Visit our website
at canadiantire.ca to tell us about your
experience, and share your photos with us
using #myCANVASstyle.
Show us how you bring CANVAS® products
to life. We can’t wait to see!

Parts List 4
Before You Begin Assembly 8
Step-by-step Guide 10
Technical Data 22
Troubleshooting 23
Caring for Your Item 23
Warranty 24
TABLE OF CONTENTS
TOOLS REQUIRED
• Pleasereadandunderstandthisentiremanualbeforeattemptingtoassemble,
operate,orinstalltheproduct.
• Anyassemblyormaintenanceoftheproductmustbecarriedoutbyadultsonly.
• Somepartsmaycontainsharpedges.Wearprotectiveglovesifnecessary.
• Topreventdamage,placeallpartsonalevelsurfaceduringassembly.Adda
layerofprotectivesurfaceifneeded.
• Donotallowyourchildrentoclimborjumponfurnitureduetopossibleaccident,
injuryordeath.Achildclimbingonapieceoffurniturecanmakeittop-heavy
andcausethefurnituretotipover.
• Keepchildrenandpetsawayduringassembly.
• Repairingandreplacingpartsshouldbedonebyaqualiedtechnician.
• Thisunitisintendedforuseonlywithinthemaximumweightindicated.Use
withloadsheavierthanthemaximumweightindicatedmayresultininstability
causingpossibleinjury.
• Failuretofollowthesewarningscouldresultinseriousinjury.
WARNING!TOREDUCETHERISKOFSERIOUSINJURY,
READTHEFOLLOWINGSAFETYINSTRUCTIONSBEFORE
ASSEMBLINGANDUSINGTHEPRODUCT.
2 People
No.2Cross-headScrewdriver
TipShownActualSize
NOTE: Donotover-drill/
beawareofover-drilling

GIBSONS 30” (76.2 CM) BATHROOM VANITY4
PARTS LIST
ITEM DESCRIPTION THUMBNAIL QUANTITY
7Bottom Panel 1
8 UpperFrontStretcher 1
9 LowerFrontStretcher 1
10 UpperDrawerFront 1
11 UpperDrawerLeft 1
12 UpperDrawerRight 1
13 UpperDivideLeftPanel 1
14 UpperDivideRightPanel 1
15 UpperDrawerLeftBack 1
1 Backsplash 1
2Vanity Top 1
3Side Panel Left 1
4Side Panel Right 1
5 UpperBackStretcher 1
6 LowerBackStretcher 1

GIBSONS 30” (76.2 CM) BATHROOM VANITY 5
PARTS LIST
ITEM DESCRIPTION THUMBNAIL QUANTITY
22 LowerDrawerRight 1
23 LowerDivideLeftPanel 1
24 LowerDivideRightPanel 1
25 LowerDrawerLeftBack 1
26 LowerDrawerMiddleBack 1
27 LowerDrawerRightBack 1
28 LowerDrawerSideBottom 2
29 LowerDrawerMiddleBottom 1
30 DrawerStretcher 4
16 UpperDrawerMiddleBack 1
17 UpperDrawerRightBack 1
18 UpperDrawerSideBottom 2
19 UpperDrawerMiddleBottom 1
20 LowerDrawerFront 1
21 LowerDrawerLeft 1
31 BackPanel 2

GIBSONS 30” (76.2 CM) BATHROOM VANITY6
EXPLODED PARTS
1
2
3
4
5
8
69
7
10
20
11
21
15
25
13 16
14
17 12
30 18
19 18
30
23 26 24
22
27
28
28
30
30
29
31
31

GIBSONS 30” (76.2 CM) BATHROOM VANITY 7
HARDWARE LIST
ITEM DESCRIPTION THUMBNAIL QUANTITY
A LargeCamLock 18
BLarge Cam Bolt 18
GSmall Cam Bolt 24
H M3.5x10mmScrew 24
C M8x30mmWoodDowel 18
D HandlewithBolts 4
E M4x25mmScrew 32
F SmallCamLock 24
I DrawerSlides 4
J Leveller 4
KGlue 1
L M3.5x15mmScrew 12
M M4x50mmScrew 2
NPlastic anchor 2

GIBSONS 30” (76.2 CM) BATHROOM VANITY8
BEFORE YOU BEGIN ASSEMBLY
MAKE SURE ALL PARTS ARE PRESENT
Compareallpiecestothepartsandhardwarelists,and
makesureyouhavealltoolsrequiredforassembly.
REMOVE PACKAGING MATERIALS
Placepackingmaterialsbackinthebox.Donotdisposeof
packagingmaterialsuntilassemblyiscomplete.
READ EACH STEP CAREFULLY
Makesureyouunderstandeachstep.Ifyouhaveanyquestions,
contact CANVAS®customerserviceat1-888-670-6684(tollfree).
ASSEMBLE IN A CLEARED AREA
Placeallpartsfromtheboxontheoorinfrontofyouonaclean,
dry,levelsurfacetoprotecttheproductasitisbeingbuilt.

GIBSONS 30” (76.2 CM) BATHROOM VANITY 9
BEFORE YOU BEGIN ASSEMBLY
CAM LOCK SYSTEM OPERATION
NOTE:ITISVERYIMPORTANTTOUSEGLUEWITHDOWELS.EXCESSGLUECAN
BEWIPEDOFFWITHDAMPCLOTH.
InsertdowelatleasthalfwaybytappinglightlywitharubbermalletIFNECESSARY.
GLUE
X
X
1 4
3
2
HOW THE KNOCK DOWN (KD) ASSEMBLY SYSTEM WORKS
1.Screwcamboltintothepre-drilledsmallholesonpanel.Alignthepanelstobejoined
so that the cam bolt goes into the pre-drilled hole on the edge of the second panel and
protrudesintotheholethatwillhousethecamlock.
2.Insertthecamlockintopre-drilledlargeholeonpanel.Makesurearrowonthecam
lockispointedtowardthecambolt.
3.Oncethecamboltisconnectedinsidecamlock,takeacross-headscrewdriverand
tightenthecamlockbyturningclockwise.
Youarenowreadytoassembletheproduct.

GIBSONS 30” (76.2 CM) BATHROOM VANITY10
STEP-BY-STEP GUIDE
10 X1
G
DX4
10 D
G
20 D
20 X1
RemovepreassembledboltsfromhandleD.AttachdrawerhandleD toupperdrawer
front 10 andlowerdrawerfront20,securingwithpreviouslyremovedbolts. Install
small cam bolts Gintoupperdrawerfront10andlowerdrawerfront20. Set aside.
Note:MakesuresmallcamboltsGare completely seated.
STEP 1
GX24

GIBSONS 30” (76.2 CM) BATHROOM VANITY 11
STEP-BY-STEP GUIDE
11 X113 X114 X115 X116 X1
12 X1
18 X2
17 X1
19 X1
15
13 14
17
E16 E
11
12
E
18
19
Attachupperdrawerleft11,upperdrawerright12,upperdivideleftpanel13,upper
dividerightpanel14,upperdrawerleftback15,upperdrawermiddleback16 and
upperdrawermiddleback17usingM4x25mmscrews E. Insert upperdrawerside
bottom 18 and upperdrawermiddlebottom19. Set aside.
STEP 2
EX12

GIBSONS 30” (76.2 CM) BATHROOM VANITY12
STEP-BY-STEP GUIDE
21 X123 X124 X125 X126 X1
22 X1
28 X2
27 X1
29 X1
25
23 24
27
E26
E
21
22
E
28
29
Attachlowerdrawerleft21,lowerdrawerright22,lowerdivideleftpanel23,lower
dividerightpanel24,lowerdrawerleftback25,lowerdrawermiddleback26 and
lowerdrawermiddleback27usingM4x25mmscrews E. Insert lowerdrawerside
bottom 28 and lowerdrawermiddlebottom29. Set aside.
STEP 3
EX12

GIBSONS 30” (76.2 CM) BATHROOM VANITY 13
STEP-BY-STEP GUIDE
20 X130 X2FX24
10 X1
F
10 20
30 30
F
FF
E
E
Attachupperdrawerfront10 anddrawerstretcher30todrawerboxusing
M4x25mmscrewsEandsmallcamlocks F.
Attachlowerdrawerfront20anddrawerstretcher30todrawerboxusing
M4X25mmscrewsEandsmallcamlocksF.
Attachdrawerfront14anddrawerstretcher19todrawerleft15,drawerright16 and
drawerback17usingM4x25mmscrewsEandsmallcamlocks F.
STEP 4
EX8

GIBSONS 30” (76.2 CM) BATHROOM VANITY14
STEP-BY-STEP GUIDE
IX4
10
20
I
H
I
H
AttachdrawerslidesItodrawerboxusingM3.5x10mmscrews H.
STEP 5
HX12

GIBSONS 30” (76.2 CM) BATHROOM VANITY 15
STEP-BY-STEP GUIDE
4X1
3X1
3
J
4
H
JX4
AttachdrawerslidesIto side panel left 3and side panel right 4usingM3.5x10mm
screws H.AttachlevellersJtothebaseofthevanityassembly.
IX4HX12
STEP 6

GIBSONS 30” (76.2 CM) BATHROOM VANITY16
STEP-BY-STEP GUIDE
3
5X16X17X18X19X1
4
5
6
7
9
8
A
B
C
Attach upperbackstretcher5,lowerbackstretcher6,bottompanel7,upper front
stretcher 8,lowerfrontstretcher9to side panel left 3and side panel right 4using
largecamlocksA,large cam bolts Band M8x30mmwooddowelsC.
Note:Makesurelarge cam bolts Bare completely seated.
STEP 7
4X1
3X1
CX18
BX18
AX18

GIBSONS 30” (76.2 CM) BATHROOM VANITY 17
STEP-BY-STEP GUIDE
LX12
31 X2
Attachbackpanels31tothebackofthevanityassembly usingM3.5x15mmscrewsL.
L
31
31
STEP 8

GIBSONS 30” (76.2 CM) BATHROOM VANITY18
STEP-BY-STEP GUIDE
Insertthedrawerintotheassemblybypressingdownthereleaseleverson
thesliderunnersandslidingthedrawerintothetracksofslides.
STEP 9

GIBSONS 30” (76.2 CM) BATHROOM VANITY 19
STEP-BY-STEP GUIDE
STEP 10
MX2NX2
Determinewherevanityistobeplacedandmarklocationonthewallforthe
mounting.
Drilla3/8”holeinthewall.PresstheplasticanchorNinto the hole and gently tap
untiltheangeoftheanchorisagainstthewallsurface.
AttachVanitytothewallusingM4x50mmscrewsM.
3
M
N

GIBSONS 30” (76.2 CM) BATHROOM VANITY20
STEP-BY-STEP GUIDE
2X1
2
Silicone(NOTProvided)
3
STEP 11
Applysiliconearoundthetopedgesofthevanityassemblytosecurethevanitytop2.
This manual suits for next models
3
Table of contents
Languages:
Other Canvas Plumbing Product manuals
Popular Plumbing Product manuals by other brands

Franke
Franke AT3O0051 Installation and operating instructions

Danze
Danze D301040 quick guide

fine fixtures
fine fixtures VANNES VA1616 installation instructions

KWC
KWC SYSTEMA 10.501.144 Specification sheet

Mueller
Mueller HG-1 Operating instructions manual

Bossini
Bossini CUBE&OKI I01723 INSTALLATION AND CARE INSTRUCTIONS