Instruction manual CM465
Please keep this instruction manual for future reference
10
PREPARATION
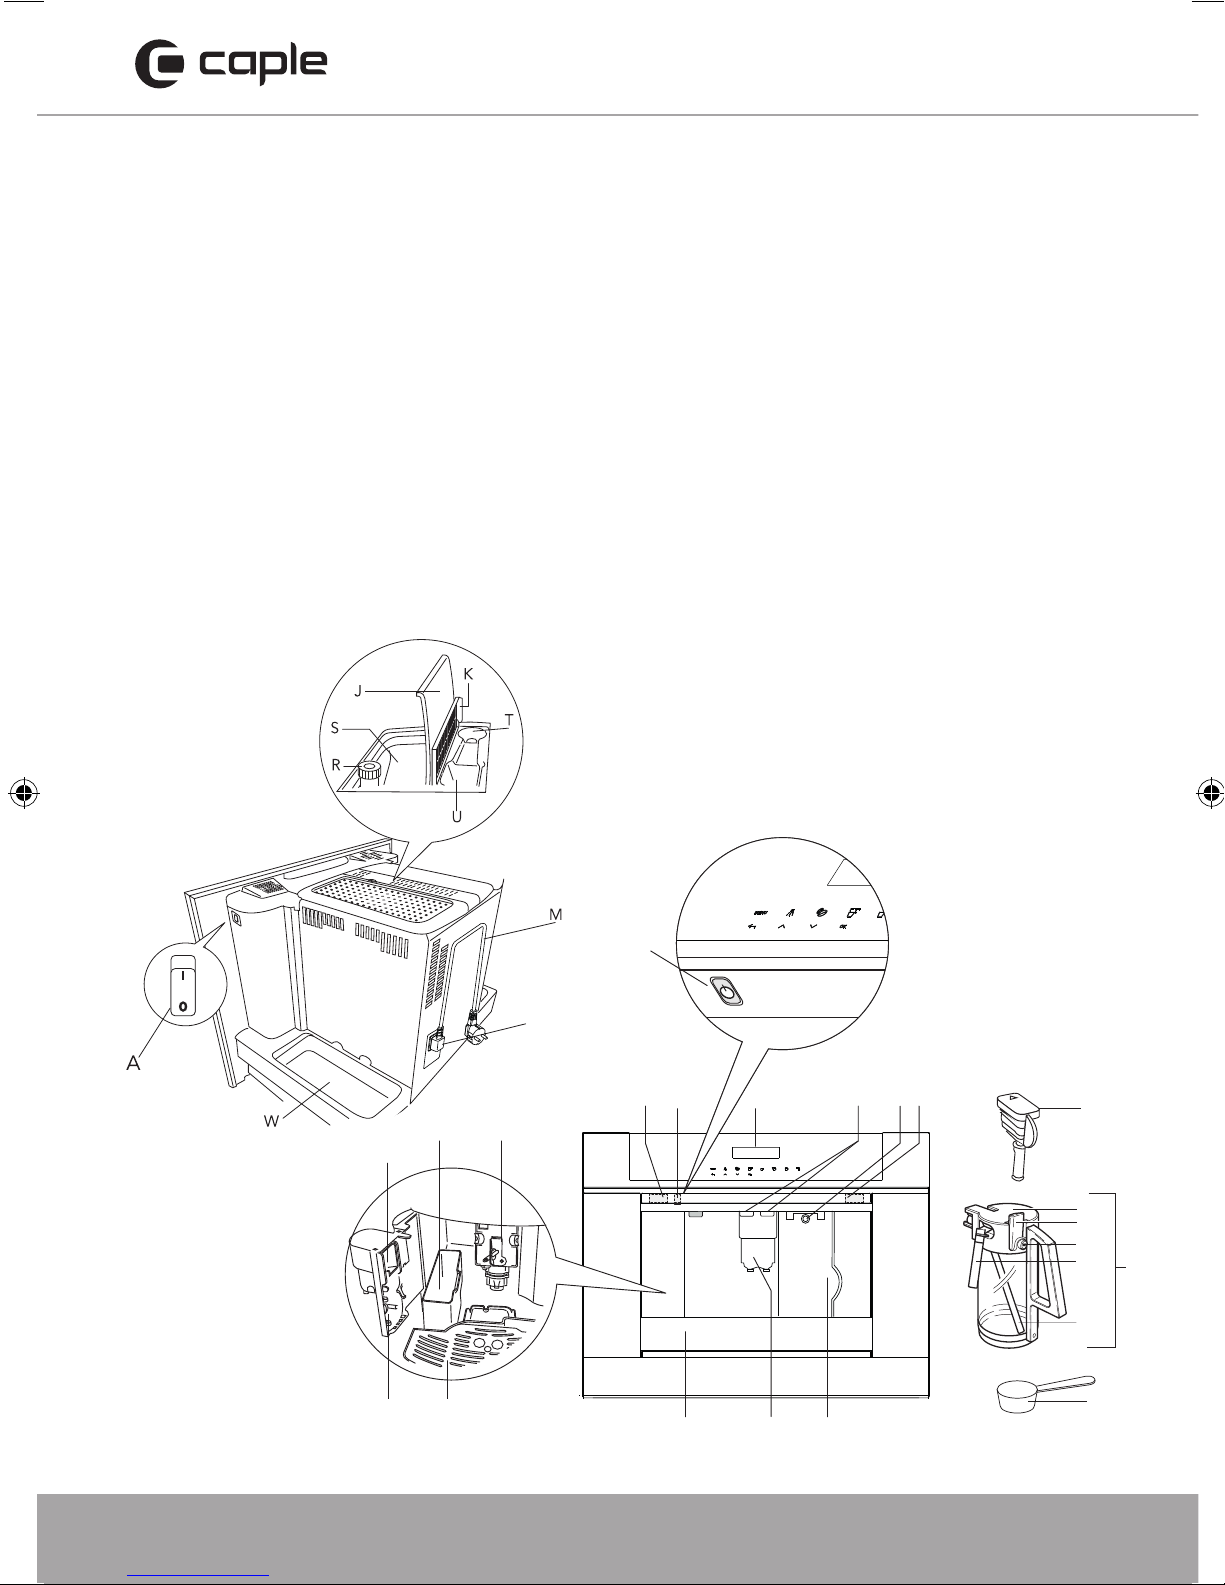
The first time you switch on the appliance with the main
switch (see ‘A’ on the ‘Product overview’ section) and every
time that it is plugged in, the appliance executes a “SELF-
DIAGNOSIS” action. Then the appliance switches off.
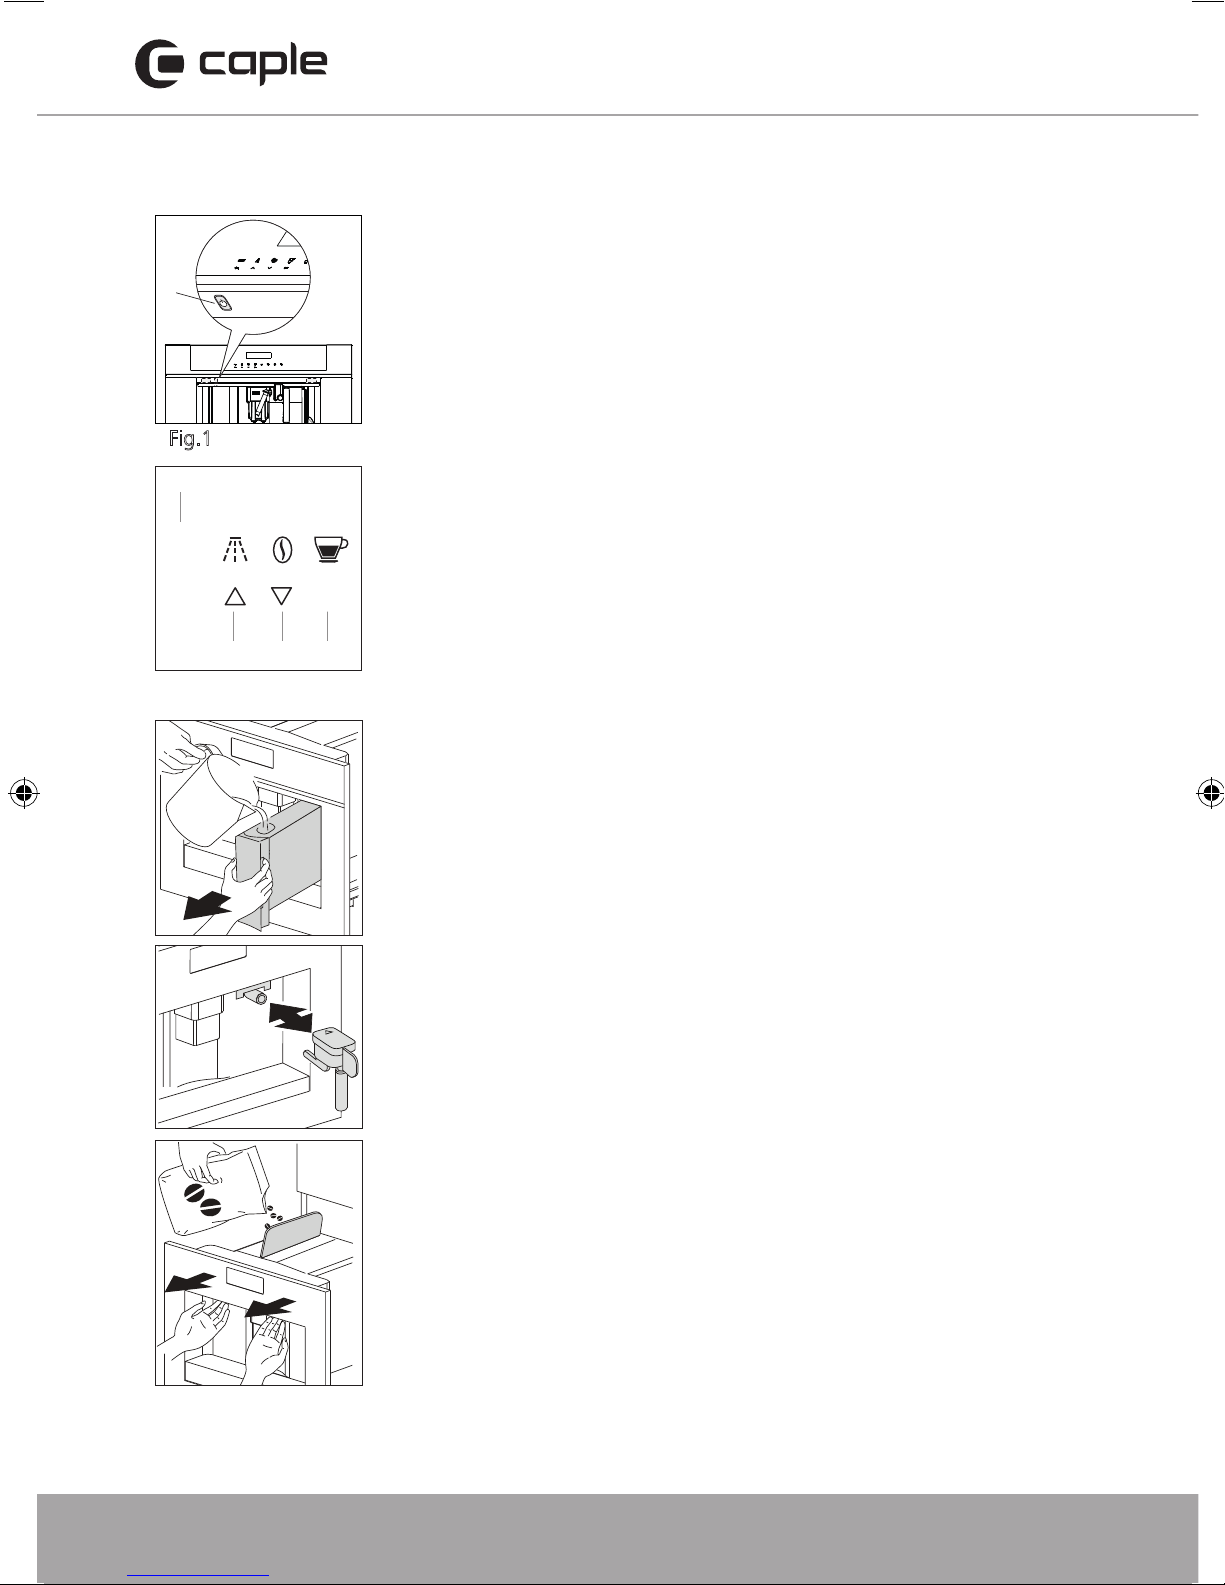
To turn it on, press the On/off button (Aa/see fig. 1) on the
left side underneath the control panel.
- Coffee has been used to factory test the appliance and it is
therefore completely normal for there to be traces of coffee
in the mill.
- Customise water hardness as soon as possible following the
instructions in the “Setting water hardness” section.
1. Connect the appliance to the mains supply.
2. Switch on the appliance with the main switch (see ‘A’ on
‘Product overview’.
3. Start the appliance with the on/off button (see ‘Aa’).
4. Set the required language.
- Choose the required language using the ‘scroll’ touch keys
(5 and 7). When the message “PRESS OK TO CHOOSE
ENGLISH” is displayed, press and hold the touch key ‘Ok’
(9). If you set the wrong language, follow the instructions in
the “Setting the language” section. If your language is not
available, select one from those displayed. The instructions
refer to the English version. Then follow the instructions
displayed:
5. After 5 seconds, the appliance displays “ENGLISH
INSTALLED”.
- Extract the water tank, rinse and fill with fresh water
without exceeding the MAX line.
- Replace and push as far as it will go.
EN 10
USE
Preparation
The first time you switch on the appliance with the main switch (see ‘A’
on the 'Product overview' section) and every time that it is plugged in,
the appliance executes a “SELF-DIAGNOSIS” action. Then the
appliance switches off.
To turn it on, press the On/off button (Aa/see fig. 1) on the left side
underneath the control panel.
• Coffee has been used to factory test the appliance and it is therefore
completely normal for there to be traces of coffee in the mill.
• Customise water hardness as soon as possible following the
instructions in the “Setting water hardness” section.
1. Connect the appliance to the mains supply.
2. Switch on the appliance with the main switch (see ‘A’ on 'Product
overview'.
3. Start the appliance with the on/off button (see ‘Aa’).
4. Set the required language.
•Choose the required language using the ‘scroll’ touch keys (5
and 7). When the message “PRESS OK TO CHOOSE ENGLISH”
is displayed, press and hold the touch key ‘Ok’ (9). If you set the
wrong language, follow the instructions in the “Setting the
language” section. If your language is not available, select
one from those displayed. The instructions refer to the English
version. Then follow the instructions displayed:
5. After 5 seconds, the appliance displays “ENGLISH INSTALLED”.
•Extract the water tank, rinse and fill with fresh water without
exceeding the MAX line.
•Replace and push as far as it will go.
6. Place a cup under the hot water spout (If the hot water spout is not
inserted, the appliance displays “INSERT WATER SPOUT”.
The appliance displays: “HOT WATER PRESS OK”. Press the touch key
‘OK’ (9) and after a few seconds a little water comes out of the spout.
7. The machine now displays “TURNING OFF...PLEASE WAIT” and
goes off.
8. Extract the appliance by pulling it out using the handles.
Open the lid and fill the container with coffee beans, then close the
lid and push the appliance in. The coffee maker is now ready for
normal use.
Only fill the water tank with cold water. Never use other liquids
such as mineral water or milk.
2
1
Aa
5
279
Fig.1
USE OUR ARTWORK
EN 10
USE
Preparation
The first time you switch on the appliance with the main switch (see ‘A’
on the 'Product overview' section) and every time that it is plugged in,
the appliance executes a “SELF-DIAGNOSIS” action. Then the
appliance switches off.
To turn it on, press the On/off button (Aa/see fig. 1) on the left side
underneath the control panel.
• Coffee has been used to factory test the appliance and it is therefore
completely normal for there to be traces of coffee in the mill.
• Customise water hardness as soon as possible following the
instructions in the “Setting water hardness” section.
1. Connect the appliance to the mains supply.
2. Switch on the appliance with the main switch (see ‘A’ on 'Product
overview'.
3. Start the appliance with the on/off button (see ‘Aa’).
4. Set the required language.
•Choose the required language using the ‘scroll’ touch keys (5
and 7). When the message “PRESS OK TO CHOOSE ENGLISH”
is displayed, press and hold the touch key ‘Ok’ (9). If you set the
wrong language, follow the instructions in the “Setting the
language” section. If your language is not available, select
one from those displayed. The instructions refer to the English
version. Then follow the instructions displayed:
5. After 5 seconds, the appliance displays “ENGLISH INSTALLED”.
•Extract the water tank, rinse and fill with fresh water without
exceeding the MAX line.
•Replace and push as far as it will go.
6. Place a cup under the hot water spout (If the hot water spout is not
inserted, the appliance displays “INSERT WATER SPOUT”.
The appliance displays: “HOT WATER PRESS OK”. Press the touch key
‘OK’ (9) and after a few seconds a little water comes out of the spout.
7. The machine now displays “TURNING OFF...PLEASE WAIT” and
goes off.
8. Extract the appliance by pulling it out using the handles.
Open the lid and fill the container with coffee beans, then close the
lid and push the appliance in. The coffee maker is now ready for
normal use.
Only fill the water tank with cold water. Never use other liquids
such as mineral water or milk.
2
1
Aa
Fig.1
MENU
EXIT OK
2
5 7 9
CM465 Coffee Machine Instruction manual.indd 10 17/08/2017 13:59