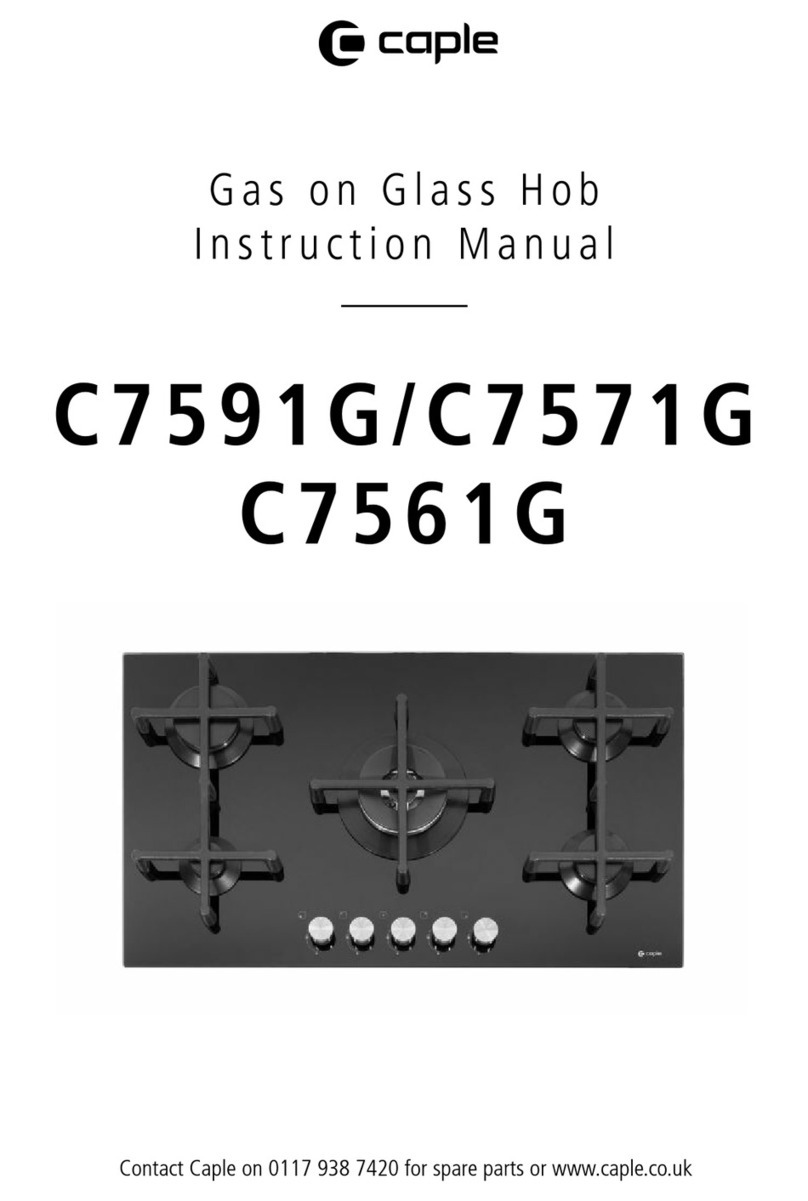
Caple C981G User manual

Gas on Glass Hob
Instruction Manual
C981G & C1081G
Contact Caple on 0117 938 7420 for spare parts or www.caple.co.uk

2Instruction manual C981G & C1081G Please keep this instruction manual for future reference
CONTENTS
Introduction 3
Warnings 3
Environmental Protection 10
Warranty 11
Parts of the Appliance 12
Using the Burners 13
Using your Gas Hob 14
Cleaning and Maintenance 21
Troubleshooting 22
Installation 24
Electrical Connection 28
Technical Specification 36
Caple Contact Details 40

3Instruction manual C981G & C1081GPlease keep this instruction manual for future reference
INTRODUCTION
Congratulations on the purchase of your new Caple hob.
We recommend that you spend some time reading this
instruction manual in order to fully understand how to
correctly install and operate your hob. For installation,
please read the installation section. Read all the safety
instructions carefully before using your hob and keep this
instruction manual for future reference.
INTRODUCTION
Congratulations on the purchase of your new Caple hob.
We recommend that you take some time to read this
instruction manual in order to fully understand how to
correctly install and operate it. For installation, please
read the installation section. Read all the safety
instructions carefully before use and keep this instruction
manual for future reference.
Please read this instruction manual carefully
before installing and using the appliance.
This manual must be kept in easy reach of the
appliance for future consultation. If this appliance
is sold or transferred to another user, please give
this manual to the new user so that they can
learn how to use it correctly and be aware of the
various warnings.
This is a Class 3 appliance designed for home use.
Please read this instruction manual carefully before
installing and using the appliance.
This manual must be kept in easy reach of the appliance
for future consultation. If this appliance is sold or
transferred to another user, please give this manual to the
new user so that they can learn how to use it correctly and
be aware of the various warnings.
This is a Class 3 appliance designed for home use.
SAFETY INSTRUCTIONS
Your safety is important to us. Please read this information
before using your hob.
INSTALLATION
ELECTRICAL SHOCK HAZARD
-Disconnect the appliance from the mains electricity supply
before carrying out any work or maintenance on it.
-Connection to a good earth wiring system is mandatory.

4Instruction manual C981G & C1081G Please keep this instruction manual for future reference
-Alterations to the domestic wiring system must only be
made by a qualified electrician.
-Failure to follow this advice could be fatal or seriously injure
the user.
CUT HAZARD
-If you choose to use a ceramic hob scraper, the razor blade
is exposed when the safety cover is retracted. Use with
extreme care and always store safely and out of reach of
children.
-Failure to use caution could result in injury or cuts.
-Take care - panel edges are sharp. Failure to do so may
result in injury or cuts.
IMPORTANT SAFETY INSTRUCTIONS
-Read these instructions carefully before installing or using
this appliance.
-No combustible materials or products should be placed on
this appliance at any time.
-Please make this information available to the person
responsible for installing the appliance.
-In order to avoid a hazard, this appliance must be installed
according to these instructions.
-This appliance is to be installed correctly and earthed only
by a suitably qualified person.
-This appliance should be connected to a circuit which
incorporates an isolating switch providing full disconnection
from the power supply.

5Instruction manual C981G & C1081GPlease keep this instruction manual for future reference
-Failure to install the appliance correctly could invalidate any
warranty or liability claims.
OPERATION AND MAINTENANCE
WARNINGS
ELECTRICAL SHOCK HAZARD
-Do not cook on a broken or cracked hob. If the hob surface
should break or crack, switch the appliance off immediately at
the main power supply (wall switch) and contact a qualified
technician.
-Switch the hob off at the wall before cleaning or
maintenance.
-Failure to follow this advice could be fatal or seriously injure
user.
HOT SURFACE HAZARD
-During use, accessible parts of this appliance will become hot
enough to cause burns.
-Do not let your body, clothing or any item other than suitable
cookware contact the glass until the surface is cool.
-Keep children away from appliance.
-Handles of saucepans may be hot to touch. Check saucepan
handles do not overhang other cooking zones that are on.
Keep handles out of reach of children.
-Failure to follow this advice could result in burns and scalds.
CUT HAZARD
-The razor sharp blade of a hob scraper is exposed when the

6Instruction manual C981G & C1081G Please keep this instruction manual for future reference
safety cover is retracted. Use with extreme care and always
store safely and out of reach of children.
-Failure to use caution could result in serious injury or cuts.
IMPORTANT SAFETY INSTRUCTIONS
-Never leave the appliance unattended when in use as pans
may boil over which may result in smoking or grease spills
that may ignite.
-Never use your appliance as a work or storage surface.
-Never use your appliance for warming or heating the room.
-After use, always turn off the cooking zones and the hob as
described in this manual (i.e. by using the touch controls).
-Do not allow children to play, sit, stand, or climb on the
appliance.
-Do not store children’s toys in cabinets above the appliance
to avoid the risk of children climbing on the hob as this
could result in serious injury.
-Persons with reduced physical, sensory or mental
capabilities or lack of experience and knowledge must be
supervised and given appropriate instruction concerning
the use of the appliance in a safe way and understand the
hazards involved.
-Do not repair or replace any part of the appliance unless
specific instructions are detailed in the manual. All other
servicing should be done by a qualified technician.

7Instruction manual C981G & C1081GPlease keep this instruction manual for future reference
-Do not leave children alone or unattended in the kitchen
when the hob is in use.
-Do not use a steam cleaner to clean the hob.
-Do not place or drop heavy objects on your hob.
-Do not stand on your hob.
-Do not use scourers or any other harsh abrasive cleaning
agents to clean your hob, as these can scratch glass.
-If the supply cord is damaged, it must be replaced by Caple
service or similarly qualified persons in order to avoid a
hazard.
-This appliance is intended to be used in household and
similar applications such as:
› Staff kitchen areas in shops, offices and other working
environments.
› Farm Houses.
› By clients in hotels, motels and other residential
type environments.
› Bed and breakfast type environments.
WARNING
-The appliance and its accessible parts become hot during use.
-Care should be taken to avoid touching heating elements.
-Children less than 8 years of age shall be kept away unless
continuously supervised.

8Instruction manual C981G & C1081G Please keep this instruction manual for future reference
-This appliance can be used by children aged from 8 years
and above and persons with reduced physical, sensory or
mental capabilities or lack of experience and knowledge if
they have been given supervision or instruction concerning
use of the appliance in a safe way and understand the
hazards involved.
-Children should not play with the appliance.
-Cleaning and user maintenance should not be carried out
by children without supervision.
-Before carrying out maintenance or cleaning operations,
disconnect the appliance from the power supply and allow
it to cool.
-Unattended cooking on a hob with fat or oil can be
dangerous and may result in fire. NEVER try to extinguish a
fire with water, but switch off the appliance and then cover
flame e.g. with a lid or a fire blanket.
-Danger of fire: do not store items on the cooking surfaces.
-If the glass/ceramic surface is cracked it can expose live
parts, switch off the appliance to avoid the possibility of
electric shock.
-Do not steam clean.
-The appliance is not intended to be operated by means of
an external timer or separate remote control system.
-Ensure that the gas and electrical supply complies with the
type stated on the rating label.

9Instruction manual C981G & C1081GPlease keep this instruction manual for future reference
-Prior to installation, ensure that the local distribution
conditions (nature of the gas and gas pressure) and the
adjustment of the appliance are compatible.
-Before powering the appliance, ensure that it is properly
adjusted for the type of gas available (see “installation”).
-It should be installed and connected in accordance with
current installation regulations. Particular attention shall be
given to the relevant requirements regarding ventilation.
-Ensure air is able to circulate around gas appliances.
Insufficient ventilation will lead to depletion of the oxygen
in the air in the place of installation.
-In case of intense or prolonged use of the appliance, it may
be necessary to increase ventilation, for example by opening
a window or increasing the power of extractor fans, if
present.
-Combustion products must be expelled from the place of
installation through an extractor hood or extractor fan (see
“Installation”).
-For any replacements or alterations that may be required,
contact Caple Service and use original spare parts only.
IMPORTANT:
The rating label, with the serial number, is affixed to the
underside of the hob.

10 Instruction manual C981G & C1081G Please keep this instruction manual for future reference
ENVIRONMENTAL PROTECTION
Waste electrical products should not be disposed of with household waste. Please recycle where
facilities exist. Check with your Local Authority or retailer for recycling advice. This appliance is
marked according to the European directive on Waste Electrical and Electronic Equipment (WEEE).
By ensuring this product is disposed of correctly, you will help prevent potential negative
consequences for the environment and human health, which could otherwise be caused by
inappropriate waste handling of this product. The symbol on the product indicates that this
product may not be treated as household waste. Instead it shall be handed over to the applicable
collection point for the recycling of electrical and electronic equipment. Disposal must be carried
out in accordance with local environmental regulations for waste disposal.
For more detailed information about treatment, recovery and recycling of this product, please
contact your local council, your household waste disposal service or the retailer where you
purchased the product.
CE DECLARATIONS OF CONFORMITY
This appliance has been manufactured to the strictest standards and complies with all applicable
legislation, Low Voltage Directive (LVD) and Electromagnetic Compatibility (EMC).
UKCA DECLARATIONS OF CONFORMITY
This appliance has been manufactured to the strictest standards and complies with all
applicable legislation.
TECHNICAL FICHE
This appliance conforms to all current and applicable energy regulations. To view the Technical
Fiche that supports the energy labelling data, please visit the product page on our website
www.caple.co.uk

11Instruction manual C981G & C1081GPlease keep this instruction manual for future reference
WARRANTY
Your new appliance is covered by warranty. The warranty card is enclosed - if it is missing, you
must provide the following information to your retailer in order to receive a replacement: date of
purchase, model and serial number. Registration can also be completed online by visiting
www.caple.co.uk.
Ensure you keep your warranty card safe, you may need to show it to Caple Service together with
proof of purchase.
If you fail to show your warranty card you will incur all repair charges. Spare parts are only
available from Caple Service and spare parts authorised centres.

12 Instruction manual C981G & C1081G Please keep this instruction manual for future reference
PARTS OF THE APPLIANCE
C981G
1. Rapid burner 3000W
2. Semi-rapid burner 1650W
3. Auxiliary burner 1000W
4. Triple crown burner 4000W
C1081G
1. Rapid burner 3000W
2. Semi-rapid burner 1650W
3. Auxiliary burner 1000W
4. Triple crown burner 4000W
PRODUCT DESCRIPTION
C981G
C1081G
1. Rapid burner
2. Semi-rapid burner
3. Auxiliary burner
4. Triple crown burner
3000 W
1650 W
1000 W
1. Rapid burner
2. Semi-rapid burner
3. Auxiliary burner
4. Triple crown burner 4000 W
2
42
3
1
3000 W
1650 W
1000 W
4000 W
4
2
1
3

13Instruction manual C981G & C1081GPlease keep this instruction manual for future reference
USING THE BURNERS
› To obtain the maximum efficiency without wasting gas, the pot diameter must be suitable
in relation to the burner (see the following table), to avoid the flame extending beyond the
bottom of the pan.
› Use the maximum capacity to quickly make the liquids reach the boiling temperature, and the
reduced capacity to heat food or maintain the boil.
BURNERS POWER (W) ØPOT
Auxiliary 1000 10 - 14cm
Semi-rapid 1650 16 -18cm
Rapid 3000 20 -22cm
Triple crown 4000 24 - 26cm
PRECAUTIONS
› The appliance is equipped with a device that attempts to re-light the burner if the flame blows
out accidentally. If the burner does not light after 3 attempts, it will lock out and the letter “b”
will appear on the relevant display. In this case, perform the reset procedure as described in
the ‘Burner Reset’ section (page 17).
› Fat and oil can catch fire when overheated so use caution when cooking in fat or oil.
› Do not use sprays near the appliance when it is in operation.
› Do not place unstable or deformed pots on pan support: risk of overturning or spillage of
contents.
› Make sure pot handles are positioned correctly.
› When the burner is lit, check that the flame is even and, before removing pots, always turn
down the flame or switch off the burner.

14 Instruction manual C981G & C1081G Please keep this instruction manual for future reference
USING YOUR GAS HOB
USING YOUR GAS HOB
All operations concerning installation, adjustment and adaptation to
the available gas type must be carried out by a qualified technician,
in compliance with statutory legislation.
The symbols printed above each burner control show the correspondence between the
control and the burner.
STANDBY MODE
After connecting the appliance to the power supply, it will perform a brief self-diagnosis
routine and touch panel calibration (all displays and LEDs remain illuminated for a few
seconds). When this procedure is completed the display will be blank.
SWITCHING ON THE HOB
To switch on the hob, hold the ON/OFF button for at
least 2 seconds.
The appliance will switch on and the five burner
displays will show power level 0, meaning that
the burners are off.
ALL OPERATIONS CONCERNING INSTALLATION, ADJUSTMENT AND
ADAPTATION TO THE AVAILABLE GAS TYPE MUST BE CARRIED OUT
BY A QUALIFIED TECHNICIAN, IN COMPLIANCE WITH STATUTORY
LEGISLATION.
The symbols printed above each burner control show the correspondence between the control and
the burner.
STANDBY MODE
After connecting the appliance to the power supply, it will perform a brief self-diagnosis routine
and touch panel calibration (all displays and LEDs remain illuminated for a few seconds). When
this procedure is completed the display will be blank.
SWITCHING ON THE HOB
To switch on the hob, hold the ON/OFF button for at least 2 seconds.
The appliance will switch on and the five burner displays will show
power level 0, meaning that the burners are off.
USING YOUR GAS HOB
All operations concerning installation, adjustment and adaptation to
the available gas type must be carried out by a qualified technician,
in compliance with statutory legislation.
The symbols printed above each burner control show the correspondence between the
control and the burner.
STANDBY MODE
After connecting the appliance to the power supply, it will perform a brief self-diagnosis
routine and touch panel calibration (all displays and LEDs remain illuminated for a few
seconds). When this procedure is completed the display will be blank.
SWITCHING ON THE HOB
To switch on the hob, hold the ON/OFF button for at
least 2 seconds.
The appliance will switch on and the five burner
displays will show power level 0, meaning that
the burners are off.

15Instruction manual C981G & C1081GPlease keep this instruction manual for future reference
LIGHTING A BURNER
To light a burner, hold down the “+” and “-” buttons on the control panel simultaneously for
at least 1 second. After a few seconds, the selected burner will light and power setting 5 will be
selected automatically. The associated indicator light will remain on as long as the burner is lit.
All burners for which the timer has not been set will turn off automatically after 4 hours of
continuous operation.
LIGHTING A BURNER
To light a burner, hold down the “+” and “-” buttons on the control panel
simultaneously for at least 1 second. After a few seconds, the selected burner will light
and power setting 5 will be selected automatically. The associated indicator light will
remain on as long as the burner is lit.
All burners for which the timer has not been set will turn off automatically after 4 hours of
continuous operation.
5
C981G: C1081G:
5
ADJUSTING BURNER FLAME LEVELS
After lighting the burner, press “+” to turn up the power level and “-” to turn it
down. For continuous variation of the power level hold down the “+” or “-” button
and release it at the desired level. Power levels can be adjusted from 1 to 9.
Burner response differs during upward and downward power adjustment:
› When the level is increased from 1 to 9, after the adjustment, the burner first assumes
power level 9 and then assumes the set level.
›When the level is decreased from 9 to 1, the adjustment is progressive.
C981G C1081G
ADJUSTING BURNER FLAME LEVELS
After lighting the burner, press “+” to turn up the power level and “-” to turn it down. For
continuous variation of the power level hold down the “+” or “-” button and release it at the
desired level. Power levels can be adjusted from 1 to 9.
Burner response differs during upward and downward power adjustment:
› When the level is increased from 1 to 9, after the adjustment, the burner first assumes power
level 9 and then assumes the set level.
› When the level is decreased from 9 to 1, the adjustment is progressive.

16 Instruction manual C981G & C1081G Please keep this instruction manual for future reference
TURNING OFF A BURNER
Briefly press the “+” and “-” buttons for the desired burner simultaneously. The power level
indicator shows letter “H” indicating that the burner is still hot. This indication is cleared after a
few minutes.
TURNING OFF ALL THE BURNERS
To turn off all burners simultaneously, briefly press the ON/OFF button: the appliance will enter
standby mode.
SETTING THE CLOCK
After a power failure, the hob clock must be reset. To set the clock, simultaneously press and hold
the buttons shown in the figure for at least 3 seconds. The flashing digits on the left of the dot
indicate the hour and the digits on the right indicate the minutes. Increase or decrease the hour
using the “+” and “-” buttons.
Hold down the “+” or “-” button to increase or decrease the hours digits rapidly. To set the
minutes, press the button with the clock symbol again. The digits on the right of the dot will start
flashing; set the minutes as described above. Press the button with the clock symbol again to save
the set time.
TURNING OFF A BURNER
Briefly press the “+” and “-” buttons for the desired burner simultaneously. The
power level indicator shows letter “H” indicating that the burner is still hot. This indication
is cleared after a few minutes.
TURNING OFF ALL THE BURNERS
To turn off all burners simultaneously, briefly press the ON/OFF button: the appliance
will enter standby mode.
SETTING THE CLOCK
After a power failure, the hob clock must be reset. To set the clock, simultaneously press
and hold the buttons shown in the figure for at least 3 seconds. The flashing digits on
the left of the dot indicate the hour and the digits on the right indicate the minutes.
Increase or decrease the hour using the “+” and “-” buttons.
Hold down the “+” or “-” button to increase or decrease the hours digits rapidly.
To set the minutes, press the button with the clock symbol again. The digits on the right
of the dot will start flashing; set the minutes as described above. Press the button with
the clock symbol again to save the set time.
08.00
C981G: C1081G:
08.00
C981G C1081G

17Instruction manual C981G & C1081GPlease keep this instruction manual for future reference
BURNER RESET
The burners may lock out due to external faults (for example, in the event of either a power or gas
supply failure).The display of each locked out burner will show the letter “b”.
To reset the burners, simultaneously hold down the “-” and “key” buttons as shown in the figure
(regardless of which burner is locked) for at least 2 seconds.
Once the burners have been reset, they will be set to level 0, ready to be turned on again.
NOTE:
If you repeat the reset procedure 5 consecutive times within 15 minutes, the message 'FLT06'
will be displayed and no other reset requests will be accepted for the following 15 minutes.
C981G:
C1081G:
C981G:
C1081G :
C981G
C1081G
C1081G
BURNER RESET
The burners may lock out due to external faults (for example, in the event of either a power or gas
supply failure).The display of each locked out burner will show the letter “b”.
To reset the burners, simultaneously hold down the “-” and “key” buttons as shown in the figure
(regardless of which burner is locked) for at least 2 seconds.
Once the burners have been reset, they will be set to level 0, ready to be turned on again.
C981G:
NOTE:
If you repeat the reset procedure 5 consecutive times within 15 minutes, the message ‘FLT06’ will
be displayed and no other reset requests will be accepted for the following 15 minutes.

18 Instruction manual C981G & C1081G Please keep this instruction manual for future reference
CHILD SAFETY LOCK
To activate this function, press the “key” button for at least 2 seconds. All burner power levels
will remain in their current status. When the touch panel is locked the decimal points light up in
the display of each burner. When the touch panel is locked, it is not possible to change the burner
power levels or change the timer settings, but it is possible to switch the hob off by pressing the
ON/OFF button. Locked burners cannot be reset when the touch panel lock is activated. The touch
panel must be unlocked before performing the burner reset procedure.
CHILD SAFETY LOCK
To activate this function, press the “key” button for at least 2 seconds. All burner power
levels will remain in their current status. When the touch panel is locked the decimal points
light up in the display of each burner. When the touch panel is locked, it is not possible to
change the burner power levels or change the timer settings, but it is possible to switch the hob
off by pressing the ON/OFF button. Locked burners cannot be reset when the touch panel lock is
activated. The touch panel must be unlocked before performing the burner reset procedure.
5.
C981G: C1081G:
5.
TO UNLOCK THE TOUCH PANEL
5555 5
C981G:
C1081G:
5 55 5
To unlock the touch panel, press the “key” button and the “+” button of the LH burner for at least
2 seconds. When the touch panel is unlocked the decimal points switch off in the power
level displays.
C981G C1081G
C1081G
TO UNLOCK THE TOUCH PANEL
To unlock the touch panel, press the “key” button and the “+” button of the LH burner for at
least 2 seconds. When the touch panel is unlocked the decimal points switch off in the power level
displays.
C981G

19Instruction manual C981G & C1081GPlease keep this instruction manual for future reference
AUTOMATIC SWITCH OFF
Each burner can be programmed to operate for a specified time, after which it switches
off automatically.
To programme the timer of a specific burner, press the “timer” button. The position of each
burner is shown by means of a LED on the control panel. The LED will illuminate to indicate that
the burner has been selected for programming. Select the burner with which to associate the
timer using the “+” and “-” buttons. The timer display will show 00.00, meaning that the timer
of the selected burner is not activated.
Press the “key” button again. The flashing digits on the left of the dot indicate the hour and the
digits on the right indicate the minutes. Increase or decrease cooking time from 0 to 9 hours
using the “+” and “-” buttons. Hold down the “+” or “-” button to increase or decrease the
hours digits rapidly. To set the minutes, press the “key” button again. The digits on the right of
the dot start flashing. Set the minutes as described above for the hours.
When programming the cooking time you can cancel the current setting at any time by pressing
the “+” and “-” buttons simultaneously.
If the time is set to zero, the timer is deactivated. To confirm the time displayed, press the
“key” button.
At this point the indicators of the burners with the active timer will continue flashing. Press the
“timer” button to access programming mode and display the time remaining before the burner
switches off, or change the current setting. If no button is pressed for more than 10 seconds, the
system automatically quits programming mode and restores the main display.
C981G: C1081G:
C1081GC981G
AUTOMATIC SWITCH OFF
Each burner can be programmed to operate for a specified time, after which it switches off
automatically.
To programme the timer of a specific burner, press the “timer” button. The position of each burner
is shown by means of a LED on the control panel. The LED will illuminate to indicate that the
burner has been selected for programming. Select the burner with which to associate the timer
using the “+” and “-” buttons. The timer display will show 00.00, meaning that the timer of the
selected burner is not activated.
Press the “key” button again. The flashing digits on the left of the dot indicate the hour and the
digits on the right indicate the minutes. Increase or decrease cooking time from 0 to 9 hours using
the “+” and “-” buttons. Hold down the “+” or “-” button to increase or decrease the hours
digits rapidly. To set the minutes, press the “key” button again. The digits on the right of the dot
start flashing. Set the minutes as described above for the hours.
When programming the cooking time you can cancel the current setting at any time by pressing
the “+” and “-” buttons simultaneously.
If the time is set to zero, the timer is deactivated. To confirm the time displayed, press the “key”
button.
At this point the indicators of the burners with the active timer will continue flashing. Press the
“timer” button to access programming mode and display the time remaining before the burner
switches off, or change the current setting. If no button is pressed for more than 10 seconds, the
system automatically quits programming mode and restores the main display.

20 Instruction manual C981G & C1081G Please keep this instruction manual for future reference
Any settings in progress on the selected burner are retained and the associated timer remains
active. The timer can be programmed with the burner OFF or ON, and it will start counting from
when the set cooking time is confirmed.
Once the set cooking time has elapsed, the timer-controlled burner will switch off and a
series of beeps will be emitted. Switching off a burner also deactivates the associated timer (if
programmed).
Other manuals for C981G
1
This manual suits for next models
1
Table of contents
Other Caple Hob manuals