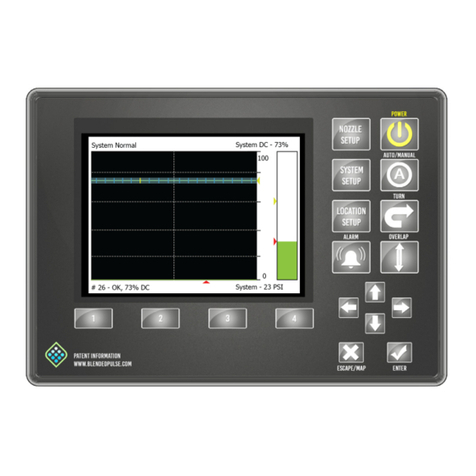
CapstanAG Synchro User manual

TM
Synchro™
Spray Application
Operator Manual
113100-596 Rev. A | Revised 08/2021 | ©2021 Capstan Ag Systems, Inc.

Thank you for your business!
At CapstanAG, our goal is to redefine the way people do their chemical application. Our PWM
control systems have been setting the bar for maximum productivity for more than 20 years.
Our focus on performance, support, and education have dramatically changed the landscape of
agricultural chemical application.
CapstanAG specializes in creating proprietary systems for the agricultural industry, primarily
focusing on chemical and fertilizer applications. Our inventive process involves research,
engineering, design, and lab and field testing.
Service Contact Information
If a problem occurs with your system that cannot be corrected with the information in this
manual, please contact your dealer for service and technical assistance. If further assistance is
needed, contact CapstanAG.
System Purchased: _____________________________________
Dealer: ______________________________________________
Contact: _____________________________________________
Phone: _______________________________________________
Address: _____________________________________________
City,State/Province, Zip: ________________________________
Factory Service/Repairs
CapstanAG
4225 S.W. Kirklawn Ave. | Topeka, KS 66609
Hours: 8:00 a.m. to 4:00 p.m. CST
Toll-free number: (855) 628-7722 | Fax: (785) 232-7799
CapstanAG.com | CapstanAG.ca
prodsupport@capstanag.com
©2021 Capstan Ag Systems, Inc. All rights reserved. No part of this publication may be reproduced, stored in a retrieval
system, or transmited, in any form or by means electronic, mechanical, photocopying, or otherwise, without prior written
permission of Capstan Ag Systems, Inc.
TM

TM
Contents
Contents
Chapter 1: Safety...................................................................................5
Signal Words...............................................................................................................................5
Emergency Safety.......................................................................................................................5
Personal Protective Equipment.................................................................................................. 6
Pressurized Fluid Lines.............................................................................................................. 6
Chemical Safety..........................................................................................................................6
Battery Safety..............................................................................................................................6
Chapter 2: Warranty..............................................................................7
Limited Warranty.........................................................................................................................7
Chapter 3: Introduction.........................................................................9
This Manual.................................................................................................................................9
System Identification.................................................................................................................10
Chapter 4: Installation.........................................................................11
Prepare for Installation..............................................................................................................11
Connect the machine with the system to a tractor...................................................................11
System Dry Test.......................................................................................................................12
System Wet Test...................................................................................................................... 13
Chapter 5: Operation...........................................................................15
Website......................................................................................................................................15
Make a profile on the Internet..................................................................................................17
Make a Profile on the Controller Wi-Fi.....................................................................................18
Transmit a Profile......................................................................................................................19
Spray with the CapstanAG System..........................................................................................20
Spray without the CapstanAG System (Manual Mode)............................................................21
Chapter 6: Maintenance......................................................................23
Service the System...................................................................................................................23
Jump Start, Weld On, or Charge the Machine..............................................................23
Recommended Guidelines for Maintenance/Service................................................................23
Maintenance Service Interval................................................................................................... 23
Baseline Evaluation Process.................................................................................................... 24
Inspect the System...................................................................................................................24
Clean the System..................................................................................................................... 24
Strainers and Screens..............................................................................................................24
Clean the Nozzle Valve(s)........................................................................................................25
Plunger Seal Inspection............................................................................................................25
Storage of the System..............................................................................................................26
©2021 Capstan Ag Systems, Inc. iii Synchro™

Winterize for Storage.....................................................................................................26
Chapter 7: Troubleshooting............................................................... 27
Troubleshooting Charts.............................................................................................................27
Interchange the Components................................................................................................... 29
Nozzle Valves........................................................................................................................... 30
Clean the Nozzle Valve(s).............................................................................................30
Plunger Seal Inspection.................................................................................................31
System Dry Test.......................................................................................................................32
System Wet Test...................................................................................................................... 33
Coil Assembly Test...................................................................................................................34
Do a Check of the System Load Capacity...............................................................................34
Battery Voltage Test.................................................................................................................35
Chapter 8: Schematics........................................................................37
System Layout.......................................................................................................................... 37
Parts List........................................................................................................................ 38
Control Module Pinout..............................................................................................................40
Cab Box Harness Pinout..........................................................................................................42
Power Harness Pinout..............................................................................................................43
Battery Harness Pinout.............................................................................................................44
Valve Harness...........................................................................................................................45
Valve Harness—16 Valves Pinout.................................................................................45
Valve Harness—9 Valves Pinout...................................................................................48
Nozzle Valve Assembly............................................................................................................50
Index.........................................................................................................................51

TM
Safety
Chapter 1: Safety
Signal Words
DANGER: Indicates an imminent hazard which, if not avoided, will result in death or
serious injury. This signal word is limited to the most extreme situations, typically for aircraft
components that, for functional purposes, cannot be guarded.
Warning: Indicates a potential hazard which, if not avoided, could result in death or serious
injury, and includes hazards that are exposed when guards are removed. It may also be used
to alert against unsafe practices.
CAUTION: Indicates a potential hazard which, if not avoided, may result in minor or moderate
injury. It may also be used to alert against unsafe practices.
Important: This is used to draw attention to specific information that is necessary for the operation,
setup, or service of the system.
Note: This is used for additional information that can help understand or operate the system.
Emergency Safety
Fire extinguishing systems must meet the applicable OSHA requirements, and all users of portable/
fixed fire suppression equipment must know the types, limitations, and proper uses of this equipment;
including hazards involved with incipient stage firefighting.
Keep emergency numbers for doctors, ambulance service, hospital, and fire department near your
telephone.
Know the location of fire extinguishers and first aid kits and how to use them.
Examine the fire extinguisher and service the fire extinguisher regularly.
Follow the recommendations on the instructions plate.
Very small fires can be put out (extinguished) with a fire extinguisher. Use an appropriate method to
extinguish a fire (water for paper fires, and chemical extinguishers for electrical or chemical fires).
©2021 Capstan Ag Systems, Inc. 5Synchro™

TM
Safety
Personal Protective Equipment
Wear close-fitting clothing and the correct personal protective equipment (PPE) for the job. See the
specific chemical manufacturer documentation or other information for correct PPE.
Pressurized Fluid Lines
Do not heat by welding, soldering, or using a torch near pressurized fluid lines or other flammable
materials. Pressurized lines can accidentally burst when too much heat is present.
Chemical Safety
Chemicals used in agricultural applications can be harmful to your health and/or the environment if
not used correctly. Always follow all label directions for effective, safe, and legal use of agricultural
chemicals.
Battery Safety
Use the procedure in the appropriate agricultural equipment manual for connecting, disconnecting,
and jump-starting the machine’s battery.
Keep sparks and flames away from the battery. Battery gas can explode and cause serious injury. Do
not smoke in the battery charging area.
Remove jewelry, which might make electrical contact and create sparks.
©2021 Capstan Ag Systems, Inc. 6Synchro™

TM
Warranty
Chapter 2: Warranty
Limited Warranty
What does the Limited Warranty cover?
The ultimate purchaser/user (“you”), by acceptance of seller Capstan Ag Systems, Inc.’s, (“our,” “we,”
or “us”) product, assume all risk and liability of the consequences of any use or misuse by you, your
employees, or others.
All replacement components furnished under this warranty, but shipped before the failed component
is returned for evaluation, will be invoiced in the usual manner and warranty adjustments will be
made after the component claimed to be defective has been returned to and inspected and deemed
defective by us at our factory.
Upon determining that a component has failed under warranty, the repaired component or
replacement component, furnished under this warranty, will be shipped at our expense, to your
location. We will credit you an amount equal to the incoming freight you paid. We shall not be
responsible for installation costs. (You shall be responsible for all customs and brokerage fees for all
international transactions.)
If the component does not prove to be defective, you shall be liable for all freight, inspection, and
handling costs. In no event will any claim for labor or incidental or consequential damages be
allowed for removing or replacing a defective product. Warranty will be denied on any component
which has been subject to misuse, abuse, accidents, or alterations, or to improper or negligent use,
maintenance, storage, transportation, and handling.
Our liability under this warranty, or for any loss or damage to the components whether the claim is
based on contract or negligence, shall not, in any case, exceed the purchase price of the components
and upon the expiration of the warranty period all such liability shall terminate. The foregoing shall
constitute your exclusive remedy and our exclusive liability.
The terms of this warranty do not in any way extend to any product which was not manufactured by
us or one of our affiliates.
While necessary maintenance or repairs on your CapstanAG product can be performed by any
company, we recommend that you use only authorized CapstanAG dealers. Improper or incorrectly
performed maintenance or repair voids this warranty.
The foregoing warranty is exclusive and is in lieu of all other warranties expressed or implied. We
shall not be liable for any incidental or consequential damages resulting from any breach of warranty.
Your exclusive remedy for breach of warranty shall be repair or replacement of defective
component(s): Provided, if the component(s) are incapable of being repaired or replaced, your
exclusive remedy shall be credit issued, but such credit shall not exceed the purchase price of the
components.
On any claim of any kind, including negligence, our liability for any loss or damage arising out of, or
from the design, manufacture, sale, delivery, resale, installation, technical direction of installation,
inspection, repair, operation of use of any products shall in no case exceed the purchase price
allocable to the components.
In no event, whether as a result of breach of contract or warranty or alleged negligence, shall we
be liable for incidental or consequential damages, including, but not limited to: personal injury, loss
of profits or revenue, loss of use of equipment or any associated equipment, cost of capital, cost of
substitute equipment, facilities or services, downtime costs, environmental damage, crop losses, or
claims of customers of you for such damages.
©2021 Capstan Ag Systems, Inc. 7Synchro™

TM
Warranty
What is the period of coverage?
We warrant to you that our products are free from defects in material and workmanship in normal use
and service for a period of one year from date of purchase.
How do you get service?
Our obligation under this warranty shall be limited to the repairing or replacing at our option, the
component which our inspection discloses to be defective, free of charge, return freight paid by
us, provided you: (i) Notify us of defect within thirty (30) days of failure; (ii) Return the defective
component to us, freight prepaid; (iii) Complete the Owner Registration Form and returned it to
us; and (iv) Establish that the product has been properly installed, maintained and operated in
accordance with our instructions or instructions contained in our operations or maintenance manuals
and within the limits of normal usage.
Any claim for breach of our warranty must be in writing addressed to us and must set forth the alleged
defect in sufficient detail to permit its easy identification by us. All breach of warranty claims must
be made within thirty (30) days after expiration of the warranty period, which is applicable to the
defective product. Any breach of warranty claim not timely made will not be honored by us and will be
of no force and effect. Any component that needs to be repaired or evaluated for warranty has to be
authorized before return. Contact the factory (785-232-4477) to get a Return Materials Authorization
(RMA #). This helps to track the part coming into the factory for repair or replacement.
Before returning any component to the factory, clean the component as well as possible to remove
any dirt or chemical residue. Components received at the factory that are not clean will be returned
and warranty denied.
After receiving your RMA #, package the part, making sure to include the RMA #, customer’s name,
your address and phone number and description of problems or failure. Then ship to:
Capstan Ag Systems, Inc.
Attn: Warranty/Repair
4225 SW Kirklawn Ave.
Topeka, KS 66609
Phone: (785) 232-4477 | Fax: (785) 232-7799
Hours: 8 am to 4:30 pm CST
How does state law relate to this Limited Warranty?
Some states do not allow limitations on how long an implied warranty lasts, so the above limitation
may not apply to you.
Some states do not allow the exclusion or limitation of incidental or consequential damages, so the
above limitation or exclusion may not apply to you.
This warranty gives you specific legal rights, and you may also have other rights which vary from
state to state.1
1Rev. Date 7/15/2014
©2021 Capstan Ag Systems, Inc. 8Synchro™

TM
Introduction
Chapter 3: Introduction
This Manual
This manual includes operation, maintenance, and installation information for the system you
purchased.
Make sure that all personnel have read this manual and that they thoroughly understand the safe
and correct operation and maintenance procedures. Failure to do so could result in personal injury or
equipment damage.
This manual should be considered a permanent part of your system and should remain with the
system at all times and when you sell it.
Right and left sides of the system are determined by facing the direction of forward travel of the
machine on which the system is installed.
The information, screenshots, and other illustrations were correct at the time of publication. Changes
can occur without notice.
This manual contains important information on how to safely and correctly install, operate, and
maintain CapstanAG products. These instructions will help keep personnel safe, reduce downtime,
and increase the reliability and life of the equipment, its components, and related systems.
Review the safety information in the manual(s) from the Original Equipment Manufacturer (OEM).
Follow the instructions (in this manual) and in the OEM manual(s) for each step, to make sure that
work conditions in and around the OEM equipment are safe.
It is important for all individuals working with chemicals to understand the potential risks, necessary
safety precautions, and proper response in the event of accidental contact.
Review the OEM manual(s) for chemical safety information.
Read, understand, and review the procedures in this manual and OEM manual(s). Use the Safety
Data Sheets (SDS) and the required Personal Protective Equipment (PPE) for hazardous chemicals.
Please keep this manual and all enclosed documentation in an accessible location known to all
operators, installation, and maintenance personnel.
If you do not understand the CapstanAG equipment after reading this manual, please obtain the
proper training before working with equipment, to make sure that your own safety, as well as your co-
workers’ safety, is maintained.
Do not attempt to operate any equipment or system until you completely understand why, when, and
how it operates. If you are uncertain after studying this manual, please contact CapstanAG.
©2021 Capstan Ag Systems, Inc. 9Synchro™

TM
Introduction
System Identification
Write the system name, serial number, and other information down in the Service Contact Information
on the inside cover of this manual. Your dealer will use these numbers when you order parts. File a
copy of the identification numbers in a secure place off the machine.
If you are not the original owner of this machine, it is in your interest to contact your local CapstanAG
dealer to inform them of this unit's serial number. Providing this information will help CapstanAG
notify you of any issues or product improvements.
Figure 1:
The Synchro™system serial number (1) is located on the controller (2).
The serial number is used as the name of the controller Wi-Fi network.
©2021 Capstan Ag Systems, Inc. 10 Synchro™

TM
Installation
Chapter 4: Installation
Prepare for Installation
If the CapstanAG system has been installed on the sprayer, continue with this manual.
If the CapstanAG system has not been installed yet, go to the Synchro™Installation Guide for correct
installation procedures.
CAUTION: Before installation, operation, or service to the system, read and understand
the machine’s operator manual and the system operator manual. Chemical residue may be
present on/in the equipment. Use the correct personal protective equipment.
Important: Do not attach the harnesses with cable ties until the test of the system is complete.
Connect the machine with the system to a tractor
1. Connect the tractor to the sprayer.
2. Make sure the Synchro™system has 12 V DC power.
3. Make sure that the cab box harness is connected.
©2021 Capstan Ag Systems, Inc. 11 Synchro™

TM
Installation
System Dry Test
Figure 2:
1. Make sure that the sprayer is off.
2. On the cab box (1), toggle the red Synchro switch (2) to ON.
The LED (3) in the switch will illuminate.
The system should come with an active profile from the factory.
3. Toggle the Lswitch (4) to ON.
The LED (5) in the switch will illuminate.
4. Make sure that you can hear the nozzles click on the left side of the machine.
5. Toggle the Lswitch to OFF.
The LED in the switch will not illuminate.
6. Toggle the Rswitch (6) to ON.
The LED (7) in the switch will illuminate.
7. Make sure that you can hear the nozzles click on the right side of the machine.
8. Toggle the Rswitch to OFF.
The LED in the switch will not illuminate.
9. Start the system wet test.
©2021 Capstan Ag Systems, Inc. 12 Synchro™

TM
Installation
System Wet Test
Figure 3:
1. Use water to pressurize the system.
2. On the cab box (1), toggle the red Synchro switch (2) to ON.
The LED (3) in the switch will illuminate.
The system should come with an active profile from the factory.
3. Toggle the Lswitch (4) to ON.
The LED (5) in the switch will illuminate.
4. Make sure that all of the nozzles spray on the left side of the machine.
5. Do a check for leaks and repair as necessary.
6. Toggle the Lswitch to OFF.
The LED in the switch will not illuminate.
7. Toggle the Rswitch (6) to ON.
The LED (7) in the switch will illuminate.
8. Make sure that all of the nozzles spray on the right side of the machine.
9. Do a check for leaks and repair as necessary.
10. Toggle the Rswitch to OFF.
The LED in the switch will not illuminate.
11. If the system test fails, see the troubleshooting chapter in the operator manual.
12. If the system test passes, attach the harnesses with cable ties.
Note: Make sure that you route the harnesses where damage is minimized. Make sure that the
harnesses are not exposed to impact or debris.
Note: Make sure that you avoid pinch points, or other sharp edges that can cause damage.
13. Installation is now complete and the system is ready for operation.
See the quick start guide and/or the operator manual for system operation.
©2021 Capstan Ag Systems, Inc. 13 Synchro™

TM
Installation
©2021 Capstan Ag Systems, Inc. 14 Synchro™

TM
Operation
Chapter 5: Operation
Website
The website, https://orchard.capstanag.com, is where you build or change profile information for your
sprayer.
Figure 4:
The system configuration interface includes:
Item Name Description
(1) Profile Name Name the profile for the sprayer
(2) Download Profile When all of the information is correct (no red errors showing), click
Download Profile.
If the download profile icon is not shown the system parameters are
not met.
(3) Rate (gpa) The rate of application of product (in gallons per acre)
(4) Speed (mph) Enter the speed the machine will be moving when product is applied
(in miles per hour)
Note: It is the responsibility of the operator to maintain this speed.
(5) Row Spacing (feet) The distance between the rows (in feet)
(6) Pressure (psi) The force at which you want to spray (in pounds per square inch)
Note: It is the responsibility of the operator to maintain this pressure.
(7) Density (lbs/gal) Water is equal to 8.33 (in pounds per gal)
©2021 Capstan Ag Systems, Inc. 15 Synchro™

TM
Operation
Item Name Description
(8) Frequency (Hz) If the system has one tip per valve use 10 Hz. If the system has
multiple tips per valve use 3 Hz. For additional information, contact
your CapstanAG representative for specific settings.
(9) Change Flow
Distribution Allows you to change the flow nozzle by nozzle
This is how to change nozzles from all being equal if the tips are
different sizes.
(10) Flow % Enter the desired percentage of total flow per nozzle to apply the
amount of product as desired for the field and/or crop.
A nozzle error message will show and the visual representation of
the nozzle will change to red when the flow is outside of the system
parameters.
Adjust the nozzle flow, change the tip size, or change the pressure to
remove the error.
(11) Multiple Tip Sizes Put a checkmark in the box and a Tip Size column will show on the
right side of the screen.
(12) Tip Size Enter the tip sizes in the additional spaces that show on the screen,
i.e. #8 tip = 0.8 gpm @ 40 psi. See the correct tip chart for the correct
information. This number reflects the sum of tips if multiple tips per
nozzle. i.e. splitter with three tips—one #8 and two #3 = #14
(13) Show Nozzle Duty
Cycle Put a checkmark in the box and a Duty Cycle column will show on the
right side of the screen.
(14) Duty Cycle This is information only. You cannot change the duty cycle values in
the location.
(15) Visual
representation of
the sprayer
As the information changes on this screen the graphic will change to
show how the sprayer will operate.
Nozzle color indicates:
•Gray—nozzle off
•Green—nozzle on and the settings are within the system
parameters
•Red—not within system parameters and changes must be
made for the system to function
Note: The nozzle line length is proportional to the flow. i.e. the longer
the line the greater the flow.
(16) Master Switches A Nozzle # icon that is green will spray. A Nozzle # icon that is gray is
off and will not spray.
(17) Invert Nozzle Order Put a checkmark in the box to invert the nozzle order. Nozzle #1 on the
valve harnesses must be closest to the controller.
(18) Nozzle Order
Numbers Nozzle 16 will show at the top of the sprayer and Nozzle 1 will be at
the bottom if the Invert Nozzle Order is selected. Otherwise Nozzle 1
will show at the top of the sprayer.
©2021 Capstan Ag Systems, Inc. 16 Synchro™

TM
Operation
Make a profile on the Internet
A profile can be made on a computer or mobile device such as a tablet or phone that is connected
to the internet. If you are using a device that is not portable, you will need to be able to transfer the
profile to a portable device like a tablet, phone, or laptop computer.
1. Go to https://orchard.capstanag.com.
2. Enter the correct information for your sprayer.
See the Website information for more information on the website.
3. Make sure that you have given your profile a name.
4. Click on Download Profile.
The profile is now downloaded to your device. If you are using a device that is not portable, you
will need to move the profile to a portable device like a tablet, phone, or laptop computer or to
virtual storage location (DropBox, Google Drive, email, etc.).
You are now ready to transmit the profile.
Note: Once a profile is transmitted to the controller it cannot be deleted. However, a profile can
be overwritten by another file with the exact same name.
©2021 Capstan Ag Systems, Inc. 17 Synchro™

TM
Operation
Make a Profile on the Controller Wi-Fi
Figure 5:
1. On the machine/sprayer, toggle the red Synchro switch (1) to on.
The light on the switch will illuminate.
2. On your device, connect to the SNCHRO 209XXXX WI-FI.
The XXXX shown above will be the last 4 digits of the controller serial number.
There is no password for this Wi-Fi connection.
3. Go to 192.168.0.1/generate.html.
4. Enter the correct information for your sprayer.
See the Website information for more information on the website.
5. Make sure that you have given your profile a name.
6. Click on Save Profile (2) or Save & Transmit Profile (3).
•Save Profile—saves the profile to the controller
•Save & Transmit Profile—saves the profile to the controller and automatically takes you
to the transmit page.
You are now ready to transmit the profile.
Note: This does not save the profile you to device.
Note: Once a profile is transmitted to the controller it cannot be deleted. However, a profile can
be overwritten by another file with the exact same name.
©2021 Capstan Ag Systems, Inc. 18 Synchro™

TM
Operation
Transmit a Profile
Figure 6:
1. On the machine/sprayer, toggle the red Synchro switch (1) to on.
The light on the switch will illuminate.
2. On your device, connect to the SNCHRO 209XXXX WI-FI.
The XXXX shown above will be the last 4 digits of the controller serial number.
There is no password for this Wi-Fi connection.
3. Open a web browser and go to 192.168.0.1/transmit.html.
The top line (3) will always show the active profile. This is the profile that will spray when the
system in turned on.
4. If you have made a new profile, click Choose File (4) and find the correct profile.
The selected file name will show on the screen.
5. To load a saved profile, click on the Or select a stored profile drop down menu (5) to select
desired profile to load.
6. Click Transmit Profile (6).
As the profile is sent to the controller, Profile transmission started. will show on the screen.
When the transmission is successful a green Profile transmitted successfully. will show.
This profile is now the active profile on the controller, and will stay active until another profile is
transmitted to the controller.
Once transmitted, profile is stored on controller, and available to reload at a later date.
Note: Once a profile is transmitted to the controller it cannot be deleted. However, a profile can
be overwritten by another file with the exact same name.
Note: The settings for the selected profile will be show on the screen (7).
7. If there is any red text on the screen, an error in the transmission communication has occurred.
Move closer to the controller and click Transmit Profile again.
8. You are now ready to spray.
©2021 Capstan Ag Systems, Inc. 19 Synchro™

TM
Operation
Spray with the CapstanAG System
Figure 7:
1. Get the sprayer ready for operation.
2. On the cab box (1), toggle the red Synchro switch (2) to ON.
The LED (3) in the switch will illuminate.
3. To start the left side of the machine, toggle the Lswitch (4) to ON.
The LED (5) in the switch will illuminate.
Important: If the sprayer pump is on, toggling the boom switches may apply product. You can
use the L(left) and R(right) side of the sprayer separately or together.
4. To start the right side of the machine, toggle the Rswitch (6) to ON.
The LED (7) in the switch will illuminate.
5. Operate the sprayer.
Important: Do not operate the system at 125 psi or more. Operating the system at this pressure
will damage the plungers.
6. When you are done spraying, toggle the boom switch(es) and the Synchro switch off.
When the switches are off the LEDs will not be illuminated
Important: If any switch is ON the system will still pull a current that can drain the battery.
Note: If one or both boom switches are ON but the Synchro switch is OFF, the system
will operate with a constant equal flow of product through all nozzles and not use the profile
parameters. The sprayer will function as it would without the CapstanAG system. This can be
used to flush the system out, or can be used to spray conventionally, especially during a failure.
©2021 Capstan Ag Systems, Inc. 20 Synchro™
Table of contents
Other CapstanAG Control System manuals
Popular Control System manuals by other brands

Vinten
Vinten HD-VRC user guide

Minitech
Minitech Mini-Mill Series user guide

ero electronic
ero electronic ESR user manual

RECO
RECO EasyLine RM-216 CB.11 Operating and installation instructions

Extron electronics
Extron electronics TouchLink TLP Pro 520M user guide

Whelen Engineering Company
Whelen Engineering Company PCCS9R installation guide

Baumuller
Baumuller PCC-04 Instruction handbook

Crestron
Crestron DIN Rail 4 Series quick start guide

KW
KW DIAJEKT Assembly, installation and operation instructions

Roger
Roger MC16-PAC-2-KIT installation manual

A-T Controls
A-T Controls TRIAG M-3POS-115 Installation & maintenance manual

ONEFINITY
ONEFINITY Elite Series Installation and operation instruction