Capstone 10016 User manual

THIS INSTRUCTION BOOKLET CONTAINS
IMPORTANT SAFETY INFORMATION. PLEASE
READ AND KEEP FOR FUTURE REFERENCE.
TWO ARM HITCH MOUNTED BIKE RACK
ASSEMBLY MANUAL
Part No.: #10016

FOR SERVICE ASSISTANCE
CALL TOLL FREE 1.800.451.5368
Monday - Friday 8:00 a.m. to 4:00 p.m. Eastern Standard Time
Thank you for purchasing the CAPSTONE two arm hitch mounted bike rack. Please check all components according to drawing
included. If anything is missing, please contact an authorized dealer.
IMPORTANT:
Carefully read and follow this manual (and any other materials included) before using. Please retain this manual for future use.
This manual is provided to assist you and is not intended to be a comprehensive manual covering all aspects of maintenance.
The carrier you have purchased is a complex piece of equipment that must be properly assembled and maintained in order for proper
usage. If you have any doubts about the assembly or your ability to properly assemble and maintain the carrier, you must have
it assembled and maintained by a professional.
DANGER! Failure to properly assemble and maintain this product could result in serious injury or death.

PARTS IDENTIFICATION
x1
x8
x1
D x1
E x2
x1 x4
x1 x1
x1
x1 x1
x1
J x5
K x1
I x3
x1

ASSEMBLY INSTRUCTIONS
Step 1:
Connect upper frame to lower frame
by using carriage bolts, washers and nuts.
Step 2:
Connect main frame to the base by using
carriage bolt , washers and nuts on the lower
hole of the base. Then secure the main frame
with safety pin in the upper hole of the base.
Jx2 Ix2 Ex2
D x1
Jx2 Ix1

ASSEMBLY INSTRUCTIONS Continued
Step 3:
Slide the rack inside 2” hitch receiver and
secure it with safety bolt, washer and nut.
NOTE: Use wrench to tighten the safety
threaded bolt from RIGHT side as the photo
shown. The Anti-wobble mechanism is
functioning when the safety threaded bolt
is tightened.
J x1 K x1
x1 x1
x1

ASSEMBLY INSTRUCTIONS Continued
Step 4:
Lift supporting arm up 90 degrees to horizontal
and secure it with integrated safety pin.
Turn bike holder to the up position as shown
on the diagram.
Take out safety pin to lower supporting arm
when rack is not in use.
Step 5:
Load your bicycle on bike holders.
Then secure the bicycle with rubber straps.
90°
x2

ASSEMBLY INSTRUCTIONS Continued
Step 6:
To secure the bicycle, make a loop around
main frame with the safety strap and pass it
through bicycle tires. Pass the safety strap
through the buckle and pull firmly to secure
the bicycles.
x1

ASSEMBLY INSTRUCTIONS Continued
Step 7:
To help deter theft, thread securing cable
around frame of rack and through spokes
of front wheel, then above and through
frame and spokes of rear wheel. Align
grommet end with locking pin as shown.
Apply lock.

ASSEMBLY INSTRUCTIONS Continued
Step 8:
Take out safety pin from the base of the rack and tilt it for rear access.

WARNINGS:
1.This carrier has been designed and manufactured to attach securely to a variety of vehicles.The attachment of this carrier to a
vehicle is safety critical and beyond the control of the manufacturer. The user must therefore ensure that the cycle carrier is
suitable for use with their particular vehicle and that both carrier and cycles are securely and safely attached to the vehicle.
2.Roof spoilers (made by ABS) may prevent the correct fitting of the cycle carrier as straps and carrier framework should be in
contact with them when fitted.
3.During your journey, frequently check the tension of carrier fixing straps and the security of the cycles carried.
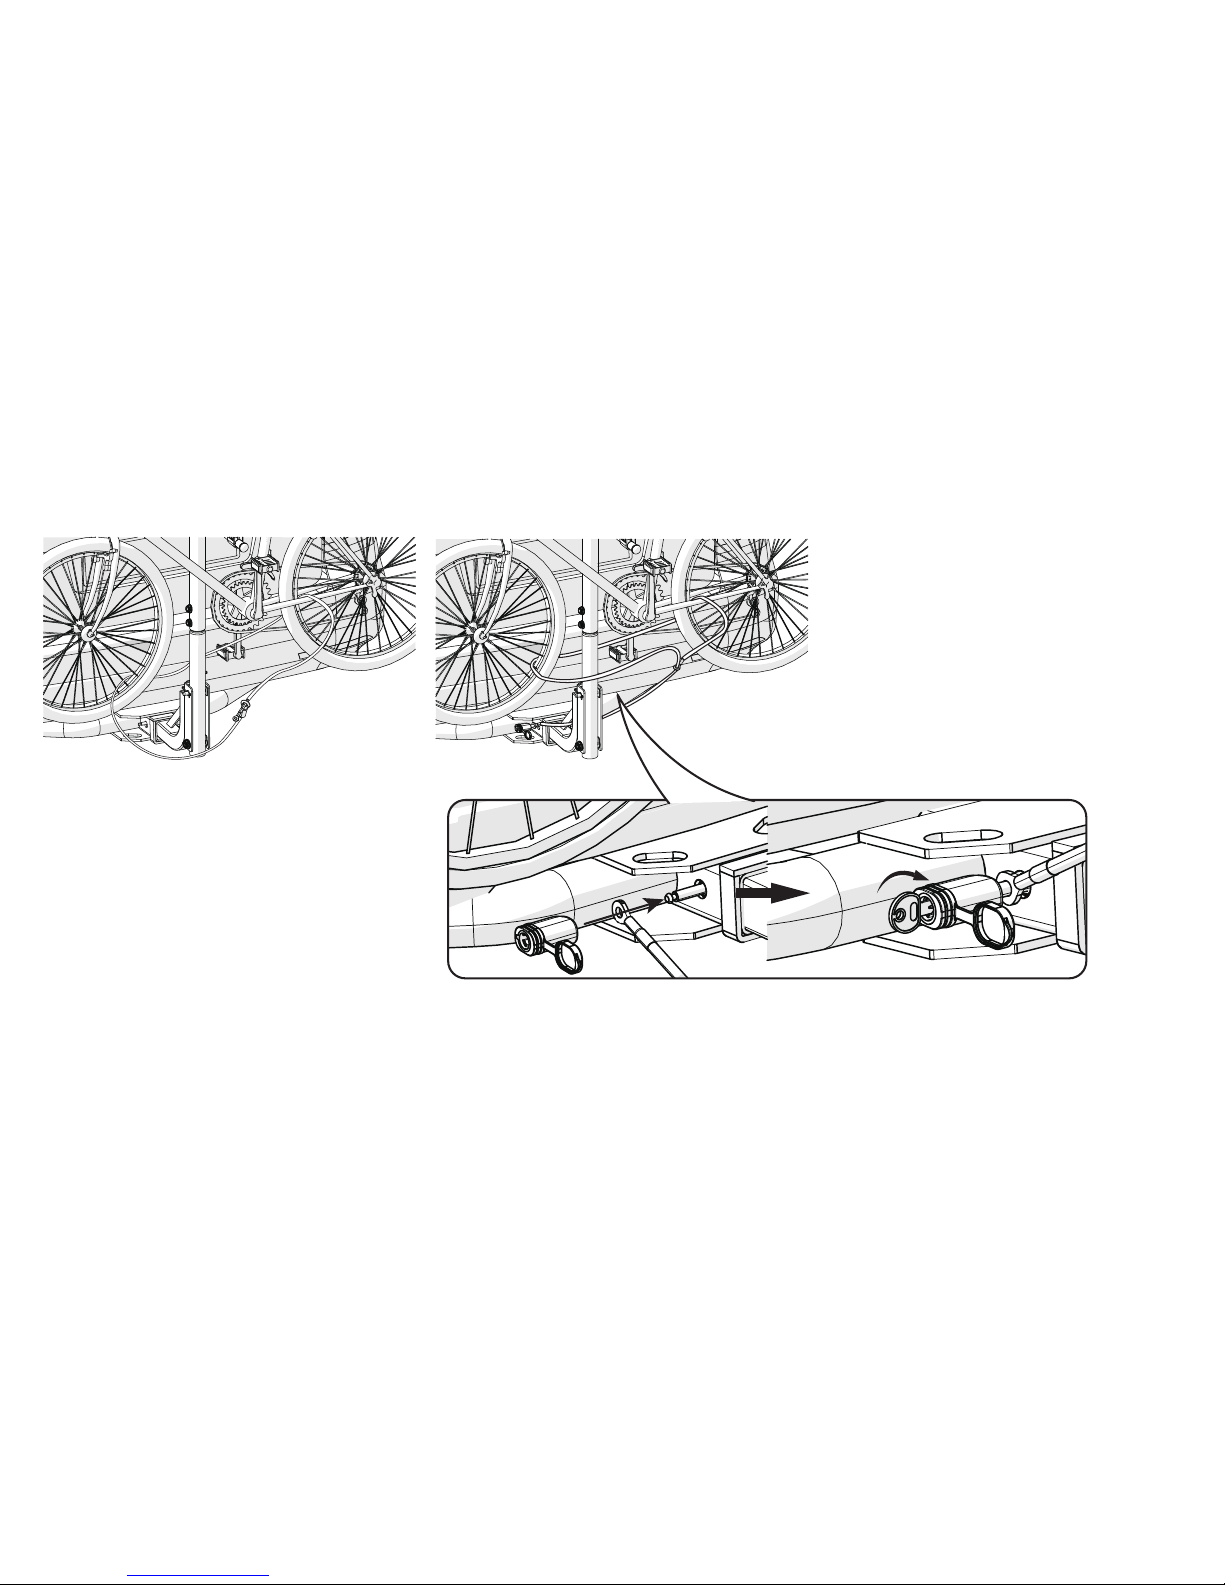
4.Be cautious that the bicycles and bicycle carrier do not come close to exhaust pipe of the vehicle.
5 The maximum capacity of this bike rack is 4 bikes and 60 kg (132lbs.) or 15kg (33lbs.) per bike. Never exceed this capacity.
6.Reduce the speed when on rough or dirt road.
7.This bicycle carrier is designed for temporary use only, remove when not in use or before going through a car wash.
8.Should your rear lights or number plate be obscured when carrying bikes an auxiliary lighting board and number plate must be
provided. Consult your law enforcement.
FOR SERVICE ASSISTANCE,
CALL TOLL FREE 1.800.451.5368

LIMITED LIFETIME WARRANTY
This Limited Warranty extends only to the original retail purchase, who must produce proof of purchase in order to validate any claim. This warranty is not
transferable to anyone else.
What does this Limited Warranty cover? We offer our customer a limited lifetime warranty for main body of the bike rack from defects in material and
workmanship and one year on degradable material like rubber and plastics form the date of the original purchase.
What must you do to keep the Limited Warranty in effect? This warranty is effective only if
– The bike rack is completely and correctly assembled.
– The bike rack is used under normal conditions for its intended purpose.
What is not covered by this Limited Warranty? This warranty does not include labor and transportation charges. This warranty does not cover normal
wear and tear, paint, rust, normal maintenance items, personal injury, or any damage, failure or loss that is caused by accident, improper assembly,
adjustment, storage, or use of the bike rack.
This Limited Warranty will be void if the bike rack is ever:
– Modified in any way.
– Rented or used for commercial purposed.
Kent International will not be liable for incidental or consequential loss or damage, due directly or indirectly from use of this product.
For how long does this Limited Warranty last? The main body is warranted for the usable life of the bike rack. Kent International will replace the main
body at no charge, should it fail in any weld point when the rack has been used in a normal manner, and determined by our inspection. You must receive
prior authorization from Kent Customer Service, before returning any product or parts. All other components are warranted against defects for one year
form the date of purchase when properly assembled and used in a normal manner.
What will Kent do? It is under our discretion or determinate which of the following methods is most suitable to execute the warranty: repair, replacement,
or refund. CONSUMER MUST PAY ALL LABOR AND TRANSPORTATION CHARGES CONNECTED WITH THE REPAIR OR WARRANTY
WORK.
How do you get service? Phone the Customer Service Department (8am - 4pm E.S.T.) at 1-800-451-KENT. All warranty claims should be made to Kent
International, Inc. 60 E. Halsey Rd. Parsippany, NJ 07054 USA.
What rights do you have? This limited warranty gives you specific legal rights. You may also have other rights which vary from State to State.
Table of contents
Popular Automobile Accessories manuals by other brands

Circontrol
Circontrol CCS CHA T2C63 instruction manual

Thule
Thule Kit 4014 instructions

Whispbar
Whispbar K816W Fitting Instructions for Basic Carrier

Whispbar
Whispbar K066W Fitting Instructions for Basic Carrier

GROM Audio
GROM Audio VLine Lite LEX89 installation manual

Whispbar
Whispbar K346W Fitting Instructions for Basic Carrier

National Cycle
National Cycle Quantum N30213 Assembly instructions and owner's manual

FIA
FIA TR47-23 Installation instructions manual

Whispbar
Whispbar K161W Fitting instructions

Alpine
Alpine PSS-21WRA installation manual

AL-KO
AL-KO 35121L installation instructions

STO N SHO
STO N SHO SNS 365 Installation procedures