Car Keys Express Simple Key TORH-E4TZ1SK User manual

USER GUIDE
Pairing Instructions for Toyota Remote Key Replacement Keys
V1.0520
KE
Y
TM
Powered By
Instruction Manual
Part Number: TYPKA-7000-0
Replacing car keys is simple and affordable again.™www.CarKeysExpress.com

SIMPLE™ KEY USER GUIDE
2
IMPORTANT NOTES
►You MUST have at least one existing key that already works with your vehicle in order to use the EZ
Installer™. If you have no working keys, return the Simple™ Key to the retailer where it was purchased.
►The new keyblade MUST be cut before pairing. It can be cut at any local hardware store.
►Vehicle battery should be in good condition and fully charged prior to pairing the new key. Turn off
headlights, radio, A/C fan, etc. to minimize battery draw during the process.
►Do not use the EZ Installer™ while the vehicle is in motion. Unplug it from the OBD port before driving the
vehicle.
►Only original remote features will work, regardless of buttons included on the Simple™ Key. This key does
not add remote features that your vehicle did not have before.
►For your security, a tamper-evident security label is installed over the EZ Installer™ connector. If this label is
missing, damaged, or the word “VOID” appears on the EZ Installer™, please exchange this Simple™ Key for a
new one at the retailer where it was purchased.
►Before pairing, familiarize yourself with the Simple™ Key’s compatibility with the make, model, year, and
transponder chip for your vehicle on pages 4-5.
LET’S GET STARTED
Simple™ Key requires two steps: “KEY PAIRING” and “REMOTE PAIRING.” Key pairing allows the new key to start your
vehicle. Remote pairing allows the key’s remote functions to work. It is important to follow these steps in order to
successfully complete setup.
If you skip a step, the key WILL NOT work properly, and you will have to repeat the setup process.
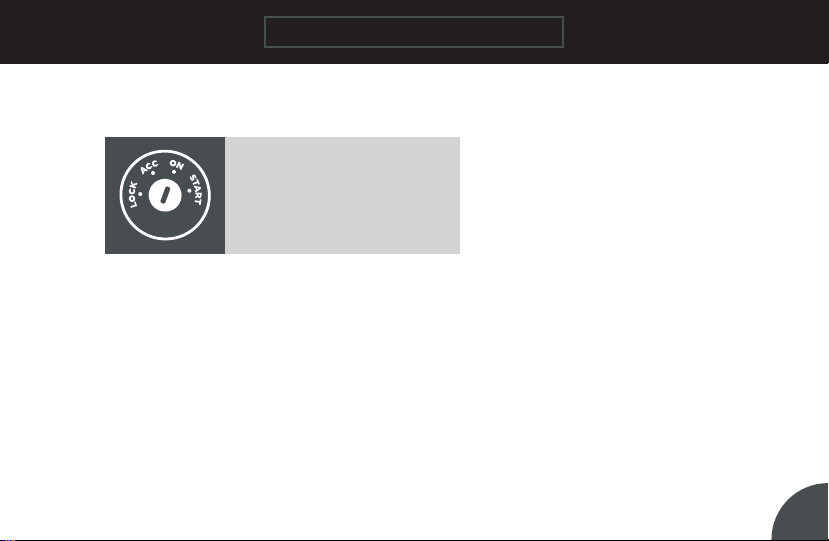
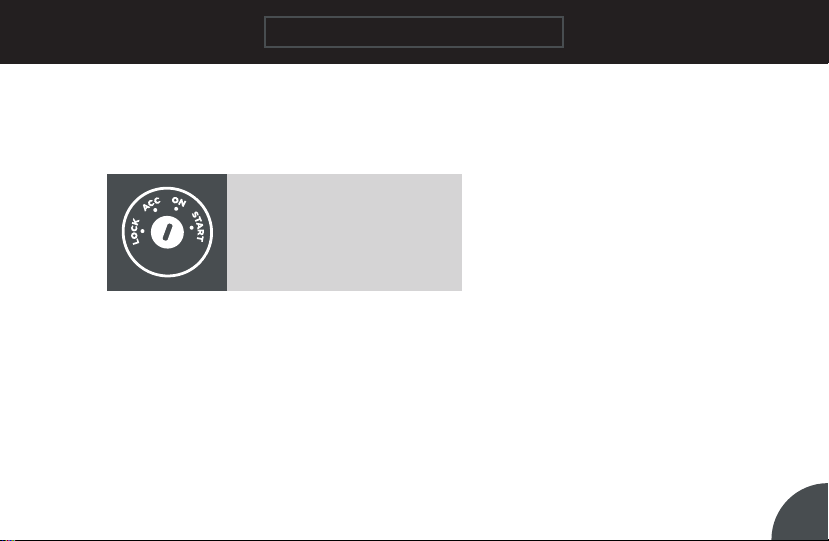
Find your EZ Installer™ DIAL POSITION in the following chart by referencing your vehicle’s make, model, year, and
transponder key (chip) type.

SIMPLE™ KEY USER GUIDE
3
COMPATIBILITY LOOKUP
NOTE: Only FCC IDs ending in “BBY” or “BDM” will work with Simple™ Key. To check your key’s FCC ID, turn your key
over or remove the remote cover. The FCC ID is engraved on the back of the remote or under the remote cover.
NOTE: Determine the type of transponder chip that is in your vehicle’s key. To do this, look at your existing key. The
transponder key chip type is engraved on the base of the key blade. Transponder key chip types are identified in this
User Manual as the letter H, or Dot. If you cannot find the key chip type, try all EZ Installer™ dial positions for your
vehicle’s make, model, and year.
Dot Chip H Chip

SIMPLE™ KEY USER GUIDE
4
MAKE/MODEL
TOYOTA
TRANSPONDER KEY
CHIP TYPE
PAIR KEY EZ INSTALLER™
DIAL POSITION
PRIMARY DIAL
POSITION
ALTERNATE DIAL
POSITION
YEAR
Camry Dot 2006-2011 1 3 2 4 5 7 6 8
Camry H 2014-2018 3 1 2 4 7 5 6 8
Corolla Dot 2009-2010 1 3 2 4 5 7 6 8
Corolla H 2014-2019 3 1 2 4 7 5 6 8
RAV4 Dot 2006-2010 1 3 2 4 5 7 6 8
RAV4 H 2013-2018 3 1 2 4 7 5 6 8
COMPATIBILTY LOOKUP
Visit www.CarKeysExpress.com for the most up-to-date vehicle compatibility lookup.

SIMPLE™ KEY USER GUIDE
5
PAIR REMOTE EZ INSTALLER™
DIAL POSITION
ERASE KEY EZ INSTALLER™
DIAL POSITION
ERASE REMOTE EZ INSTALLER™
DIAL POSITION
PRIMARY DIAL
POSITION
PRIMARY DIAL
POSITION
PRIMARY DIAL
POSITION
ALTERNATE DIAL
POSITION
ALTERNATE DIAL
POSITION
ALTERNATE DIAL
POSITION
Camry Dot 2006-2011 1 3 2 4 5 7 6 8
Camry H 2014-2018 3 1 2 4 7 5 6 8
Corolla Dot 2009-2010 1 3 2 4 5 7 6 8
Corolla H 2014-2019 3 1 2 4 7 5 6 8
RAV4 Dot 2006-2010 1 3 2 4 5 7 6 8
RAV4 H 2013-2018 3 1 2 4 7 5 6 8
COMPATIBILTY LOOKUP
Visit www.CarKeysExpress.com for the most up-to-date vehicle compatibility lookup.

SIMPLE™ KEY USER GUIDE
6
STEP 1 (OF 2) KEY PAIRING
Instructions have timing requirements. If you wait too long between steps, your vehicle’s computer may time
out, requiring you to start over. Once you begin the pairing procedure, move at a quick and even pace.
NOTE: If you have a Toyota RAV4 (2006-2010), your vehicle may not have a transponder key. Try starting
the vehicle with your new cut key, without completing the steps below. If the vehicle starts and runs for
10 seconds, move on to STEP 2 (of 2) REMOTE PAIRING. If the vehicle does not start or does not continue
running, begin at Step 1 below to pair the key.
1. Find your vehicle’s make, model, year, and transponder key type in the Compatibility Lookup on pages
4-5. Turn the dial on the EZ Installer™ to the position listed for your vehicle’s make, model, year, and
transponder key type under the column labeled, “Pair Key EZ Installer™ Dial Position.”
a. NOTE: If more than one dial position exists for your vehicle, try the PRIMARY dial position first. If you
are unable to successfully pair the key, try the ALTERNATE dial position listed for your vehicle.
b. NOTE: One working key and the new key should be present during the pairing process.
2. Enter the vehicle and ensure all doors are closed.
3. Begin with the vehicle in PARK and the engine OFF.
4. Remove the security label from the EZ Installer™ and insert it firmly into the on-board diagnostic (OBD)
port located under the dash.
a. The location of your vehicle’s OBD port can be found in your owner’s manual.

SIMPLE™ KEY USER GUIDE
7
5. Insert the original key and turn the ignition to the ON/RUN position. If there are no markings, turn the key
clockwise and stop just short of starting the engine.
6. Press and release the EZ Installer™ button. You will hear a short beep.
a. NOTE: If you hear a series of 5 quick beeps, this indicates that the maximum number of keys have been paired,
and an error has occurred. Please see FAQs to learn more.
7. Wait 30 seconds, the EZ Installer™ will beep twice. You will then have 12 seconds to complete the next step (step 8).
8. Remove the original key and insert the new key into the ignition. Do not turn the key. Then, press and release the
button on EZ Installer™.
a. NOTE: If you do not complete this step in 12 seconds, the EZ Installer™ will beep continuously, and an error has
occurred (see FAQs for more information). Unplug the device, remove the key, and begin again at Step 1. If you
do not hear any sound, you have started the pairing process. Continue below.
9. Wait 60 seconds. When pairing is complete, the EZ Installer™ will beep 3 quick, different pitch beeps.
10. To pair additional keys, repeat the pairing process for any additional keys, beginning with KEY PAIRING STEP 5.
11. Leave the EZ Installer™ plugged into the OBD port and continue to STEP 2 (of 2) REMOTE PAIRING.
a. NOTE:: If you are not pairing a remote, or your key does not have remote functions, unplug the EZ Installer™. If
the EZ Installer™ is left in the vehicle’s OBD port for more than 20 minutes, an alarm will sound reminding you
to remove it.
12. To test the new key, start the vehicle.
TOYOTA IGNITION POSITIONS

SIMPLE™ KEY USER GUIDE
8
STEP 2 (OF 2) REMOTE PAIRING
Instructions have timing requirements. If you wait too long between steps, your vehicle’s computer may time out,
requiring you to start over. Once you begin the pairing procedure, move at a quick and even pace.
NOTE: If you have a Toyota Camry or Corolla, your vehicle may not be equipped with a remote. This key does
not add remote features that your vehicle did not have before.
1. Find your vehicle’s make, model, year, and transponder chip type in the Compatibility Lookup on pages 4-5.
Turn the dial on the EZ Installer™ to the position listed for your vehicle’s make, model, year, and transponder
chip type under the column labeled, “Pair Remote EZ Installer™ Dial Position.”
a. NOTE: If more than one dial position exists for your vehicle, try the PRIMARY dial position first. If you
are unable to successfully pair the key, try the ALTERNATE dial position listed for your vehicle.
b. NOTE: One working key and the new key should be present during the pairing process.
2. Enter the vehicle and ensure all doors are closed.
3. Begin with the vehicle in PARK and the engine OFF.
4. Remove the security label from the EZ Installer™ and insert it firmly into the on-board diagnostic (OBD) port
located under the dash.
a. The location of your vehicle’s OBD port can be found in your owner’s manual.

SIMPLE™ KEY USER GUIDE
9
5. Insert the original key, buttons facing down, and turn the ignition to the ON/RUN position. If there are no
markings, turn the key clockwise and stop just short of starting the engine.
a. NOTE: It is important to make sure that you insert the key, buttons facing down, so that when you
turn the key to the ON/RUN position, buttons are facing up and easily visible and accessible for the
following steps.
6. To continue, press and release the EZ Installer™ button.
a. NOTE: If you hear a series of 5 quick beeps, this indicates that the maximum number of remotes have
been paired, and an error has occurred. Please see FAQs to learn more.
7. Wait and listen for 2 quick beeps from the EZ Installer™.
8. On the new remote, simultaneously press the LOCK and UNLOCK buttons. Then, press and release the
UNLOCK button.
9. When pairing is complete, you will hear 3 quick beeps from the EZ Installer™. Depending on the model, your
vehicle may also beep twice.
a. NOTE: : If you do not hear beeps from the EZ Installer™ and/or your vehicle an error may have occurred
(see FAQs for more information). Repeat Step 8 again.
10. To pair additional remotes, repeat the pairing process for any additional remotes, beginning with REMOTE
PAIRING STEP 5.
TOYOTA IGNITION POSITIONS

SIMPLE™ KEY USER GUIDE
10
11. Unplug the EZ Installer™. If the EZ Installer™ is left in the vehicle’s OBD port for more than 20 minutes, an
alarm will sound reminding you to remove it.
12. Remove the key from the ignition and test the new remote.
OPTIONAL STEP: ERASE KEY
Instructions have timing requirements. If you wait too long between steps, your vehicle’s computer may time out,
requiring you to start over. Once you begin the pairing procedure, move at a quick and even pace.
NOTE: The following steps are only only necessary if you received the maximum number of keys error during
KEY PAIRING (see FAQs for more information). Once you have completed the steps below, go back to KEY
PAIRING.
1. Find your vehicle’s make, model, year, and transponder chip type in the Compatibility Lookup on pages 4-5.
Turn the dial on the EZ Installer™ to the position listed for your vehicle’s make, model, year, and transponder
chip type under the column labeled, “Erase Key EZ Installer™ Dial Position.”
a. NOTE: If more than one dial position exists for your vehicle, try the PRIMARY dial position first. If you are
unable to successfully pair the key, try the ALTERNATE dial position listed for your vehicle.
b. NOTE: One working key and the new key should be present during the pairing process.
c. NOTE: Make sure any keys are removed from the ignition.
2. Enter the vehicle and ensure all doors are closed.
3. Begin with the vehicle in PARK and the engine OFF.
4. Remove the security label from the EZ Installer™ and insert it firmly into the on-board diagnostic (OBD) port
located under the dash.
a. The location of your vehicle’s OBD port can be found in your owner’s manual.

SIMPLE™ KEY USER GUIDE
11
5. Insert the original key and turn the ignition to the ON/RUN position. If there are no markings, turn the key
clockwise and stop just short of starting the engine.
6. Press and release the EZ Installer™ button. You will hear a short beep.
7. Wait 30 seconds, the EZ Installer™ will beep twice. You will then have 12 seconds to complete the next step
(step 8).
8. Remove the key and re-insert it. Do not turn the key. Then, press and release the button on EZ Installer™.
a. NOTE: If you do not complete the steps in 12 seconds, the EZ Installer™ will beep continuously, and an
error has occurred. Unplug the device, remove the key, and begin again at Step 1. If you do not hear any
sound, you have started the pairing process. Continue below.
9. Wait 60 seconds. When erasing is complete, the EZ Installer™ will beep 3 quick, different pitch beeps.
10. If you need to pair keys, leave the EZ Installer™ plugged into the OBD port and continue to STEP 1 (of 1)
KEY PAIRING.
TOYOTA IGNITION POSITIONS

SIMPLE™ KEY USER GUIDE
12
OPTIONAL STEP: ERASE REMOTE
Instructions have timing requirements. If you wait too long between steps, your vehicle’s computer may time out,
requiring you to start over. Once you begin the pairing procedure, move at a quick and even pace.
NOTE: This process is only necessary if you received the maximum number of keys error during REMOTE
PAIRING (see FAQs for more information). Once you have completed the steps below, go back to REMOTE
PAIRING.
1. Find your vehicle’s make, model, year, and transponder chip type in the Compatibility Lookup on pages 4-5.
Turn the dial on the EZ Installer™ to the position listed for your vehicle’s make, model, year, and transponder
chip type under the column labeled, “Erase Remote EZ Installer™ Dial Position.”
a. NOTE: If more than one dial position exists for your vehicle, try the PRIMARY dial position first. If you are
unable to successfully pair the key, try the ALTERNATE dial position listed for your vehicle.
b. NOTE: One working key and the new key should be present during the pairing process.
2. Enter the vehicle and ensure all doors are closed.
3. Begin with the vehicle in PARK and the engine OFF.
4. Remove the security label from the EZ Installer™ and insert it firmly into the on-board diagnostic (OBD) port
located under the dash.
a. The location of your vehicle’s OBD port can be found in your owner’s manual.

SIMPLE™ KEY USER GUIDE
13
5. Insert the original key, buttons facing down, and turn the ignition to the ON/RUN position. If there are no
markings, turn the key clockwise and stop just short of starting the engine.
a. NOTE: It is important to make sure that you insert the key, buttons facing down, so that when you
turn the key to the ON/RUN position, buttons are facing up and easily visible and accessible for the
following steps.
6. To continue, press and release the EZ Installer™ button.
7. Wait and listen for 2 quick beeps from the EZ Installer™.
8. On the key in the ignition, simultaneously press the LOCK and UNLOCK buttons on the remote. Then, press and release the
UNLOCK button.
a. NOTE: All other paired remotes will be erased.
9. If ERASE REMOTE is successful, you will hear 3 quick beeps from the EZ Installer™. Depending on the model, your vehicle
may also beep twice.
a. NOTE: If you do not hear beeps from the EZ Installer™ and/or your vehicle, an error may have occurred (see FAQs for
more information). Repeat Step 8 again.
10. If you need to pair keys, leave the EZ Installer™ plugged into the OBD port and continue to STEP 1 (of 1) KEY PAIRING.
TOYOTA IGNITION POSITIONS

SIMPLE™ KEY USER GUIDE
14
FREQUENTLY ASKED QUESTIONS
Q: The EZ Installer™ beeps 5 times after pushing the button to initiate the pairing process and will not pair the new key.
A: Your vehicle allows a maximum of 5 paired keys or 6 paired remotes. If the vehicle already has 5 keys paired to it, a new key
cannot be paired. If the EZ Installer™ beeps 5 times early in the pairing process, this indicates that the maximum number of keys
have been paired. Perform both the ERASE KEY and ERASE REMOTE steps. Then, try the KEY PAIRING and REMOTE PAIRING
processes again. Gray colored valet keys should be paired before black master keys or remotes.
Q: Can I use the same EZ Installer™ on other vehicles?
A: No, the EZ Installer™ will be locked to the first vehicle it is used on. You may add more keys to the same vehicle again as
needed, but it will not work on different vehicles. If the EZ Installer™ sounds 3 beeps at 1 second intervals, then beeps rapidly, this
signifies that the device has already been used on another vehicle. Visit CKESimpleKey.com or your local retailer to purchase
additional key.
Q: The EZ Installer™ sounds 3 or 4 beeps at 1 second intervals 3 times then beeps continuously.
A: When problems occur during the pairing process, EZ Installer™ will beep an error code, followed by continuous faster beeps.
The number of error beeps correspond to specific error codes, explained below.
• Three distinct beeps at 1 second intervals indicate the device has already been used on another vehicle. The EZ Installer™
can only pair Simple™ Keys to one vehicle. The EZ Installer™ will be locked to the first vehicle it is used on. You may add
more keys to the same vehicle again as needed, but it will not work on different vehicles.
• Four distinct beeps at 1 second intervals indicate that the incorrect dial position was selected on the EZ Installer™. Carefully
read the instructions and refer to the compatibility lookup on pages 4-5.
Please contact Car Keys Express customer service at 888-598-8910 for any questions.

SIMPLE™ KEY USER GUIDE
15
Q: The new key won’t pair to my car.
A: If the EZ Installer™ doesn’t pair the key to your car, most likely an incorrect dial position was used. In this case,
the EZ Installer™ will beep continuously after you press the pairing button. Check the compatibility section on
pages 4-5 to confirm the correct dial position for your make, model, year, and transponder chip of your original
key. If an alternate dial position(s) is listed for your vehicle, unplug the EZ Installer™, turn the knob to the alternate
position, and try pairing again. If the key still won’t pair, please contact customer service at 888-598-8910.
Q: The EZ Installer™ was unplugged during the pairing process.
A: The EZ Installer™ must remain plugged into the on-board diagnostic (OBD) port until pairing is complete. If the
EZ Installer™ becomes unplugged during the pairing process, turn the ignition to the OFF position, remove the
key, and begin the pairing process again.
Q: The vehicle won’t start with the new key or old keys after attempting to pair.
A: Please call Car Keys Express customer service at 888-598-8910.
FCC AND ISED REGULATORY STATEMENT
MODEL: RT-TOY-A or 12BBY MODEL: RT-TY54B or 12BDM
FCC ID: 2AOKM-TOY-V1 or HYQ12BBY FCC ID: 2AOKM-TY5 or HYQ12BDM
IC: 24223-TYV1 or 1551A-12BBY IC: 24223-TY5 or 1551A-12BDM
This device complies with Part 15 of the FCC Rules and with Industry Canada license-exempt RSS standard(s). Operation is subject
to the following two conditions: (1) This device may not cause harmful interference, and (2) this device must accept any interference
received, including interference that may cause undesired operation.
TRANSPONDER CHIP: DOT TRANSPONDER CHIP: H

Patent Pending
Designed and assembled in the USA
828 East Market Street Louisville, KY 40206
© 2020 Car Keys Express
www.CarKeysExpress.com
Replacing car keys is simple and affordable again.™
Warning: Changes or modifications to this device not expressly approved by iKeyless LLC could void the user’s authority to
operate the equipment.
Le présent appareil est conforme à la réglementation FCC part 15 et aux CNR d’Industrie Canada applicables aux appareils radio
exempts de licence. L’exploitation est autorisée aux deux conditions suivantes: (1) l’appareil ne doit pas produire de brouillage, et (2)
l’appareil doit accepter tout brouillage radioélectrique subi, même si le brouillage est susceptible d’en compromettre le fonctionnement.
Attention: Tout changement ou modification n’ayant pas été expressément approuvé(e) par iKeyless LLC est susceptible d’annuler
l’autorité de l’utilisateur à faire fonctionner l’équipement.
HELP
For help or assistance, please contact technical support at: 888-598-8910.
OTHER KEYS
Visit CarKeysExpress.com to find a variety of award-winning products, like Universal Car Keys, Universal Car Remotes, and OEM keys
and remotes. New Ford, Lincoln, Toyota, and Honda, Simple™ Keys are coming soon.

MANUAL DE USUARIO
Instrucciones de emparejamiento para llaves de repuesto de llaves remotas para Toyota
V1.0520
KE
Y
TM
Desarrollado por
Parte del manual de
instrucciones número: TYPKA-7000-0
Replacing car keys is simple and affordable again.™www.CarKeysExpress.com

2
SIMPLE™ KEY MANUAL DE USUARIO
NOTAS IMPORTANTES
►DEBE tener al menos una llave existente que ya funcione con su vehículo para poder usar el EZ Installer™. Si no tiene
llaves que funcionen, devuelva la Simple™ Key a la tienda donde la compró.
►La nueva llave extraíble DEBE cortarse antes del emparejamiento. Se puede cortar en cualquier ferretería local.
►La batería del vehículo debe estar en buen estado y completamente cargada antes de emparejar la nueva llave.
Apague los faros, la radio, el aire acondicionado, entre otros, para minimizar el consumo de batería durante el proceso.
►No use el EZ Installer™ mientras el vehículo esté en movimiento. Desconéctelo del puerto OBD antes de
conducir el vehículo.
►Solo funcionarán las características remotas originales, independientemente de los botones incluidos en la Simple™
Key. Esta llave no agrega características remotas que su vehículo no tenía antes.
►Para su seguridad, se instala una etiqueta de seguridad con precinto sobre el conector del EZ Installer™. Si falta esta
etiqueta, está dañada o aparece la palabra “VOID” [inválido] en el EZ Installer™, cambie esta Simple™ Key por una nueva
en la tienda donde la compró.
►Antes del emparejamiento, familiarícese con la compatibilidad de la Simple™ Key con la marca, el modelo, el año y el
chip transpondedor de su vehículo según las páginas 4-5.
COMENCEMOS
La Simple™ Key requiere dos pasos: “EMPAREJAMIENTO DE LA LLAVE” y “EMPAREJAMIENTO DEL CONTROL REMOTO”. El
emparejamiento de la llave permite que la nueva llave arranque el vehículo. El emparejamiento del control remoto permite que las
funciones remotas de la llave funcionen. Es importante seguir estos pasos para completar con éxito la configuración.
Si se saltea un paso, la llave NO funcionará correctamente, y usted tendrá que repetir el proceso de configuración.
Encuentre su POSICIÓN DEL DIAL del EZ Installer™ en la siguiente tabla según la referencia de la marca, el modelo, el año y el tipo de
llave de transpondedor (chip) de su vehículo.

3
SIMPLE™ KEY MANUAL DE USUARIO
BÚSQUEDA DE COMPATIBILIDAD
NOTA: Solo los FCC ID que terminen en “BBY” o “BDM” funcionarán con la Simple™ Key. Para comprobar el FCC ID de su llave, dé
vuelta su llave o quite la cubierta del control remoto. El FCC ID se encuentra impreso en el reverso del control remoto o debajo de la
cubierta del control remoto.
NOTA: Determine el tipo de chip transpondedor que se encuentra en la llave de su vehículo. Para hacer esto, mire la llave existente.
El tipo de chip de la llave de transpondedor se encuentra impreso en la base de la llave extraíble. Los tipos de chip de la llave de
transpondedor se identifican en este Manual de usuario con la letra H o un Punto. Si no puede encontrar el tipo de chip de su llave,
intente todas las posiciones del dial del EZ Installer™ para la marca, el modelo y el año de su vehículo.
Chip Punto Chip H

4
SIMPLE™ KEY MANUAL DE USUARIO
MARCA/MODELO
TOYOTA
TIPO DE CHIP
DE LA LLAVE DE
TRANSPONDEDOR
POSICIÓN DEL DIAL DEL EZ INSTALLER™
PARA EMPAREJAR LA LLAVE
PRIMARIA ALTERNATIVA
AÑO
Camry Punto 2006-2011 1 3 2 4 5 7 6 8
Camry H 2014-2018 3 1 2 4 7 5 6 8
Corolla Punto 2009-2010 1 3 2 4 5 7 6 8
Corolla H 2014-2019 3 1 2 4 7 5 6 8
RAV4 Punto 2006-2010 1 3 2 4 5 7 6 8
RAV4 H 2013-2018 3 1 2 4 7 5 6 8
BÚSQUEDA DE COMPATIBILIDA
Visite www.CarKeysExpress.com para la búsqueda más actualizada sobre la compatibilidad de vehículos.
This manual suits for next models
1
Table of contents
Other Car Keys Express Automobile Accessories manuals
Popular Automobile Accessories manuals by other brands

Steinhof
Steinhof R-077 FITTING AND OPERATION MANUAL

Toyota
Toyota PT278-48140 installation instructions

bosal
bosal 040-208 installation instructions

SAF-HOLLAND
SAF-HOLLAND HOLLAND FW17 Series Service bulletin

v.LOGiC
v.LOGiC 27-V5-NBT manual

WeatherTech
WeatherTech No-Drill MudFlap installation instructions

Virtual Reality
Virtual Reality Hands-Free Car Kit VRBT300V product manual

STO N SHO
STO N SHO SNS 20 Installation procedures

Mopar
Mopar Sun Bonnet manual

Yakima
Yakima EXO LitKit quick start guide

Fiamma
Fiamma 08753-01 Installation and usage instructions

Thule
Thule Spare me 963PRO installation instructions