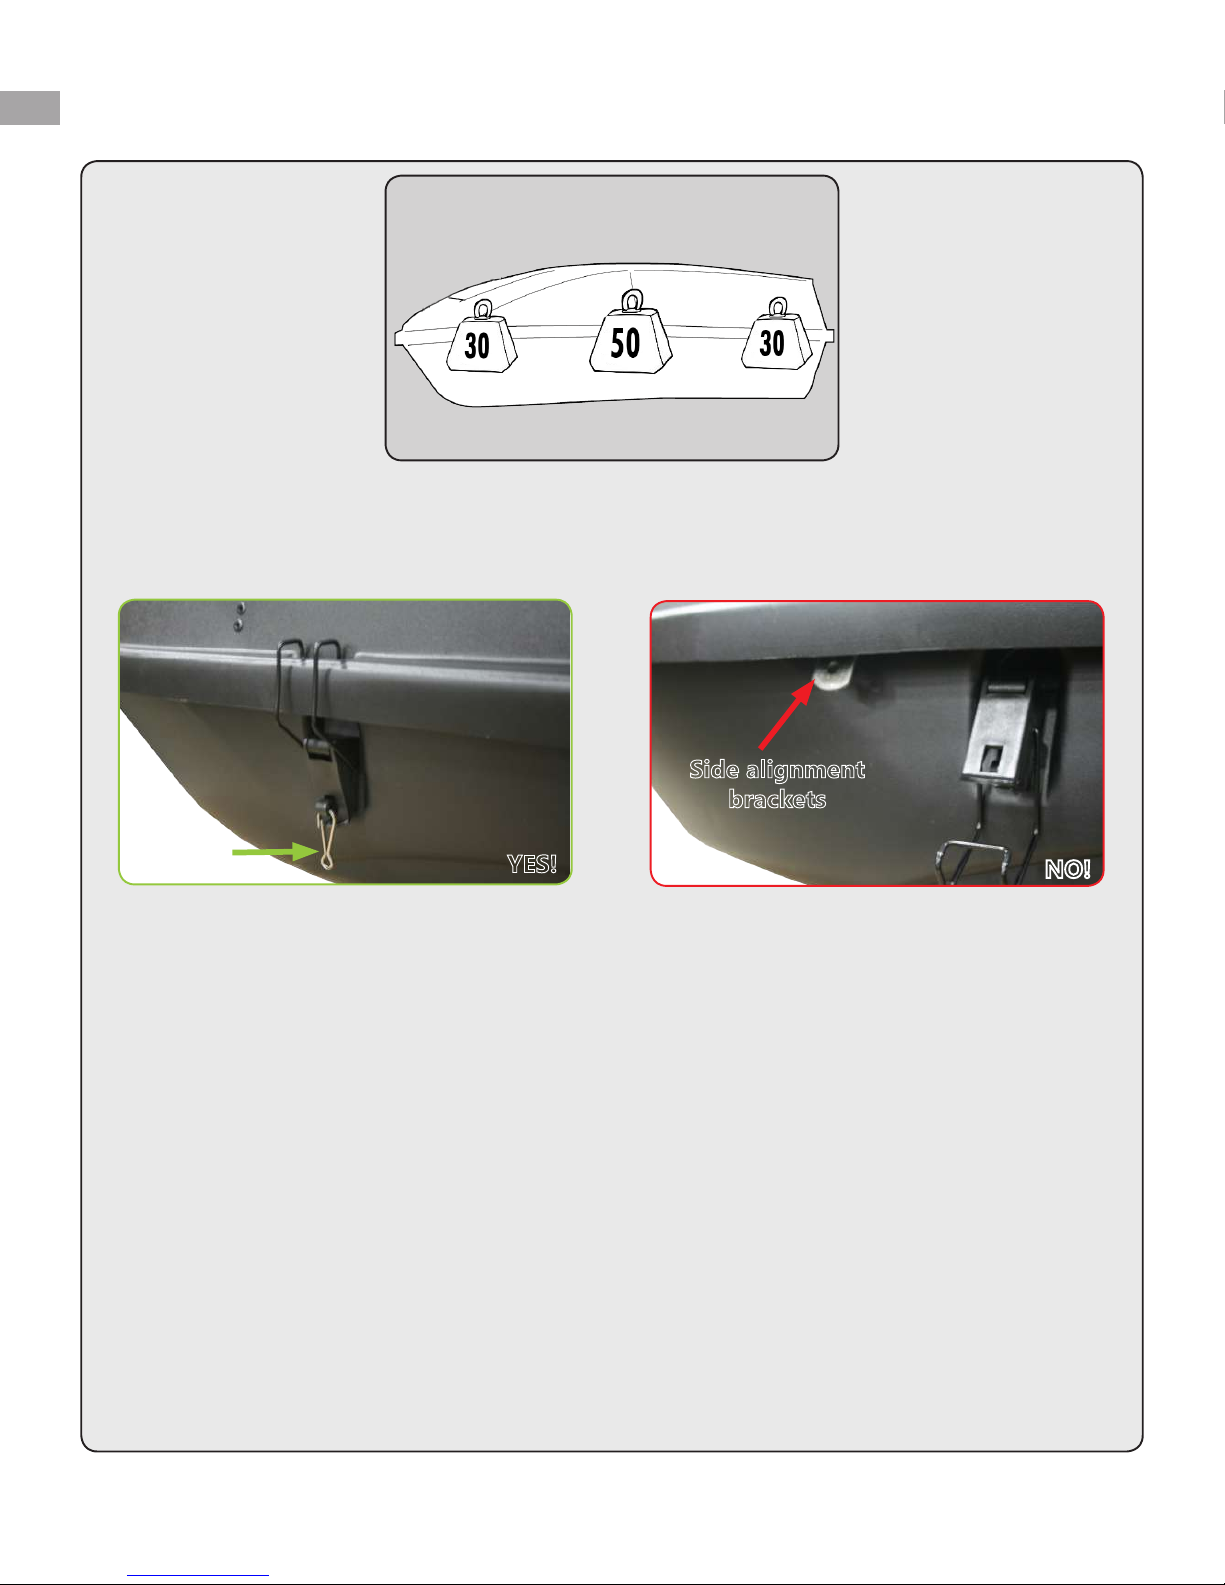
Check clearance area
4.
If the side wall is not properly seated, squeeze
together with your hand, and it will snap in place
as shown above. Side alignment brackets will be
visible if not seated correctly. See picture below.
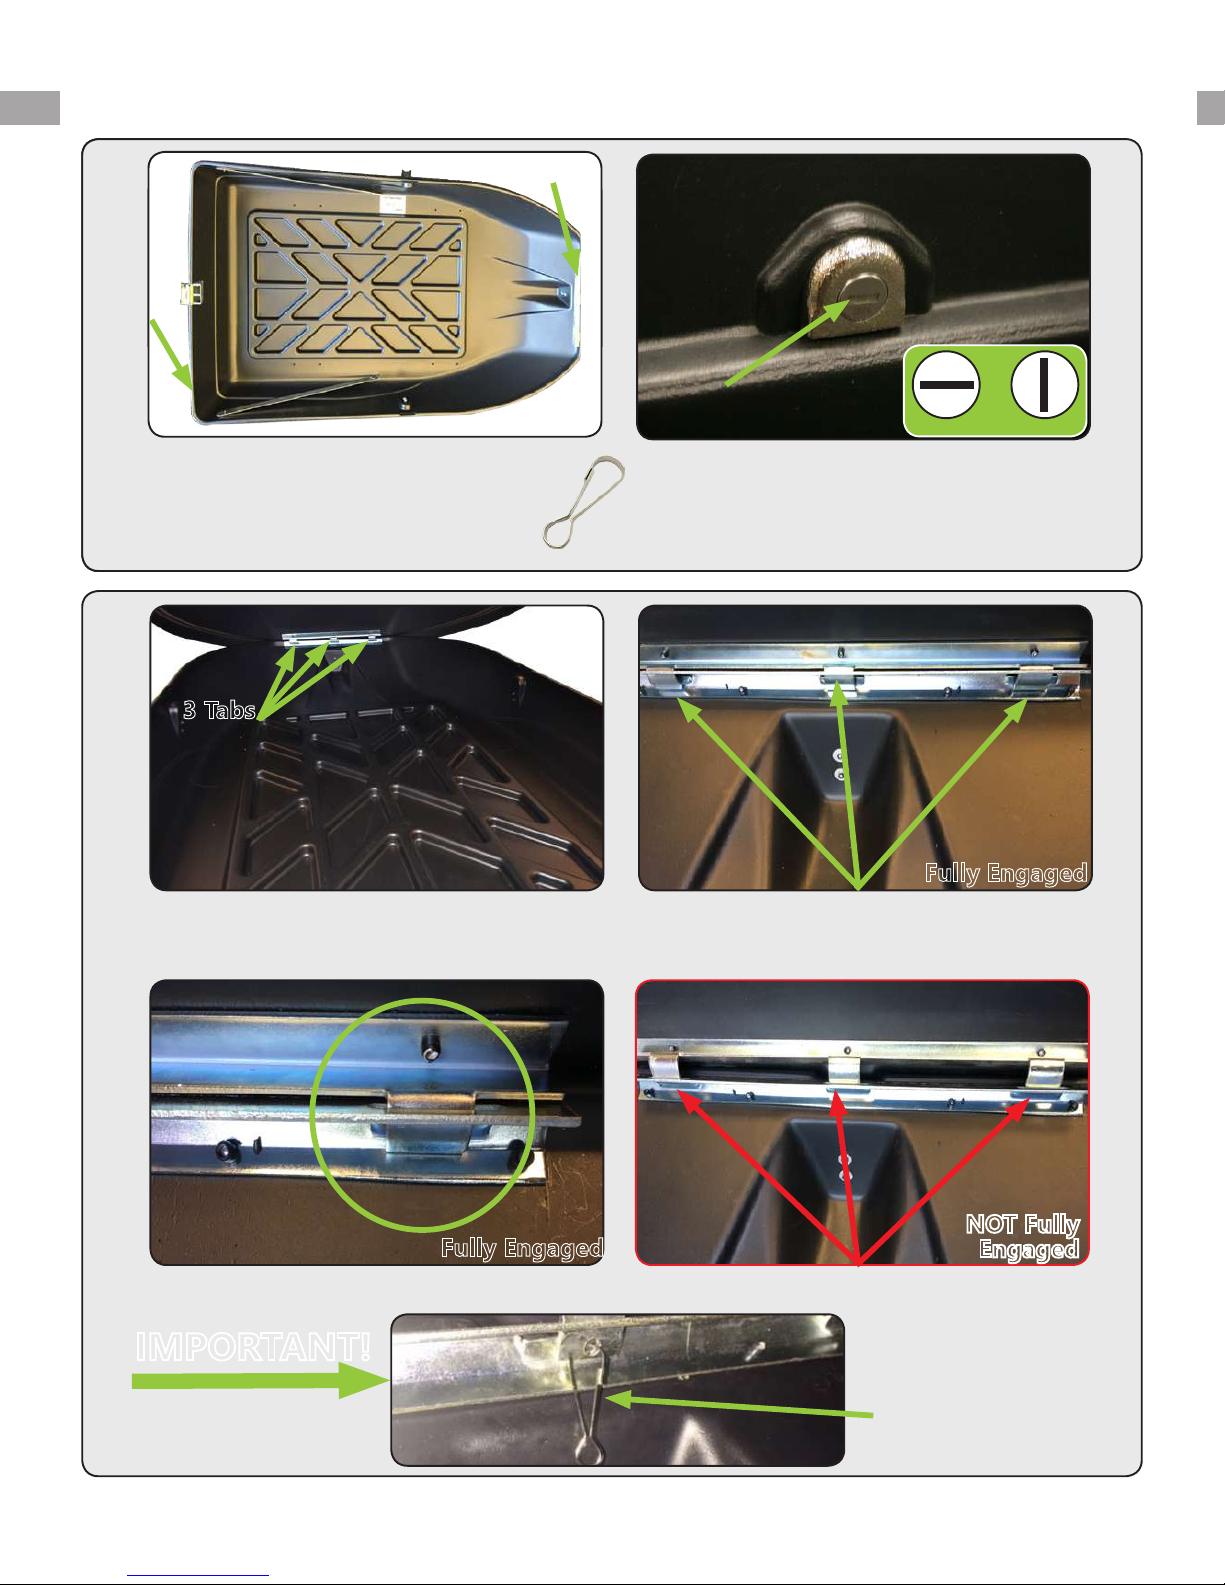
9.
Secure both side bale latches. Begin by
confirming the box side wall is properly seated.
If properly seated, side alignment brackets will
NOT be visible.
Seated Not Seated
Both side alignment brackets MUST NOT be visible!
Then latch BOTH side bale latches and insert lanyard
snap clip hooks on each side to secure.
NO!
Both side
alignment
brackets must be
INSIDE of carrier.
Once key is removed, verify that the lock
is properly engaged by trying to lift the
lid from the base.
8.
Place key in lock and turn to vertical position
as shown. Then remove key to prevent lock
from allowing box to open.
Be sure cargo carrier is fully closed. When this
occurs, the yellow warning label will no longer
be visible.
Yellow Warning Label Not Visible Yellow Warning Label Visible
Close up of warning label which should NOT
be visible when cargo carrier is properly closed.
Clip hooks can
be replaced by
padlocks for
greater security.
8
INSTRUCTIONS
Unlocked Locked
NOTE!