Installation and Maintenance Guide: Before You Begin 4
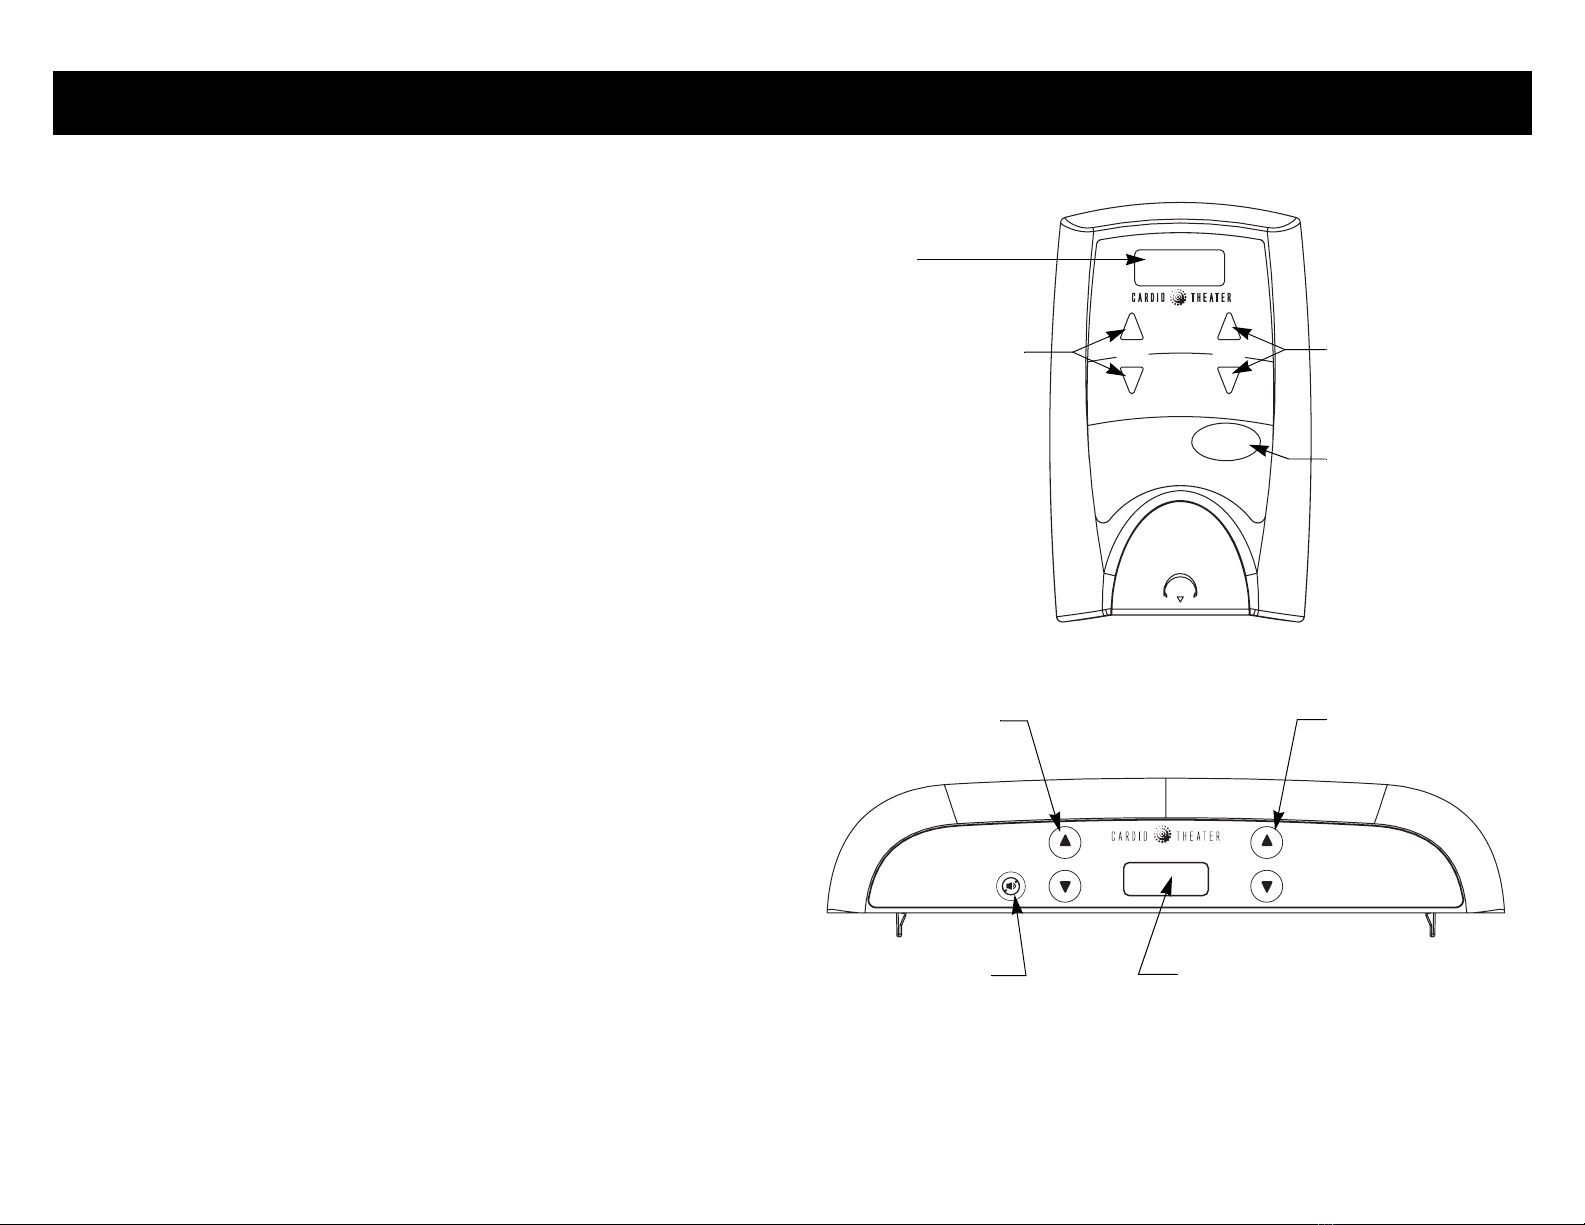
About the xTV863 Receiver
The xTV863 receiver supports many channels of high-fidelity sound.
Use of the receiver is intuitive; people can typically begin using the
receiver with little or no training.
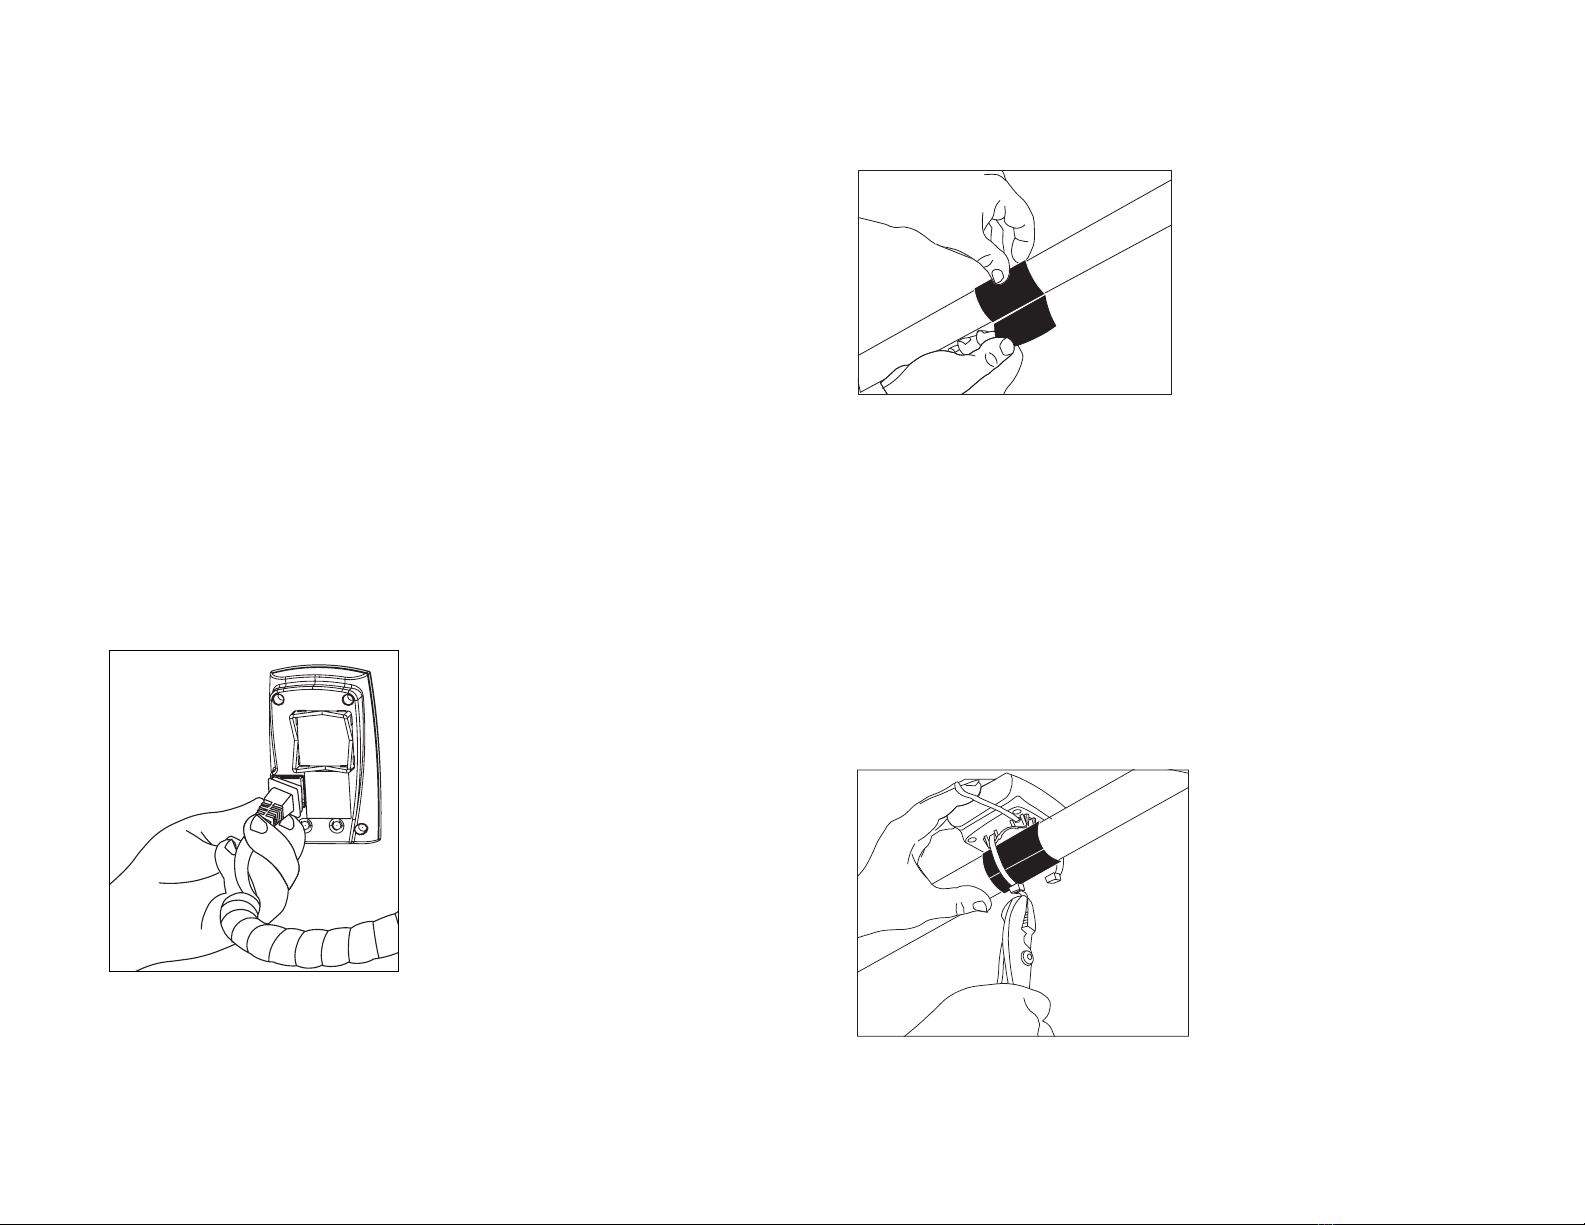
During installation, the technician attaches receivers to selected
equipment in the facility. Receivers are typically powered by the
equipment to which they are attached. For example, when
connected to a treadmill, the receiver is powered continuously as
long as the treadmill is turned on. With self-powered equipment,
such as cycles and elliptical crosstrainers, the receiver turns on
when a person is using the equipment, or the optional power
adapter is connected to the equipment.
Note: To receive power from exercise equipment, standalone
receivers require exercise equipment with CSAFE power
connections. Otherwise, the receiver must be powered through an
AC power adapter plugged into a power outlet.
Installation Requirements
Review the following installation requirements before assembly:
• Transmitters and receivers should be installed so they are within
50 meters of each other and are in direct line of sight. For
example, if you are within 30 meters and can see the transmitter
antenna, the receivers should have good reception.
• With new xTV wireless installations, we recommend installing the
receivers on the equipment first, then installing the transmitters.
Doing so will allow installers to check the sound quality of the
transmitters throughout the room.
• Receiver channels are programmed during installation and will
correspond to the TV and audio options available. The receiver
automatically acquires the available channels from the installed
transmitters and assigns them to channel numbers, starting with
the lowest transmitting channel to the highest transmitting
channel, regardless of which channels are used.
• To avoid confusion with people using the wireless system, you
want receivers to logically select TV and audio components based
on their placement. So, on the receiver, channel 1 would select the
first TV, channel 2 would select the second TV, and so on. To
support this logical usage, transmitters need to be installed in
channel order, as explained in the Transmitter Installation and
Maintenance Guide.
• There is no correlation between channel numbers on transmitters
and channel numbers shown on receivers when they are
programmed. For more information about transmitter channels,
refer to the Transmitter Installation and Maintenance Guide.