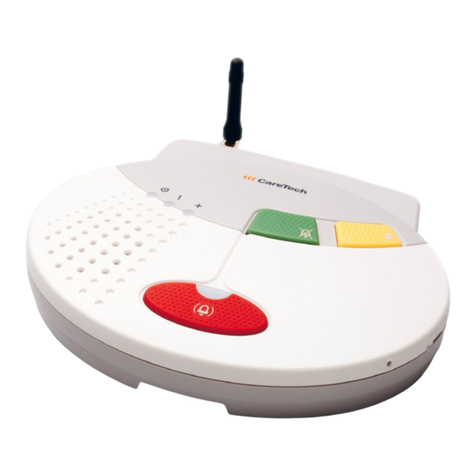
CareTech CareIP User manual

Service manual / Technical Handbook

2
© 2014 Copyright CareTech AB, Rev H

3
Table of contents
1
11
1
REVISIO S
REVISIO SREVISIO S
REVISIO S
................................
................................................................
................................................................
................................................................
................................................................
................................................................
..........................................
....................
..........
5
55
5
2
22
2
TECH ICAL TERMS
TECH ICAL TERMSTECH ICAL TERMS
TECH ICAL TERMS
................................
................................................................
................................................................
................................................................
.............................................................
..........................................................
.............................
5
55
5
3
33
3
SAFETY I FORMATIO
SAFETY I FORMATIOSAFETY I FORMATIO
SAFETY I FORMATIO
................................
................................................................
................................................................
................................................................
........................................................
................................................
........................
6
66
6
4
44
4
OVERVIEW CareIP
OVERVIEW CareIPOVERVIEW CareIP
OVERVIEW CareIP
................................
................................................................
................................................................
................................................................
................................................................
................................................................
................................
7
77
7
4.1
CareIP front ................................................................................................................ 7
4.1.1
Indicator lights ..................................................................................................... 7
4.2
CareIP back ............................................................................................................... 8
4.2.1
Connection terminals ........................................................................................... 8
5
55
5
DESCRIPTIO OF FU CTIO S
DESCRIPTIO OF FU CTIO SDESCRIPTIO OF FU CTIO S
DESCRIPTIO OF FU CTIO S
................................
................................................................
................................................................
................................................................
.............................................
..........................
.............
9
99
9
5.1
Activating an alarm ..................................................................................................... 9
5.2
Different types of alarm triggers .................................................................................. 9
5.3
Alarm receivers ........................................................................................................... 9
5.4
Alarm process ............................................................................................................ 9
5.5
Log alarm ................................................................................................................. 10
5.6
Test alarm ................................................................................................................ 10
5.7
Inactivity alarm .......................................................................................................... 11
5.7.1
Home/Away function .......................................................................................... 11
5.8
Call-back after alarm ................................................................................................ 11
5.9
Automatic answer on incoming calls ......................................................................... 12
5.10
Intruder alarm ........................................................................................................ 12
5.11
VoIP – Telephone call over internet ........................................................................ 13
5.12
Heartbeat - activity message ................................................................................. 13
6
66
6
I STALLATIO
I STALLATIOI STALLATIO
I STALLATIO
................................
................................................................
................................................................
................................................................
................................................................
................................................................
...................................
......
...
14
1414
14
6.1
Connection ............................................................................................................... 14
6.2
Connecting external equippment .............................................................................. 14
6.2.1
Inputs ................................................................................................................ 15
6.2.2
Output 1, relay output ........................................................................................ 15
6.2.3
Output 2, transistor output ................................................................................. 15
6.2.4
Output 3, connection to hearing loop systems ................................................... 16
6.3
Installing the SIM card .............................................................................................. 17
6.3.1
GSM Only .......................................................................................................... 17
6.3.2
GSM signal strength check ................................................................................ 17
6.4
PoE .......................................................................................................................... 18
6.4.1
Installing PoE module ......................................................................................... 18
7
77
7
PROGRAMMI G
PROGRAMMI GPROGRAMMI G
PROGRAMMI G
................................
................................................................
................................................................
................................................................
................................................................
................................................................
................................
19
1919
19
7.1
Programming of radio unit ........................................................................................ 19
7.1.1
Programming of radio transmitter ....................................................................... 19
7.1.2
Check radio coverage ........................................................................................ 19
7.1.3
Erase programmed radio units ........................................................................... 19
7.2
Recording of speech message (ID) ........................................................................... 19
7.3
i-care Online ............................................................................................................. 20
7.4
Local programming .................................................................................................. 21
7.5
Service Mode ........................................................................................................... 22
7.5.1
Activate Service Mode ....................................................................................... 22
7.5.2
Service Mode functions ...................................................................................... 22
7.5.3
avigate in Service Mode ................................................................................... 23
7.6
CareIP settings ......................................................................................................... 24
7.6.1
IP settings .......................................................................................................... 24
7.6.2
SIP Settings ....................................................................................................... 26
7.6.3
GSM/GPRS settings .......................................................................................... 27

4
7.6.4
Alarm handling ................................................................................................... 28
7.6.5
Function settings................................................................................................ 29
7.6.6
Settings buttons/inputs/output ........................................................................... 33
7.6.7
Configuration of programmed radio units ........................................................... 34
8
88
8
ALARM TYPES
ALARM TYPESALARM TYPES
ALARM TYPES
................................
................................................................
................................................................
................................................................
................................................................
................................................................
...................................
......
...
35
3535
35
9
99
9
MAI TE A CE
MAI TE A CEMAI TE A CE
MAI TE A CE
................................
................................................................
................................................................
................................................................
................................................................
................................................................
..................................
....
..
37
3737
37
9.1
Cleaning ................................................................................................................... 37
9.2
Replacing the battery ................................................................................................ 37
10
1010
10
ACCESSORIES
ACCESSORIESACCESSORIES
ACCESSORIES
................................
................................................................
................................................................
................................................................
................................................................
................................................................
................................
38
3838
38
11
1111
11
TECH ICAL DATA
TECH ICAL DATATECH ICAL DATA
TECH ICAL DATA
................................
................................................................
................................................................
................................................................
...........................................................
......................................................
...........................
39
3939
39
12
1212
12
E VIRO ME TAL I FORMATIO
E VIRO ME TAL I FORMATIOE VIRO ME TAL I FORMATIO
E VIRO ME TAL I FORMATIO
................................
................................................................
................................................................
................................................................
.....................................
..........
.....
40
4040
40

5
1REVISIONS
Rev
Dat
e
Fil
e
nam
e
ote
s
A
08/02/2010
Th_CareIP_
En
_01
F
irst
release
B
16/04/2010
Th_CareIP_En_02
CareIP Mobile
functions
added
C
13/09/2010
Th_CareIP_En_03
Additional
information CareIP Mobile
added
D
18/01/2011
Th_CareIP_En_04
For V1.1.2.0 and newer
E
2011
-
11
-
14
Th_CareIP_En_05
Minor clarifications
F
2013
-
11
-
20
Th_CareIP_En_06
F
or V1.2.3.0 and newer
G
201
3
-
1
2
-
1
6
Th_CareIP_En_0
7
Minor
additions
H
2014
-
02
-
24
Th_CareIP_Sv_08
Description for outputs added
2TECHNICAL TERMS
Abbreviation
Meaning
DHCP
Dynamic Host Configuration Protocol
–
Dynami
c assignment of
IP-addresses
SIP
Session Initiation Protocol
–
Proto
c
ol
for initiation of int
eractive
multimedia sessions
RTP
Real
-
time Transport Protocol
–
Proto
c
ol specifie
d
f
or carrying
data streams in real time e.g. audio or video
VoIP
Voice over Internet Protocol
–
Transfer of voice calls via networks
based in the Internet protocol (IP)
D
S
Domain ame System
-
S
ystem
that translates
”nam
es
” (FQD )
to IP-addresses
FQD
Fully Qualified Domain ame
S TP
Simple etwork Time Protocol
–
S
erver
s that provides a
”ti
me
service”
Peer
-
to
-
peer
Two equal units that communicates with each other.
Gat
eway
A network node that connects two different networks that can
use different network protocols or topologies.
etmask
et mask
-
“Mask”
that together with the
IP
-
a
d
dres
s defines the
local network number and ”host”-address
URI
Uniform Resource
Identifi
er
–
string that is used to identify a
resource.
CIP
CareTech IP
–
Proto
c
ol
for digital alarm transfer
Proxyserver
Server
that acts as an intermediary for requests
from units that
are seeking resources from other servers

6
3SA ETY IN ORMATION
The compartment covers on the reverse may be opened only by authorized
person.
Only use recommended battery type as stated under accessories. CAUTIO –
Risk of explosion if battery is replaced by an incorrect type. Dispose of used
batteries shall be done in an environmental friendly way. See environmental
information.
Only use power supply recommended in accessories.
Important information
All systems using radio and network communication are subject to interference
beyond the user’s control.
Products from CareTech are designed to minimise the impact of such
interference. evertheless, the user must be aware that system components can
be subjected to interference or other influences that may cause malfunction.
It is therefore important to regularly check that every part of the system works in
all areas, especially radio communications. Contact your supplier immediately in
case of any suspected malfunction.
Users should pay particular attention to the risk of disruption from products which
communicate using the same or adjacent frequencies.
When connecting or disconnecting external accessories, CareIP shall be turned
OFF and the power supply shall be disconnected from the unit.
For further information, please contact your supplier.
Always read and follow the safety information accompanied by this
symbol

7
4 OVERVIEW CareIP
4.1 CareIP front
4.1.1 Indicator lights
On, (Green)
Steady light: Mains power.
Flashing light: Mains failure or radio programming mode.
Alarm, (Red)
Steady light: Idle mode.
Slow flashing: Alarm state.
Error, (Red)
Off: Idle mode.
Steady light: Problem with Ethernet link or IP configuration.
Slow flashing: Registration to SIP server failed.
Status, (Red/Green)
Off: Idle mode.
Steady red light: o connection to GSM network.
Alternating Red/Green: Away mode
Green button
(CA CEL)
stops the alarm
Red button
activates the alarm
Yellow button
(Function button)

8
4.2 CareIP back
4.2.1 Connection terminals
Volume control: Loudspeaker volume adjustable in eight levels.
Pull cord: Attachment for pull cord when wall mounted.
Power switch: Turns CareIP O and OFF.
DC I : Connection for power supply 7,5VDC
Ethernet port: Connection for cable from broadband/network.
I/O connectors (wired).
Hole for wall mounting
Battery
compartment
SIM
card
Antenna connector

9
5DESCRIPTION O UNCTIONS
CareIP is a digital alarm unit that uses SIP protocol for communication. SIP is a
standard protocol for transfer of speech and video over broadband connections.
If CareIP are connected to a ”Firewall” following UDP ports must be open for
outgoing traffic.
Port 5060 SIP protocol.
Port 10000-10999 RTP protocol.
Port 69 TFTP protocol (programming).
Port 123 S TP
Port 53 D S.
5.1 Activating an alarm
Activation of an alarm can be done by.
•The red button on CareIP.
•Radio unit that is programmed to CareIP.
•Trigger connected to input.
•Pull cord, when wall mounted.
5.2 Different types of alarm triggers
Ten radio transmitters can be programmed with the CareIP, e.g. a radio trigger
and four wired triggers.
5.3 Alarm receivers
Up to ten Contacts and five different call sequences can be programmed. Alarm
against alarm centre is identified by an alarm code that’s programmed in CareIP,
Alarm to telephone is identified through a recorded speech message (ID). The
receiver can establish a speech connection with the person that has activated the
alarm and take appropriate actions.
5.4 Alarm process
CareIP has ten programmable contacts (alarm receivers), the receivers can be a
SIP telephone, mobile telephone or an Alarm centre (in this case a alarm code
must be set).
The unit has five alarm sequence lists that are programmable to call the contacts
in any order, as default all alarm types uses sequence one, any of the alarm types
are programmable to use any of the five sequences.

10
The default setting for each alarm sequence list is: contact 1 -> contact 2 ->
contact 3 -> ….. contact 10.
When an alarm is activated, CareIP first checks which call sequence shall be
used, after that CareIP calls the alarm receivers according to the programmed
order in the call sequence until the alarm is acknowledged or the maximum
number of call attempts is reached.
With acknowledgement means that the receiver confirms that the alarm is
received, this is made with the ”4” key if the receiver is a SIP telephone/ mobile
phone or if the receiver is an alarm centre by sending an acknowledgement
message to CareIP.
If the receiver is a SIP telephone or a mobile phone at e.g. neighbour or relative,
CareIP identifies itself with a recorded speech message. When an alarm is
received at an alarm centre the information (alarm code and alarm type) is sent
digitally to the receiver and no synthetic speech is sent.
If the alarm is a so-called speech connected alarm e.g. Emergency alarm, there is
possibility to establish a two way speech connection. If the alarm is a so-called
technical alarm e.g. Battery alarm there will not be any speech connection.
Disconnection of an alarm is made with the”0” key if the receiver is a telephone or
by a disconnection command from a alarm centre. Care IP automatically
disconnects the call after that the programmed connection time has elapsed
(default set to 150 sec), this time can be extended with the ”4” key on the
telephone or by a command from the alarm centre.
5.5 Log alarm
If the function for log alarm (acknowledgement message, alarm type 89) is
activated, the unit automatically sends a log alarm to a alarm central after that an
alarm is received on a telephone. This function is used to get documentation on
alarms that are received on telephone. The log alarm is called out according to
the call sequence for alarm type 89.
5.6 Test alarm
Test alarm is used to monitor the unit’s functionality and that the connection
works correctly. If the test alarm function is activated a silent alarm will be sent
according to the call sequence for alarm type 26. The time interval for test alarms
can be set between 1 and 999 hours.

11
5.7 Inactivity alarm
Inactivity alarm is a function that is used for sending an alarm (alarm type 14) if no
activity occurs during a certain pre-programmed time. When inactivity alarm is
activated an internal timer starts that generates an alarm if it is not restored within
the set time. After every reset the timer will restart.
The inactivity alarm is reset and the time will be recounted from the start at the
following events:
•If any of the units buttons (Red, Yellow or Green) are pressed. ormally the
Green button is used for resetting the inactivity alarm (activity button).
•Activation of any alarm input on CareIP. If an input is programmed to transmit
alarm type 12 (Reset) the units alarm function will not be activated, only the
timer for the inactivity alarm will be reset.
•Activation of a programmed radio transmitter. If the transmitter is programmed
to transmit alarm type 12 (Reset) the units alarm function will not be activated.
If the function pre-alert for inactivity alarm is activated, the unit will through an
audible signal once every minute during the set time to alert the user that the time
for inactivity alarm is about to expire.
5.7.1 Home/Away function
Temporary suspension of inactivity alarm can be made if the Home/Away function
is activated. In connection with activation of the function you choose which button
(Yellow or Green) to be used for temporary suspension of inactivity alarm,
normally yellow button is used for this. The message on temporary suspension of
inactivity alarm is transmitted to the alarm receiver as alarm type 57(voice
connected) or alarm type 98(not voice connected). Away mode is indicated on the
unit by the LED that alternates between Red and Green light.
Reconnection of inactivity alarm is made by pressing the green button if the
yellow button is used for temporary suspension or by pressing the yellow button if
the green button is used for temporary suspension. The message on
reconnection of inactivity alarm is transmitted to the alarm receiver as alarm type
56(voice connected) or alarm type 97(not voice connected).
5.8 Call-back after alarm
With the function call-back after alarm means that after an alarm is received by a
response center you shall call up the CareIP from a SIP telephone or from an
landline/mobile telephone (CareIP mobile) to acknowledge the alarm.
CareIP then automatically answers on the incoming call, speech connection can
then be established by pressing “4” on the telephone. The acknowledgement by
pressing ”4” has to be made within ten seconds after that the unit has answered

12
on the incoming call. Disconnection always has to be made by pressing “0” on
the phone. The function is active during the programmable time called call-back
time. If the unit doesn’t be called up or reset by the green button on the unit the
alarm will be sent again after that the programmed call-back time has elapsed.
Shorter time than two minutes shall not be programmed.
A log alarm is sent to the response center after call-back if the function log alarm
is activated.
If the alarm is reset by pressing the green button on the unit during the call-back
time a reset message with alarm type 12 is sent to the response center.
The unit calls the programmed number of call attempts if no reset is made a time
disconnection message with alarm type 66 is sent to the response center.
5.9 Automatic answer on incoming calls
CareIP can be programmed to answer automatically on incoming calls after a
certain time. The function is used to facilitate call-up of the unit and e.g. operate
the relay. If the holder has permitted this, the function can be used for automatic
voice connection upon call-up.
5.10 Intruder alarm
CareIP can be used as an intruder Alarm Centre. The intruder alarms can be
connected/disconnected using a radio button that disconnects the alarm when
pressed briefly and connects it when pressed for approx. 4 sec. ERIK/ELLIOT
radio-alarm button has two buttons that on can be programmed for intruder alarm
O and OFF.
When the alarm is connected, the relay emits three quick pulses on a output. In
the event of intruder alarm OFF the relay emits a quick pulse. The function can be
set (see Activate output x on Intruder alarm).
There are possible to send message about O /OFF to Alarm Central (see
Register Intruder alarm ON/OFF).
When the intruder alarm is OFF Alarm Type 07, Intruder Alarm, is not recorded.
Other alarms have normal function.
The CareIP emits audible signals to indicate which function has been activated. If
it has voice synthesis activated, you can also receive the voice message 'Intruder
alarm off' or 'Intruder alarm on'. Connection of the intruder alarm is delayed for 30
seconds. During the delay period tone signals are emitted through the
loudspeaker.

13
The relay output is activated for approx. 3-5 minutes in the event of an alarm and
can be switched off by pressing '9' on the receiving phone (‘5’ in Tunstall
protocol) or by ‘Intruder alarm OFF’ after the alarm has been disconnected from
the emergency service center.
In the event of an intruder alarm, the CareIP calls according to chosen call
sequence. An audible signal will only be given via the speaker after a successful
call has been completed. This signal continues for 3-5 minutes, and can only be
stopped using the O /OFF radio button, Input 2 after disconnection from the
emergency service center or by the recipient pressing '9' ('5' in Tunstall mode).
Sensors for intruder alarms must be of Alarm Type 07.
5.11 VoIP – Telephone call over internet
VoIP (Voice over IP) is a way to make telephone calls over a network/broadband
connection (Internet), the communication is handled by two different protocols,
SIP and RTP.
A short description:
SIP is used for the communication between CareIP and the alarm receiver for e.g.
initiate a connection, send alarm information (alarm code and alarm type), handle
the speech direction and disconnection of the alarm.
RTP is used for sending audio streams between CareIP and the receiver.
5.12 Heartbeat - activity message
Heartbeat is a way to monitor the unit’s function. The monitoring works in the way
that the unit sends an SIP message ”Heartbeat” to a server with a programmed
time interval. In the messages the unit can include information about operational
disruptions ex. mains failure, battery faults and other types of interference. If there
is a fault in the IP communication from the unit the problem is recorded by the
server trough missing ”Heartbeat” from the unit.
This function must be activated if the unit shall be administrated trough i-care
online. The function is activated by programming of ”Heartbeat period” and ”i-
care online server”, on CareIP Mobile the ”AP ” must be programmed.

14
6INSTALLATION
6.1 Connection
The CareIP is connected to the broadband/network via the network cable.
CareIP shall always be connected to the network as near incoming broadband as
possible to avoid other equipment to affects the function.
Power is supplied via the power supply from a wall socket
.
•Connect the network cable from the broadband/network to the Ethernet
socket .
•Connect the power supply to the wall socket and the power supply lead to the
DC input socket .
•Turn the power switch to the I
II
I position. Check that the “O ” indicator lamp
has a steady green light.
The power supply shall be placed so the information text
“Do not to unplug” is visible.
6.2 Connecting external equippment
CareIP are equipped with a connection terminal for wire connection of external
equipment, the terminal is located on the back of CareIP.
I/O Connections (wire).
1-4: Inputs ( ormally closed / ormally open to G D).
5: DC out.
6: G D.
7: Output 3, connection to hearing loop systems
8: Output 2, close contact to G D through transistor (max. 70mA)
9: Output 1, relay output (+) (max. 0,7A).
10: Output 1, relay output (-).
Note!
Only use network cable and power supply acc
ording to
specification under accessories.

15
6.2.1 Inputs
The unit has four inputs that can be programmed to generate an alarm with
selected alarm type when connected/disconnected from the units G D ( C/ O).
Switch connected between terminal 6 (G D) and terminal 1
(input 1)
6.2.2 Output 1, relay output
The relay output on the unit can be used for activation of e.g. a siren or an input in
other systems (max. 0,7A). Connection (1 sec) occurs during speech connection
when the alarm receiver sends a command (DTMF 9). ote
oteote
ote!
! !
! Connect positive
Connect positive Connect positive
Connect positive
connection to
connection toconnection to
connection to
terminal 9
terminal 9terminal 9
terminal 9.
..
.
Can also be activated by all alarm types with speech
or any specific alarm type.
6.2.3 Output 2, transistor output
Output 2 on the unit can be used for activation of e.g. an input in other systems
(max. 70mA). The output closes to G D through a transistor upon activation. Can
be activated by all alarm types with speech or any specific alarm type.
Siren
SirenSiren
Siren
G D
G DG D
G D
+
++
+
7V
7V7V
7V
DC
DCDC
DC
G D
G DG D
G D
Input
A
u
x
system
OUT 2
OUT 2OUT 2
OUT 2
OUT 2
OUT 2OUT 2
OUT 2

16
6.2.4 Output 3, connection to hearing loop systems
Output 3 on the unit can be used for connection to a hearing loop system to
amplify the audio for persons with hearing impairment. Designed for loop
amplifiers with a 5-10kΩ microphone- or line input. The installation should be
adjusted and verified with a FSM field strength meter according to IEC 60118-4.
Note!
When connecting or disconnecting external equipment
shall the unit be turned off and power/network disconnected.
G D
G DG D
G D
OUT 3
OUT 3OUT 3
OUT 3
I
II
I
nput on
nput on nput on
nput on
loop
loop loop
loop
amplifier
amplifieramplifier
amplifier
I
II
I
nductive loop
nductive loopnductive loop
nductive loop

17
6.3 Installing the SIM card
(Exclusively CareIP Mobile)
•Unscrew the safety screw for the SIM card compartment cover.
•Remove the compartment cover.
•Install the SIM card according to picture below; note the markings on the
card.
•Mount the cover and the safety screw for the SIM card compartment.
6.3.1 GSM Only
If CareIP Mobile is installed without Ethernet connection the function
“Deactivation of Ethernet fault indication” shall be activated. This function is
activated along with the other IP settings.
6.3.2 GSM signal strength check
Signal strength can be checked with help of the service menu, see section
service mode. The signal strength will be stated as a value between 0 and
31, the value shall exceed 15 for proper functionality. If the value is less than
15 CareIP shall be relocated to an area with better GSM reception or the
antenna should be replaced by an antenna with better performance.
OTE! 1234 or 0000 are not appropriate PI codes for the SIM card, if any of
these PI codes are used, the code should be changed before installation.
Change of PI code is preferably done using a mobile phone.

18
6.4 PoE
Power over Ethernet
Power over EthernetPower over Ethernet
Power over Ethernet (PoE
PoEPoE
PoE)
))
) is a technology to power network devices by
transmitting electrical power along with data in Ethernet cables. Power can come
from a power supply within a PoE-enabled networking device such as an Ethernet
switch or can be injected into a cable run with a midspan power supply. Direct
injection from standard 48 V DC battery power arrays are possible; this enables
critical infrastructure to run more easily in outages, and make power rationing
decisions centrally for all the PoE devices. PoE uses only one type of connector,
an 8P8C (RJ45) connector.
This technology is useful for powering Ethernet connected units ex. CareIP.
6.4.1 Installing PoE module
•
Unscrew the safety screw for the battery compartment door.
•
Remove the battery compartment door .
•
Detach the battery connector and remove the battery .
•
Mount the PoE module in the CareIP.
•
Refit the battery compartment door and the safety screw.
2
22
2
3
33
3
1
11
1
4
44
4
OTE! In case PoE is used as power supply for CareIP, no battery for
backup power can be mounted in the unit. In this case the backup power
must be integrated in the PoE system.
1
11
1
2
22
2
3
33
3
4
44
4

19
7PROGRAMMING
The programming of functions, contacts, alarm codes and settings in CareIP are
remote programmed trough i-Care online or locally programmed with a computer
and the software CareTech CS2. Radio pendants and other radio units can be
programmed directly on CareIP without use of a computer.
7.1 Programming of radio unit
Up to ten radio units can be programmed in CareIP.
7.1.1 Programming of radio transmitter
•Hold down the green button approx. four sec. until the green O LED
starts flashing.
•Activate the radio transmitter. When CareIP receives the radio signal a tone
signal is played.
•Confirm the programming by pressing the red button on CareIP.
7.1.2 Check radio coverage
This shall always be performed in connection with the installation.
•Hold down the green button approx. four sec. until the green O LED
starts flashing.
•Press the button on the radio pendant. When CareIP receives the radio signal
a tone signal is played. Repeat this in all areas where the alarm shall function.
7.1.3 Erase programmed radio units
This erases ALL programmed radio units.
•Hold down the green button approx. four sec. until the green O LED
starts flashing.
•Press the volume control button. The deletion is confirmed by a tone signal.
7.2 Recording of speech message (ID)
The speech message is used for identification when a SIP phone is used as alarm
receiver.
•Hold in the green button approx. four sec. until the green O LED starts
flashing.
•Hold in the yellow button approx. four sec until a tone signal is heard.
•Dictate the approx. 4 s message e.g. ”Jane Doe 3 High Road, Anytown”
approx. 50 cm from the microphone.
•The message will automatically be played back by way of control.

20
7.3 i-care Online
i-care Online is a web based service for easy handling, programming and
monitoring of your units. The service is accessible around the clock and it is
always possible in real time to see the status of deployed CareIP.
To be able to administrate the units you must be logged on to i-care online,
username and password are provided by your supplier.
ew units must be activated in i-Care Online; to be able to activate a unit you
must have the serial number of the unit.
The unit must be connected to a network that uses DHCP (Dynamic Host
Configuration Protocol) and have internet access. If static IP addresses are used
this must be configured in CareIP.
When the unit is turned O the red LED located under the exclamation mark will
light up for a few seconds after that only the green LED shall be lit. ow you can
see the status of the unit under ”deployed units” in i-care Online.
Depending on permissions, you now can read out and program the unit.
When programming the unit, it is updated in several steps; first all parameters are
sent to the unit after that the update is verified and finally a validation are made.
Depending on network conditions and other this can take up to one minute.
Monitoring of the unit is done by that CareIP sends a ”Heartbeat” (activity
message) to the i-care online server. These messages contain for example
information about power failure and when power is restored. If there is a problem
with the IP communication from the unit it is recorded by the i-care online server
trough missing ”Heart beat”. The server may in turn alert the disruption to the
customer.
i
-
C
are Online
Internet
CareIP
Other manuals for CareIP
1
Table of contents
Other CareTech Security System manuals