Cargoglide WALLSLIDE User manual

WALL
Ford Transit Midroof, 148” Wheelbase
WALL
SLIDE
Ford Transit Midroof, 148” Wheelbase
Assembly Steps
1
SLIDE
Assembly Steps

2
Contents
Specifications ................................................................................................................................................ 5
Package Contents .......................................................................................................................................... 6
Left Wall Frame Assembly............................................................................................................................. 7
Step 1 ........................................................................................................................................................ 8
Step 2 ........................................................................................................................................................ 8
Step 3 ........................................................................................................................................................ 9
Step 4 ........................................................................................................................................................ 9
Step 5 ...................................................................................................................................................... 10
Step 6 ...................................................................................................................................................... 11
Step 7 ...................................................................................................................................................... 13
Right Wall Frame Assembly ........................................................................................................................ 17
Step 1 ...................................................................................................................................................... 18
Step 2 ...................................................................................................................................................... 18
Step 3 ...................................................................................................................................................... 19
Step 4 ...................................................................................................................................................... 19
Step 5 ...................................................................................................................................................... 20
Step 6 ...................................................................................................................................................... 21
Step 7 ...................................................................................................................................................... 23
Bearing Rail Assembly ................................................................................................................................. 27
Step 1 ...................................................................................................................................................... 28
Step 2 ...................................................................................................................................................... 29
Step 3 ...................................................................................................................................................... 30
Step 4 ...................................................................................................................................................... 31
Step 5 ...................................................................................................................................................... 33
Step 6 ...................................................................................................................................................... 34
Step 7 ...................................................................................................................................................... 35
Step 8 ...................................................................................................................................................... 36
Cross Supports Assembly ............................................................................................................................ 38
Step 1 ...................................................................................................................................................... 39
Step 2 ...................................................................................................................................................... 40
Step 3 ...................................................................................................................................................... 41

3
Step 4 ...................................................................................................................................................... 42
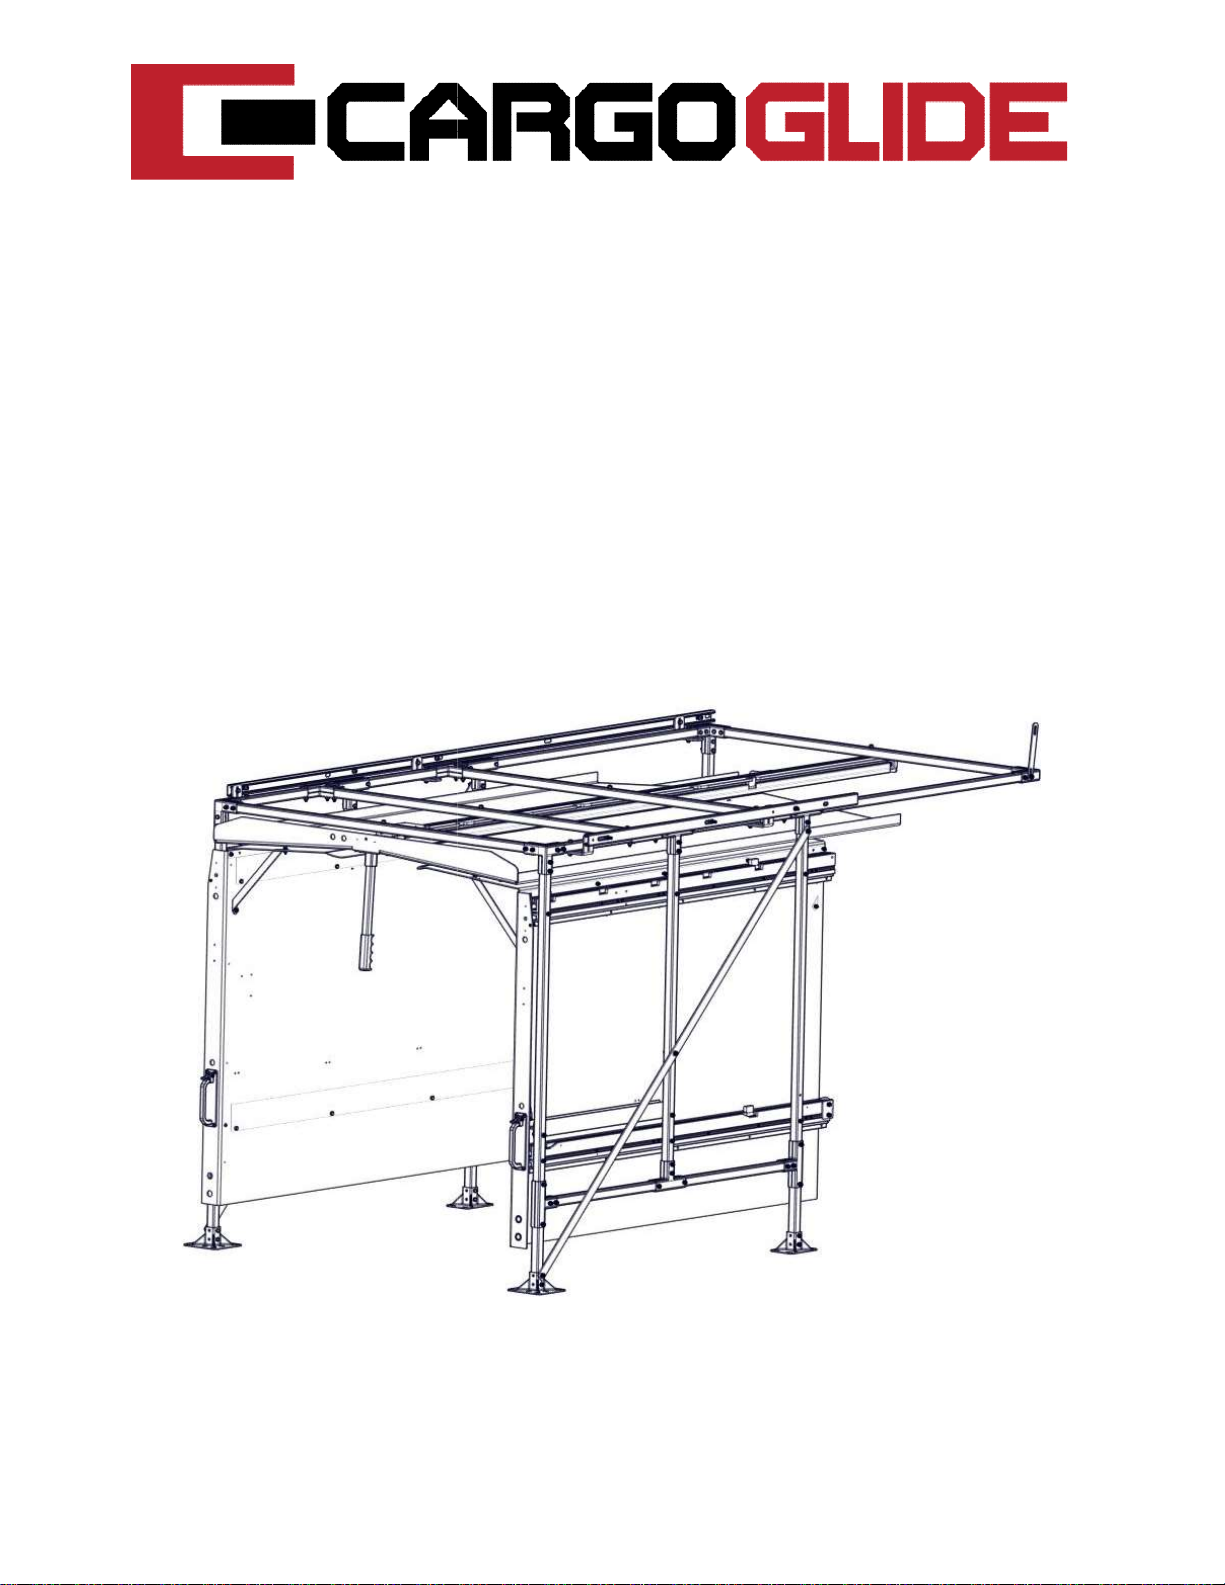
Ford Transit,Mid Roof, 148” Wheelbase Van Installation .......................................................................... 43
Step 1 ...................................................................................................................................................... 44
Step 2 ...................................................................................................................................................... 45
Step 3 ...................................................................................................................................................... 46
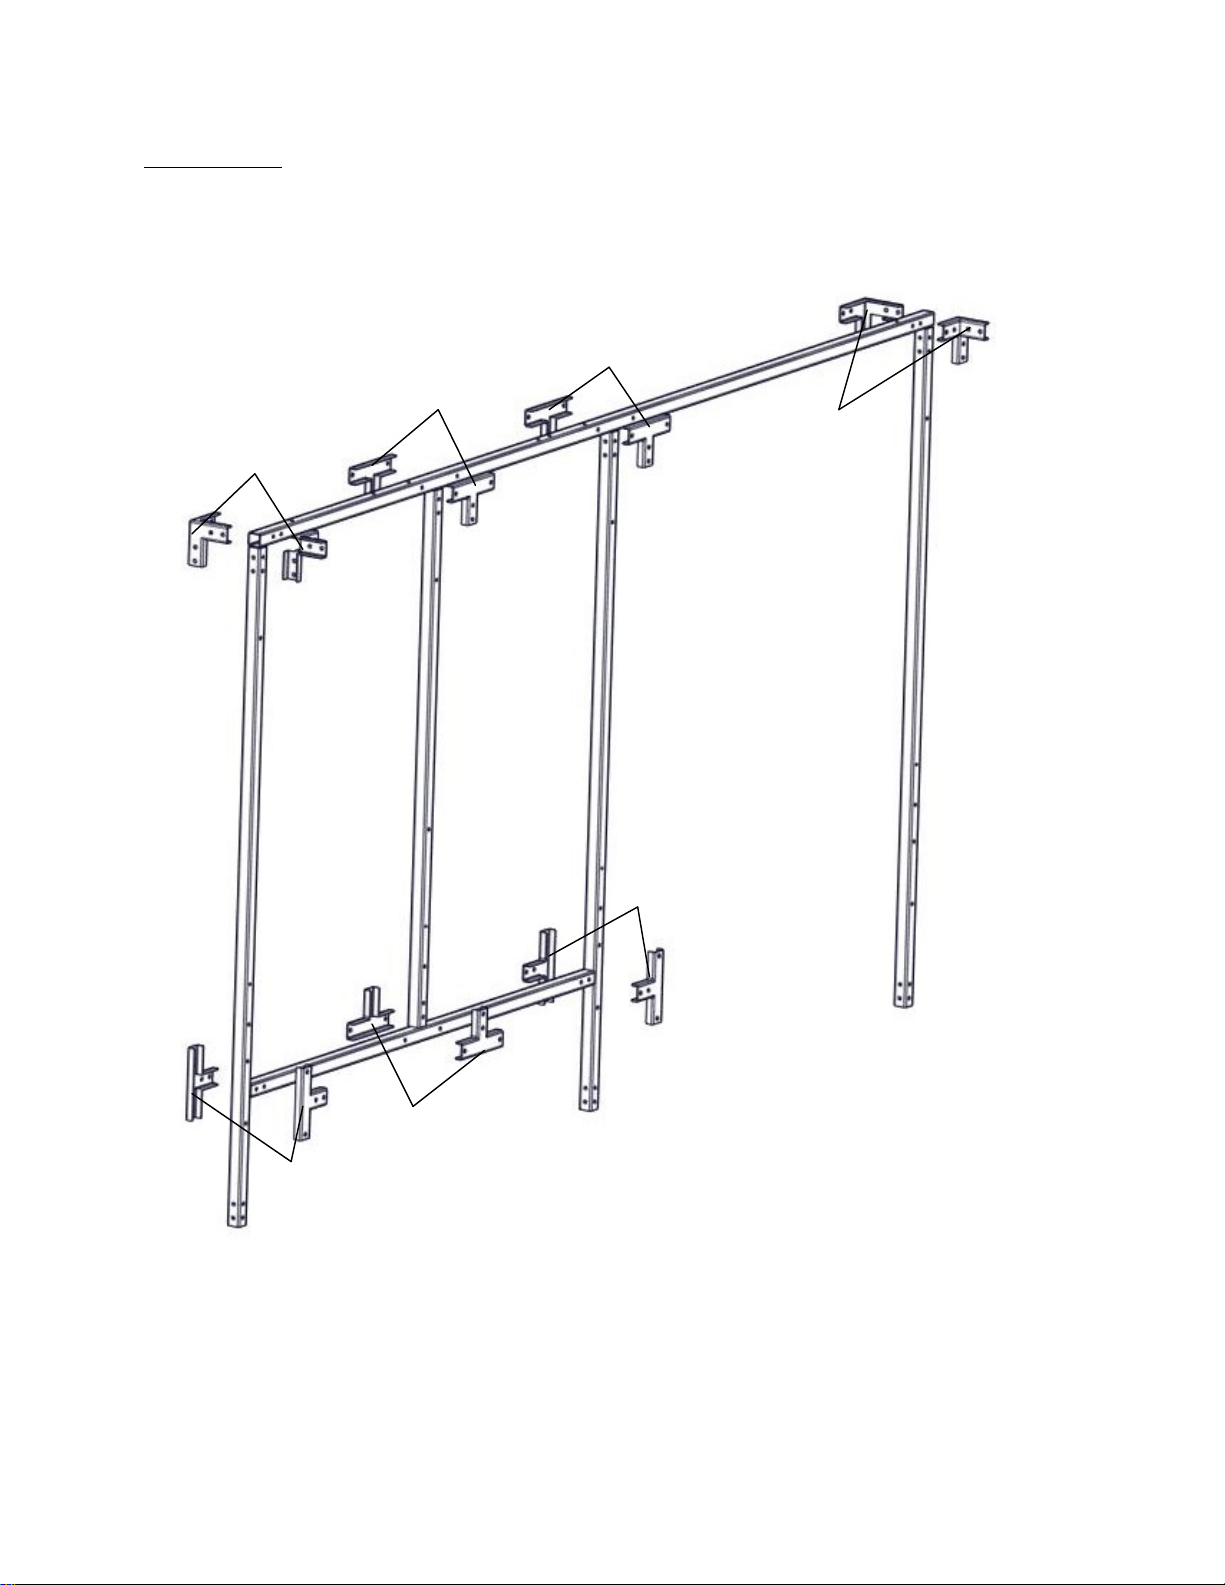
Left Wall Panel Assembly ............................................................................................................................ 48
Step 1 ...................................................................................................................................................... 50
Step 2 ...................................................................................................................................................... 51
Step 3 ...................................................................................................................................................... 52
Step 4 ...................................................................................................................................................... 53
Step 5 ...................................................................................................................................................... 54
Step 6 ...................................................................................................................................................... 55
Step 7a .................................................................................................................................................... 56
Step 7b .................................................................................................................................................... 57
Step 8 ...................................................................................................................................................... 58
(Optional) Left Wall Canopy Assembly ....................................................................................................... 59
Step 1 ...................................................................................................................................................... 60
Installing Assembled Left Wall Panel onto Assembled Frame .................................................................... 62
Step 1 ...................................................................................................................................................... 62
Step 2 ...................................................................................................................................................... 63
Step 3 ...................................................................................................................................................... 64
Right Wall Panel Assembly .......................................................................................................................... 65
(Optional) Right Wall Canopy Assembly ..................................................................................................... 67
(Optional) Ceiling Bearing Rail Assembly .................................................................................................... 70
Step 1 ...................................................................................................................................................... 71
Step 2 ...................................................................................................................................................... 72
Step 3 ...................................................................................................................................................... 73
Step 4 ...................................................................................................................................................... 74
(Optional) Ceiling Canopy Assembly ........................................................................................................... 76
Step 1 ...................................................................................................................................................... 77
Step 2 ...................................................................................................................................................... 78
Canopy Latch Assembly .............................................................................................................................. 79

4
Step1 ....................................................................................................................................................... 80
Step 2 ...................................................................................................................................................... 81
Step 3 ...................................................................................................................................................... 82
Installing Assembled Ceiling Canopy onto Assembled Frame .................................................................... 83
Step 1 ...................................................................................................................................................... 84
Step 2 ...................................................................................................................................................... 85
Step 3 ...................................................................................................................................................... 86

5
Specifications
Wall Slide Specifications
Ford Transit
SKU# WSS501
SKU# WSS502
SKU# WSC110
Frame Size (L x W x H)
108.375” x 60” x 62.875
”
Wall Panel Size (L x W
)
112.355” x 50”
67.355” x 50”
83.875” x 54.829”
Rail Length
110”
65”
110”
Wall Extension
77”
45.5”
77”
Bolt Torque Specifications
Bolt Size
and Type
Recommended Torque
5/16”
-
18 Hex Bolt
17
-
19 ft/lbs
5/16”
-
18 Button Head Cap
Screw
15
-
17 ft/lbs
¼”
-
20 Hex Bolt
8
-
10 ft/lbs
¼”
-
20 Flat Head Cap Screw
10
-
12 ft/lbs
¼”
-
20 Button Head Cap Screw
8
-
10 ft/lbs
¼”
-
20 Flanged Hex Bolt
8
-
10 ft/lbs
10
-
32 Button Head Cap Screw
5
-
6 ft/lbs

6
Package Contents

7
Left Wall Frame Assembly
Parts Identification:
(1) Upper Horizontal Frame Tube
(3) Main Upright Frame Tube
(1) Lower Horizontal Frame Tube
(1) Mid Upright Frame Tube
(1) Rear Stabilizer Frame Strap
(1) Front Stabilizer Frame Strap
(2) 3
-
Way Outside Cor
ner Clamshell
(2) 3
-
Way Inside Corner Clamshell
(14) Tee Clamshell
(1
) 6 X 6 Basefoot
(2) 4 X 6 Basefoot
(36) 5/16”
-
18 x 2” Hex Bolt
(3) 5/16”
-
18 x 2.5” Hex Bolt
(5) 5/16” Flat Washer
(39) 5/16”
-
18 Nyloc Nut

8
Parts Required: (1) Upper Horizontal Tube and (3) Main Upright Tubes for these steps.
Step 1- Place the Upper Horizontal onto a stable, flat surface and orient as shown.
Step 2- Place the (3) Main Uprights as shown.
Upper Horizontal
Rear of Van
Front of Van
M
ain Upright
Main Upright
Main Upright

9
Parts Required: (1) Lower Horizontal Tube and (1) Mid Upright Tube for these steps.
Step 3- Place the Lower Horizontal as shown.
Step 4- Place the Mid Upright as shown.
Lower Horizontal
Mid Upright

10
Parts Required: (2) 3-Way Outside Corner Clamshells, (2) 3-Way Inside Corner Clamshells and (10) Tee
Clamshells for this step.
Step 5- Place the 3-Way Corner Clamshells and Tee-Clamshells onto each intersection as shown.
3-Way Corners
3-Way Corners
Tees
Tees
Tees
Tees
Tees

11
Parts Required: (27) 5/16”-18 X 2” Hex Bolts, (27) 5/16”-18 Nyloc Nuts for this step.
Step 6- Fasten Clamshells with the fastener hardware as shown.
Note: Reference detail views for proper assembly.
Reference A2
Reference A1
Reference A3
Only use (3) 5/16”
-
18 X 2” Bolts Here

12
(A1) Rear 3-Way Corner Clamshell Assembly
(A2) Front 3-Way Corner Clamshell Assembly
(A3) Tee Clamshell Assembly

13
Parts Required: (5) 5/16”-18 X 2” Hex Bolts, (3) 5/16”-18 X 2.5” Hex Bolts, (7) 5/16”-18 Nyloc Nuts, (5)
5/16” Flat Washers, (1) 6 X 6 Basefoot, (2) 4 X 6 Basefeet, (1) Rear Stabilizer and (1) Front Stabilizer for
this step.
Step 7- Fasten Basefeet and Stabilizers with the fastener hardware as shown.
Note: Securely tighten all fasteners. Refer to the Bolt Torque Chart in the Specifications section for
proper torque specs.
5/16”-18 X 2.5” Hex Bolt
Use Flat Washer Here
5/16”-18 X 2.5” Hex Bolt
Use Flat Washer Here
4 X 6 Basefeet
(Reference A5)
6 X 6 Basefoot
(Reference A4)
Front Stabilizer
Rear Stabilizer
REAR VIEW
Use Flat Washers Here
Use Flat Washer Here
5/16”-18 X 2.5” Hex Bolt

14
(A4) 6 X 6 Basefoot Orientation
(A5) 4 X 6 Basefoot Orientation

15
The Left Wall Frame is now assembled.
FRONT VIEW

16
REAR VIEW

17
Right Wall Frame Assembly
Parts Identification:
(1) Upper Horizontal Frame Tube
(2) Main Upright Frame Tube
(1) Lower Horizontal Frame Tube
(1) Mid Upright Frame Tube
(1) Rear Stabilizer Frame Str
ap
(
1
) 3
-
Way Outside Corner Clamshell
(
1
) 3
-
Way Inside Corner Clamshell
(10
) Tee Clamshell
(1
) 6 X 6 Basefoot
(1) 4 X 6 Basefoot
(28) 5/16”
-
18 x 2” Hex Bolt
(2) 5/16”
-
18 x 2.5” Hex Bolt
(4) 5/16” Flat Washer
(30) 5/16”
-
18 Nyloc Nut
(
1
)
2
-
Way Outside Corner Clamshell
(
1
)
2
-
Way Inside Corner Clamshell

18
Parts Required: (1) Upper Horizontal Tube and (2) Main Upright Tubes for these steps.
Step 1- Place the Upper Horizontal onto a stable, flat surface and orient as shown.
Step 2- Place the (2) Main Uprights as shown.
Upper Horizontal
Rear of Van
Front of Van
Main Upright
Main Uprigh
t

19
Parts Required: (1) Lower Horizontal Tube and (1) Mid Upright Tube for these steps.
Step 3- Place the Lower Horizontal as shown.
Step 4- Place the Mid Upright as shown.
Lower Horizontal
Mid Upright

20
Parts Required: (1) 3-Way Outside Corner Clamshell, (1) 3-Way Inside Corner Clamshell, (1) 2-Way
Outside Corner Clamshell, (1) 2-Way Inside Corner Clamshell and (10) Tee Clamshells for this step.
Step 5- Place the 3-Way Corner Clamshells and Tee-Clamshells onto each intersection as shown.
2-Way Corners
3-Way Corners
Tees
Tees
Tees
Tees
Tees
Table of contents