resort comfort base™
quick assembly guide
step 2: assemble legs
Locate the legs and choose one of the heights.
Make sure the leg with the solid end is touching the
floor.
Screw six legs into the pre-drilled holes by hand. All
legs must be installed and resting evenly on the floor.
The base will not operate properly without the legs.
The legs must be a minimum of 6” to maintain
articulating clearance and must not exceed 12”;
anything taller is considered unstable.
Violating any of the safety guidelines may result in
damage or injury, void the warranty for improper use
and may cause damage to the floor.
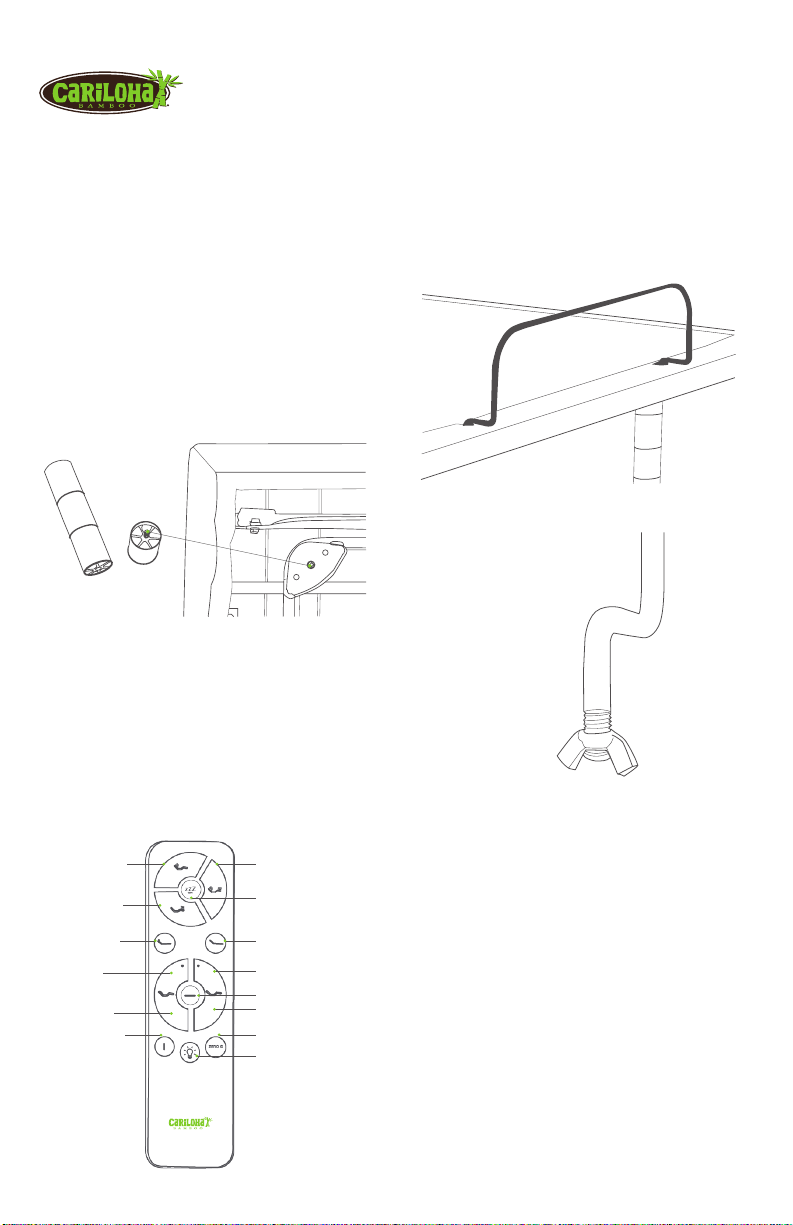
step 4: install mattress
retainer bar
Slide the retainer bar into the opening at the foot of
the bed. Secure the retainer base (Figure 1) with the
included wing-nuts (Figure 2).
step 3: install remote batteries
Locate the wireless remote control and insert (3x)
AAA batteries (included). The remote control is
pre-programmed to work with the adjustable bed
base.
If you have more than one adjustable bed base,
each remote control and adjustable bed base set
should be pre-programmed to work separately. This
will prevent both beds from being controlled by one
wireless remote control.
Figure 1
Figure 2
step 5: return to
upright position
CAREFULLY place the adjustable bed base onto all
six legs and plug the power cord into a power outlet.
Place a mattress on the adjustable base once the
bed is plugged in and functioning correctly. Use a
memory foam, latex or acceptable hybrid mattress
at least 8” in height.
See manual for Connecting Strap and Sync cable
instructions for Split King/Cal King Bases.
Pillow Tilt Down
Foot Up
Foot Down
Flat Position
Zero Gravity Position
LED Underbed
Lighting
Anti-Snore
Head & Foot Massage:
3 Intensities
3 Intensities
Pillow Tilt Up
Head Up
Head Down
Programmable
Position I
Head Massage:
3 Intensities


