12
12
TO SELECT A PROGRAM
1. When you first switch on the running
machine, P1 will be displayed
flashing in the Speed display window.
2. When P1 is flashing, select the
program you want using the Up or
Down buttons. Press stop/enter to
select the program
3. If you select programs 2-4 then press
stop/enter the relevant display will
flash to allow you to adjust the setting
e.g. in program 3 the time display will
flash.
4. You can then use the Up or Down
buttons to make the program
adjustments.
5. Press the Start button to begin the
program, the treadmill will start
rotating, For programs 1-4 adjust the
speed to the required level.
smart
COMPUTER
SPEED
STOP/ENTER
PULSEDISTANCE
TIME
UP
REFERENCE CHART FOR PRESET PROGRAMS
UP
DOWN
DOWN
SAFETY KEY
START
CALORIE
F5 F6 F7
TREADMILL
QUICK START:
- For Manual Program (P1) press to
select. Speed starts at 0.5 miles.
- Select desired speed rating and
buttons.
- For target programs (P2-P4) enter target
data using and buttons.
- Push / to conirm the program.
- Push and to target the input the target
information.
- Press to begin.
- For pre-set programs (P3-P7) push
and to select.
- Press to begin.
0.0
K
0
00:00
p 1
ATTENTION!
- Read users manual first to avoid
injury.
- Be sure to stand on side rails when
starting treadmill.
- Moving parts can cause injury. Be
alert and keep children away.
- Listen to your body. STOP if you feel
dizzy, short of breath or any strain.
F4F3F2F1
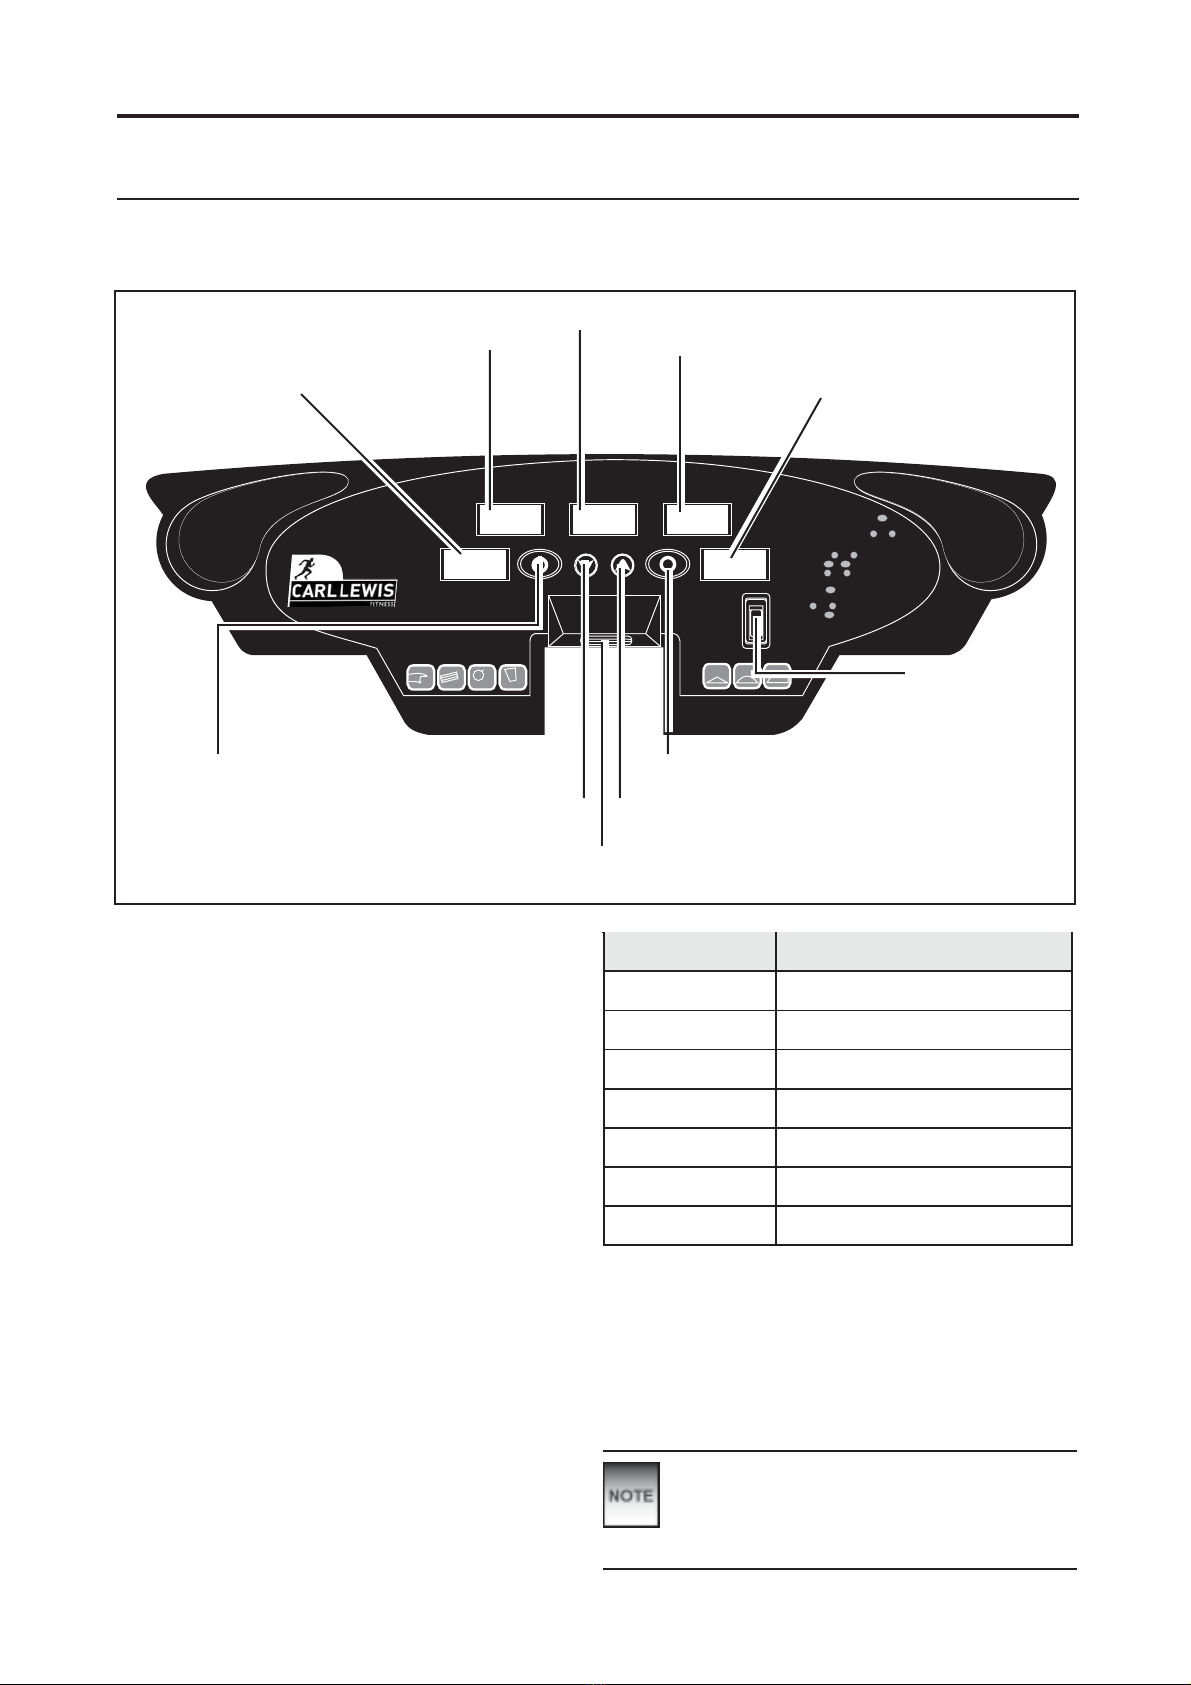
MONITOR
Pulse display
Start
Speed displayDistance display
Time display
Incline control
Down Up
Stop / Enter
FIG 10
Safety key socket
Calorie display
MARGORP
1launaM
2nwodtnuocecnatsiDteserP
3nwodtnuocemiTteserP
4nwodtnuoceirolaCteserP
5margorPniM51teserP
6margorPniM03teserP
7margorPniM04teserP
Note: programs 5-7 automatically
adjust the speed throughout the
program.