Carlson Merlin LT User manual

Merlin LT user manual H-0218-8000-01-B January 2020
Merlin LT
Vessel-based LIDAR system
user manual


Page | 3
Contents
1Customer information.............................................................................................................................................................................5
1.1 Dear customer .............................................................................................................................................................................5
1.2 User manual ................................................................................................................................................................................5
1.3 General safety .............................................................................................................................................................................5
2Introduction ............................................................................................................................................................................................7
2.1 System overview..........................................................................................................................................................................7
2.2 Applications .................................................................................................................................................................................7
3Equipment description ...........................................................................................................................................................................8
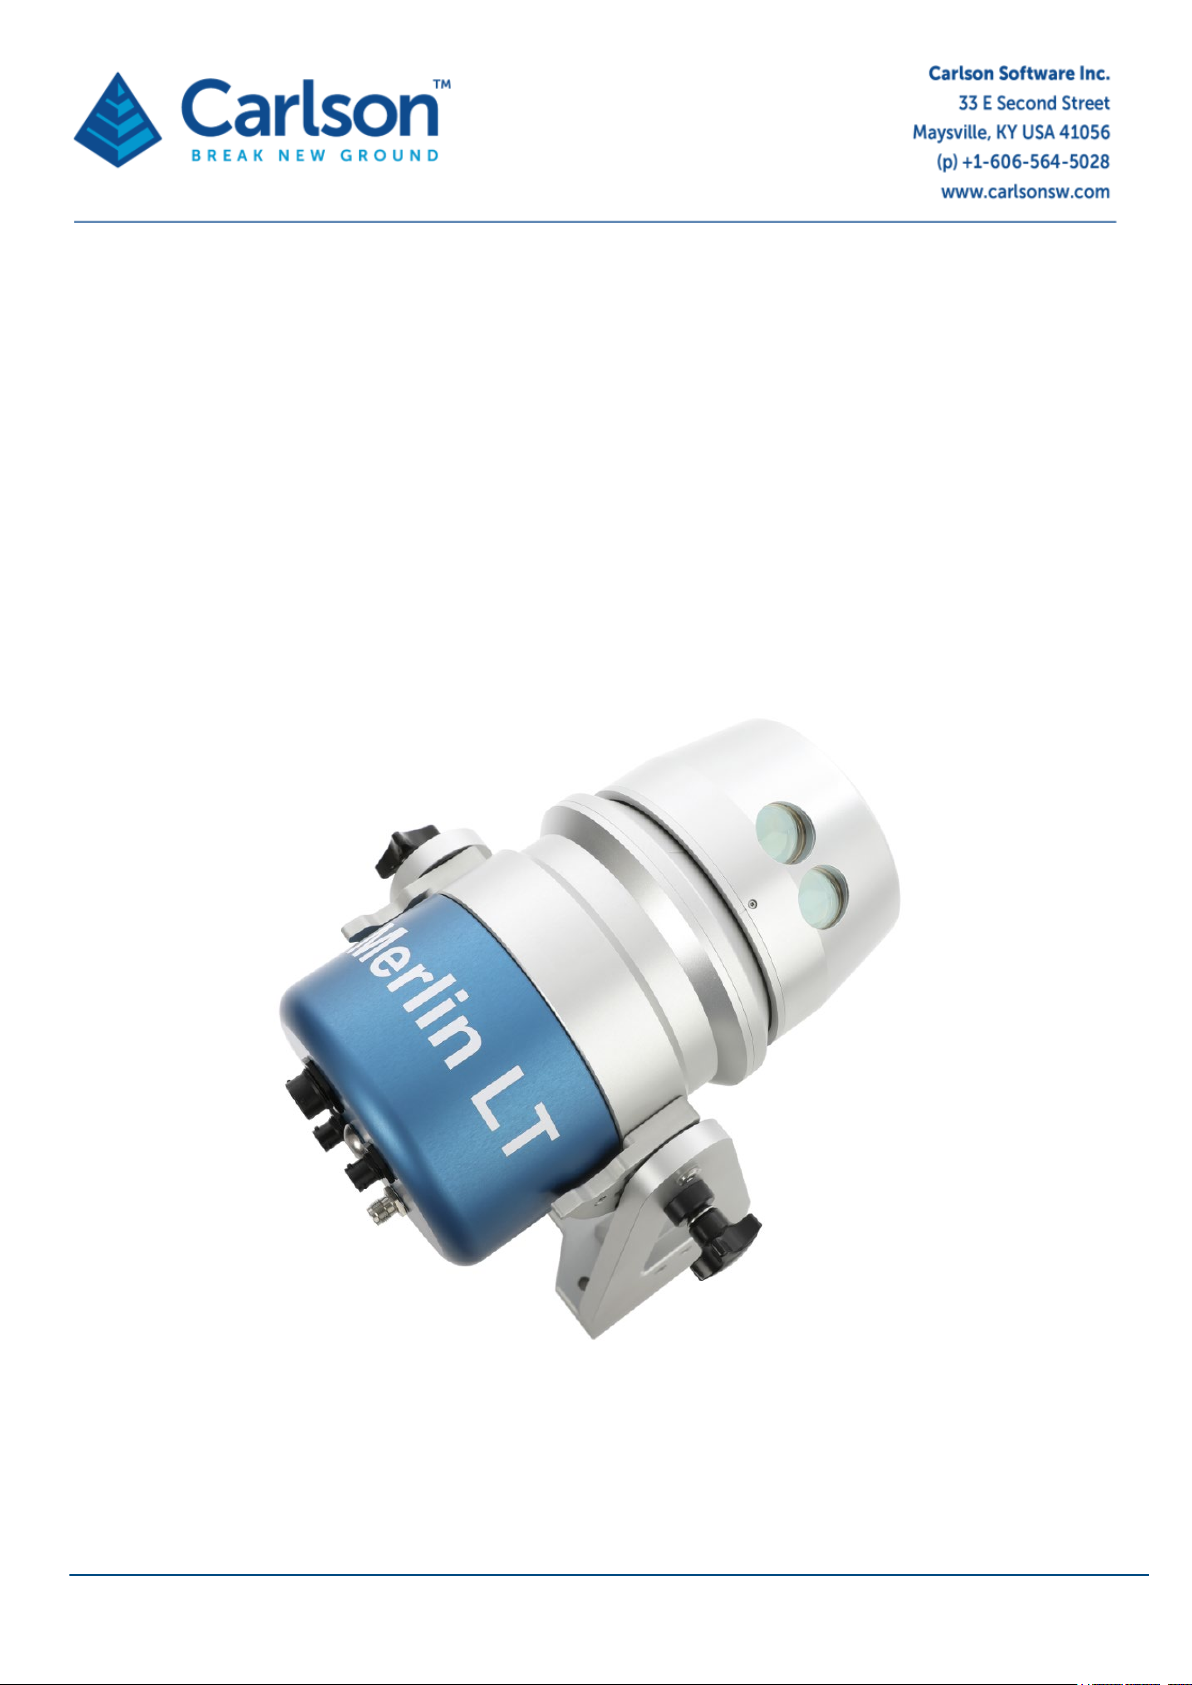
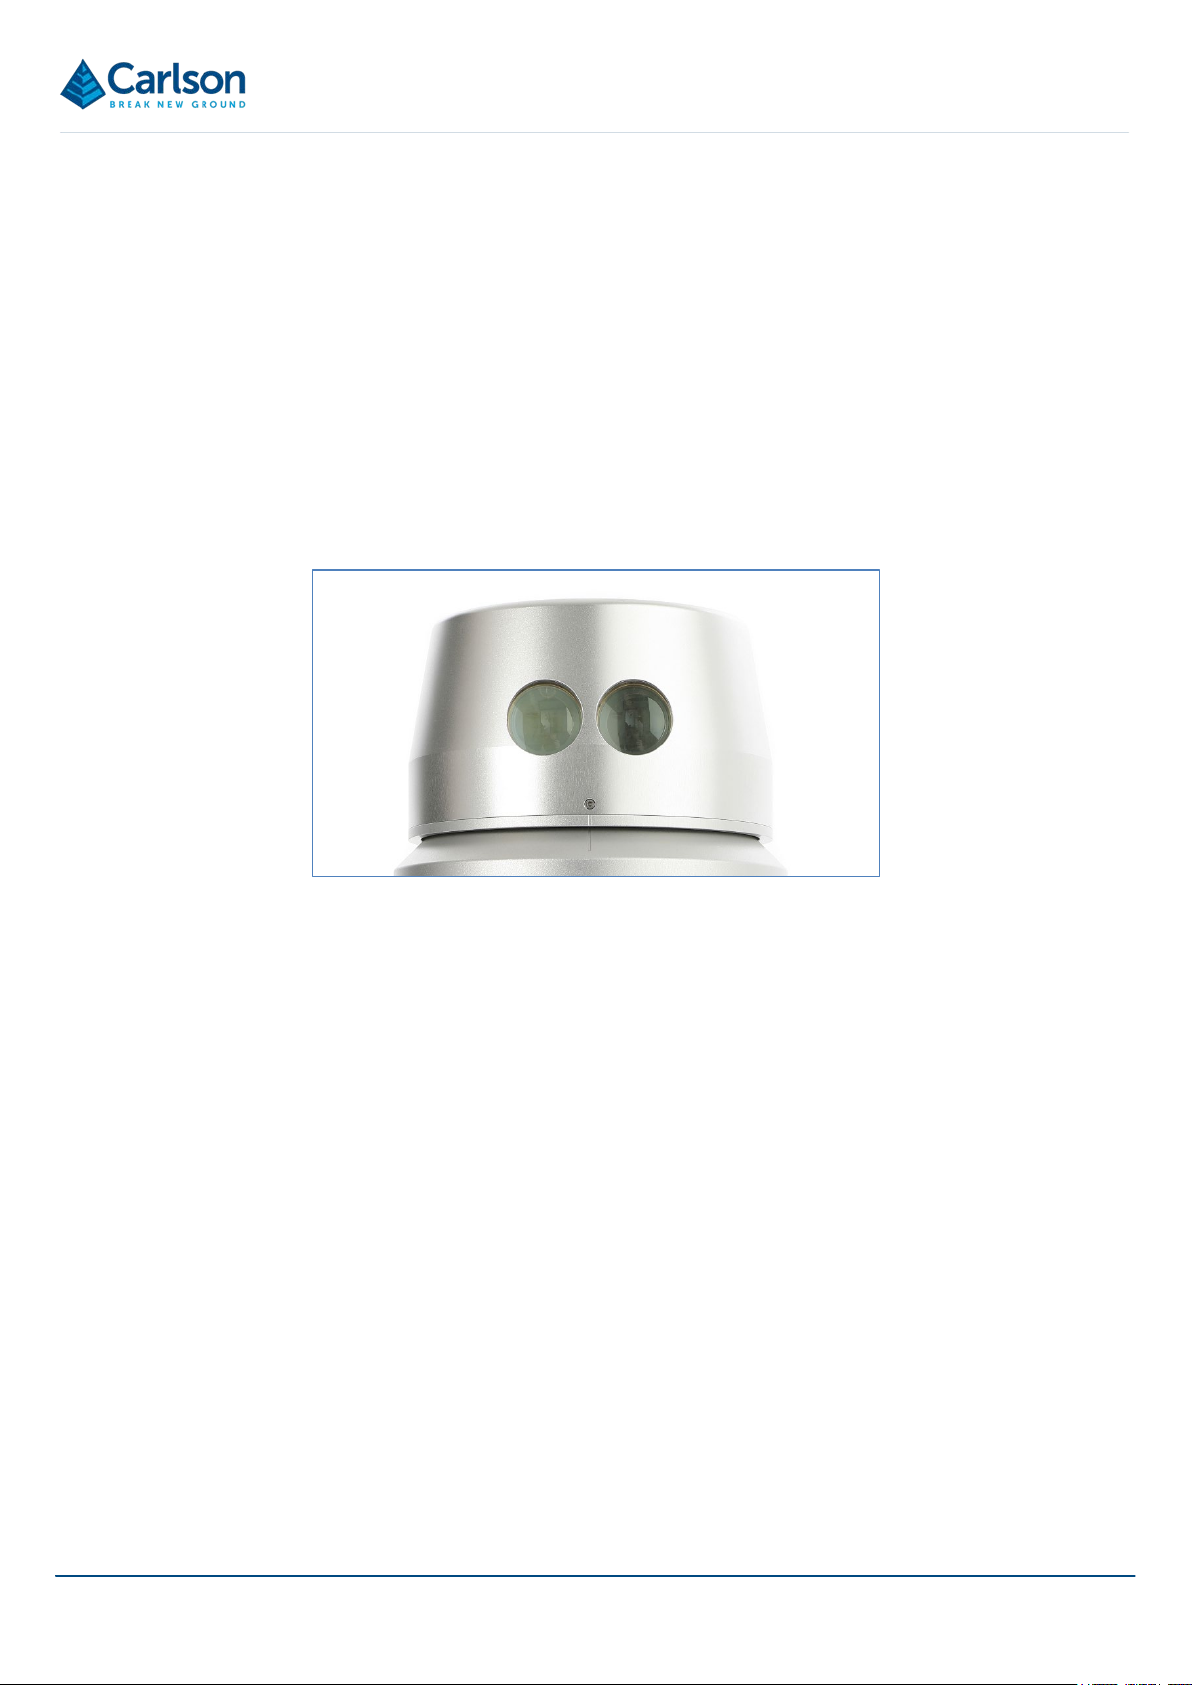
3.1 Merlin LT......................................................................................................................................................................................8
3.2 Cables .......................................................................................................................................................................................11
3.3 Transit case ...............................................................................................................................................................................13
3.4 USB drive ..................................................................................................................................................................................14
3.5 Merlin diagnostic tool software ...................................................................................................................................................14
3.6 Optional accessories..................................................................................................................................................................15
4Installation ...........................................................................................................................................................................................16
4.1 Choosing a mounting location for the Merlin LT .........................................................................................................................16
4.2 Choosing an appropriate orientation ..........................................................................................................................................19
4.3 Lever arm offset measurement ..................................................................................................................................................20
4.4 Lever arm offset measurement when using the mounting plate..................................................................................................23
4.5 Cable runs .................................................................................................................................................................................29
5Electrical installation ............................................................................................................................................................................30
5.1 Merlin LT Power cable ...............................................................................................................................................................31
6Merlin LT time-tagging .........................................................................................................................................................................32
7Operation of Merlin LT .........................................................................................................................................................................35
7.1 Network set-up...........................................................................................................................................................................35
7.2 Pinging the Merlin LT laser.........................................................................................................................................................36
7.3 Changing the Merlin LT network settings ...................................................................................................................................38
7.4 Setting up Merlin diagnostic tool software to receive external timing ..........................................................................................44
7.5 Checking the laser operation......................................................................................................................................................45
7.6 Checking the timing source........................................................................................................................................................46

Page | 4
7.7 Other functions of the Merlin diagnostic tool software.................................................................................................................51
7.8 Navigation software ...................................................................................................................................................................51
8Maintenance and care of Merlin LT ......................................................................................................................................................52
8.1 General......................................................................................................................................................................................52
8.2 Preventative maintenance..........................................................................................................................................................52
9Mechanical drawings ...........................................................................................................................................................................53
9.1 Merlin LT positioned at 90° vertical angle...................................................................................................................................53
9.2 Merlin LT positioned at 0°vertical angle......................................................................................................................................54
10 Laser safety .........................................................................................................................................................................................55
10.1 Merlin LT laser module...............................................................................................................................................................55
11 Compass safe distance........................................................................................................................................................................57
12 Merlin LT Specifications .......................................................................................................................................................................58
13 Product information..............................................................................................................................................................................59

Page | 5
1 Customer information
1.1 Dear customer
The Merlin LT system is designed to be easy to operate. However, we would ask you to take the time to read these
operating instructions carefully before using the system, and to keep the manual with the instrument at all times.
For any feedback or comments, or if there are questions about the Merlin LT which are beyond the scope of this
manual, contact the product support department at Carlson, or your local Carlson representative.
Alternatively, for information on your local Carlson-approved service centre, visit our website: www.carlsonsw.com.
To ensure best service, please make a note of your Merlin LT’s serial number. This can be found on the instrument.
1.2 User manual
This Merlin LT manual has a Carlson part number of H-0218-8000.
This version is H-0218-8000-01-A, released in November 2019.
It is important that you read this manual carefully before using the equipment. The manual comprises three main
sections:
1. The Merlin LT vessel-based lidar system hardware, describing the Merlin LT system and all accessories
supplied with a standard system.
2. The installation and use of the Merlin LT system on a vessel. Be sure to fully understand this section before
starting an installation.
3. The Merlin diagnostic software, showing how the software enables basic configuration and testing of the
Merlin LT.
This manual does not cover the calibration of the Merlin LT in hydrographic acquisition software packages. These
are detailed in separate quick-start guides: QINSy (Carlson part no. H-9931-9506), HYPACK (H-9931-9505), and
PDS (H-9931-9512).
This manual has been compiled with care. However, should you discover any errors we would be grateful if you
could contact Carlson directly. Reproduction in whole or in part, including utilisation in machines capable of
reproduction or retrieval, without the express written permission of Carlson, is prohibited. Reverse engineering is
also prohibited.
The information in this document is subject to change without notice. Carlson has made considerable efforts to
ensure the content of this document is correct at the date of publication but makes no warranties or representations
regarding the content. Carlson excludes liability, however arising, for any inaccuracies in this document.
1.3 General safety
CAUTION: Before unpacking and installing the Merlin LT system, read the safety instructions throughout this manual
carefully and ensure that they are followed at all times by all operators. Failure to do so could adversely affect the
performance of the Merlin LT system and/or lead to personal injury. Operators must be trained in the use and
application of the Merlin LT system and accompanying accessories before being allowed to operate the system.
1.3.1 Operation and maintenance
Following the simple maintenance procedures below will prolong the operational life and continued high

Page | 6
performance of the system. The user should determine the frequency of inspection and maintenance actions
according to the conditions of use.
•The product is to be used only with the appropriate Carlson-supplied cabling.
•Installation of the Merlin LT system must be performed only by trained personnel.
•Changing the Merlin LT port and IP addresses must be carried out using only the Merlin diagnostic tool
software by appropriately trained personnel.
•Disconnect power before performing any maintenance operations.
•Maintenance is restricted to procedures described in section 8.
•Beware of unexpected mechanical movement. The user must remain outside the full working envelope of
the Merlin LT system whilst in operation.
•It is the machine supplier’s responsibility to ensure that the user is made aware of any hazards involved in
operation, including those mentioned in Carlson product documentation.
•The Merlin LT system must be transported in Carlson-supplied packaging.
•This equipment is not suitable for use in a potentially explosive atmosphere.
1.3.2 Precautions
•There are no user-serviceable parts inside the unit. Do not remove any panel. Do not attempt to
service parts inside the unit. If servicing is required please contact Carlson.
•Unauthorised removal of any panel may expose live connection points and non eye-safe laser
radiation.
•Avoid directing the laser apertures towards the sun or other high-powered, infrared light sources.
•Avoid mechanical shocks
•The laser is driven by a rotating motor. If the motor is rotated by hand or prevented from moving by an
obstruction, the motor will not be damaged. It is advisable, however, to minimise any manual movement of
the laser and to keep the instrument away from potential obstructions so the motor may turn freely.
•Users should not manually or otherwise obstruct the operation of the motor or allow clothing to come into
contact with the device, to avoid entrapment in the unit.

Page | 7
2 Introduction
2.1 System overview
Merlin LT is a development from the Merlin, Carlson’s first, time-tagged, vessel-based lidar system. The Merlin LT
can be operated from any vessel platform and is designed specifically for use in extreme and changeable marine
environments. Its plug-and-play design offers quick and simple deployment, as well as easy integration into existing
vessel infrastructure, such as an inertial measurement unit (IMU), global navigation satellite system (GNSS)
receivers, and industry-standard hydrographic acquisition software packages.
The Merlin LT is designed to be lighter-weight, and of a smaller footprint, than the standard Merlin system, while
the capabilities of the laser remain the same.
The instrument employs the ‘time-of-flight’ laser measurement technique to measure ranges to above-water
topography without the need to place reflectors at the target. This allows accurate measurements to be made of
inaccessible points, such as cliff faces and rock groynes, from the relative safety of the survey vessel. With the
Merlin LT integrated into the vessel’s navigation system and the sensors all calibrated with respect to the IMU, the
laser data can be collected at the same time as underwater data is collected.
Merlin LT is supported by drivers in all the main hydrographic survey / navigation software packages, including
QINSy, HYPACK, EIVA and PDS. This support provides flexibility to end users involved with a wide variety of clients,
applications and global locations.
Merlin LT observes 36,000 points per second, with a 360° field of view.
The Merlin diagnostic tool software is supplied with Merlin LT. This can be used to program IP addresses, change
port numbers, fault-find, and carry out diagnostic checks on the system.
2.2 Applications
This innovative instrument is suitable for a large number of surveying and measuring functions, including:
•Infrastructure planning
•Offshore construction
•Coastal erosion monitoring
•Port and harbour surveys
•Navigation chart updates
•Flood-risk management
•Canals and inland waterways
•Inspection surveys
•Bridge condition surveys
•Terrestrial mobile mapping

Page | 8
3 Equipment description
The sections below describe each individual hardware element of a standard Merlin LT vessel-based lidar system.
3.1 Merlin LT
The Merlin LT unit incorporates a rotating laser range finder which is housed with a motor and encoder in a weather-
proof pod, held between two ‘A-frame’ pillars that sit on a base plate.
3.1.1 Laser
The laser contains the optical and electronic components that allow distance measurements to be recorded to
reflectorless targets up to 250 m from the instrument.
The laser uses a ‘time-of-flight’ method to measure ranges to remote targets.
The two lenses visible within the laser module are the transmitting and receiving optics. It is through these optics
that the infrared measuring laser is fired, and its reflected light is received back into the instrument.
The laser measures 36,000 ranges each second, to an accuracy of +/-1 cm.
The laser ranges up to a limit of 250 m to 90% reflective material (e.g., Kodak white card). However, the maximum
achievable range at any given time or location will depend on a number of factors. In some circumstances these
may prevent any readings from being taken:
•dark, light-absorbent surfaces such as coal;
•atmospheric conditions such as dust, fog, heavy rain and snow;
•wet, slick, shiny or very smooth surfaces;
•an acute angle between the laser and the surface.
The minimum, calibrated range of the laser is 0.5 m. At shorter distances, readings may still be recorded, but their
accuracy may be diminished.
An internal motor physically rotates the laser housing at up to 20 times per second.
An encoder measures the rotational angle of the laser to an accuracy of 0.01°.
Figure 1 Rotating laser module

Page | 9
3.1.2 A-frame and base plate
The pod can rotate vertically around the vertical pivot at the top of the A-Frame. The fixed angles are 90° (horizontal),
45° and 0° (vertically up).
Changing the vertical inclination of the Merlin can help to produce more useful data, depending on the nature of the
scene being scanned and on the specific project requirements.
Leave the pod horizontal – at 90° – to generate vertical sections of points as the laser rotates.
Incline the laser to 45°, and the section of scanned points is also inclined. This can help to pick out vertical features
such as lamp posts, pillars and building edges.
A-frame
Base plate
Vertical
locking stud
Measurement
datum point
Figure 2 Merlin positioned vertically at 90°, 45° and 0°
Figure 3 Merlin A-frame and base plate

Page | 10
At 0° The Merlin LT generates horizontal sections of points. This orientation can be used for proximity detection and
to assist dynamic positioning.
If the unit is repositioned with a different vertical angle, new lever arm values must be used. The pitch calibration
values must also be changed in your navigation package.
Use the four holes in the base plate to secure the Merlin LT directly to a mounting point on a vessel. Alternatively,
use the base plate to secure the Merlin LT to the mounting plate (see section 3.6.1).
A central point on the base plate marks a measurement datum point which you can use when surveying the lever
arm offset.
3.1.3 Connectors
There are four connectors on the Merlin LT unit, at the rear of the pod.
Each connector is uniquely matched to one of the supplied cables described in section 3.2.
When the cables are correctly and securely attached to the Merlin LT, the connections are watertight.
The connectors are supplied with protective caps which should be placed on the connector when the system is not
in use and cable are disconnected.
Power
Serial ZDA input
Ethernet
PPS input
Figure 4 Merlin LT connectors

Page | 11
3.2 Cables
All supplied cables must be connected and correctly interfaced for the Merlin LT to run fully optimised operations.
When secured to the back of the Merlin LT, each connection is protected against the environment.
3.2.1 Ethernet cable
The Ethernet cable provides communication between the Merlin LT and the vessel’s main PC running navigation
software.
The Cat 6 Ethernet cable attaches to the back of the Merlin LT with a four-pin female Souriau connector. The
standard RJ45 connector connects to the PC.
Figure 5 All cables connected to the Merlin LT
Figure 6 Ethernet cable

Page | 12
3.2.2 PPS cable
The PPS cable delivers a timing pulse to the Merlin LT.
The PPS cable is a coaxial RF cable. A threaded TNC connector attaches to the connector on the back of the Merlin
LT. A bayonet BNC connector is on the other end. This connects to the source of the PPS output.
3.2.3 Serial cable
The serial cable delivers ZDA timing messages from an external timing source to the Merlin LT unit.
The serial cable attaches to the back of the Merlin LT via a three-pin male Souriau connector. The 9-way D-type
connector on the other end connects to the source of the ZDA output.
See section 6.1.3 for details of the serial cable pin-outs.
Figure 7 PPS cable
Figure 8 Serial cable

Page | 13
3.2.4 Power
The power cable attaches to the back of the Merlin LT via a four-pin female Souriau connector. On the other end
are ring-crimp connectors which connect to a dc power supply of voltage range 12 V dc.
See section 5 for details of electrical connections.
3.3 Transit case
The Merlin LT system is supplied in a rugged transit case designed to transport the unit and all accessories.
The case protects the equipment from minor shocks and from the environment. Use the transit case at all times
when transporting and storing the Merlin LT system.
Take care to clean and dry the Merlin LT unit and accessories before packing them into the case.
Figure 9 Power cable
Figure 10 Merlin LT system in transit case

Page | 14
3.4 USB drive
The Merlin LT USB stick contains the Merlin diagnostic tool software and this Merlin LT installation and operation
manual. Copy and install all files onto the vessel’s PC.
3.5 Merlin diagnostic tool software
The Merlin diagnostic tool software is a simple application which allows the set-up and configuration of the Merlin
LT system. It is loaded on the USB stick that is supplied in the Merlin LT transit case. Plug the USB stick into the
your PC and double-click on the installer application to launch it. Follow the on-screen installation instructions.
A shortcut of this application will be created on the desktop for ease of use.
The Merlin diagnostic tool software is compatible with Microsoft Windows 7, 8 and 10.
For details of the Merlin diagnostic tool operation, see section 7.
Figure 11 Merlin diagnostic tool desktop shortcut
Figure 12 Merlin diagnostic tool software

Page | 15
3.6 Optional accessories
3.6.1 Mounting plate
The Merlin LT can be directly secured to a vessel using the holes in the base plate. Alternatively, the mounting plate
is supplied to offer more flexibility during the installation process.
The mounting plate can be welded or bolted to the vessel infrastructure to provide a permanent base for the Merlin
LT. The mounting plate should be installed aligned to the vessel centre line.
Predrilled, threaded holes provide locations to bolt the Merlin LT onto the mounting plate at different horizontal
angles:
•0°: produces scan lines perpendicular to the vessel. This gives the best range from the vessel’s sailing line.
•22.5°: rotation port and starboard. Produces horizontally offset scans which help when surveying features
perpendicular to the vessel’s sailing line – for example, the sides of buildings facing the vessel.
•45°: rotation port and starboard. Produces horizontally offset scans which help when surveying features
perpendicular to the vessel’s sailing line – for example, the sides of buildings facing the vessel.
If the unit is moved horizontally, new lever arm values must be used. The heading calibration values must also be
changed in your navigation package.
Use M5 countersunk bolts to secure the mounting plate to the vessel.
Use M8 bolts to secure the Merlin LT base plate to the mounting plate.
For details on using the mounting plate, see section 4.4.
Measurement
datum point
Holes for
attaching
mounting plate
to vessel
Guides to
mount Merlin
LT at
predefined
horizontal
angles
Holes for
attaching
Merlin to
Mounting
plate
Figure 13 Mounting plate

Page | 16
4 Installation
This section of the manual describes a typical installation of the Merlin LT on a vessel, and its integration into the
vessel’s existing navigation system.
The installation workflow for a Merlin LT without the optional mounting plate is as follows:
1. Decide on a suitable mounting location for the Merlin LT on the vessel.
2. Orientate the Merlin LT parallel to the vessel centreline.
3. Secure the Merlin LT base plate in the selected mounting position.
4. Measure lever arms from the vessel’s IMU reference point to the measurement datum point on the Merlin
LT base plate.
5. Position the Merlin LT at the desired vertical angle.
6. Adjust and recalculate lever arms using the appropriate vertical laser offset adjustment.
7. Connect cables to Merlin LT.
oLay out and connect power cable to 12 Vdc power source.
oLay out and connect Ethernet cable to PC.
oLay out and connect PPS cable to PPS source.
oLay out and connect serial cable to ZDA source.
4.1 Choosing a mounting location for the Merlin LT
The location and mounting of the Merlin LT system on a vessel are important considerations in any installation.
Before any work is carried out, due attention should be paid to the following:
•The Merlin LT is an optical device that relies upon a clear line of sight to the survey area. Ensure the field
of view of the laser will not be restricted by any vessel infrastructure, such as railings, masts or antennas.
This ensures that the Merlin LT will have a clear view to the survey area.
•The recommended Merlin LT installation location is often on the centre line, directly above the vessel cabin.
Alternatively, the location can be on either side of the centre line, as close to the centre of gravity (CoG) as
possible, and still with the Merlin LT parallel to the centre line.
•The location should be easy to access so that routine maintenance, inspection and re-orientation can be
carried out regularly and without risk. A mast installation may offer the best line of sight but presents
problems when the Merlin LT unit must be removed for servicing.
•The mounting location should be solid, free from vibration and rigidly secured with respect to the position
of the vessel’s IMU.
•Avoid dusty or dirty areas, such as engine room exhaust emissions, that may cause the lenses to become
obscured.
•The mounting location must allow space for a 360° rotation of the head. An obstacle could block the
movement and cause damage to the mechanical assembly.
•The location must be a suitable distance away from the power source, ZDA and PPS sources, and from the
PC. This ensures that all the cabling can be routed in a safe, strain-free manner.

Page | 17
•The XYZ distance to the Merlin LT unit from an existing IMU or CoG must be accurately measured and
recorded in the navigation software. When considering the location and orientation of the Merlin LT unit, it
is important to ensure that it is possible to accurately measure this lever arm.
4.1.1 Orientation of the Merlin LT
It is recommended that the Merlin LT is installed in the same orientation as the vessel centre line, as shown in
Figure 14. This simplifies the calibration process of Merlin LT. Care should be taken to align the base pate in an
orientation parallel to the vessel centre line from bow to stern.
Note: The approximate heading value for the selected orientation will need to be applied in your navigation software.
Refer to the accompanying navigation software quick-start guides for details on how to calibrate Merlin LT within
QINSy, HYPACK, or PDS.
4.1.2 Securing the base plate
The base plate has four holes to allow the Merlin LT to be secured to the vessel.
The holes take M8 bolts. The use of Nyloc nuts is recommended for a stable, bolted installation.
Taking into account the criteria listed in the previous sections, position the base plate of the Merlin in the desired
location, with the Merlin parallel to the vessel’s centre line.
Mark out four M8-sized holes, using the base plate as a template. Drill the holes.
Use M8 bolts to secure the flange plate in position to a torque of 21 Nm.
When fixing the base plate in place, the Merlin LT must be secured absolutely rigid with respect to the vessel’s IMU.
If the platform to which the Merlin LT is mounted is flexible, vibrating, or not firm enough to take the weight of the
unit, data collected with the Merlin LT is liable to be erroneous and to be mismatched with respect to data from other
sensors onboard the vessel.
Vessel
centre line
Vessel
centre line
Merlin
pointing to
aft
Merlin
pointing
fore
Figure 14 Orientation of the Merlin LT on the vessel

Page | 18
All drilling must be undertaken by a suitably trained engineer.
Use personal protective equipment, such as dust mask, eye protection and safety shoes.
Use the drill in accordance with the drill manufacturer’s instructions.
Note that the optional mounting plate can provide a base which can be permanently installed on a vessel, making
the process of mobilising and demobilising the Merlin LT itself much simpler: see section 3.6.1.
Use M5 countersunk bolts to secure the mounting plate to the vessel. Position the mounting plate so that the
reference lines are parallel and perpendicular to the vessel’s centre line.
Use M8 bolts to secure the Merlin LT base plate directly to the predrilled holes in the mounting plate.
4.1.3 Selecting a survey angle for the Merlin LT
There are three vertical angles at which the Merlin LT laser can be positioned. Changing the vertical angle can help
to optimise the point cloud produced by the Merlin LT, specifically for your operation.
To set the desired vertical orientation, unscrew the two vertical locking studs - one on each side of the A-frame – to
free the vertical pivot.
With both locking studs undone, move the Merlin LT to the desired vertical angle.
Make sure that the vertical locking studs are in the correct lock position, then retighten them to secure the Merlin
LT in place. No tooling should be used to tighten the locking studs – finger tight is adequate.
Do not attempt to alter the vertical angle when the Merlin LT laser is rotating. This could cause
damage to the Merlin LT system and/or injury to the operator.
Once the locking studs are released the Merlin LT unit is free to pivot around the pivot point on the
A-frame. Take care to avoid trapping fingers or clothing when altering the unit’s vertical location.
Figure 15 Unscrew the locking studs

Page | 19
4.2 Choosing an appropriate orientation
All projects are different, with their own set of unique challenges that need to be overcome. These challenges are
never the same, but the Merlin LT’s design offers the user several different scanning orientations which can provide
scan patterns appropriate for your specific survey application.
It is important to ensure that the mounting orientation of the Merlin LT unit is correct from the outset of any specific
project. Selecting the correct mounting angle will minimise shadows that cause gaps in the scan data and will ensure
the best coverage of the targeted area. This will avoid the need to run extra survey lines, reducing cost and time.
Some of the considerations to take into account when selecting the orientation of the Merlin LT include:
•Range to the target from the vessel’s sailing line;
•Angle of incidence of the laser with respect to the targeted surface;
•Foreground obstructions;
•The position, shape and orientation of the targeted objects or landscape.
Below are some recommendations that will help to assist in choosing the most appropriate mounting angle of the
Merlin LT system for your specific project. Note that some projects would benefit from using the optional mounting
plate which allows the Merlin LT to be mounted at fixed horizontal angles from the vessel’s centre line: see section
4.4.
4.2.1 Example 1
When surveying features such as lampposts, telegraph poles, masts and marker posts along harbour walls or river
channels, it is advised to have the vertical angle set to 45°. This allows the laser scan pattern to ‘slice’ through the
vertical structure at an angle. A vertical angle of 90° could result in the feature being missed, as the ‘slice’ of data
would be very close to vertical, and therefore in the same plane as the target object.
4.2.2 Example 2
When carrying out DTM (Digital Terrain Model) work – such as beach profiling along a coastline or flood-plain
mapping along a canal or river – it is recommended to have the vertical angle set at 90° as this will give the greatest
range either side of the vessel.
4.2.3 Example 3
When surveying buildings or man-made structures along a harbour wall or river, it is recommended to mount the
Merlin LT unit at a 45° vertical angle, and to use the mounting plate to rotate the Merlin LT to a 22.5 or 45° horizontal
angle.
By rotating the Merlin LT around the horizontal axis, the laser can view the façades of buildings and structures that
run both perpendicular to and parallel with the direction of vessel travel.

Page | 20
4.3 Lever arm offset measurement
The purpose of this section is to outline the process necessary to calculate the lever arm, which is the position of
the Merlin LT laser origin point in relation to the vessel’s IMU/CoG. The laser origin point is inside the Merlin LT, at
the centre point of the laser’s horizontal rotation.
The lever arm is expressed as an XYZ coordinate on the vessel reference frame. This coordinate is entered into
the navigation software and ensures that data from the Merlin LT is correctly positioned in relation to data received
from other onboard sensors and survey equipment.
Note that a calibration must also be carried out prior to the start of survey operations in order to fine tune the
heading, pitch and roll angles of the Merlin LT data with respect to the IMU. See the accompanying Merlin manuals
for QINSy, HYPACK and PDS for further details on this process.
The workflow for carrying out the lever arm offset measurement is as follows:
•Secure the Merlin LT base plate in position.
•Establish the physical XYZ lever arm to the Merlin LT measurement datum point on the base plate.
•Position the Merlin LT at the desired vertical angle.
•Determine the vertical laser offset adjustment from Table 1.
•Apply the vertical laser offset adjustment to the measured XYZ lever arm.
•Enter the final lever arm into your navigation software.
The final lever arm values are dependent on the vertical angle at which the Merlin LT is positioned. These values
will therefore change as the Merlin LT is reoriented vertically. Each time the unit is moved from its fixed position,
new values must be accounted for and entered into the navigation software.
If the mounting plate is used, then a horizontal rotation may also need to be taken into account: see section 4.4.
4.3.1 Measuring the physical XYZ lever arm
Navigation software packages require an XYZ measurement from the vessel’s IMU/CoG to the Merlin LT laser origin
point. Since the laser origin point cannot be accessed for direct measurement, establishing this lever arm is carried
out in two stages: a physical measurement to the visible Merlin LT measurement datum point in the centre of the
base plate, followed by an adjustment taken from Table 1 which accounts for the offset from the measurement
datum point to the laser origin point.
The measurement datum point is shown in Figure 16. This point must be physically measured as an XYZ offset
from the IMU/CoG.
Measurement datum point
Figure 16 Merlin LT measurement datum point
Table of contents
Other Carlson Measuring Instrument manuals
Popular Measuring Instrument manuals by other brands

Amprobe
Amprobe ACD - 50NAV user manual

UFM
UFM KATflow 210 operating instructions

Sper scientific
Sper scientific 850081 instruction manual

Armada Technologies
Armada Technologies Pro50 instruction manual

Rohde & Schwarz
Rohde & Schwarz ESW Series user manual

PCB Piezotronics
PCB Piezotronics 3713B1230G/-0001 Installation and operating manual