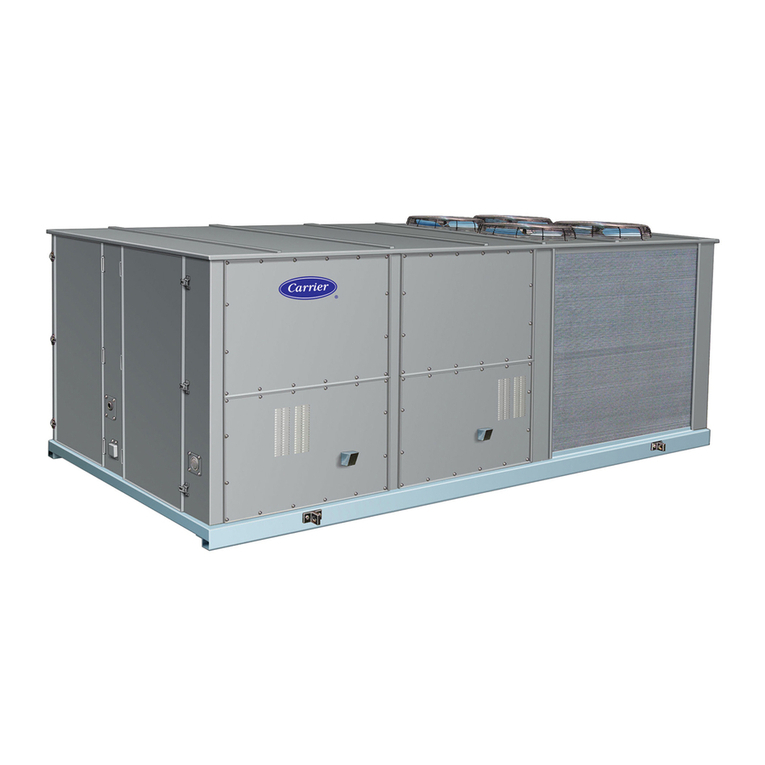
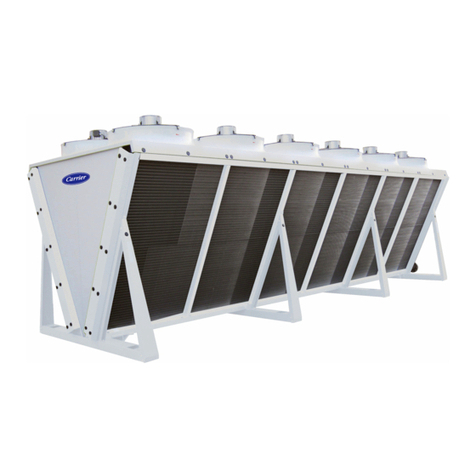
Carrier Transicold 69NT40-561-199 Operation manual

T−340 Rev D
OPERATION AND SERVICE
for
69NT40-561-001 to 199
Container Refrigeration Units
Container Refrigeration

OPERATION AND SERVICE MANUAL
CONTAINER REFRIGERATION UNIT
Models
69NT40−561−001 to 199
©Carrier Corporation, 2012 Printed in U. S. A. May 2012

iT-340
TABLE OF CONTENTS
PARAGRAPH NUMBER Page
INTRODUCTION 1−1..............................................................................
1.1 INTRODUCTION 1−1.....................................................................
1.2 CONFIGURATION IDENTIFICATION 1−1...................................................
1.3 FEATURE DESCRIPTIONS 1−1............................................................
1.3.1 Control Box 1−1......................................................................
1.3.2 Temperature Readout 1−1..............................................................
1.3.3 Pressure Readout 1−1.................................................................
1.3.4 Compressor 1−1......................................................................
1.3.5 Condenser Coil 1−1...................................................................
1.3.6 Evaporator 1−1.......................................................................
1.3.7 Evaporator Fan Operation 1−1..........................................................
1.3.8 Plate Set 1−1.........................................................................
1.4 OPTION DESCRIPTIONS 1−1.............................................................
1.4.1 Battery 1−1...........................................................................
1.4.2 Dehumidification 1−1..................................................................
1.4.3 USDA 1−1...........................................................................
1.4.4 Interrogator 1−1.......................................................................
1.4.5 Remote Monitoring 1−1................................................................
1.4.6 Quest −CCPC 1−2....................................................................
1.4.7 Communications Interface Module 1−2...................................................
1.4.8 Autotransformer 1−2...................................................................
1.4.9 Temperature Recorder 1−2.............................................................
1.4.10 Gutters 1−2..........................................................................
1.4.11 Handles 1−2..........................................................................
1.4.12 Thermometer Port 1−2.................................................................
1.4.13 Water Cooling 1−2....................................................................
1.4.14 Back Panels 1−2......................................................................
1.4.15 460 Volt Cable 1−2....................................................................
1.4.16 230 Volt Cable 1−2....................................................................
1.4.17 Cable Restraint 1−2...................................................................
1.4.18 Upper Air (Fresh Air Make Up) 1−2......................................................
1.4.19 Lower Air (Fresh Air Make Up) 1−2......................................................
1.4.20 Labels 1−2...........................................................................
1.4.21 Controller 1−2........................................................................
1.4.22 Condenser Grille 1−2..................................................................
1.4.23 Emergency Bypass 1−2................................................................
1.4.24 eAutoFresh 1−2.......................................................................

ii
T-340
TABLE OF CONTENTS (Continued)
PARAGRAPH NUMBER Page
DESCRIPTION 2−1...............................................................................
2.1 GENERAL DESCRIPTION 2−1.............................................................
2.1.1 Refrigeration Unit −Front Section 2−1...................................................
2.1.2 Fresh Air Makeup Vent 2−1.............................................................
2.1.3 Evaporator Section 2−2................................................................
2.1.4 Compressor Section 2−3...............................................................
2.1.5 Air−Cooled Condenser Section 2−4......................................................
2.1.6 Water−Cooled Condenser Section 2−5...................................................
2.1.7 Control Box Section 2−6...............................................................
2.1.8 Communications Interface Module 2−6...................................................
2.2 REFRIGERATION SYSTEM DATA 2−7......................................................
2.3 ELECTRICAL DATA 2−8...................................................................
2.4 SAFETY AND PROTECTIVE DEVICES 2−9.................................................
2.5 REFRIGERATION CIRCUIT 2−10...........................................................
2.5.1 Standard Operation 2−10................................................................
2.5.2 Economized Operation 2−10.............................................................
2.5.3 Electronic Expansion Valve 2−10.........................................................
MICROPROCESSOR 3−1..........................................................................
3.1 TEMPERATURE CONTROL MICROPROCESSOR SYSTEM 3−1..............................
3.1.1 Keypad 3−2..........................................................................
3.1.2 Display Module 3−2...................................................................
3.1.3 Controller 3−3........................................................................
3.2 CONTROLLER SOFTWARE 3−3...........................................................
3.2.1 Configuration Software (CnF Variables) 3−3..............................................
3.2.2 Operational Software (Cd Function Codes) 3−4...........................................
3.3 MODES OF OPERATION 3−4.............................................................
3.3.1 Start up - Compressor Phase Sequence 3−4..............................................
3.3.2 Start up - Compressor Bump Start 3−4...................................................
3.3.3 Perishable Mode Temperature Control 3−4...............................................
3.3.4 Perishable Pulldown 3−4...............................................................
3.3.5 Perishable Steady State 3−4............................................................
3.3.6 Perishable Idle, Air Circulation 3−4......................................................
3.3.7 Perishable Heating 3−4................................................................
3.3.8 Perishable Dehumidification 3−5........................................................
3.3.9 Perishable Dehumidification - Bulb Mode 3−6.............................................
3.3.10 Perishable Economy 3−6...............................................................
3.3.11 Perishable Mode Cooling - Sequence of Operation 3−6.....................................
3.3.12 Perishable Mode Heating - Sequence of Operation 3−7....................................
3.3.13 Perishable Mode - Trim Heat 3−7........................................................
3.3.14 Frozen Mode - Temperature Control 3−7.................................................
3.3.15 Frozen Steady State 3−7...............................................................
3.3.16 Frozen Idle Mode 3−7.................................................................
3.3.17 Frozen “Heat” Mode 3−8...............................................................

iii T-340
TABLE OF CONTENTS (Continued)
PARAGRAPH NUMBER Page
3.3.18 Frozen Economy Mode 3−8............................................................
3.3.19 Frozen Mode Cooling - Sequence of Operation 3−8........................................
3.3.20 Defrost 3−9..........................................................................
3.3.21 Automatic Defrost 3−9.................................................................
3.3.22 Defrost Initiation 3−9..................................................................
3.3.23 Defrost Interval 3−10...................................................................
3.3.24 Defrost Related Settings 3−10...........................................................
3.4 PROTECTION MODES OF OPERATION 3−11................................................
3.4.1 Evaporator Fan Operation 3−11..........................................................
3.4.2 Failure Action 3−11.....................................................................
3.4.3 Generator Protection 3−11..............................................................
3.4.4 Compressor High Temperature, Low Pressure Protection 3−11...............................
3.4.5 Perishable Mode - System Pressure Regulation 3−11.......................................
3.4.6 Condenser Fan Override 3−11...........................................................
3.5 QUEST −CCPC 3−12......................................................................
3.6 CONTROLLER ALARMS 3−12..............................................................
3.7 PRE−TRIP DIAGNOSTICS 3−12............................................................
3.8 DataCORDER 3−13........................................................................
3.8.1 Description 3−13.......................................................................
3.8.2 DataCORDER Software 3−13............................................................
3.8.3 Sensor Configuration (dCF02) 3−14......................................................
3.8.4 Logging Interval (dCF03) 3−14...........................................................
3.8.5 Thermistor Format (dCF04) 3−14.........................................................
3.8.6 Sampling Type (dCF05 & dCF06) 3−16...................................................
3.8.7 Alarm Configuration (dCF07 - dCF10) 3−16................................................
3.8.8 DataCORDER Power Up 3−16...........................................................
3.8.9 Pre-trip Data Recording 3−16............................................................
3.8.10 DataCORDER Communications 3−16.....................................................
3.8.11 USDA Cold Treatment 3−17.............................................................
3.8.12 USDA Cold Treatment Procedure 3−17...................................................
3.8.13 DataCORDER Alarms 3−18.............................................................
3.8.14 ISO Trip Header 3−18..................................................................
3.9 CONTROLLER CONFIGURATION VARIABLES 3−19..........................................
3.10 CONTROLLER FUNCTION CODES 3−20....................................................
3.11 CONTROLLER ALARM INDICATIONS 3−29..................................................
3.12 CONTROLLER PRE−TRIP TEST CODES 3−37...............................................
OPERATION 4−1.................................................................................
4.1 INSPECTION (Before Loading) 4−1.........................................................
4.2 CONNECT POWER 4−1..................................................................
4.2.1 Connection To 380/460 VAC Power 4−1..................................................
4.2.2 Connection To 190/230 VAC Power 4−1..................................................
4.3 ADJUST FRESH AIR MAKEUP VENT 4−1...................................................
4.3.1 Upper Fresh Air Makeup Vent 4−2.......................................................
4.3.2 Lower Fresh Air Makeup Vent 4−2.......................................................
4.3.3 Vent Position Sensor 4−3..............................................................

iv
T-340
TABLE OF CONTENTS (Continued)
PARAGRAPH NUMBER Page
4.4 eAutoFresh OPERATION 4−3..............................................................
4.4.1 eAutoFresh Pre−Trip Inspection 4−3.....................................................
4.4.2 eAutoFresh Start−Up Procedure 4−3....................................................
4.4.3 eAutoFresh Modes of Operation 4−3.....................................................
4.5 CONNECT WATER-COOLED CONDENSER 4−4.............................................
4.5.1 Water-Cooled Condenser with Water Pressure Switch 4−4..................................
4.5.2 Water−Cooled Condenser with Condenser Fan Switch 4−5.................................
4.6 CONNECT REMOTE MONITORING RECEPTACLE 4−5......................................
4.7 STARTING AND STOPPING INSTRUCTIONS 4−5...........................................
4.7.1 Starting the Unit 4−5...................................................................
4.7.2 Stopping the Unit 4−5..................................................................
4.8 START−UP INSPECTION 4−5.............................................................
4.8.1 Physical Inspection 4−5................................................................
4.8.2 Check Controller Function Codes 4−5....................................................
4.8.3 Start Temperature Recorder 4−5........................................................
4.8.4 Complete Inspection 4−5...............................................................
4.9 PRE−TRIP DIAGNOSIS 4−6...............................................................
4.10 PROBE DIAGNOSTICS 4−7...............................................................
4.11 EMERGENCY BYPASS OPERATION 4−8...................................................
TROUBLESHOOTING 5−1.........................................................................
5.1 UNIT WILL NOT START OR STARTS THEN STOPS 5−1......................................
5.2 UNIT OPERATES LONG OR CONTINUOUSLY IN COOLING 5−1..............................
5.3 UNIT RUNS BUT HAS INSUFFICIENT COOLING 5−2........................................
5.4 UNIT WILL NOT HEAT OR HAS INSUFFICIENT HEATING 5−2................................
5.5 UNIT WILL NOT TERMINATE HEATING 5−2................................................
5.6 UNIT WILL NOT DEFROST PROPERLY 5−2................................................
5.7 ABNORMAL PRESSURES 5−3............................................................
5.8 ABNORMAL NOISE OR VIBRATIONS 5−3..................................................
5.9 MICROPROCESSOR MALFUNCTION 5−3..................................................
5.10 NO EVAPORATOR AIR FLOW OR RESTRICTED AIR FLOW 5−4..............................
5.11 EAUTOFRESH NOT OPERATING 5−4......................................................
5.12 ELECTRONIC EXPANSION VALVE MALFUNCTION 5−4......................................
5.13 AUTOTRANSFORMER MALFUNCTION 5−5................................................
5.14 WATER−COOLED CONDENSER OR WATER PRESSURE SWITCH 5−5.......................
5.15 COMPRESSOR OPERATING IN REVERSE 5−5.............................................
5.16 ABNORMAL TEMPERATURES 5−5........................................................
5.17 ABNORMAL CURRENTS 5−5..............................................................
SERVICE 6−1....................................................................................
6.1 SECTION LAYOUT 6−1...................................................................
6.2 MANIFOLD GAUGE SET 6−1..............................................................
6.3 SERVICE CONNECTIONS 6−2............................................................
6.4 PUMP DOWN THE UNIT 6−2..............................................................

vT-340
TABLE OF CONTENTS (Continued)
PARAGRAPH NUMBER Page
6.5 REFRIGERANT LEAK CHECKING 6−3.....................................................
6.6 EVACUATION AND DEHYDRATION 6−3....................................................
6.6.1 General 6−3..........................................................................
6.6.2 Preparation 6−3.......................................................................
6.6.3 Complete System 6−3.................................................................
6.6.4 Partial System 6−4....................................................................
6.7 REFRIGERANT CHARGE 6−4.............................................................
6.7.1 Checking the Refrigerant Charge 6−4....................................................
6.7.2 Adding Refrigerant to System (Full Charge) 6−4...........................................
6.7.3 Adding Refrigerant to System (Partial Charge) 6−4........................................
6.8 COMPRESSOR 6−5......................................................................
6.8.1 Removal and Replacement of Compressor 6−5...........................................
6.9 HIGH PRESSURE SWITCH 6−6...........................................................
6.9.1 Checking High Pressure Switch 6−6.....................................................
6.9.2 Replacing High Pressure Switch 6−6.....................................................
6.10 CONDENSER COIL 6−7..................................................................
6.11 CONDENSER FAN AND MOTOR ASSEMBLY 6−7...........................................
6.12 WATER−COOLED CONDENSER CLEANING 6−7............................................
6.13 FILTER DRIER 6−9.......................................................................
6.14 EVAPORATOR COIL & HEATER ASSEMBLY 6−9............................................
6.14.1 Evaporator Coil Replacement 6−9.......................................................
6.14.2 Evaporator Heater Replacement 6−10....................................................
6.15 EVAPORATOR FAN AND MOTOR ASSEMBLY 6−10..........................................
6.15.1 Replacing the Evaporator Fan Assembly 6−10.............................................
6.15.2 Disassemble the Evaporator Fan Assembly 6−10...........................................
6.15.3 Assemble the Evaporator Fan Assembly 6−11.............................................
6.16 EVAPORATOR SECTION CLEANING 6−11...................................................
6.17 ELECTRONIC EXPANSION VALVE 6−12.....................................................
6.17.1 Replacing Electronic Expansion Valve and Screen 6−12.....................................
6.18 ECONOMIZER SOLENOID VALVE 6−13.....................................................
6.19 ECONOMIZER EXPANSION VALVE 6−13....................................................
6.19.1 Economizer Expansion Replacement 6−13................................................
6.20 DIGITAL UNLOADER VALVE 6−14..........................................................
6.21 VALVE OVERRIDE CONTROLS 6−15........................................................
6.22 AUTOTRANSFORMER 6−16...............................................................
6.23 CONTROLLER 6−16.......................................................................
6.23.1 Handling Modules 6−16.................................................................
6.23.2 Controller Troubleshooting 6−16..........................................................
6.23.3 Controller Programming Procedure 6−17..................................................
6.23.4 Removing and Installing a Controller 6−19.................................................
6.23.5 Battery Replacement 6−19..............................................................

vi
T-340
TABLE OF CONTENTS (Continued)
PARAGRAPH NUMBER Page
6.24 TEMPERATURE SENSOR SERVICE 6−19...................................................
6.24.1 Sensor Checkout Procedure 6−19........................................................
6.24.2 Sensor Replacement 6−22..............................................................
6.24.3 Sensor Re-Installation 6−22.............................................................
6.25 VENT POSITION SENSOR (VPS) 6−24......................................................
6.26 eAutoFresh SERVICE 6−25.................................................................
6.26.1 Servicing the eAutoFresh Air Filter 6−25...................................................
6.26.2 Checking eAutoFresh Drive System 6−25.................................................
6.26.3 Checking the Controller 6−26............................................................
6.26.4 Servicing the eAutoFresh Drive System 6−26..............................................
6.27 ELECTRONIC PARTLOW TEMPERATURE RECORDER 6−28..................................
6.28 MAINTENANCE OF PAINTED SURFACES 6−29..............................................
6.29 COMMUNICATIONS INTERFACE MODULE INSTALLATION 6−29..............................
ELECTRICAL WIRING SCHEMATICS 7−1...........................................................
7.1 INTRODUCTION 7−1.....................................................................
LIST OF ILLUSTRATIONS
FIGURE NUMBER Page
Figure 2−1 Refrigeration Unit −Front Section 2−1....................................................
Figure 2−2 Evaporator Section 2−2.................................................................
Figure 2−3 Compressor Section 2−3................................................................
Figure 2−4 Air−Cooled Condenser Section 2−4.......................................................
Figure 2−5 Water−Cooled Condenser Section 2−5....................................................
Figure 2−6 Control Box Section 2−6................................................................
Figure 2−7 Refrigeration Circuit Schematic −Standard Operation 2−11...................................
Figure 2−8 Refrigeration Circuit Schematic −Economized Operation 2−12................................
Figure 3−1 Temperature Control System 3−1.........................................................
Figure 3−2 Keypad 3−2...........................................................................
Figure 3−3 Display Module 3−3....................................................................
Figure 3−4 Control Module 3−3.....................................................................
Figure 3−5 Controller Operation - Perishable Mode 3−5...............................................
Figure 3−6 Perishable Mode Cooling 3−6............................................................
Figure 3−7 Perishable Mode Heating 3−7............................................................
Figure 3−8 Controller Operation - Frozen Mode 3−8...................................................
Figure 3−9 Frozen Mode 3−9......................................................................
Figure 3−10 Defrost 3−10..........................................................................
Figure 3−11 Standard Configuration Download Report 3−15.............................................
Figure 3−12 DataReader 3−17......................................................................
Figure 3−13 Alarm Troubleshooting Sequence 3−28....................................................
Figure 4−1 Autotransformer 4−1....................................................................
Figure 4−2 Upper Fresh Air Make Up Flow Chart 4−2.................................................

vii T-340
LIST OF ILLUSTRATIONS (Continued)
FIGURE NUMBER Page
Figure 4−3 Diagram of Emergency Bypass Connections 4−8...........................................
Figure 6−1 Manifold Gauge Set 6−1................................................................
Figure 6−2 R-134a Manifold Gauge/Hose Set 6−1....................................................
Figure 6−3 Service Valve 6−2......................................................................
Figure 6−4 Refrigeration System Service Connections 6−3.............................................
Figure 6−5 Compressor Kit 6−5....................................................................
Figure 6−6 High Pressure Switch Testing 6−6........................................................
Figure 6−7 Water-Cooled Condenser Cleaning, Forced Circulation 6−8.................................
Figure 6−8 Water-Cooled Condenser Cleaning - Gravity Circulation 6−9.................................
Figure 6−9 5+1 Heater Arrangement −Omega Heater 6−10.............................................
Figure 6−10 Evaporator Fan Assembly 6−11..........................................................
Figure 6−11 Electronic Expansion Valve 6−12.........................................................
Figure 6−12 Coil View of Economizer Solenoid Valve (ESV) 6−13........................................
Figure 6−13 Economizer Expansion Valve 6−13.......................................................
Figure 6−14 View of Digital Unloader Valve (DUV) Assembly 6−14.......................................
Figure 6−15 Autotransformer 6−16...................................................................
Figure 6−16 Controller Section of the Control Box 6−17.................................................
Figure 6−17 Sensor Types 6−22.....................................................................
Figure 6−18 Sensor and Cable Splice 6−22...........................................................
Figure 6−19 Supply Sensor Positioning 6−23..........................................................
Figure 6−20 Return Sensor Positioning 6−23..........................................................
Figure 6−21 Evaporator Temperature Sensor Positioning 6−23..........................................
Figure 6−22 Compressor Discharge Temperature Sensor 6−24..........................................
Figure 6−23 Stepper Components 6−25..............................................................
Figure 6−24 Jumper Assembly 6−26.................................................................
Figure 6−25 Motor Cup Replacement 6−27...........................................................
Figure 6−26 Electronic Partlow Temperature Recorder 6−28.............................................
Figure 6−27 Communications Interface Installation 6−29................................................
Figure 7−1 LEGEND −Standard Unit Configuration 7−2...............................................
Figure 7−2 SCHEMATIC DIAGRAM −Standard Unit Configuration 7−3..................................
Figure 7−3 LEGEND −Configuration Includes Available Options
(Except Vent Positioning System, eAutoFresh, Emergency Bypass Options) 7−4..............
Figure 7−4 SCHEMATIC DIAGRAM −Configuration Includes Available Options
(Except Vent Positioning System, eAutoFresh, Emergency Bypass Options) 7−5..............
Figure 7−5 LEGEND −Configuration Includes eAutoFresh and Emergency Bypass Options 7−6............
Figure 7−6 SCHEMATIC DIAGRAM −Configuration Includes eAutoFresh and Emergency Bypass Options 7−7
Figure 7−7 SCHEMATIC AND WIRING DIAGRAM −Upper Vent Position Sensor (VPS) Option 7−8.........
Figure 7−8 SCHEMATIC AND WIRING DIAGRAM −Lower Vent Position Sensor (VPS) Option 7−9.........
Figure 7−9 UNIT WIRING DIAGRAM −Standard Unit Configuration with 3−Phase Condenser Fan Motors 7−10
Figure 7−10 UNIT WIRING DIAGRAM −Configuration Includes Single Phase Condenser Fan Motor
& Optional Heater Arrangement 7−12.....................................................
Figure 7−11 UNIT WIRING DIAGRAM −Configuration Includes eAutoFresh & Emergency Bypass Options 7−14
Figure 7−11 UNIT WIRING DIAGRAM −Configuration Includes eAutoFresh & Emergency Bypass Options 7−15
viii
T-340
LIST OF TABLES
TABLE NUMBER Page
Table 2−1 Safety and Protective Devices 2−9.........................................................
Table 3−1 Keypad Function 3−2.....................................................................
Table 3−2 DataCORDER Configuration Variables 3−14..................................................
Table 3−3 DataCORDER Standard Configurations 3−16.................................................
Table 3−4 Controller Configuration Variables 3−19......................................................
Table 3−5 Controller Function Codes 3−20.............................................................
Table 3−6 Controller Alarm Indications 3−29...........................................................
Table 3−7 Controller Pre-trip Test Codes 3−37..........................................................
Table 3−8 DataCORDER Function Code Assignments 3−43..............................................
Table 3−9 DataCORDER Pre-trip Result Records 3−44..................................................
Table 3−10 DataCORDER Alarm Indications 3−45......................................................
Table 6−1 Valve Override Control Displays 6−15........................................................
Table 6−2 Sensor Resistance 6−20...................................................................
Table 6−3 Sensor Resistance (CPDS) 6−21............................................................
Table 6−4 R-134a Temperature - Pressure Chart 6−30..................................................
Table 6−5 Recommended Bolt Torque Values 6−31.....................................................

T−340
Safety−1
SAFETY SUMMARY
GENERAL SAFETY NOTICES
The following general safety notices supplement specif-
ic warnings and cautions appearing elsewhere in this
manual. They are recommended precautions that must
be understood and applied during operation and mainte-
nance of the equipment covered herein. The general
safety notices are presented in the following three sec-
tions labeled: First Aid, Operating Precautions and
Maintenance Precautions. A listing of the specific warn-
ings and cautions appearing elsewhere in the manual
follows the general safety notices.
FIRST AID
An injury, no matter how slight, should never go unat-
tended. Always obtain first aid or medical attention im-
mediately.
OPERATING PRECAUTIONS
Always wear safety glasses.
Keep hands, clothing and tools clear of the evaporator
and condenser fans.
No work should be performed on the unit until all circuit
breakers and start-stop switches are turned off, and
power supply is disconnected.
In case of severe vibration or unusual noise, stop the
unit and investigate.
MAINTENANCE PRECAUTIONS
Beware of unannounced starting of the evaporator and
condenser fans. Do not open the condenser fan grille or
evaporator access panels before turning power off, dis-
connecting and securing the power plug.
Be sure power is turned off before working on motors,
controllers, solenoid valves and electrical control
switches. Tag circuit breaker and power supply to pre-
vent accidental energizing of circuit.
Do not bypass any electrical safety devices, e.g. bridg-
ing an overload, or using any sort of jumper wires. Prob-
lems with the system should be diagnosed, and any
necessary repairs performed by qualified service per-
sonnel.
When performing any arc welding on the unit or contain-
er, disconnect all wire harness connectors from the
modules in control boxes. Do not remove wire harness
from the modules unless you are grounded to the unit
frame with a static safe wrist strap.
In case of electrical fire, open circuit switch and extin-
guish with CO2(never use water).
SPECIFIC WARNING AND CAUTION STATEMENTS
To help identify the label hazards on the unit and explain
the level of awareness each one carries, an explanation
is given with the appropriate consequences:
DANGER - means an immediate hazard that WILL re-
sult in severe personal injury or death.
WARNING - means to warn against hazards or unsafe
conditions that COULD result in severe personal injury
or death.
CAUTION - means to warn against potential hazard or
unsafe practice that could result in minor personal injury,
product or property damage.
The statements listed below are applicable to the refrig-
eration unit and appear elsewhere in this manual. These
recommended precautions must be understood and ap-
plied during operation and maintenance of the equip-
ment covered herein.
WARNING
EXPLOSION HAZARD: Failure to follow this
WARNING can result in death, serious
personal injury and / or property damage.
Never use air or gas mixtures containing
oxygen (O2) for leak testing or operating the
product.
Charge Only With R−134a: Refrigerant must
conform to AHRI Standard 700
specification.
WARNING
Beware of unannounced starting of the
evaporator and condenser fans. The unit
may cycle the fans and compressor unex-
pectedly as control requirements dictate.
WARNING
Do not attempt to remove power plug(s) be-
fore turning OFF start-stop switch (ST), unit
circuit breaker(s) and external power
source.
WARNING
Make sure the power plugs are clean and
dry before connecting to power receptacle.
WARNING
Make sure that the unit circuit breaker(s)
(CB-1 & CB-2) and the START-STOP switch
(ST) are in the “O” (OFF) position before
connecting to any electrical power source.

Safety−2
T−340
WARNING
Make sure power to the unit is OFF and
power plug disconnected before replacing
the compressor.
WARNING
Before disassembly of the compressor, be
sure to relieve the internal pressure very
carefully by slightly loosening the cou-
plings to break the seal.
WARNING
Do not use a nitrogen cylinder without a
pressure regulator.
WARNING
Do not open the condenser fan grille before
turning power OFF and disconnecting
power plug.
WARNING
Oakite No. 32 is an acid. Be sure that the
acid is slowly added to the water. DO NOT
PUT WATER INTO THE ACID - this will cause
spattering and excessive heat.
WARNING
Wear rubber gloves and wash the solution
from the skin immediately if accidental con-
tact occurs. Do not allow the solution to
splash onto concrete.
WARNING
Always turn OFF the unit circuit breakers
(CB-1 & CB-2) and disconnect main power
supply before working on moving parts.
WARNING
Installation requires wiring to the main unit
circuit breaker, CB1. Make sure the power to
the unit is off and power plug disconnected
before beginning installation.
CAUTION
Charge water−cooled condenser or receiv-
er according to nameplate specifications to
ensure optimal unit performance.
CAUTION
Do not remove wire harnesses from con-
troller modules unless you are grounded to
the unit frame with a static safe wrist strap.
CAUTION
Unplug all controller module wire harness
connectors before performing arc welding
on any part of the container.
CAUTION
Do not attempt to use an ML2i PC card in an
ML3 equipped unit. The PC cards are physi-
cally different and will result in damage to
the controller.
CAUTION
Pre-trip inspection should not be per-
formed with critical temperature cargoes in
the container.
CAUTION
When Pre-Trip key is pressed, economy, de-
humidification and bulb mode will be deac-
tivated. At the completion of Pre-Trip activi-
ty, economy, dehumidification and bulb
mode must be reactivated.
CAUTION
When condenser water flow is below 11 lpm
(3 gpm) or when water-cooled operation is
not in use, the CFS switch MUST be set to
position “1” or the unit will not operate
properly.

T−340
Safety−3
CAUTION
When a failure occurs during automatic
testing, the unit will suspend operation
awaiting operator intervention.
CAUTION
When Pre-Trip test Auto 2 runs to comple-
tion without being interrupted, the unit will
terminate pre-trip and display “Auto 2”
“end.” The unit will suspend operation until
the user depresses the ENTER key!
CAUTION
The unit will remain in the full cooling mode
as long as the EB switch is in the On posi-
tion and the Mode Switch is in the Full Cool
position. If the cargo can be damaged by
low temperatures, the operator must monit-
or container temperature and manually
cycle operation as required to maintain
temperature within required limits.
CAUTION
Allowing the scroll compressor to operate
in reverse for more than two minutes will re-
sult in internal compressor damage. Turn
the start-stop switch OFF immediately.
CAUTION
To prevent trapping liquid refrigerant in the
manifold gauge set be sure set is brought to
suction pressure before disconnecting.
CAUTION
The scroll compressor achieves low
suction pressure very quickly. Do not use
the compressor to evacuate the system
below 0 psig. Never operate the
compressor with the suction or discharge
service valves closed (frontseated). Internal
damage will result from operating the
compressor in a deep vacuum.
CAUTION
Take necessary steps (place plywood over
coil or use sling on motor) to prevent motor
from falling into condenser coil.
CAUTION
Do not remove wire harnesses from module
unless you are grounded to the unit frame
with a static safe wrist strap.
CAUTION
Unplug all module connectors before per-
forming arc welding on any part of the con-
tainer.
CAUTION
The unit must be OFF whenever a program-
ming card is inserted or removed from the
controller programming port.
CAUTION
Use care when cutting wire ties to avoid
nicking or cutting wires.
CAUTION
Do not allow moisture to enter wire splice
area as this may affect sensor resistance.

1−1T−340
SECTION 1
INTRODUCTION
1.1 INTRODUCTION
The Carrier Transicold model 69NT40−561−001 to 199
series units are of lightweight aluminum frame
construction, designed to fit in the front of a container
and serve as the container’s front wall.
They are one piece, self−contained, all electric units,
which include cooling and heating systems to provide
precise temperature control.
The units are supplied with a complete charge of
refrigerant R−134a and compressor lubricating oil, and
are ready for operation upon installation. Forklift
pockets are provided for unit installation and removal.
The base unit operates on nominal 380/460 volt,
3−phase, 50/60 hertz (Hz) power. An optional
autotransformer may be fitted to allow operation on
nominal 190/230, 3−phase, 50/60 Hz power. Control
system power is provided by a transformer which steps
the supply power down to 18 and 24 volts, single phase.
The controller is a Carrier Transicold Micro−Link 3
microprocessor. The controller operates automatically
to select cooling, holding or heating as required to
maintain the desired set point temperature within very
close limits. The unit may also be equipped with an
electronic temperature recorder.
The controller has a keypad and display for viewing or
changing operating parameters. The display is also
equipped with lights to indicate various modes of
operation.
1.2 CONFIGURATION IDENTIFICATION
Unit identification information is provided on a plate
located to the left of the receiver or water−cooled
condenser, on the back wall of the condenser section.
The plate provides the unit model number, the unit serial
number and the unit parts identification number (PID).
The model number identifies the overall unit
configuration, while the PID number provides
information on specific optional equipment, factory
provisioned to allow for field installation of optional
equipment and differences in detailed parts.
1.3 FEATURE DESCRIPTIONS
1.3.1 Control Box
Units are equipped with either an aluminum or
composite material box, and may be fitted with a
lockable door.
1.3.2 Temperature Readout
The unit is fitted with suction and discharge temperature
sensors. The sensor readings may be viewed on the
controller display.
1.3.3 Pressure Readout
The unit is fitted with evaporator and discharge
transducers. The transducer readings may be viewed
on the controller display.
1.3.4 Compressor
The unit is fitted with a scroll compressor equipped with
suction and discharge service connections.
1.3.5 Condenser Coil
The unit is fitted with a four−row condenser coil using
7mm tubing.
1.3.6 Evaporator
Evaporator section is equipped with an electronic
expansion valve (EEV).
1.3.7 Evaporator Fan Operation
Units are equipped with three−phase evaporator fan
motors. Opening of an evaporator fan internal protector
will shut down the unit.
1.3.8 Plate Set
Each unit is equipped with a tethered set of wiring
schematics and wiring diagram plates. The plate sets
are ordered using a seven−digit base part number and a
two−digit dash number.
1.4 OPTION DESCRIPTIONS
Various options may be factory or field equipped to the
base unit. These options are described in the following
sub−paragraphs.
1.4.1 Battery
The refrigeration controller may be fitted with standard
replaceable batteries or a rechargeable battery pack.
Rechargeable battery packs may be fitted in the
standard location or in a secure location.
1.4.2 Dehumidification
The unit may be fitted with a humidity sensor. This
sensor allows setting of a humidity set point in the
controller. In dehumidification mode, the controller will
operate to reduce internal container moisture level.
1.4.3 USDA
The unit may be supplied with fittings for additional
temperature probes, which allow recording of USDA
Cold Treatment data by the integral DataCORDER
function of the Micro−Link refrigeration controller.
1.4.4 Interrogator
Units that use the DataCORDER function are fitted with
interrogator receptacles for connection of equipment to
download the recorded data. Two receptacles may be
fitted; one is accessible from the front of the container
and the other is mounted inside the container (with the
USDA receptacles).
1.4.5 Remote Monitoring
The unit may be fitted with a remote monitoring
receptacle. This item allows connection of remote
indicators for COOL, DEFROST and IN RANGE.
Unless otherwise indicated, the receptacle is mounted
at the control box location.

1−2
T−340
1.4.6 Quest −CCPC
Compressor−Cycle Perishable Cooling (CCPC) is a
method of temperature control used during
steady−state perishable cooling that cycles the
compressor on and off according to supply / return air
temperature conditions.
1.4.7 Communications Interface Module
The unit may be fitted with a communications interface
module. The communications interface module is a
slave module, which allows communication with a
master central monitoring station. The module will
respond to communication and return information over
the main power line. Refer to the ship master system
technical manual for further information.
1.4.8 Autotransformer
An autotransformer may be provided to allow operation
on 190/230, 3−phase, 50/60 Hz power. The
autotransformer raises the supply voltage to the
nominal 380/460 volt power required by the base unit.
The autotransformer may also be fitted with an
individual circuit breaker for the 230 volt power.
If the unit is equipped with an autotransformer and
communications module, the autotransformer will be
fitted with a transformer bridge unit (TBU) to assist in
communications.
1.4.9 Temperature Recorder
The unit may be fitted with an electronic temperature
recording device.
1.4.10 Gutters
Rain gutters may be fitted over the control box and
recorder section to divert rain away form the controls.
The different gutters include standard length bolted
gutters, extended length gutters, and riveted gutters.
1.4.11 Handles
The unit may be equipped with handles to facilitate
access to stacked containers. These fixed handles are
located on either side of the unit.
1.4.12 Thermometer Port
The unit may be fitted with ports in the front of the frame
for insertion of a thermometer to measure supply and/or
return air temperature. If fitted, the port(s) will require a
cap and chain.
1.4.13 Water Cooling
The refrigeration system may be fitted with a
water−cooled condenser. The condenser is constructed
using copper−nickel tube for sea water applications.
The water−cooled condenser is in series with the air
cooled condenser and replaces the standard unit
receiver. When operating on the water−cooled
condenser, the condenser fan is deactivated by a water
pressure switch or condenser fan switch.
1.4.14 Back Panels
Aluminum back panels may have access doors and/or
hinge mounting.
1.4.15 460 Volt Cable
Various power cable and plug designs are available for
the main 460 volt supply. The plug options tailor the
cables to each customer’s requirements.
1.4.16 230 Volt Cable
Units equipped with an autotransformer require an
additional power cable for connection to the 230 volt
source. Various power cable and plug designs are
available. The plug options tailor the cables to each
customer’s requirements.
1.4.17 Cable Restraint
Various designs are available for storage of the power
cables. These options are variations of the compressor
section cable guard.
1.4.18 Upper Air (Fresh Air Make Up)
The unit may be fitted with an upper fresh air makeup
assembly. The fresh air makeup assembly is available
with a vent positioning sensor (VPS) and may also be
fitted with screens.
1.4.19 Lower Air (Fresh Air Make Up)
The unit may be fitted with a lower fresh air makeup
assembly. The fresh air makeup assembly is available
with a vent positioning sensor (VPS) and may also be
fitted with screens.
1.4.20 Labels
Safety Instruction and Function Code listing labels
differ, depending on the options installed. Labels
available with additional languages are listed in the parts
list.
1.4.21 Controller
Two replacement controllers are available:
1. Re−manufactured −Controller is the equivalent of a
new OEM controller and is supplied with a 12−month
warranty.
2. Repaired −Controller has had previous faults re-
paired and upgraded with the latest software.
Note: Repaired controllers are NOT to be used for
warranty repairs; only full OEM Remanufactured
controllers are to be used.
Controllers will be factory−equipped with the latest
version of operational software, but will NOT be
configured for a specific model number and will need to
be configured at the time of installation or sale.
1.4.22 Condenser Grille
Two styles of condenser grilles are available: direct
bolted grilles and hinged grilles.
1.4.23 Emergency Bypass
The optional Emergency Bypass switch (EB) functions
to bypass the controller in the event of controller failure.
1.4.24 eAutoFresh
The optional eAutoFresh venting system moderates the
atmospheric level inside the container unit in response
to cargo respiration.

T-340
2−1
SECTION 2
DESCRIPTION
2.1 GENERAL DESCRIPTION
2.1.1 Refrigeration Unit −Front Section
The unit is designed so that the majority of the compo-
nents are accessible from the front (see Figure 2−1).
The unit model number, serial number and parts identifi-
cation number can be found on the serial plate to the left
of the receiver or water−cooled condenser on the back
wall of the condenser section.
2.1.2 Fresh Air Makeup Vent
The function of the upper or lower makeup air vent is to
provide ventilation for commodities that require fresh air
circulation. A manually operated venting system is loc-
ated in the upper left access panel.
The optional eAutoFresh vent system is to moderate the
atmospheric level in the container in response to cargo
respiration. When transporting frozen cargo loads the
vent will be closed. The upper left access panel contains
the vent slide and motor assembly. It may be removed to
allow entry into the evaporator section where the CO2
sensor and drive pack are located.
1
2
9
3
14
5
15
17
10
19
13
16
11
12
6
7
18
8
4
1. Access Panel (Evap. Fan #1)
2. Fork Lift Pockets
3. Control Box
4. Compressor
5. Ambient Sensor (AMBS)
6. Economizer
7. Filter Drier
8. Receiver or Water Cooled Condenser
9. Unit Serial Number, Model Number and
Parts Identification Number (PID) Plate
10. Power Cables and Plug (Location)
11. Condenser Fan
12. Autotransformer (Location)
13. TransFRESH Communications Connector
14. Interrogator Connector (Front left)
15. Temperature Recorder
16. Lower Fresh Air Makeup Vent Location
(Blank Cover Shown)
17. TIR (Transports Internationaux Routiers)
Sealing Provisions −Typical All Panels
18. Upper Fresh Air Makeup Vent or eAutoFresh
(Automatic Vent) panel
19. Access Panel (Evap. Fan #2)
Figure 2−1 Refrigeration Unit −Front Section

2−2T-340
2.1.3 Evaporator Section
The evaporator section (Figure 2−2) contains the return
temperature sensor, humidity sensor, electronic expan-
sion valve, dual speed evaporator fans (EM1 and EM2),
evaporator coil and heaters, defrost temperature sen-
sor, heat termination thermostat and evaporator tem-
perature sensors (ETS1 and ETS2).
The evaporator fans circulate air through the container
by pulling it in the top of the unit, directing it through the
evaporator coil, where it is heated or cooled, and
discharging it at the bottom.
If the unit is equipped with eAutoFresh, system compon-
ents are mounted in addition to the standard refrigera-
tion unit components. The stepper motor component is
installed in the vent; the air filter, CO2sensor, stepper
motor drive and CO2sensing lines are installed on the
rib of the upper grill.
Most evaporator components are accessible by remov-
ing the upper rear panel (as shown in the illustration) or
by removing the evaporator fan access panels (see
Figure 2−1, Items 1 and 19).
21
1
2
3
4
5
6
7
8
9
10
17
18
19
20
11
13
15
16
14
12
1. Evaporator Fan Motor #1 (EM1)
2. Return Recorder Sensor/Temperature Sensor
(RRS/RTS)
3. Humidity Sensor (HS)
4. Evaporator Fan Motor #2 (EM2)
5. Evaporator Coil
6. Evaporator Coil Heaters (Underside of Coil)
7. Heater Termination Thermostat (HTT)
8. Defrost Temperature Sensor (DTS)
9. Electronic Expansion Valve (EEV)
10. Evaporator Temperature Sensors (Location)
(ETS1 and ETS2)
11. Air Filter
12. CO2Sensor Sensing Line
13. CO2Sensor (COS)
14. CO2Sensor Outlet Line
15. Stepper Motor Drive (SD)
16. Stepper Motor (AF)
17. Interrogator Connector (Rear) (ICR)
18. USDA Probe Receptacle PR2
19. USDA Probe Receptacle PR1
20. USDA Probe Receptacle PR3
21. Cargo Probe Receptacle PR4
Figure 2−2 Evaporator Section

T-340
2−3
2.1.4 Compressor Section
The compressor section includes the compressor,
digital unloader valve (DUV), high pressure switch,
discharge pressure transducer (DPT), evaporator
pressure transducer (EPT) and the suction pressure
transducer (SPT).
The supply temperature sensor, supply recorder sensor
and ambient sensor are located to the left of the com-
pressor.
1
16
813
9
5
6
11
3
7
4
10
15
12
2
14
1. Compressor
2. Compressor Discharge Temperature Sensor
(CPDS) (Location)
3. Discharge Connection
4. Suction Connection (Location)
5. Compressor Terminal Box
6. Oil Drain (Location)
7. Economizer Connection
8. Discharge Pressure Transducer (DPT)
9. Suction Pressure Transducer (SPT)
10. Digital Unloader Valve (DUV)
11. Evaporator Pressure Transducer (EPT)
12. Discharge Service Valve
13. High Pressure Switch (HPS)
14. Warning Label
15. Suction Service Valve
16. Supply Temperature/Supply Recorder Sensor
Assembly (STS/SRS)
Figure 2−3 Compressor Section

2−4T-340
2.1.5 Air−Cooled Condenser Section
The air−cooled condenser section (Figure 2−4)
consists of the condenser fan, condenser coil, receiver,
liquid line service valve, filter drier, fusible plug,
economizer, economizer expansion valve, economizer
solenoid valve (ESV), and sight glass/moisture
indicator.
The condenser fan pulls air through the bottom of the
coil and discharges it horizontally through the con-
denser fan grille.
5
6
1
24
3
7
89 10
11
12
14
15
16
13
1. Grille and Venturi Assembly
2. Condenser Fan
3. Key
4. Condenser Fan Motor
5. Condenser Coil
6. Condenser Coil Cover
7. Receiver
8. Sight Glass
9. Filter Drier
10. Economizer
11. Economizer Solenoid Valve (ESV)
12. Economizer Expansion Valve
13. Warning Label
14. Service Access Valve
15. Liquid Level/Moisture Indicator
16. Fusible Plug
Figure 2−4 Air−Cooled Condenser Section

T-340
2−5
2.1.6 Water−Cooled Condenser Section
The water−cooled condenser section (Figure 2−5)
consists of a water−cooled condenser, sight glass,
rupture disc, filter drier, water couplings, water pressure
switch, economizer, economizer expansion valve,
economizer solenoid valve (ESV), and moisture/liquid
indicator.
The water−cooled condenser replaces the standard unit
receiver.
1
23 4
6
7
5
10 9 8
11
12
1. Water−Cooled Condenser
2. Rupture Disc
3. Moisture/Liquid Indicator
4. Filter Drier
5. Economizer
6. Economizer Solenoid Valve (ESV)
7. Economizer Expansion Valve
8. Coupling (Water In)
9. Liquid Line Service Valve/Connection
10. Self Draining Coupling (Water Out)
11. Water Pressure Switch (WP)
12. Sight Glass
Figure 2−5 Water−Cooled Condenser Section
This manual suits for next models
1
Table of contents
Other Carrier Freezer manuals

Carrier
Carrier NEOS 100S User manual

Carrier
Carrier WeatherMaster Series User manual

Carrier
Carrier C302 NPR User manual

Carrier
Carrier PH61 User manual

Carrier
Carrier 50DPE014 Dimensions and installation guide

Carrier
Carrier B5 Installation instructions

Carrier
Carrier 50CD User manual

Carrier
Carrier 09VE Manual

Carrier
Carrier 50gs sizes 018-060 Installation manual

Carrier
Carrier EC 2709N User manual