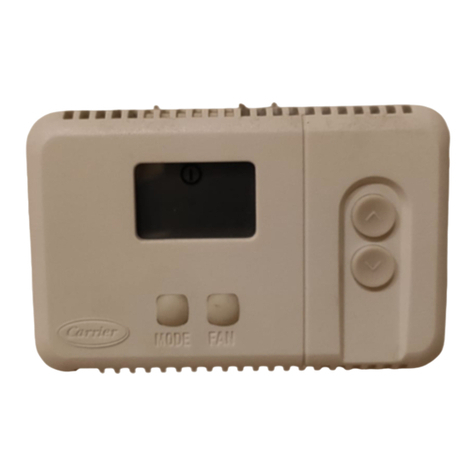
3. Press MODE button once to display current value between 01
and 09. Factory default is 03.
4. Use up and down buttons to move between values.
5. Press MODE button to return to 1-. Up and down buttons now
move between option choices 1- through 6-. Or press FAN
button to exit configuration mode.
ZONING ON/OFF—SELECTION
This selection enables or defeats the 4 cycles per hr limit and the
5 minute timeguard. These timers MUST be enabled for normal
operation and disabled for zoning applications. In zoning applica-
tions, the zone control center performs these timing functions.
TO SELECT:
1. Enter configuration mode (if not already there).
2. Use up and down buttons to display 2-.
3. Press MODE button once to display current selection of ON or
OF (OFF). Factory default is OFF.
4. Use up and down buttons to move between ON and OFF.
Select ON for zoning applications ONLY and OFF for all
other applications.
5. Press MODE button to return to 2-. Up and down buttons now
move between option choices 1- through 6-. Or press FAN
button to exit configuration mode.
FAHRENHEIT/CELSIUS—SELECTION
This selection operates the thermostat in either Fahrenheit or
Celsius. Factory default is Fahrenheit.
TO SELECT:
1. Enter configuration mode (if not already there).
2. Use up and down buttons to display 3-.
3. Press MODE button once to display current selection of F or
C. Factory default is F.
4. Use up and down buttons to move between F and C.
5. Press MODE button to return to 3-. Up and down buttons now
move between option choices 1- through 6-. Or press FAN
button to exit configuration mode.
CLEAN FILTER TIMER—SELECTION AND VALUE AD-
JUSTMENT
Select hr of blower operation (heating, cooling, or fan) before
CLEAN FILTER icon is displayed. With OFF selected, icon will
never come on, disabling this feature. Time selection can be from
400 to 3600 hr by selecting numbers 1 through 9. (Time is 400 X
number selected.) Factory default is 2 (800 hr). Recommended
selections are: disposable filter 400 to 800 hr, media filter 1200 to
1600 hr, or electronic air cleaner 1600 to 2400 hr of blower
operation.
TO SELECT or ADJUST:
1. Enter configuration mode (if not already there).
2. Use up and down buttons to display 4-.
3. Press MODE button once to display current selection of OF, 1,
2, 3, 4, 5, 6, 7, 8, 9, or L. Factory default is 2. ("L" has no
function; do not select.)
4. Use up and down buttons to move between available choices.
5. Press MODE button to return to 4-. Up and down buttons now
move between option choices 1- through 6-. Or press FAN
button to exit configuration mode.
G (FAN) ON WITH ANY W (HEAT)—SELECTION
This selection determines whether the G (fan) output is to be ON
or OFF when any W (furnace or strip heat) output is ON. Most
furnaces and fan coils manage their own blowers and do not
require a separate G signal. For these applications, select OFF.
Some auxiliary heaters require a separate G signal to turn on the
blower. In this case, select ON. Factory default is OFF.
TO SELECT:
1. Enter configuration mode (if not already there).
2. Use up and down buttons to display 5-.
3. Press MODE button once to display current selection of ON or
OFF. Factory default is OFF.
4. Use up and down buttons to change between ON and OFF.
5. Press MODE button to return to 5-. Up and down buttons now
move between option choices 1- through 6-. Or press FAN
button to exit configuration mode.
HIGH-AMBIENT AUXILIARY HEAT LOCKOUT − SELEC-
TION AND VALUE ADJUSTMENT
Present in HP and 2S models only when configured as a heat
pump. Outdoor temperature sensor must be attached. This selec-
tion allows lockout of any electric heat (W output) when outdoor
temperature is above a selected temperature. Temperatures of 15˚
to 55˚F (or equivalent values in C) can be selected. Feature can be
disabled by selecting OFF. Emergency heat (EHEAT mode)
always overrides this feature.
TO SELECT or ADJUST:
1. Enter configuration mode (if not already there).
2. Use up and down buttons to display 6-.
3. Press MODE button once to display current selection of OF,
15, 20, 25, 30, 35, 40, 45, 50, or 55. Factory default is OFF.
4. Use up and down buttons to move between available choices.
5. Press MODE button to return to 6-. Up and down buttons now
move between option choices 1- through 6-. Or press FAN
button to exit configuration mode.
Thermostat configuration is now completed.
Step 5—Fan, Mode, Reset Filter Button Operation
1. Pressing FAN button will select AUTO or ON fan operation.
Fan annunciator displays current selection.
2. Pressing MODE button will select OFF, HEAT, COOL,
AUTO. Heat pumps will also have an EHEAT mode. Mode
annunciator displays current selection.
3. Pressing RESET FILTER button will reset filter timer. An-
nunciator will display CLEAN FILTER on LCD display after
the selected number of hr of blower operation. This will
remind homeowner to clean or replace filter.
Step 6—Check Thermostat Operation
FAN OPERATION
1. Press FAN button, starting fan operation. Fan annunciator
switches from AUTO to ON.
2. Press FAN button, stopping fan operation. Fan annunciator
switches from ON to AUTO.
HEATING OPERATION
1. Press MODE button until HEAT is displayed under the mode
annunciator.
2. Press up button until LCD readout reads 10˚F above room
temperature. Heating system should begin to operate within 5
minutes.
COOLING OPERATION
1. Press MODE button until COOL is displayed under the mode
annunciator.
3
→
→
→
